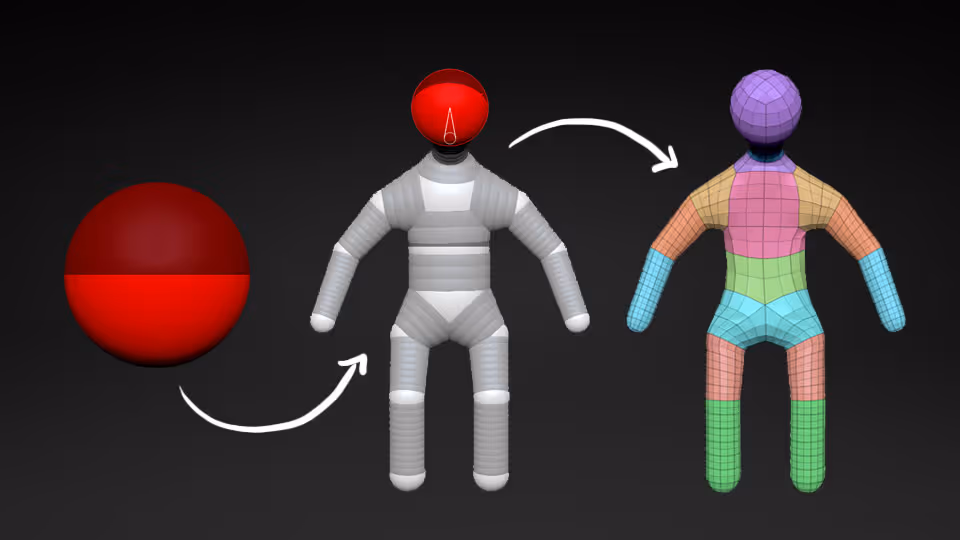
Zsphere
ZSpheres is a unique and advanced tool from ZBrush that allows you to quickly create armatures that then can be turned into meshes. You can also use them to sketch in 3D and “rig” your models to pose them.
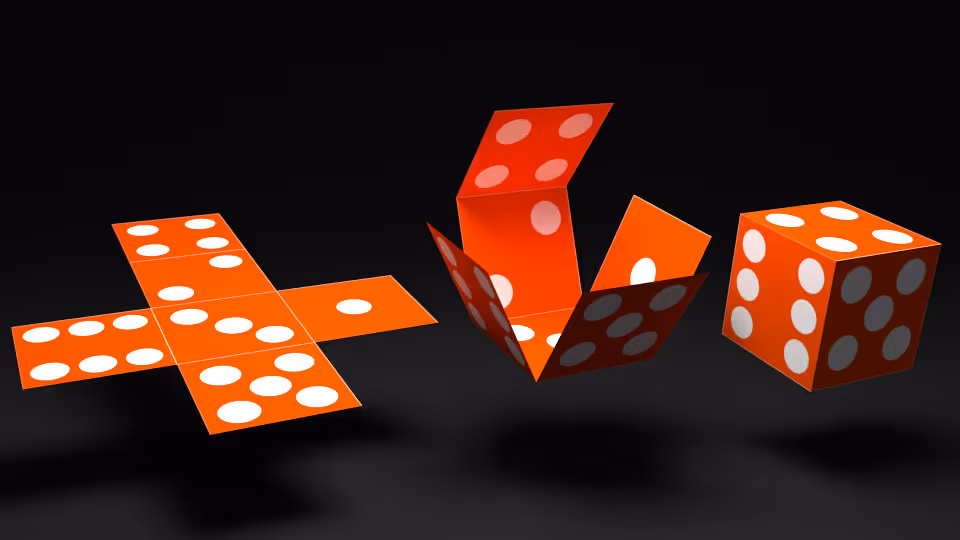
UV map
UV mapping is used to control the way a 2D texture is wrapped around a 3D object. In the same way that X, Y and Z refer to the coordinates in the 3D space, U and V are letters to define the coordinates in the 2D space. The objective of UV mapping is to find the most efficient way to layout all the polygons of a 3D object into a 2D flat image. When you create a UV map, you create a “guide” to instruct the 3D software where each polygon is placed on an image/texture.

Symmetry and mirror
Generally speaking, these two concepts refer to the same thing: modifying an object to be identical on both sides (+x and -x for instance). In ZBrush, there are a few very cool ways to use symmetry as well as the mirroring option. The difference is that with symmetry, you’ll see the changes as you sculpt; With mirror on the other hand, you can work on one side of the mesh, then mirror the changes to the other side once you finish.
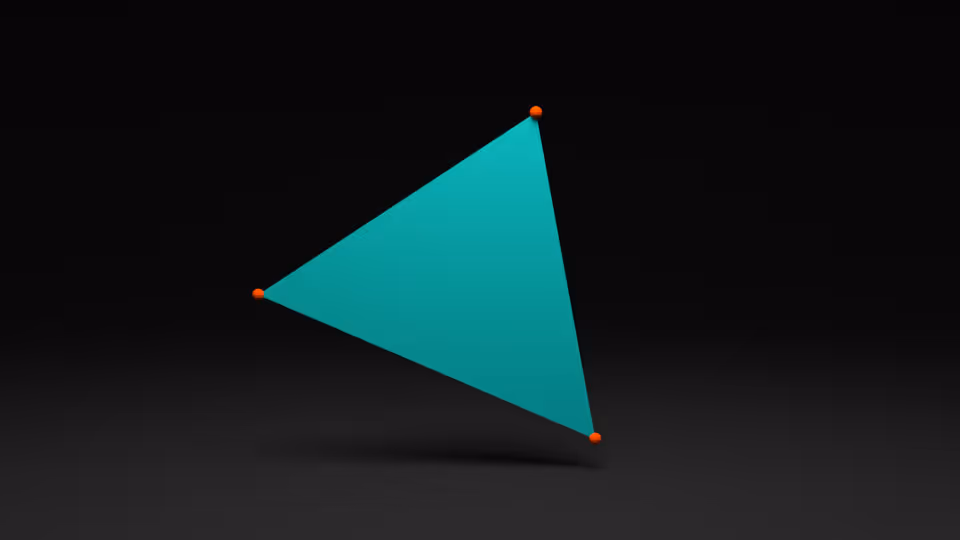
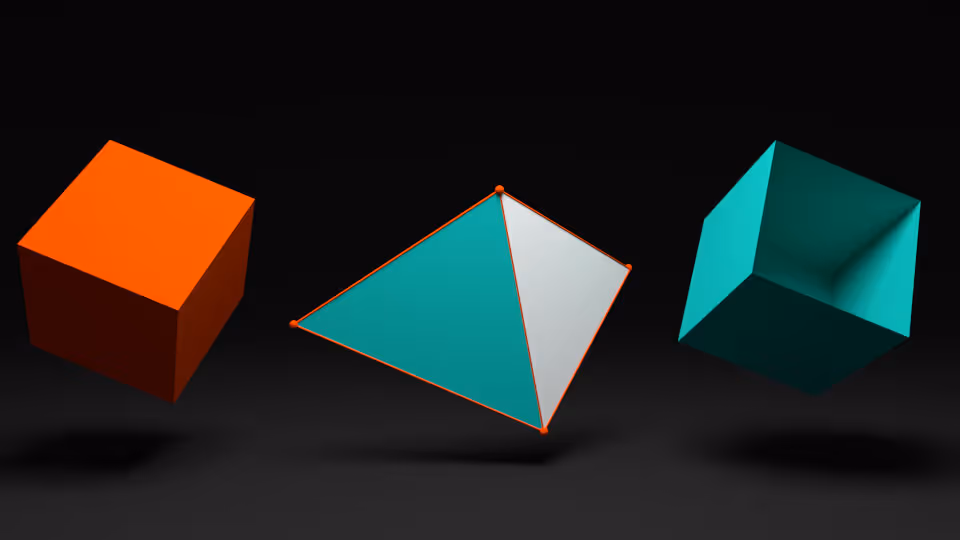
Tris
Tris or Triangles, the simplest form of a polygon are made of 3 points and the connecting edges with 1 face.
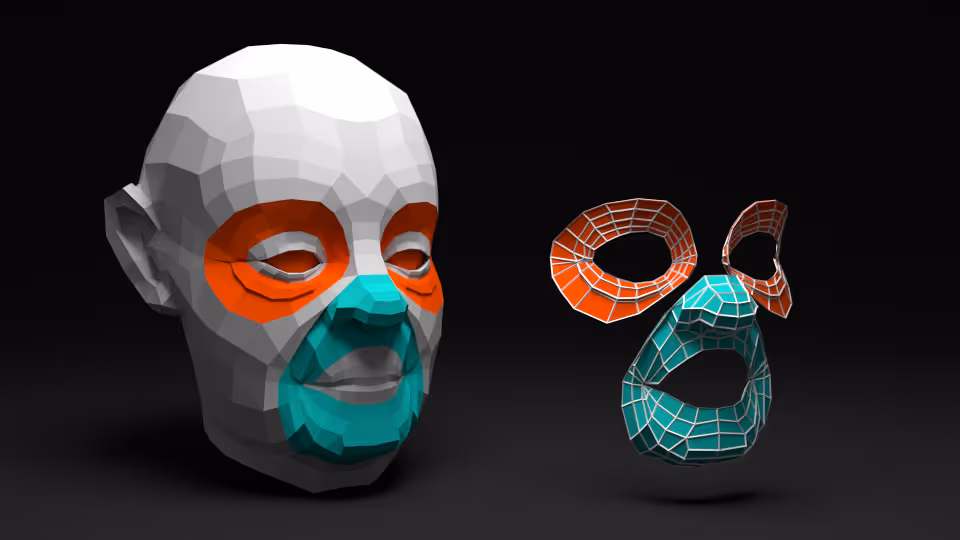
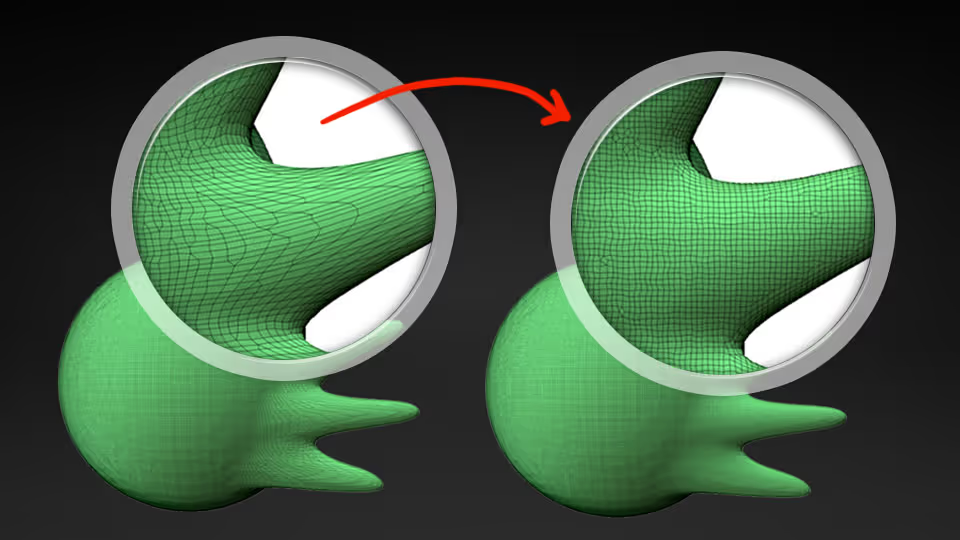
Topology
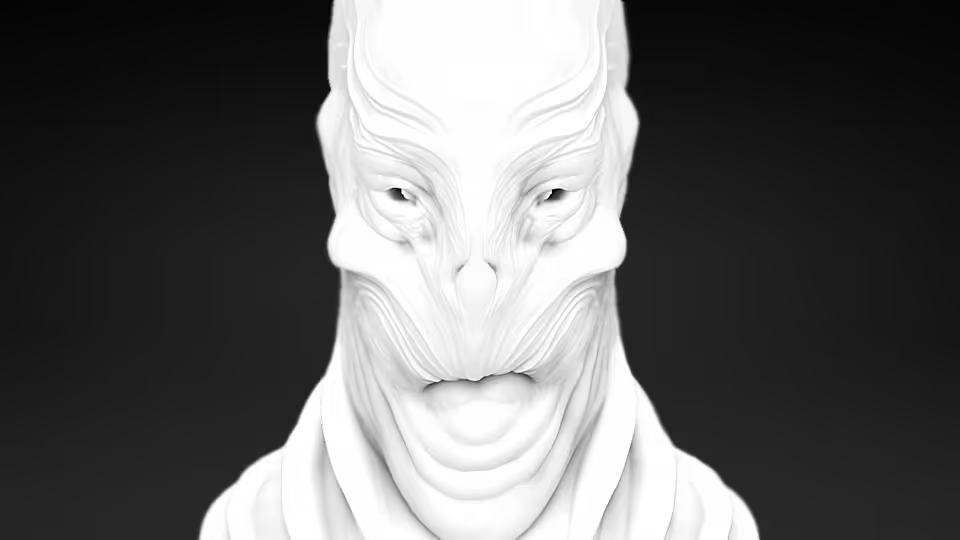
You will probably come across this term many times. This is how I like to think about topology: If you look up the definition of Cartography, you will find something along the lines of… “is the science or practise of drawing maps”. in a similar way, Topology is the science or practice of arranging 3D polygons into patterns to serve a specific purpose. it's like creating a map for your 3D model. For instance, you need a good topology for a model that will be animated. The polygons need to be arranged in a particular way so that when they move, they won't break or deform the overall shape.

SubTool
Subtools are NOT layers. They are separate objects on your model that are displayed as a list within each Tool. With multiple subtools, you can have a super detailed model with millions of polygons. Even if your system can only handle 1 million polygons, you could have a 20 millions polygon model made out of 20 SubTools each one of them with 1 million polygons.

Subdivision level
The subdivision level is directly related to the resolution of the object. basically, each time an object is sub-divided (each polygon splint into 4), ZBrush creates a new level of subdivisions. this is great because it allows you to move back and forth between low and high levels of resolution in the same model.
SSS
SSS stands for Sub-Surface Scattering, and it refers to the effect caused by the light interacting with translucent materials. If you are interested in using SSS in ZBrush you can download my FREE ebook on Skin Materials and single BPR render.

Sculptris Pro
Sculptris pro is a fantastic feature from ZBrush, that allows you to freely sculpt your meshes without any topology restrictions. There is no need to subdivide or use Dynamesh (although you can), as you change the size of the brush, ZBrush will add more or fewer polygons letting you sculpt details in specific areas without affecting the rest of the model.
Stroke
The stroke is a feature linked to each brush and it determines how the brush is applied to the surface.
PolyMesh
A PolyMesh is an object in the 3D space that is form by a number of connected polygons. The combinations of polygons create a Mesh (therefor: Poly-Mesh). in ZBrush, the meshes can be made of quadrangular or triangular polygons.
Quads
A quadrangular polygon makes a plane, 4 points and 4 edges and a single face.

PolyGroups
This is a very straightforward concept but very powerful. Polygroups are essentially ‘IDs’ for polygons and they let you create groups within a 3D object, this will speed up your workflow and help you create very cool effects like panels. You could also use PolyGroups to easily select and hide portions of your model.
Points
This is probably the most basic concept in 3D, a point is a coordinate in the 3D space with position information in the X, Y and Z axis.
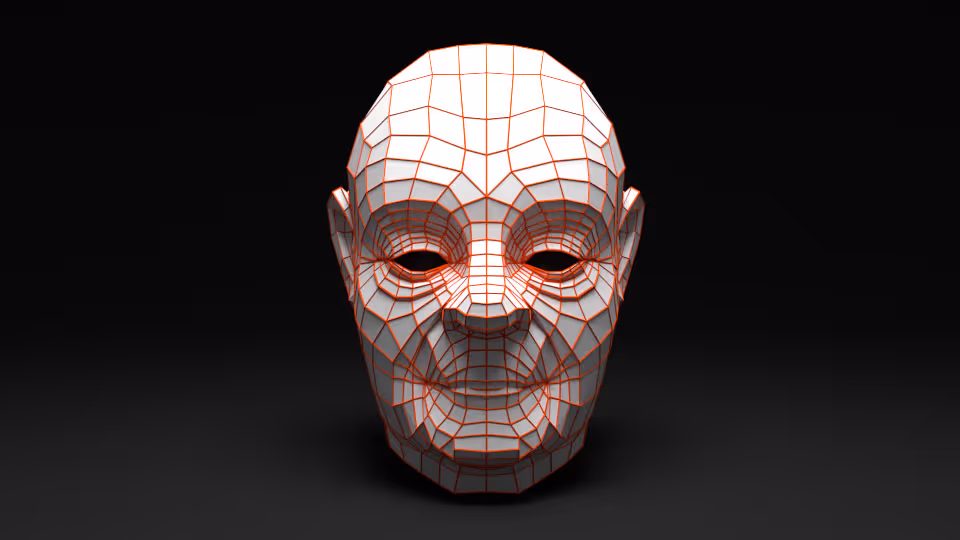
Polyframe / Wireframe
In 3D software the term Wireframe, is more commonly used. ZBrush called it Polyframe, but they are essentially the same thing. They refer to the visible “net” that is created by the connections of all points in the object. You’ll probably have seen wireframe renders which are great to show the polygon density or topology of a model.
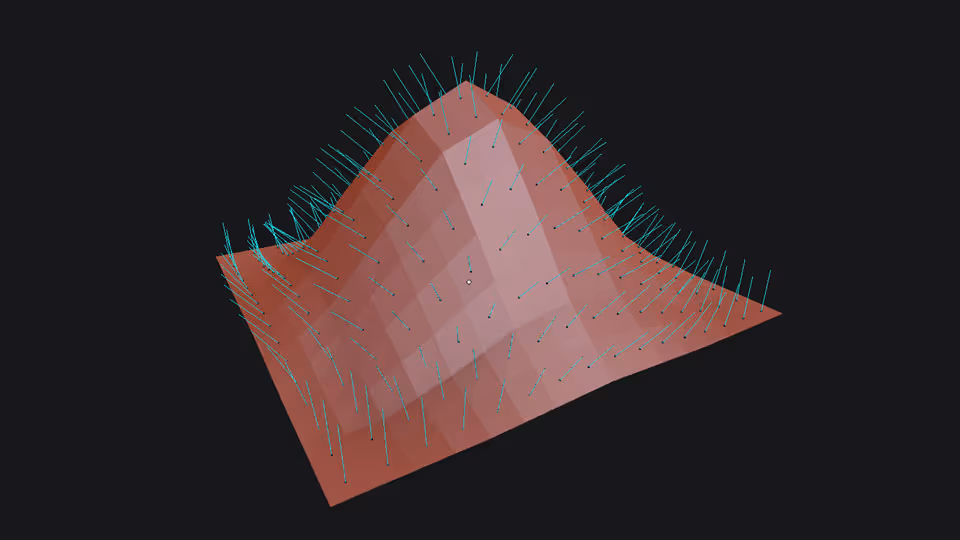
Normals
in 3D, a normal is a vector or line which is perpendicular to its underlying surface (usually it refers to the face of an object). Normals are used by 3D software to define the interaction with the light, especially when working with shaders. Normals are also very important in the process of ‘baking’ maps.
Normal map
Normal maps are very similar to bump maps as they are used for the same purpose. However, they are more accurate and more powerful because they not only store the “intensity” but also the direction of the normals using RGB values. As opposed to bump maps that only simulates pixels moved away from the surface in a straight line, normal maps simulate the pixel being moved in any direction.

Polygon
A polygon is a shape created by connecting a set of points in the 3D space. The simplest form of a polygon is a triangle, formed by the connection of 3 points. Less than that would be just two connected points (the connection is called an Edge).
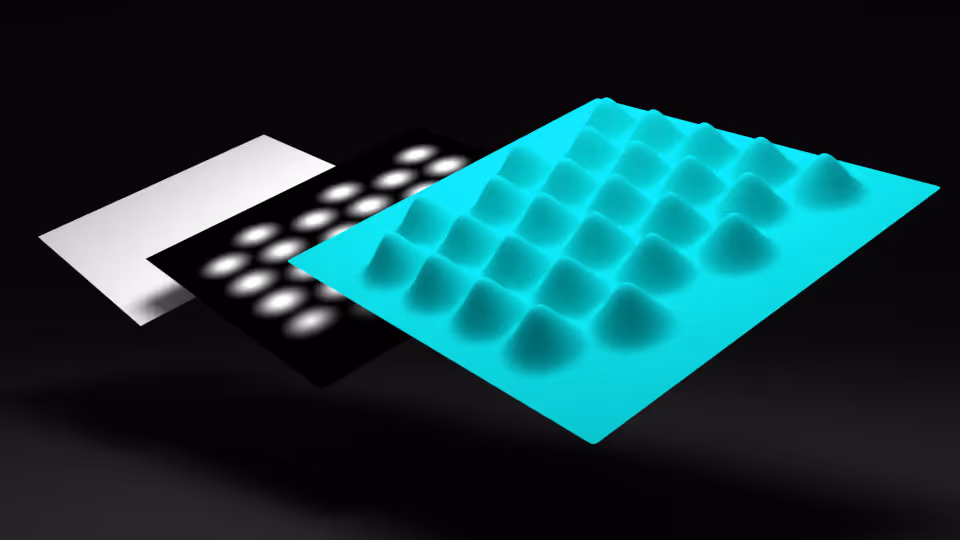
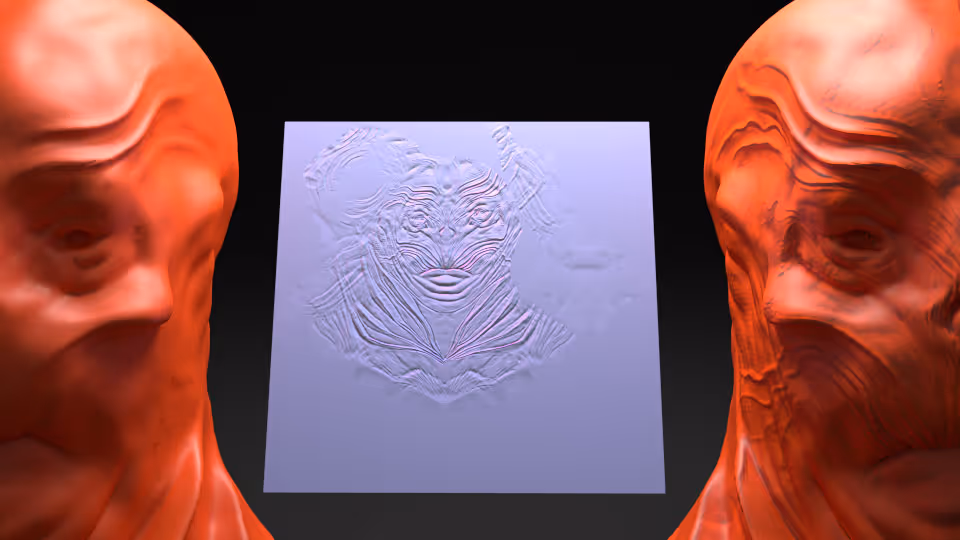
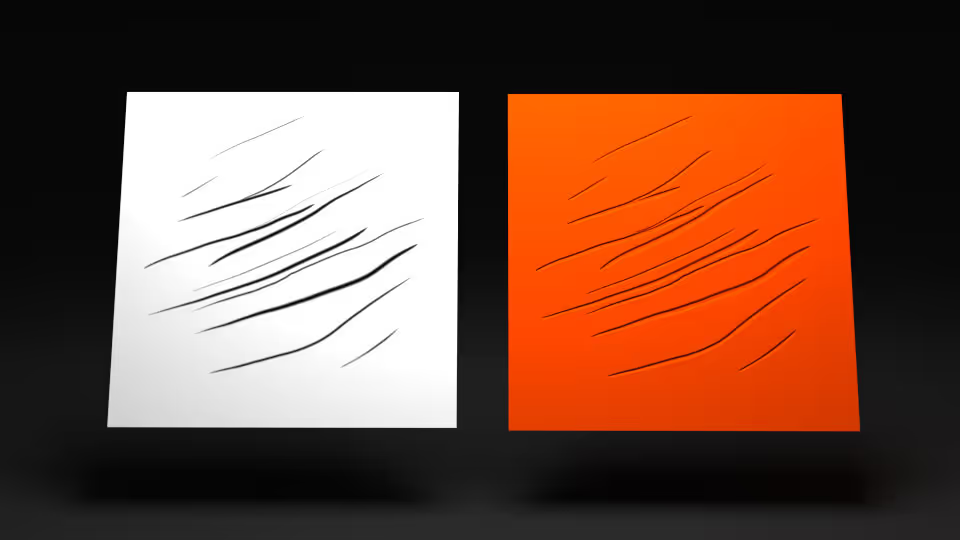
Displacement map
A displacement map is a greyscale image, also known as a heightmap, and is used to render bump or normal maps as true geometry. Differently from the normal or bump maps, displacement maps actually “displace” the surface. The white areas of the image “pull” the geometry out, and the black areas “push” the geometry in. Heightmap is a term that refers to the same thing but is more commonly used in the context of terrain modelling.
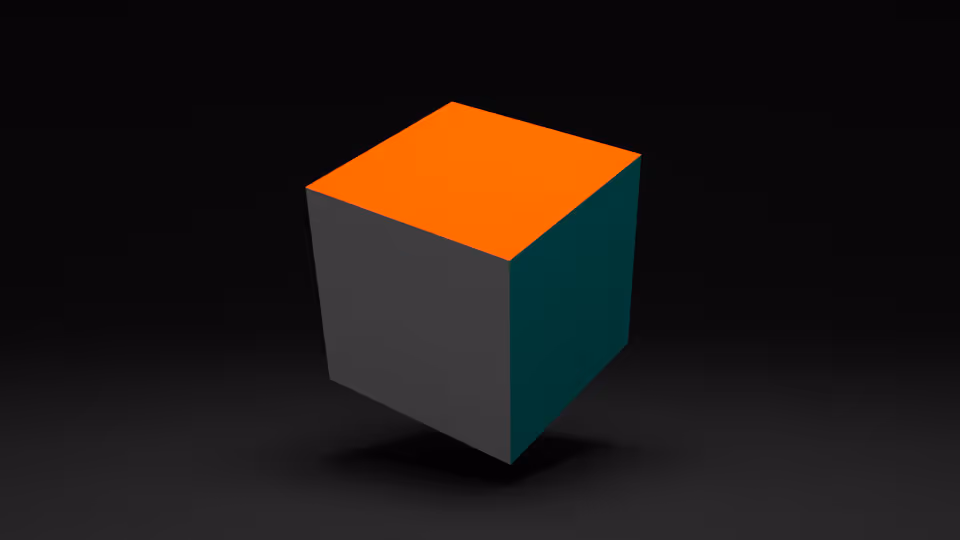
Geometry resolution
Another name for Geometry resolutions could be polygon density. it has to do with the number of polygons that a model has (or that are displayed for a particular model at any given time). A simple cube fits into the category of “Low-Res” because it only has 6 polygons forming the mesh. If you divide the cube, ZBrush (and most 3D software) will split each polygon into 4 polygons. If you continue to divide the cube mesh, the number of polygons will increase exponentially (increase in resolution), making it a “high-Res” model. The image above, shows a “Low-Res” cube vs “high-res” cube (low-res cube divided 4 times):

MatCap
MatCap stands for “Material Capture”. MatCaps are materials used by ZBrush that include environmental properties like lighting and reflections. You can essentially paint a sphere the way you want your material to look and use it as your MatCap image. If you want a more in-depth explanation and tutorial about MatCaps, go to the tutorials page and download my Wet Clay Material and rendering eBook.
Dynamesh
Dynamesh refers to the best thing ever! Also, it is a really cool approach to building volumes with ZBrush. it’s probably the closest thing to working with real clay since you don’t have to worry about Topology or continuity. with Dynamesh, you can pull, push and tear things apart. ZBrush will dynamically generate the polygons necessary to match the shape of your object while maintaining an even distribution.
Face
In 3D, a face usually refers to the planar surface of a model. For instance, the cube is made of 8 points, 12 edges and 6 faces. Each polygon (formed by 3 or 4 connected points) is a face.
Edge
An edge is a line connecting two points in space. the simplest form of polygons (the triangle) will have 3 edges. Edges can be shared by two polygons or not, when all the edges of your mesh are shared by 2 polygons the term “Closed geometry” is used. There are cases where the edges are not shared by two polygons and this is called “Open geometry”.
AO
AO refers to Ambient Occlusion, and it is used to simulate contact shadows between meshes (usually very soft shadows). It is very common to see AO in the form of a map (like texture map) as well as a render pass for compositing.
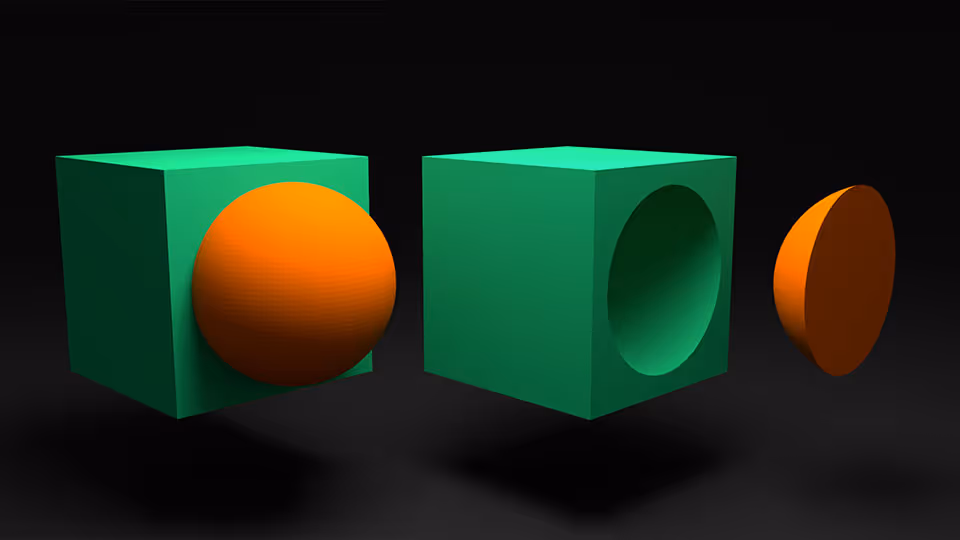
Booleans
Boolean is an operation that allows you to edit or create a mesh out of the interaction of 2 or more meshes. With booleans, you can add, subtract or intersect. ZBrush has a ‘Live Boolean’ system that lets you see the effect in real-time as you change the size, rotation or position of an object.
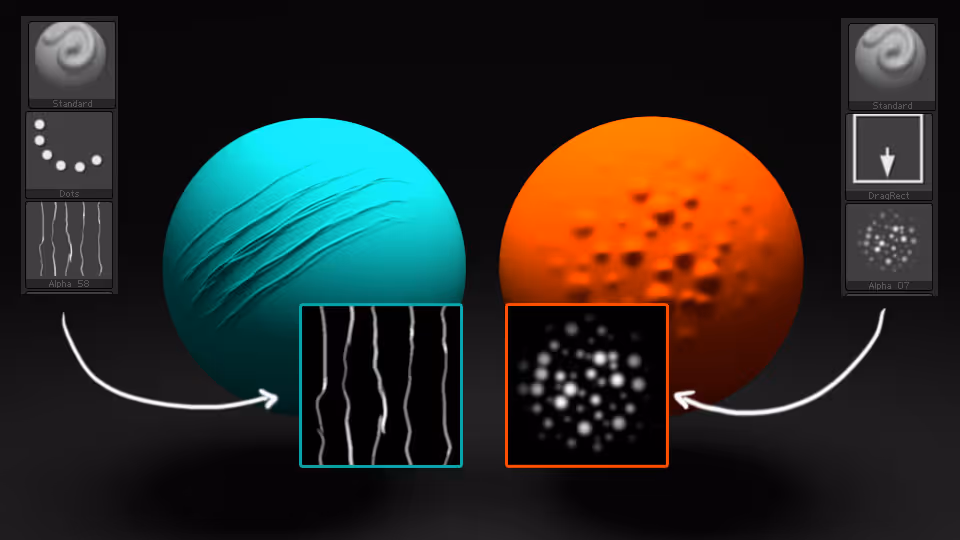
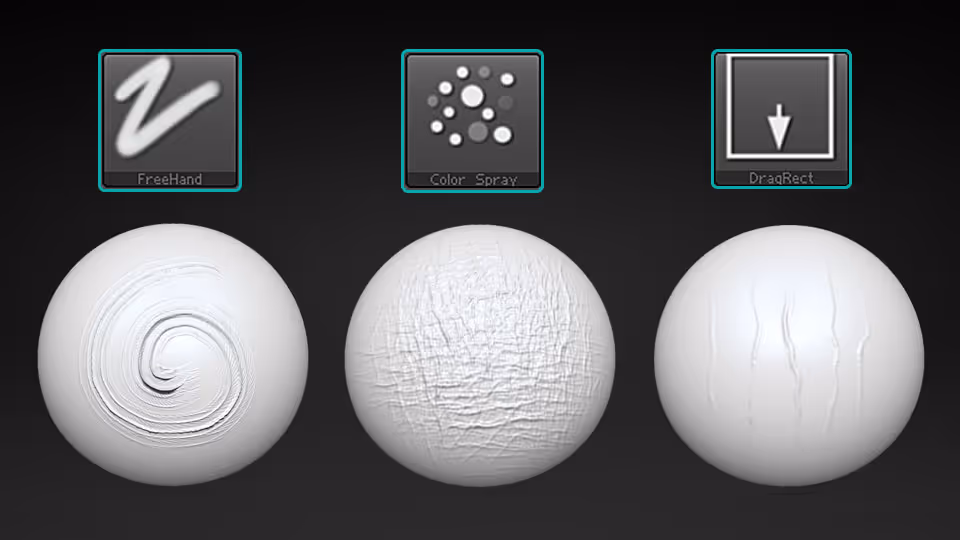
Alpha
In general “Alpha” refers to transparency or a mask in 3D, but in ZBrush and putting it in simple terms, an Alpha is a super greyscale image, (you could say it is a more refined bump map) as ZBrush generates alphas at 16 bit. They can be used in a variety of ways within ZBrush. For instance, you can completely change the shape of a brush by simply changing its alpha. You could also alter the geometry of your model by creating very fine details that interactively displace the geometry. Alphas are mostly used towards the end of the sculpting process to add very fine details.
Bump map
A bump map consists of a greyscale image used to fake crevices, wrinkles, pores and small details when rendering a 3D object. The bumps map simulates the displacement of the surface, using the face normals of the polygons to create the height in pixels relative to the camera viewpoint. In other words, it stores “intensity” in greyscale values acting as a simpler displacement map that just fakes the displacement of the surface at render time.
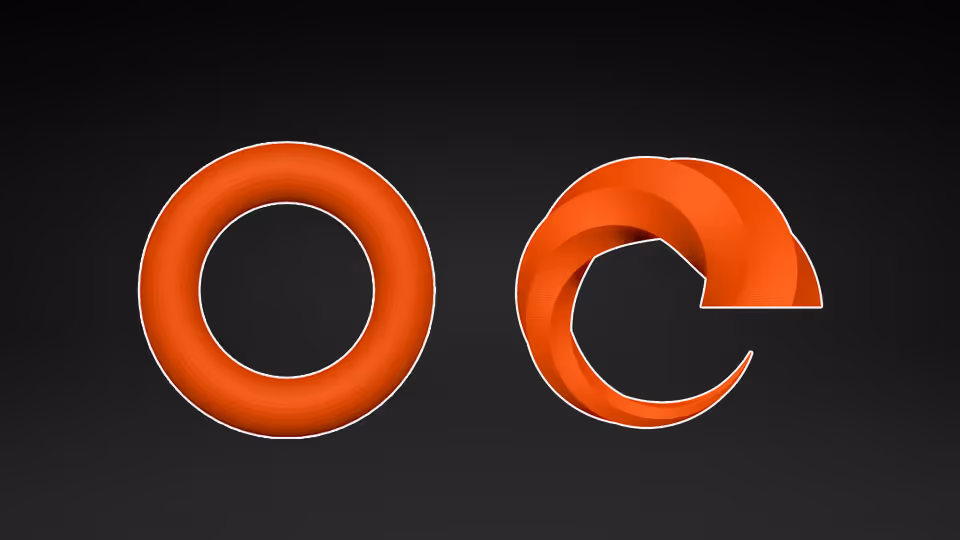
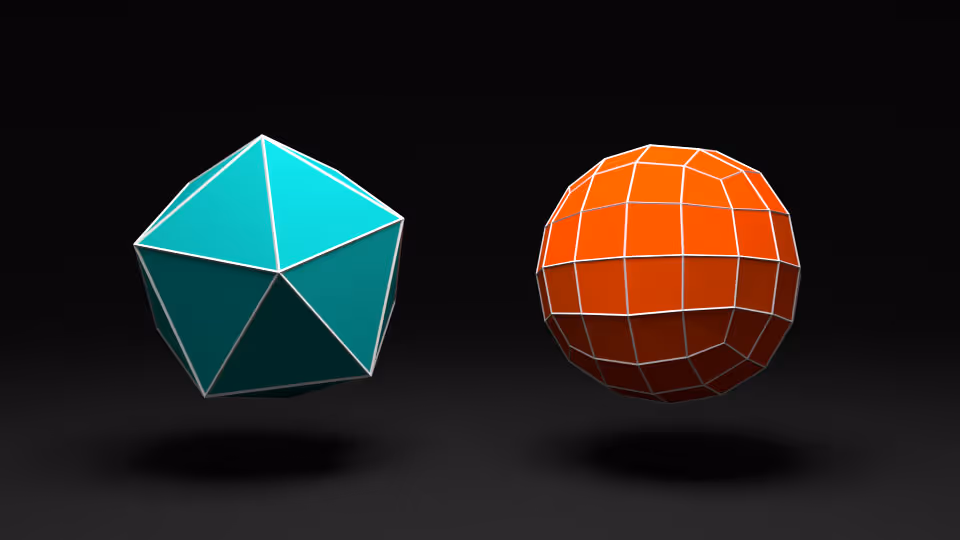
3D Primitives
The 3D primitives are the most basic shapes and building blocks in 3D such as Cube, Cone, Sphere, Torus, Cylinder, etc. They look like any other Polymesh with the same shape, they both have edges connecting points and creating a mesh of polygons. However, the primitives are objects that rely on mathematical data to define their shape. This means that you can modify the the primitive quite a bit before converting it to a PolyMesh. Zbrush offers a variety of more advance primitives, like the Gear3D. Like in the image above, you can go from the ring on the left to the “twirly thing” on the right without modeling anything, just altering the mathematical data (which is super easy using the sliders from the initialize palette).
Antialiasing
Is the technology, or rather the process of removing jagged edges (also known as the “staircase effect”). When dealing with pixels, creating a straight vertical or horizontal line is easy, the problem comes when creating diagonal lines. Each pixel is a square so when aligned diagonally, the squares meet at the corners rather than side by side (amusing is a 1 pixel line), the process of anti-aliasing evaluates the missing data between pixels, sampling the pixels around to create a softer transition, hence making the diagonal lines look smoother.