Environments in 3 steps...
This trick is more of a workflow tip than anything. I want to show you a very simple way to sculpt bases for your environments in ZBrush in 3 simple steps: 1. Asset building 2. Scene arrangement and 3. Texture.
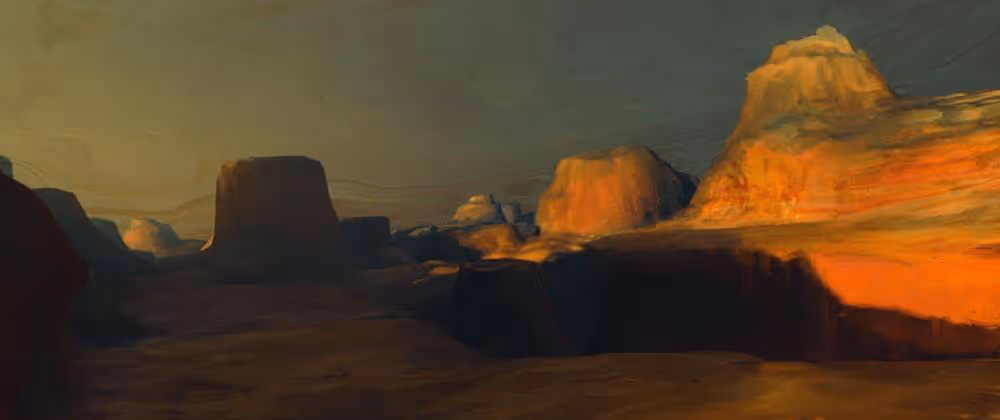
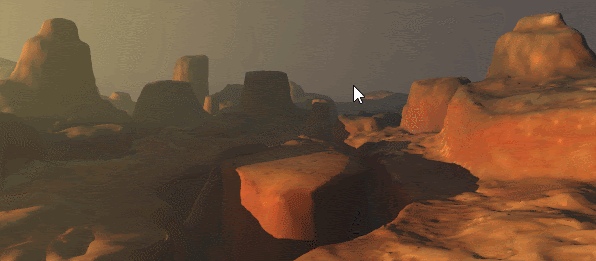
Here is a quick concept I did using the technique I'm going to show you for the creation of the base mesh:
Step 1
The first step is to create the assets you are going to use. Keep it simple a couple of shapes will be enough... you could use IMM brushes or VDMs.
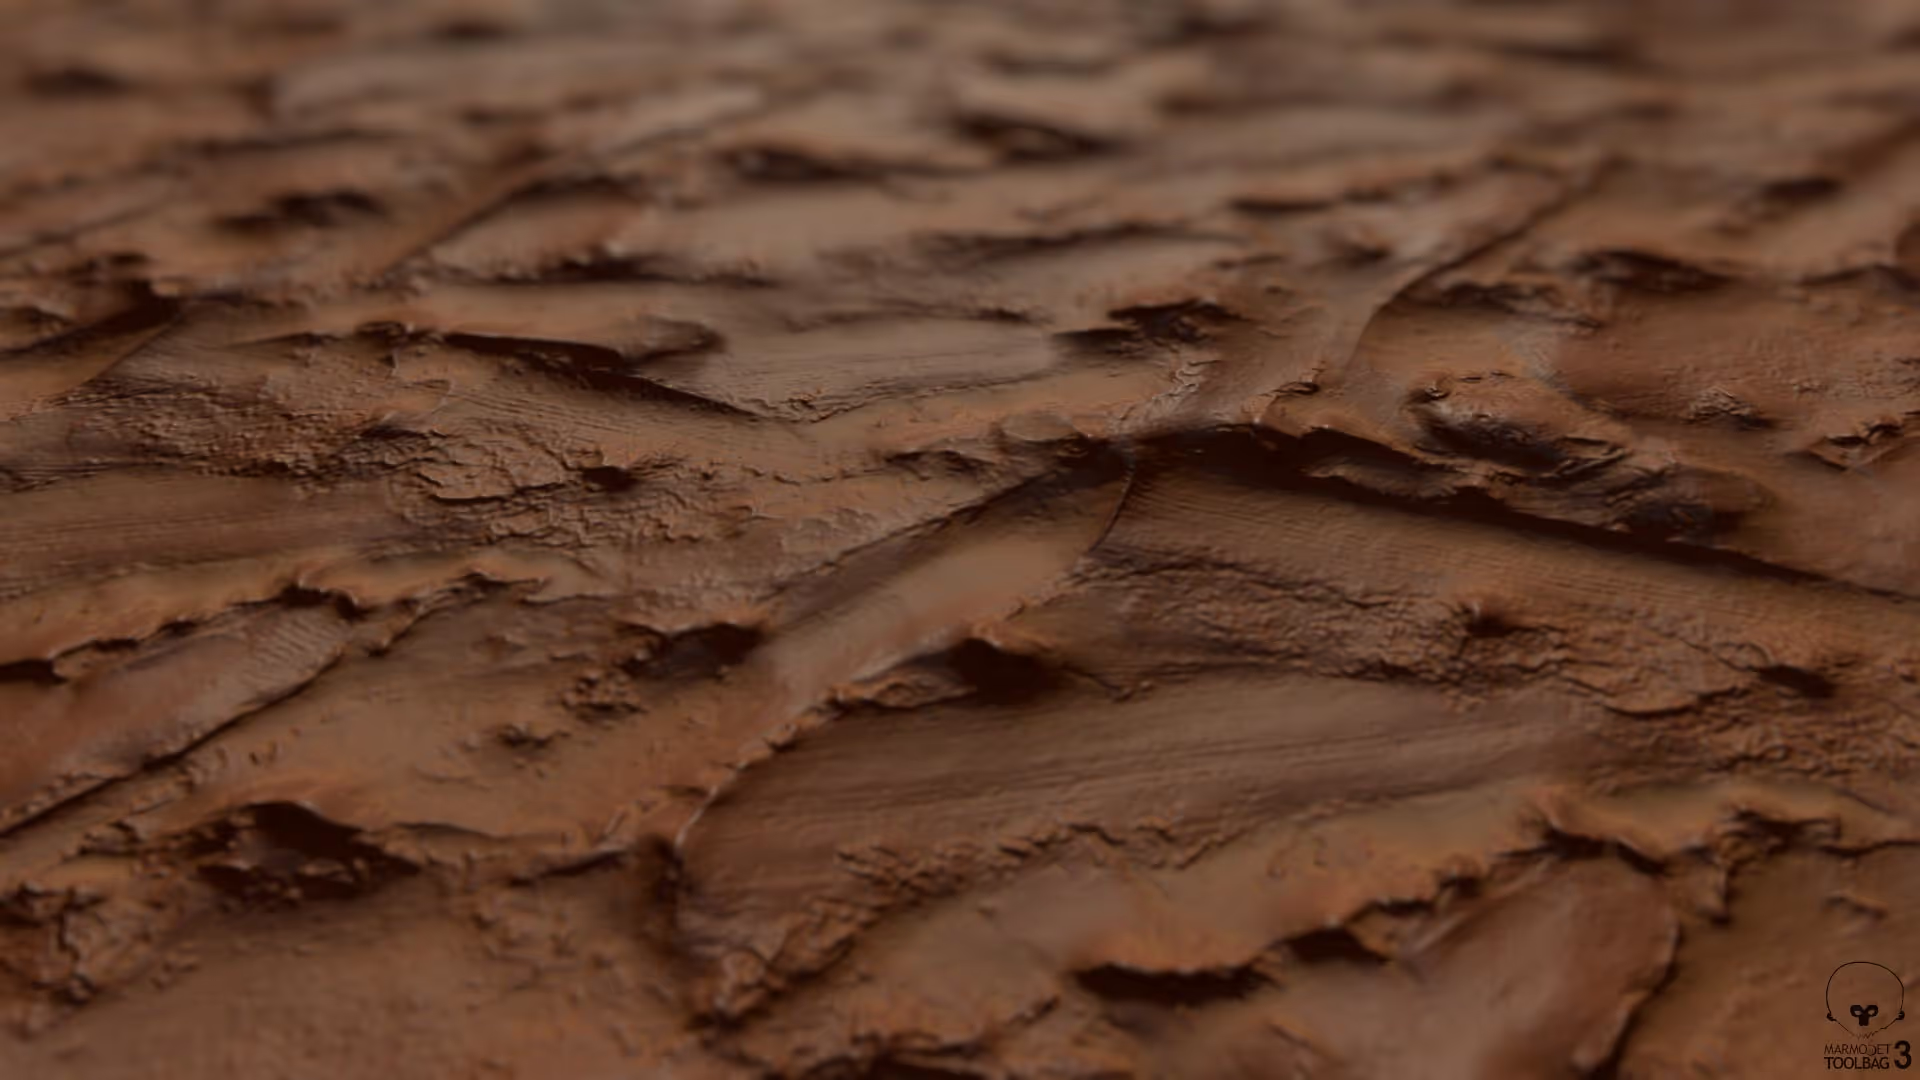
In my case I just loaded the 'Brush3DTemplate1024.ZPR' from the 'Misc' folder in the Project folder in lighbox in ZBrush (this project comes with ZBrush and is ideal to make VDMs), And sculpted a couple of shapes for large rocks formations and some variants for the ground (4 VMDs shapes in total):

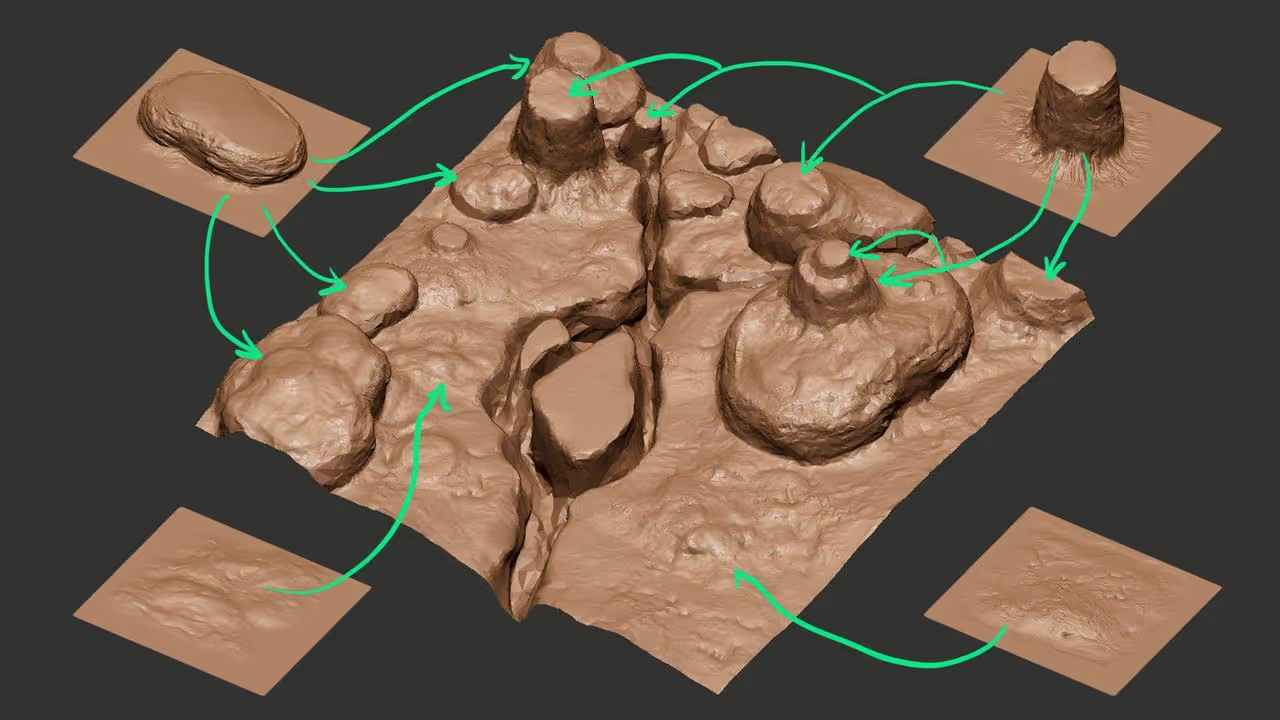
Step 2
Once you have all the assets ready is just a matter of arrange the VDMs (or IMMs, or separete meshes) to create the base for the environment.
I used the same project with the plane and created the main volumes with the two rock brushes. Then with the other 2 ground brushes I tweaked the ground to make it more uneven and add smaller details.
For the 'canyon' I used one of the knife brushes in the clay pack but you could use a standard brush with lots of pressure.
Keep an eye on the scale of the scene so instead of changing the size of the brush for the rocks too much, try changing the intensity to variate the height ;)
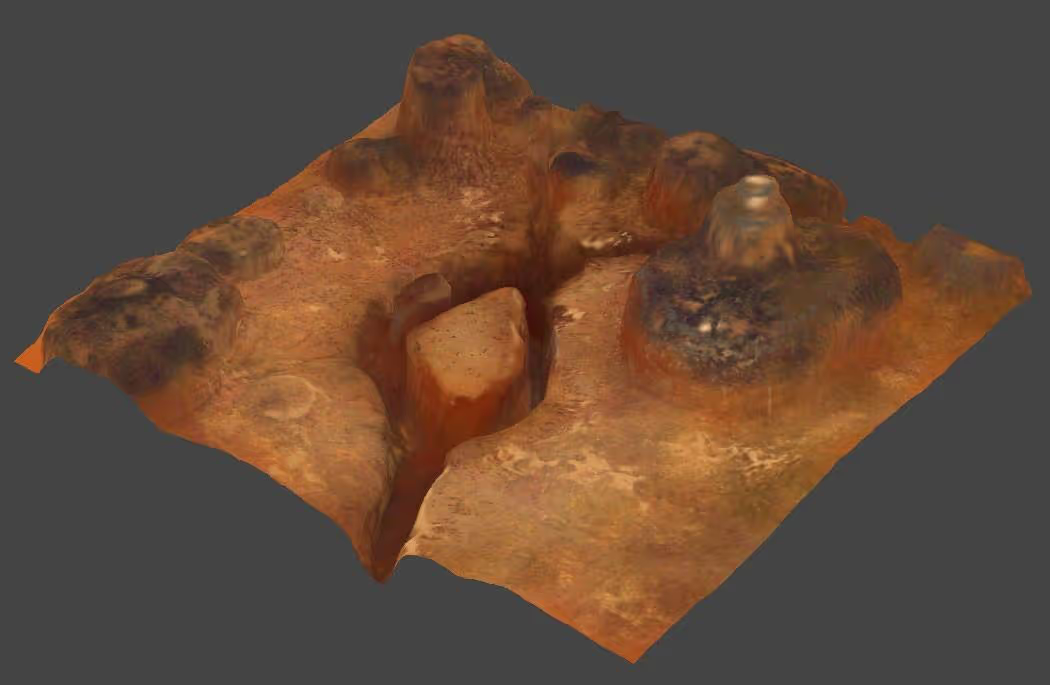
Step 3
The next step is to add texture / colour to the environment. The idea is to generate some variation in hues and saturation but keeping it very lose... the details can be done after with materials at render time or simply paint over (like I did on my concept above).
To polypaint the environment, I used a standard brush with 'Zadd' turned off, 'RGB' turned on, an irregular alpha and the colour spray stroke. I also used some of the masking options to help me break up the patterns and create an interesting mix of colour.
That's about it for the setup. If you want to take this into a render, you can simplify the mesh a bit using the Decimation Master plugin. This plugin has an option to keep the polypaint, you just need to enable the 'Use and Keep polypaint' switch at the top and you're good to go.
This is quick and functional approach to create a simple 'digital ground' that you can use to render out a bunch of angles and then use Photoshop to complete the concept.
That's it for , stay inside and stay safe!


.webp)

.webp)