So the first part is to create the screw in ZBrush:
- Take the helix 3D as a starting point to create the ‘thread’ of the screw. From the initialize palette at the bottom of the tool palette you can control the shape, thickness, radius, etc, all with simple profile curves
- I adjusted the Profile curve to create a straight ‘tubular shape’ with a bit of tapering towards the tip. The thickness follows a similar shape so it tapers slightly towards the end. And finally, the offset is a simple diagonal line to keep it consistent.
![001 (2).jpg [jpg-to-webp output image]](https://cdn.prod.website-files.com/66724d67c7a3aed4762456d2/684f505b4cb99a864f6a3dfe_ezgif-6f6f06c3ef50fd.avif)
Then you can use the ZModeler to tighten things up a bit I just ‘slide’ some edgelops to make it thinner and sharper.
To complete the screw:
- Add a cylidner and taper it to match the taper effect of the initial spiral object.
- Choose a cylinder primitive object and adjust the H and V Divided to create the hexagon for the head of the screw
- Add another squashes cylinder for the base and put all the pieces / subtool together in the same tool:
![002 (2).jpg [jpg-to-webp output image]](https://cdn.prod.website-files.com/66724d67c7a3aed4762456d2/684f505b4cb99a864f6a3e01_ezgif-6b38076ff1ab7c.avif)
Now, you can use Dynamic subdivision on each piece to soften it and polish the surface.
Here is a cool tip, to keep the hexagonal shape of the head of the screw, you can enable the ‘QGrid’ slider to a value of 1 and use the coverage slider to adjust the bevel effect:
![003 (3).jpg [jpg-to-webp output image]](https://cdn.prod.website-files.com/66724d67c7a3aed4762456d2/684f505b4cb99a864f6a3de4_ezgif-6fef535b83e769.avif)
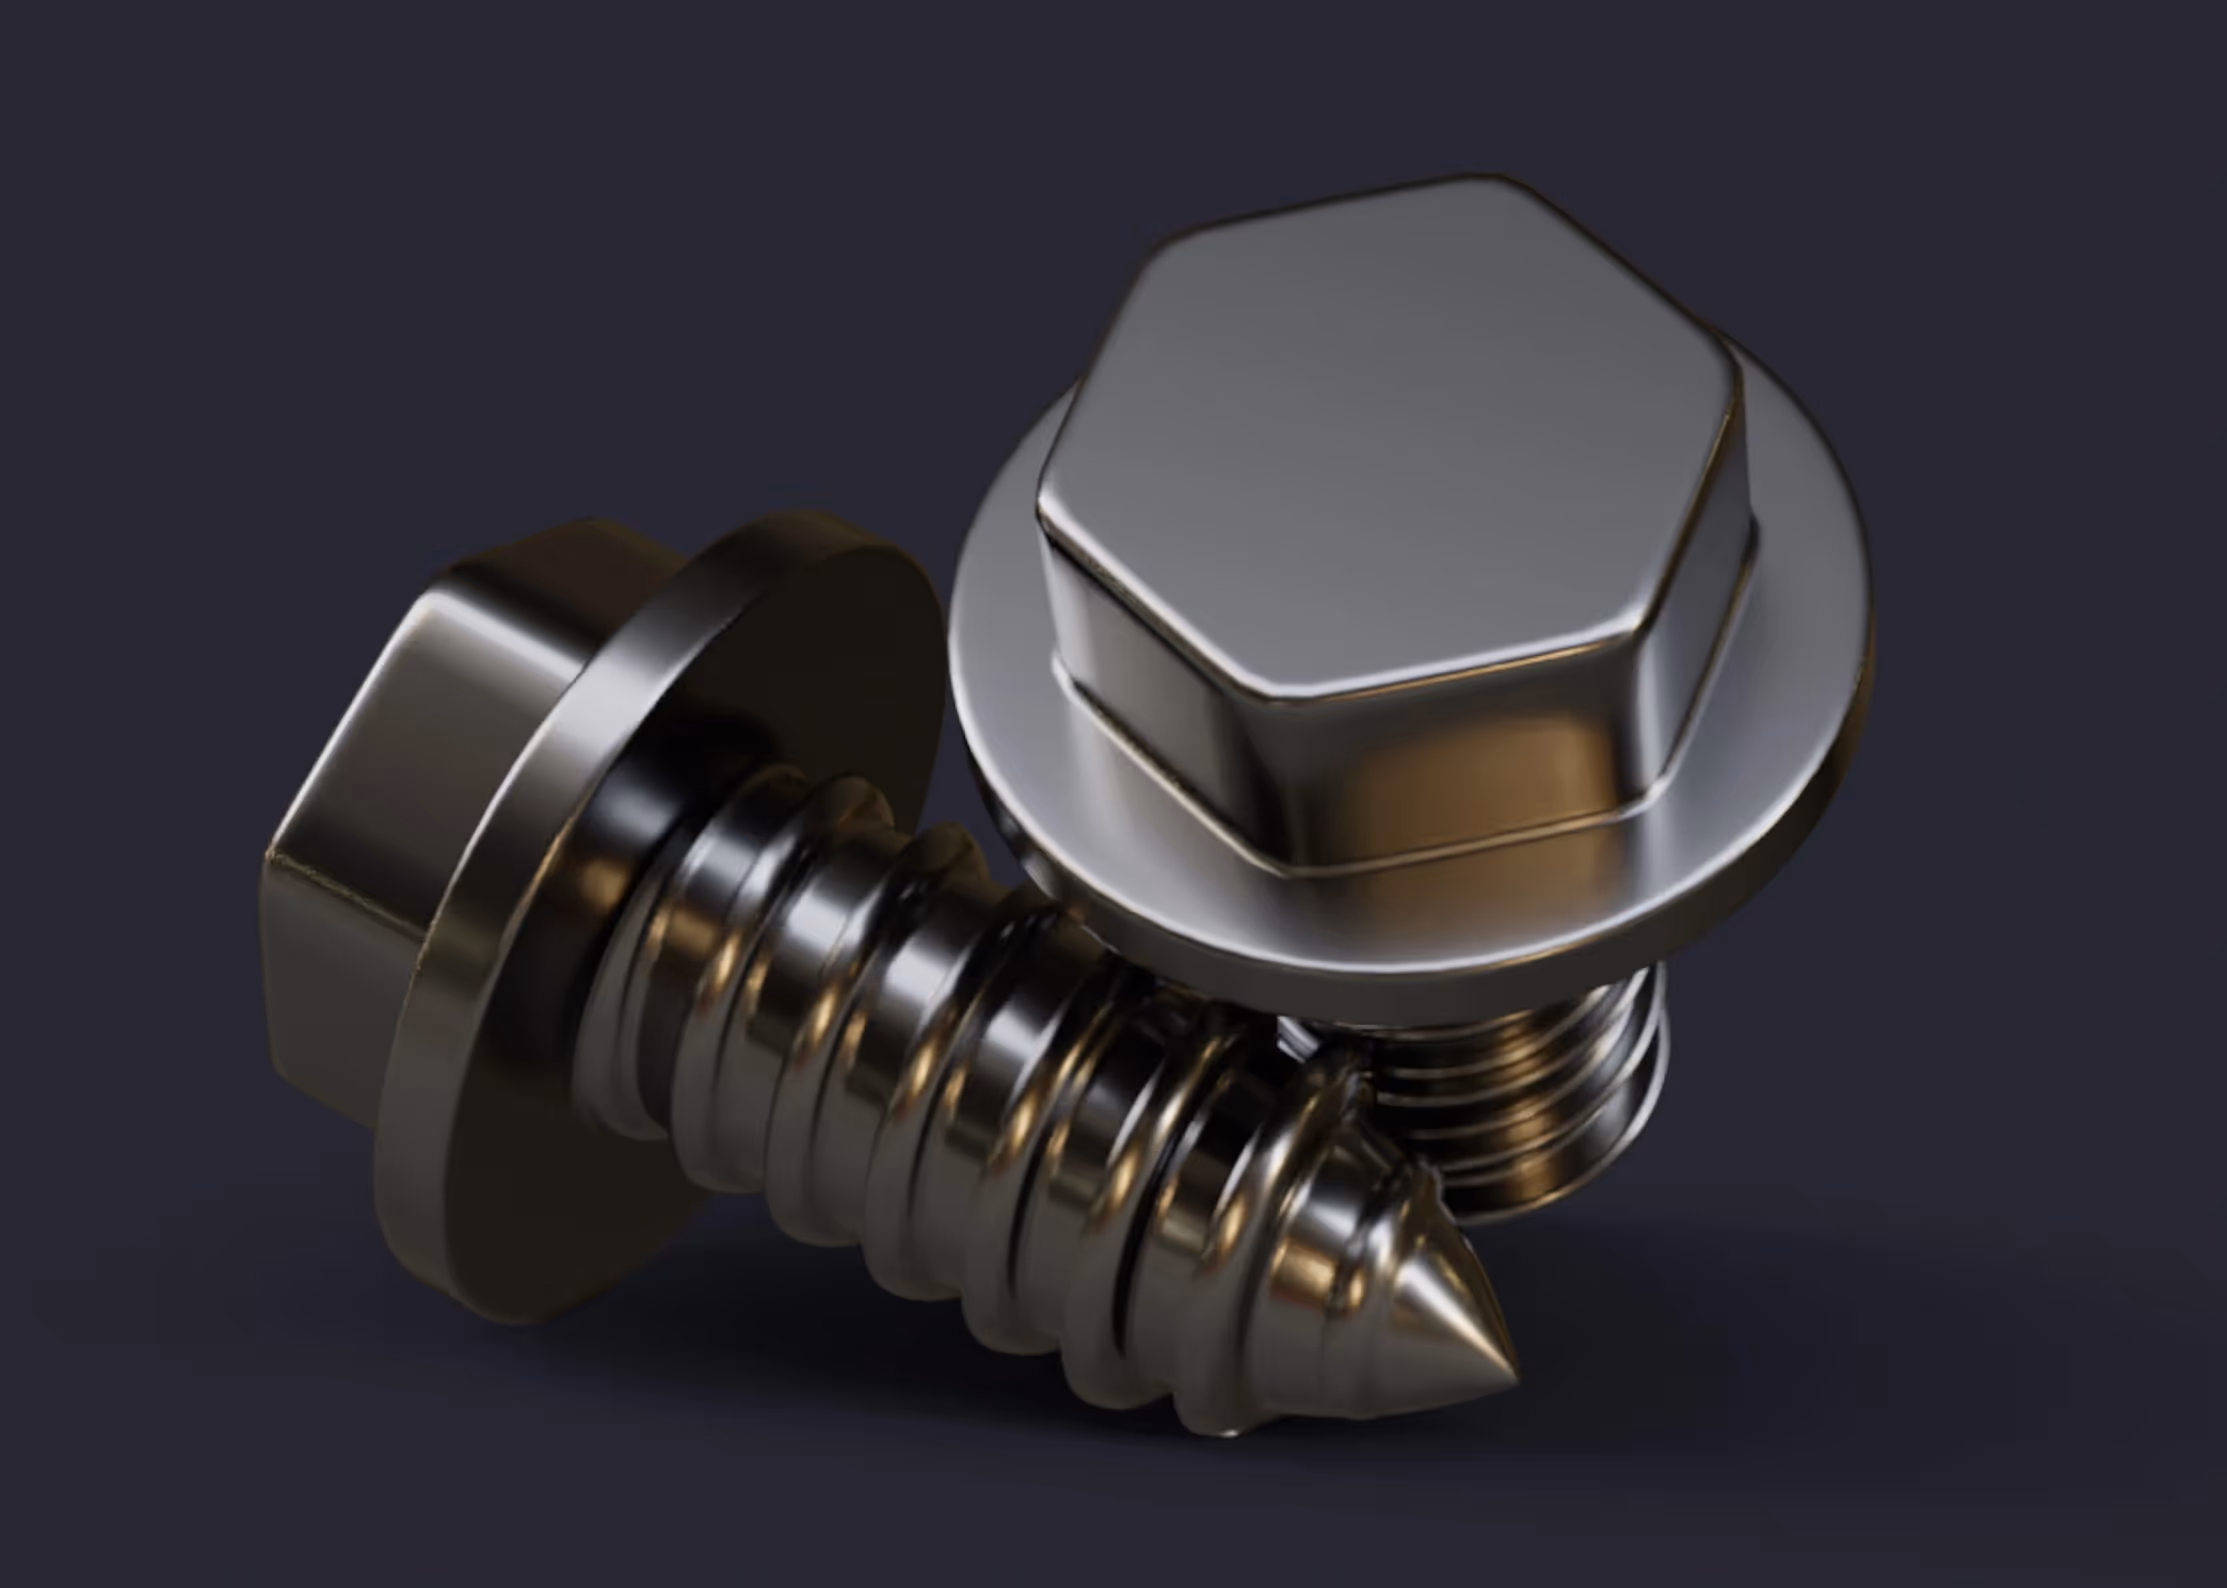
not impressed? it’s ok… is a screw I know… but here comes the real trick:
The hardest thing to create a much more realistic and polished piece, even for a screw like this, has to do with the transition between all the separate pieces and the ‘bevel’ between the hard surface objects…
Yes, you could merge everything or boolean it and retopologyse it… OR you can export the screw with all the parts as FBX and bring it into Marmoset Toolbag 5 for rendering:
![004 (3).jpg [jpg-to-webp output image]](https://cdn.prod.website-files.com/66724d67c7a3aed4762456d2/684f505b4cb99a864f6a3e07_ezgif-6c1d1a9453f732.avif)
Here is what’s amazing… you can create a new material and tweak the settings to make it look shinnier and metalic and then:
From the surface section of the material, click on the dropdown (which should be set as Normal by default), and choose Bevel… that’s right, this makes your material into a bevel shader!
![005 (2).jpg [jpg-to-webp output image]](https://cdn.prod.website-files.com/66724d67c7a3aed4762456d2/684f505b4cb99a864f6a3e04_ezgif-670b1733f6b69a.avif)
you can increase the Bevel samples to improve the quality and adjust the ‘Bevel Width (mm)’ to determine the bevel amount between surfaces… how cool is that?
![006 (1).jpg [jpg-to-webp output image]](https://cdn.prod.website-files.com/66724d67c7a3aed4762456d2/684f505b4cb99a864f6a3e0a_ezgif-6a73c89fbcefe1.avif)
here is the bevel shader in action so you can really see the massive improvement (all at render time):
![2025-04-22-13-34-17.gif [gif-to-webp output image]](https://cdn.prod.website-files.com/66724d67c7a3aed4762456d2/684f505c4cb99a864f6a3e35_ezgif-6d41220f50f0e5.avif)
Not only this is cool and super useful for hard surface objects, BUT you can also assign a different material to other parts and control the Beveling amount (width) indepenedently.. so in my case more bevel for the head of the screw, and sharper thinner beverl for the thread of the screw!


.webp)

.webp)