
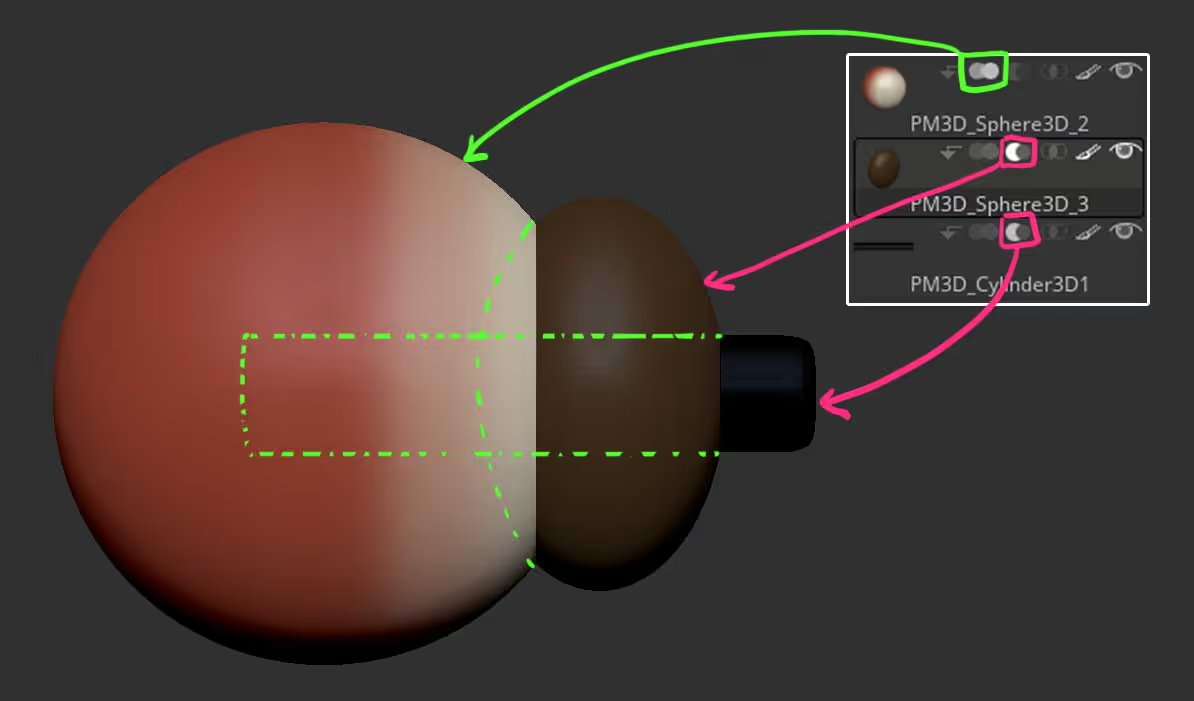
First, select a sphere and turn it into a polymesh 3D... this will be your sclera. Duplicate the sphere (this will be your iris) and scale it in the Z-axis with the Gizmo 3D so that is not perfectly round... Finally, append a cylinder 3D to your tool and scale it to make it look thinner and longer (this will be your pupil).
Go ahead and using some simple colour for each piece, if you want a blue iris, just fill the second sphere with blue, etc.

The simplicity of this workflow is what makes it powerful.. Take the 'iris' and the 'pupil' and put them below the 'sclera' in the subtool palette. Use the Gizmo 3D to adjust the position to something similar to the image below.
From the Boolean icons on the subtool, set the 'iris' and the 'pupil' to Subtract
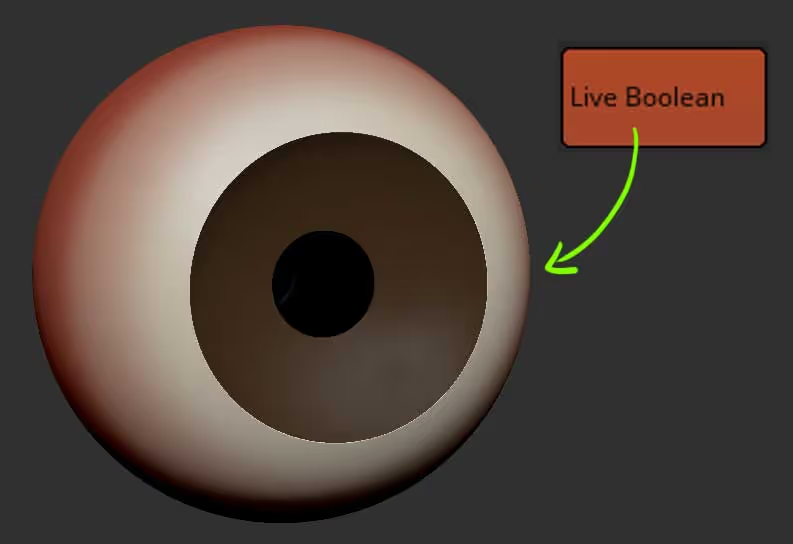
Now all you have to do is enable the Live Boolean option (from the render palette) and that's it! you have a pretty decent cartoonish eye and because we are using Live Booleans, the process of adjusting the different pieces is non-destructive...
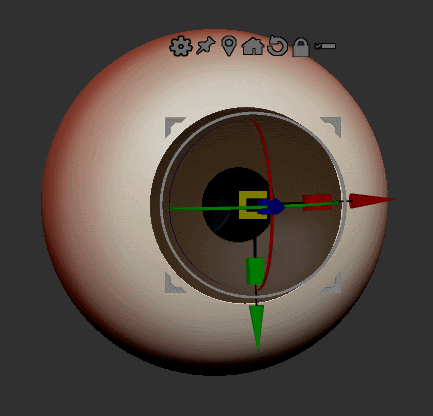
with the Live Booleans still ON, take the sphere of the 'iris' and scale it proportionally with the Gizmo 3D to increase the size of the iris and you can do the same thing with the cylinder that makes the 'pupil':
This whole process including the adjustment take less than 2 minutes and you can get on with the sculpting of your character!
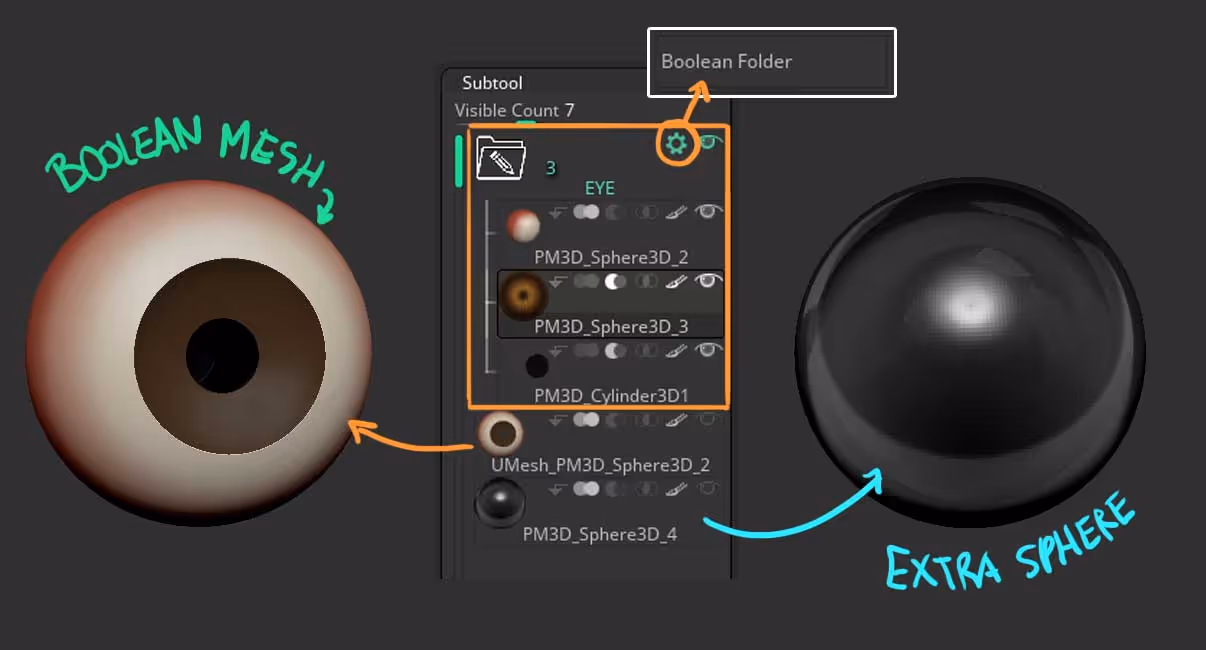
Of you want to take your eye to the next level, you can put all the pieces in a folder and use the 'Boolean folder' option from the gear icon to combine them all in a single subtool.
Then add a new sphere and scale it slightly. The extra sphere will be your reflection sphere for the eye, so you can choose a black material that has some white highlights like the Crome A MatCap:
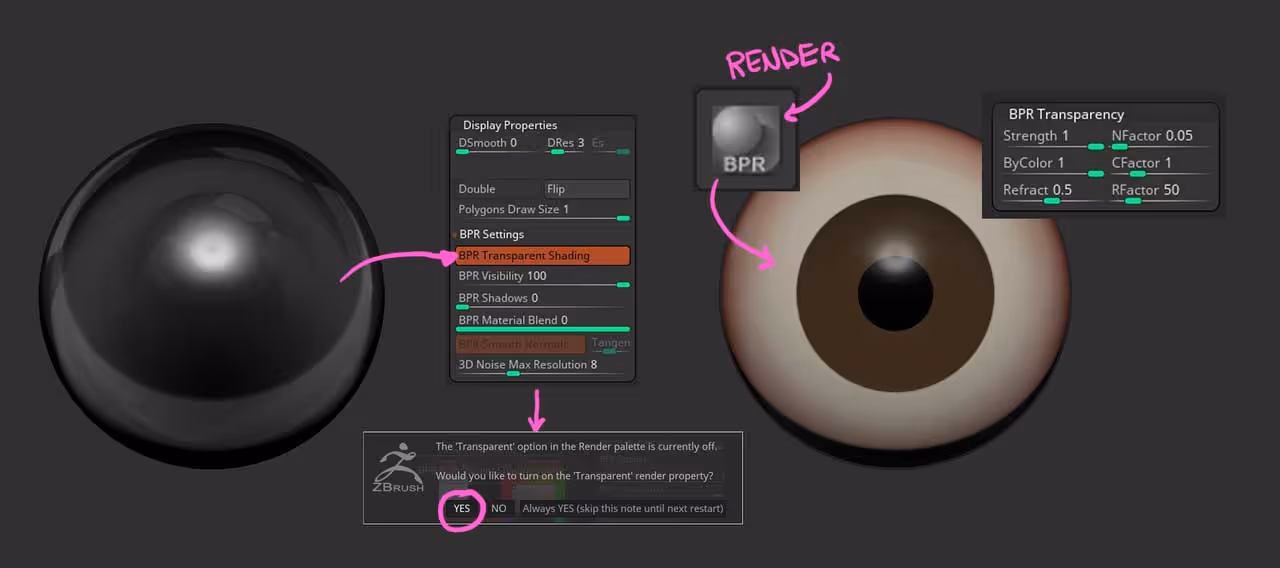
With the Extra sphere selected, scroll down in the Tool palette to the Display Properties and enable the BPR Transparent Shading. (you might get an extra pop-up about enabling transparency in the render palette, just click YES).
Now when you render (Shift+R), you'll see the extra sphere as transparent with some highlights. ZBrush treats black as transparent and you can tweak the transparency from the BPR Transparency subpalette:
hope this helps! You can also save the initial tool setup and add it to your library of assets ;)


.webp)

.webp)