Ok, so the brushes for sculpting hair in the pack are great for a stylised look, but you'll notice that in the my concept of Chrysallis, the hair looks a bit more detailed, this is for two reasons:
- On top of the sculpted details I used polypaint for extra 'bump' (which is what the trick I'm showing you is all about).
- I took the render into Photoshop and I actually did some paintover for extra details and 'flyaways' of hair.
Here is what the plain sculpture looks like in ZBrush (with the sculpted details from the brushes):
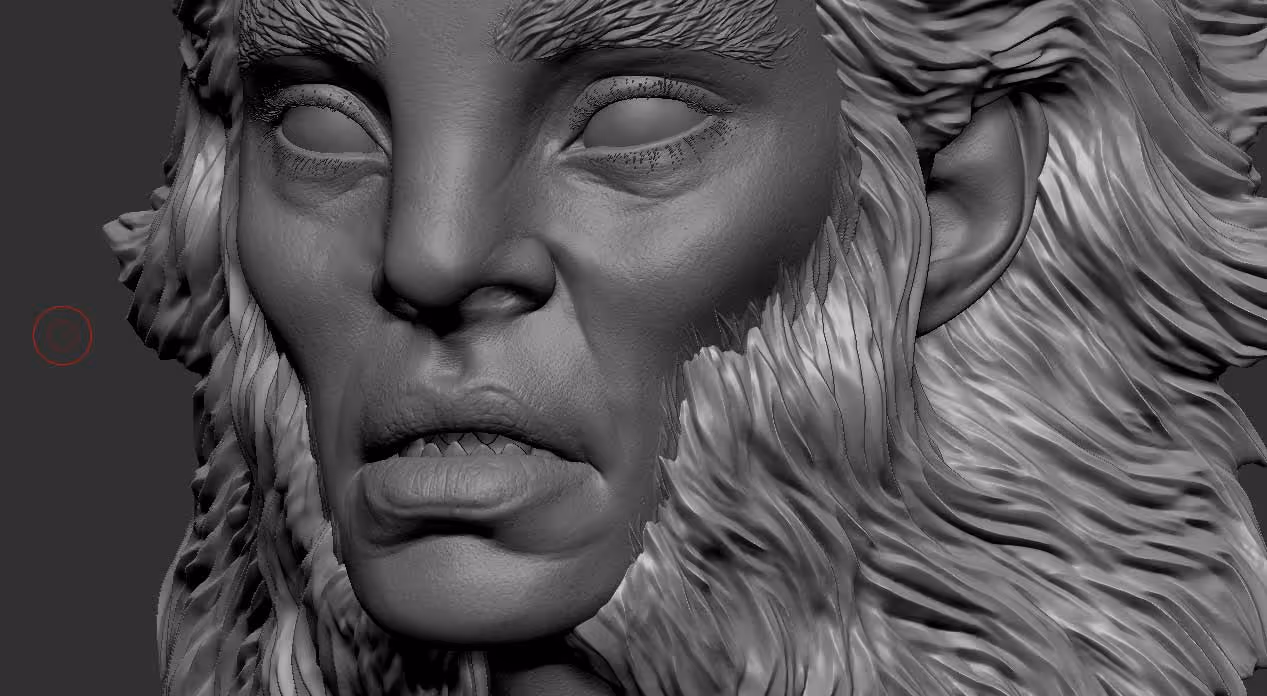
Pretty stylised right? and a bit far from what you see in the final render in terms of details... right?
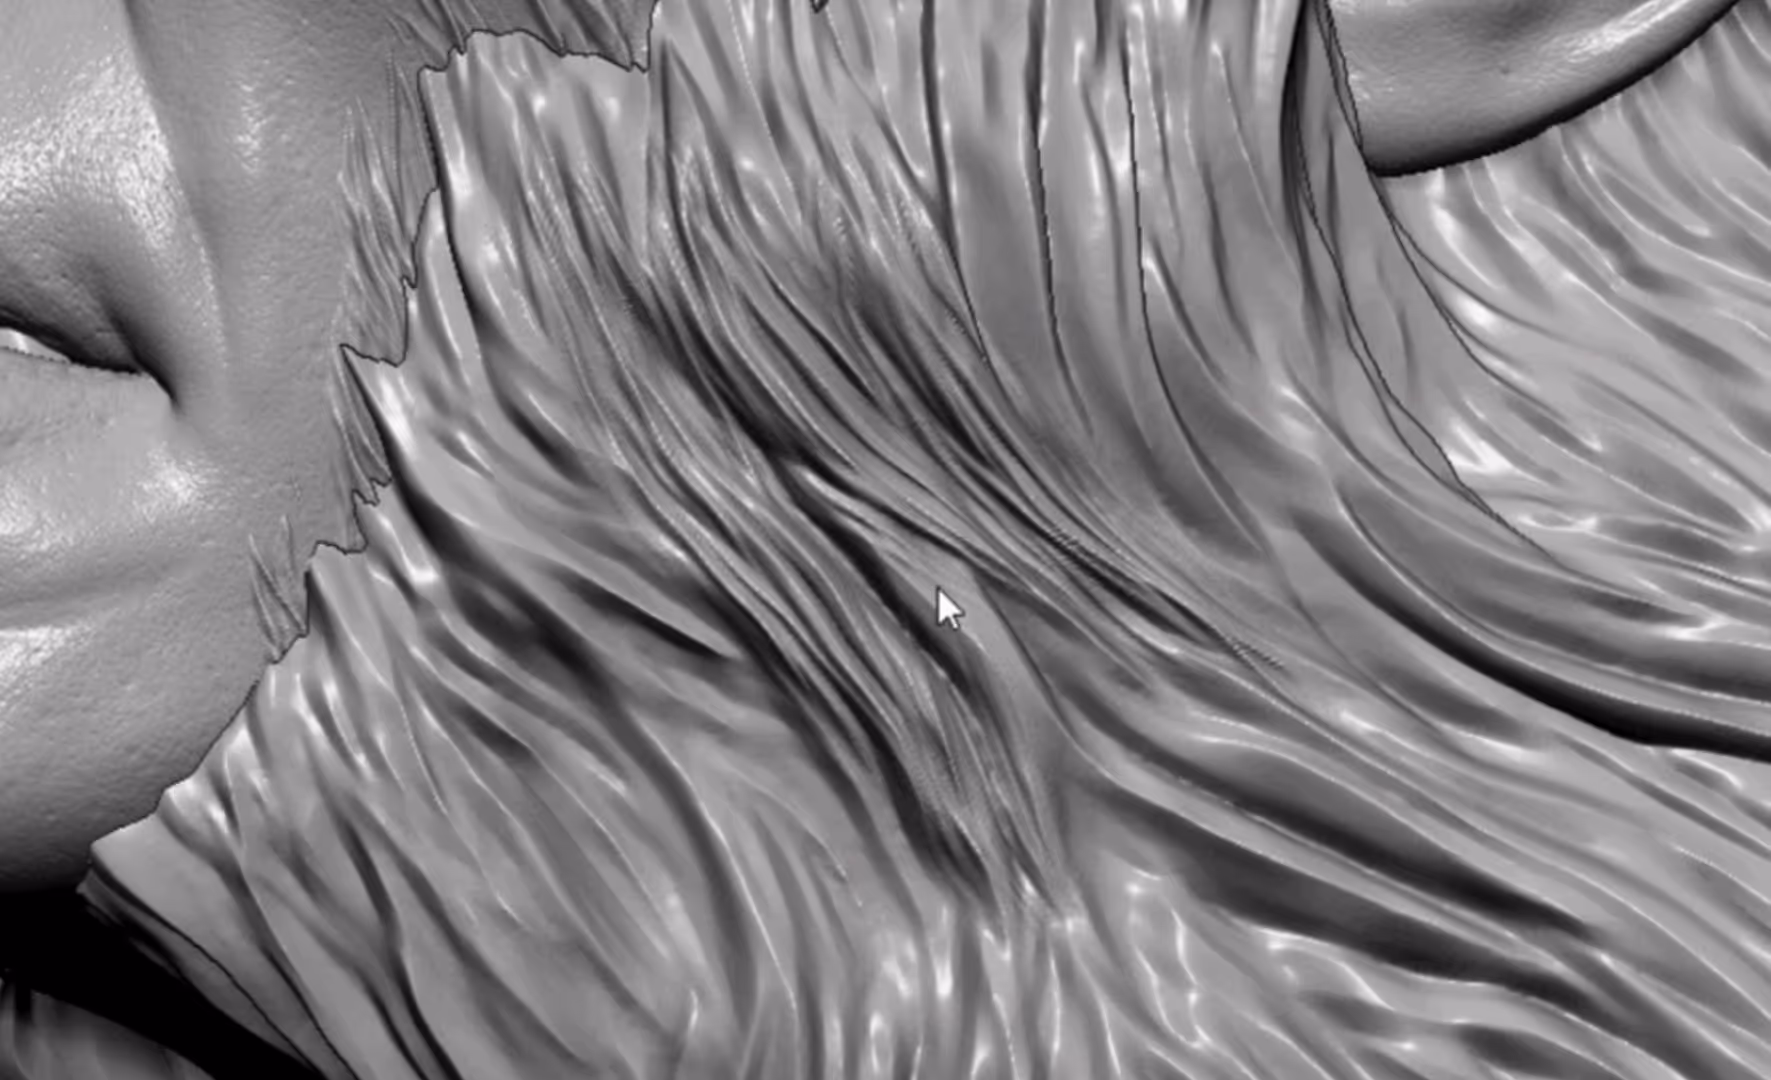
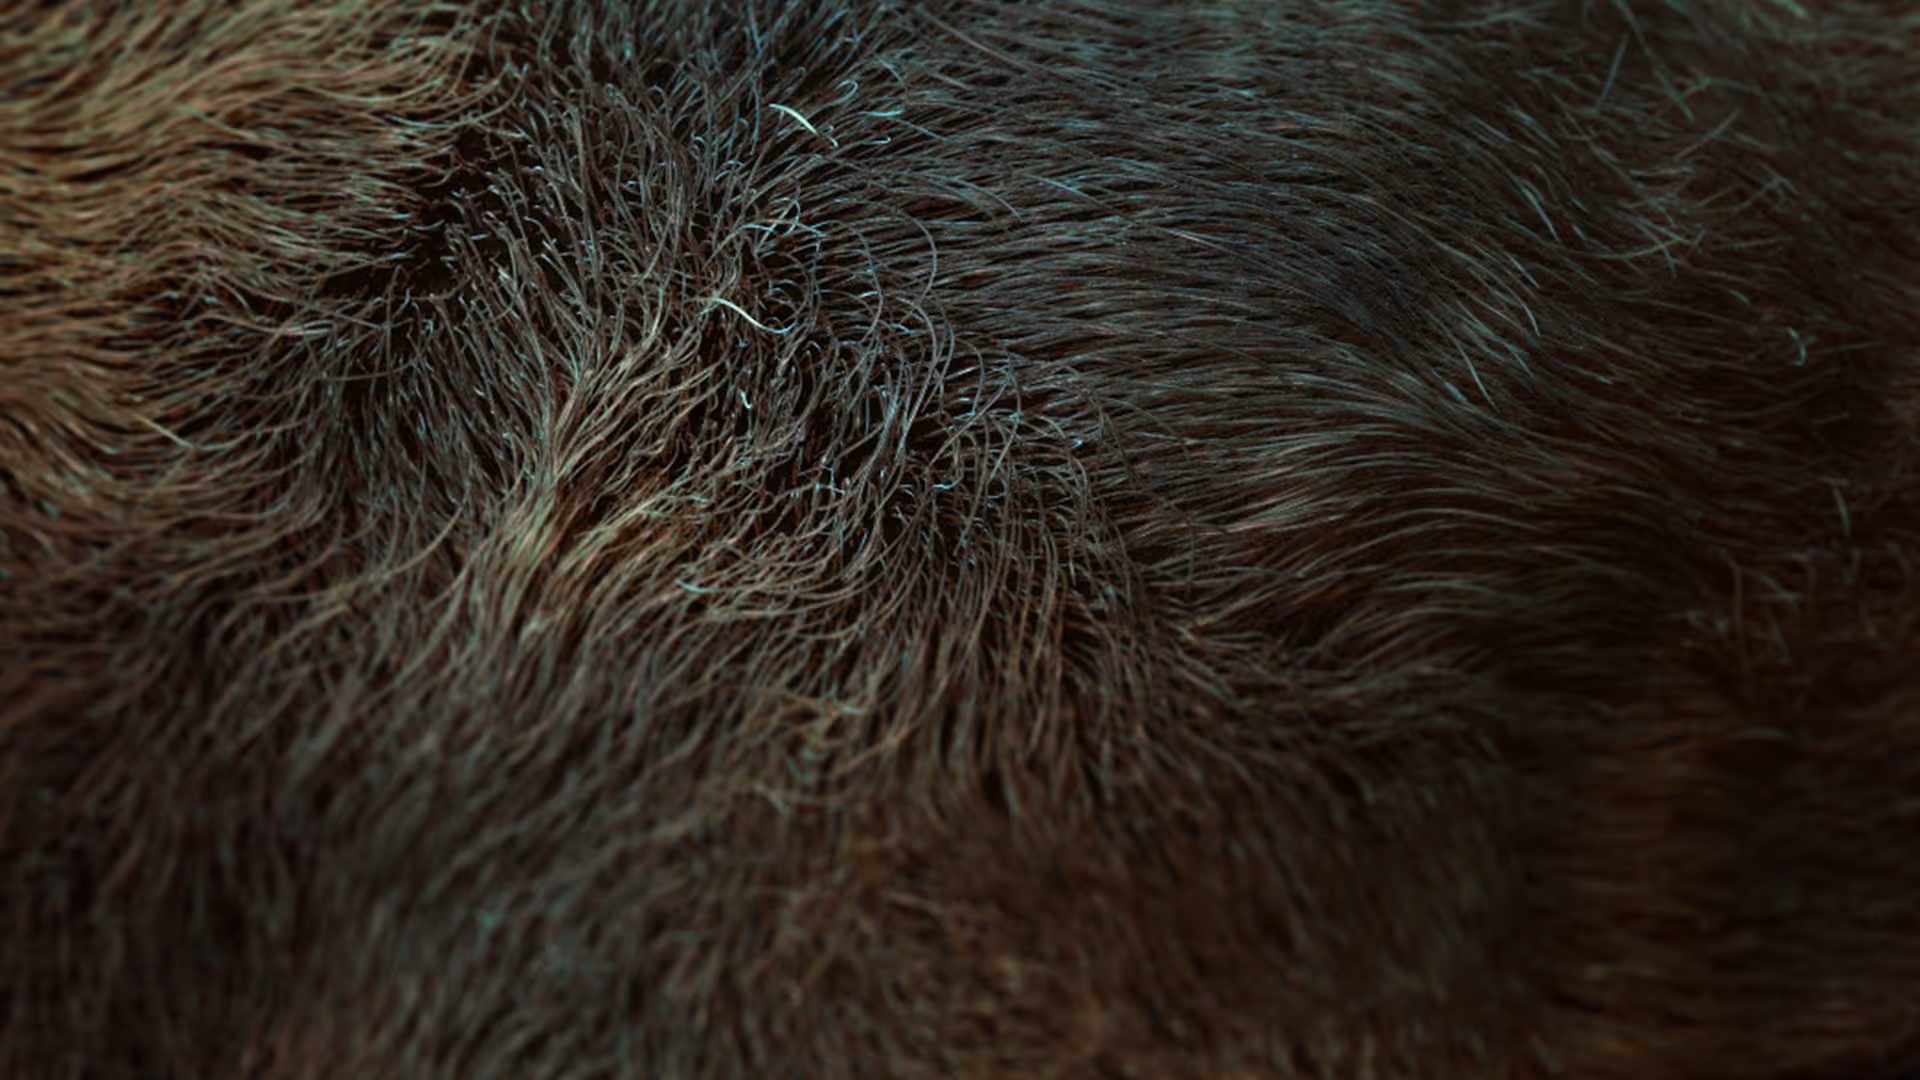
To add those extra details you can go with a smaller brush size and keep cranking up the resolution of your mesh.... However, a simpler yet effective alternative is to use the 'BumpViwerMaterial' In ZBrush (it comes by default with ZBrush and is part of the 'Standard' materials).
This material disregards any polypaint or texture as 'colour' and simulates the difference in value as 'bump' which is awesome! so here is how it works:
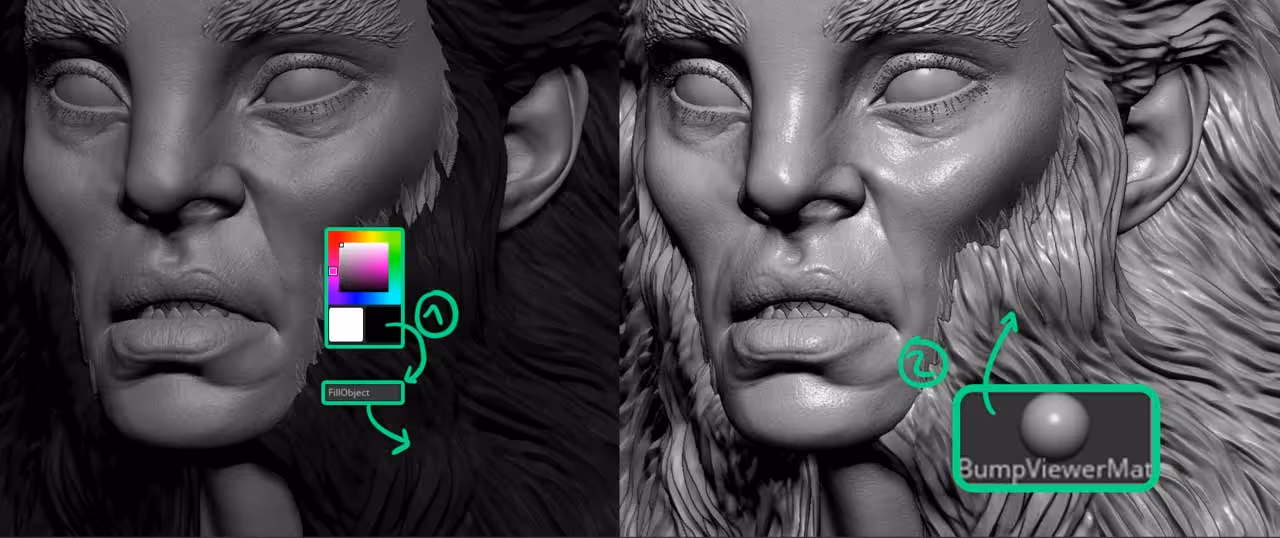
Select the mesh you want to add further details and fill it with a pure black colour, then switch to the 'BumpViwerMaterial' and you'll see that ZBrush wont show you the black colour even with the polypaint enabled.
Tweaking the sculpting brushes
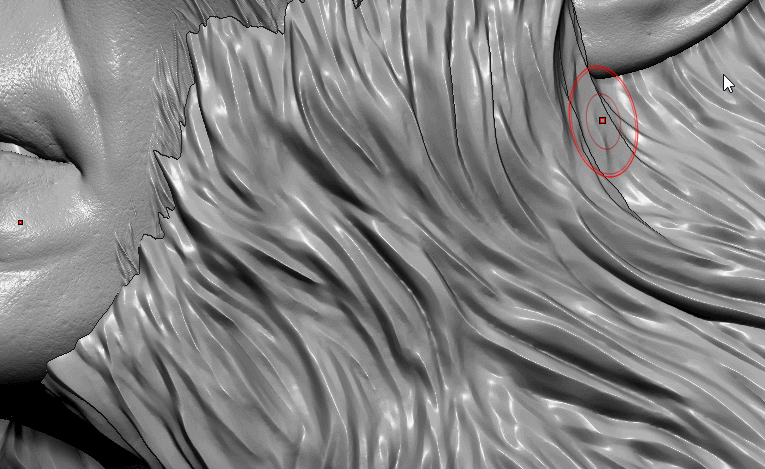
The next step is to select one of the custom sculpting brushes from the pack (for this I like the 'ZBGs_long_hair_sculpting' brush) and tweak it to convert it into a 'painting' brush.
select the brush you want and turn off the 'Zadd/Zsub' switches and enable the 'RGB' to be able to paint with it.
Now that you have a painting brush, we can select a white colour from the swatch and start painting the mesh... and the rest is magic ;)
Because we have the 'BumpViewerMaterial' enabled and we have a based filled with a black colour, when we paint with a white colour and our custom brush, ZBrush will update the material and generate 'bump' details that are not even sculpted (they are just a grayscale of polypaint).
How cool is that??? these details or additional hair are not even part of the sculpture, they are just a 'bump' effect.
You could go a quick UV unwrap on the mesh, create a texture from polypaint, which in this case will be a black and white texture, and use that as a bump in other rendering software.
That's it for now! I hope you find little golden nugget useful.


.webp)

.webp)