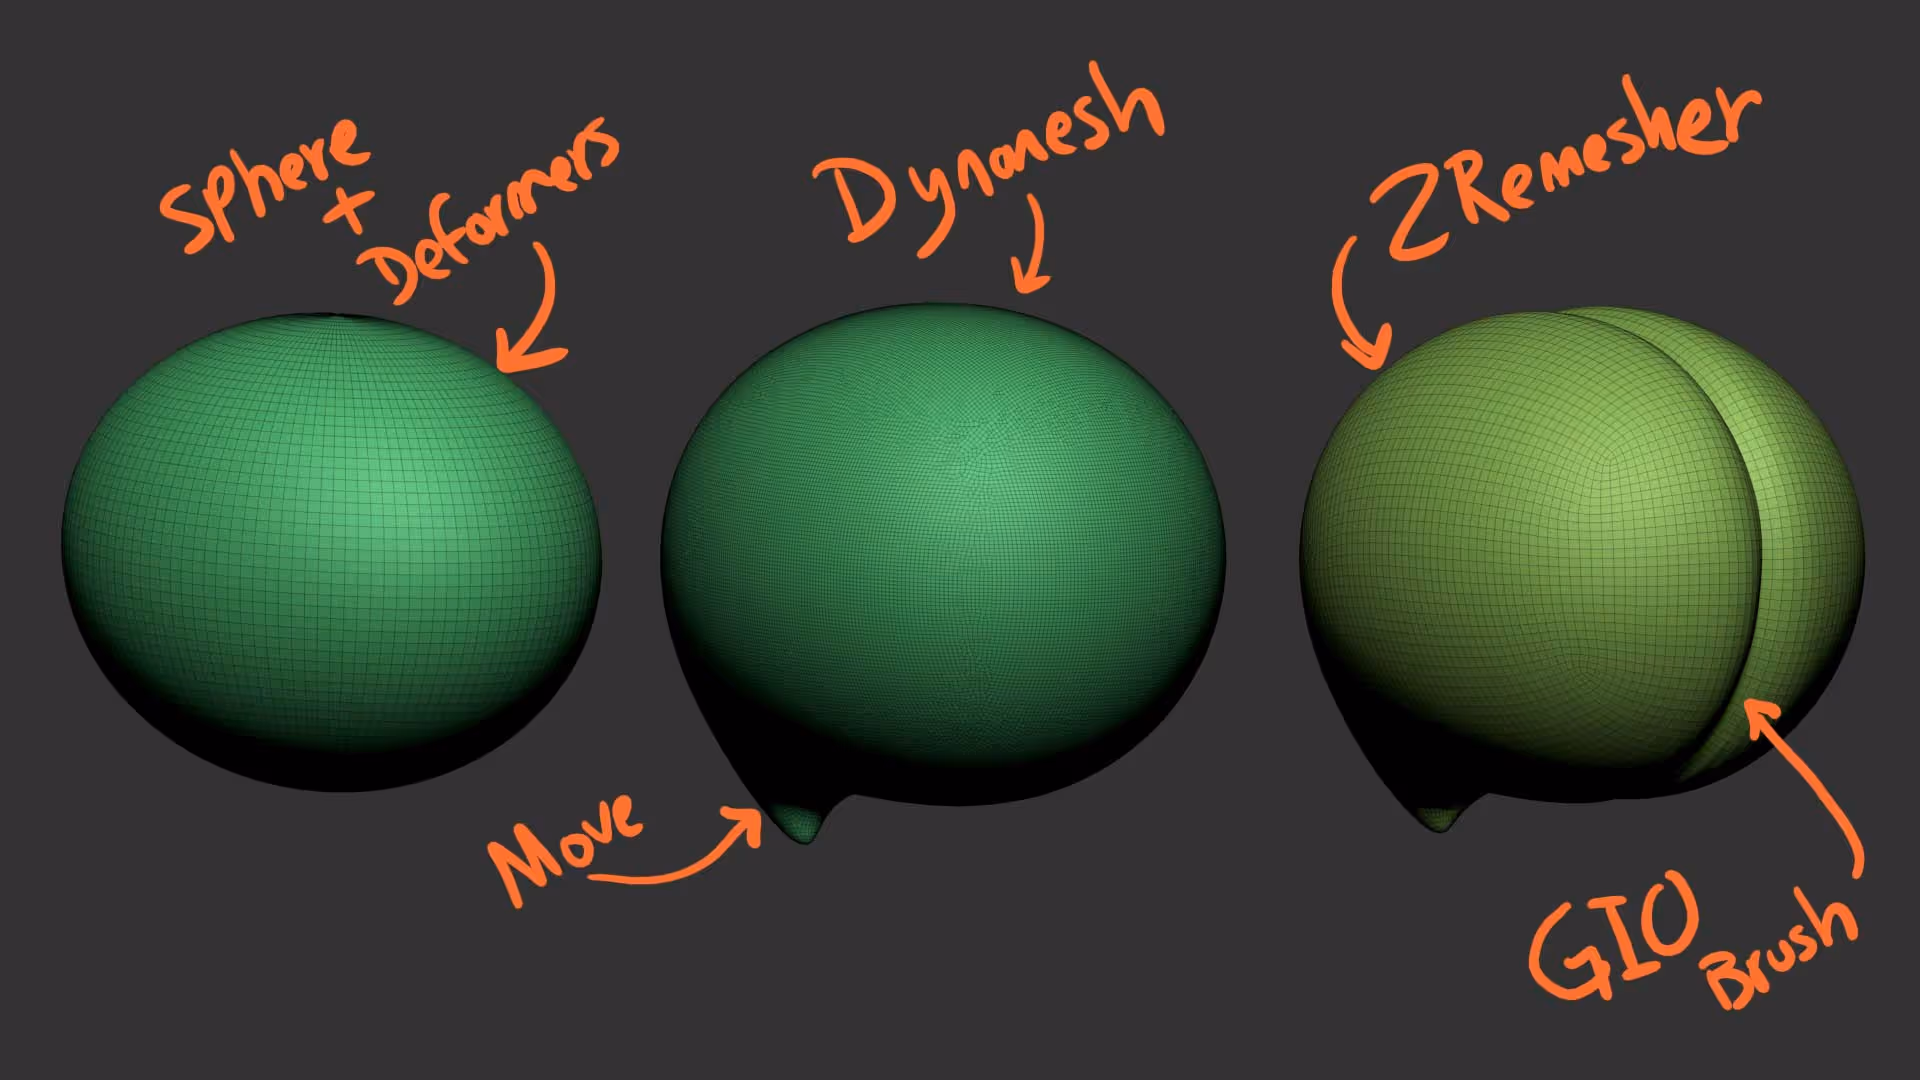
so the first thing is to get the initial shape right… for this example I just used a sphere and some deformers from the Gizmo 3D to give it shape, then Dynameshed the whole thing and ran a ZRemesher… this is just to give you an example of the full workflow but in this example I don’t think is necessary. I also used the GIO brush to refine the division of the ‘brain’:
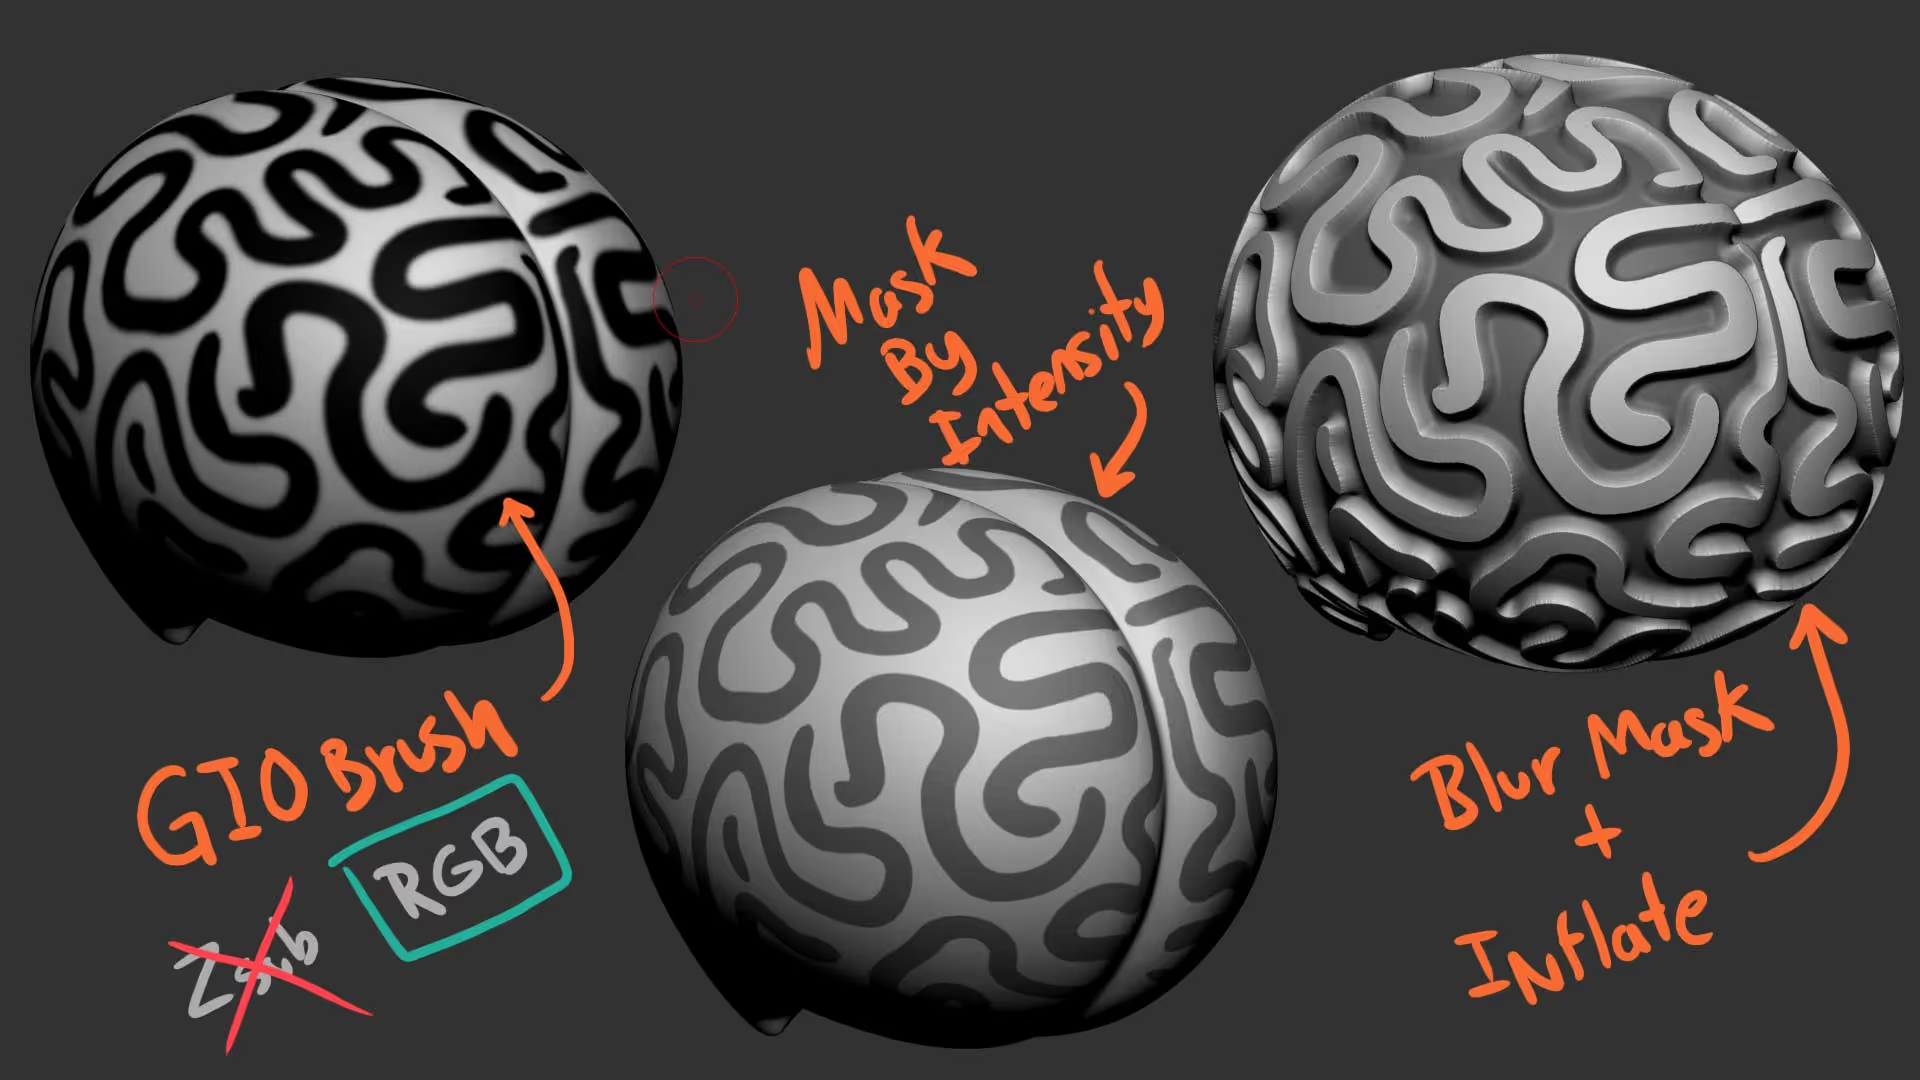
For the brain pattern effect, I acutually used the variation of the GIO brush I shared with you in my previous email… The Gio brush with ‘ZSub off and RBG enabled. With this tiny tweak, the GIO brush becomes a nice sharpie to paint with polypaint.
I painted a few squiggly lines around the brain which are fairly spread apart (this is important because later one we’ll inflate them).
Once you finish painting your pattern with polypaint, you can use the ‘Mask by intensity’ from the Masking palette in ZBrush to automatically mask the black colour. Once the mask is ready you can invert it and blur it a bit before inflating everything from the slider in the deformation palette.
if you have lots of polygons, chances are that the result is very sharp so you can use other sliders from the deformation palette like the polish and the smooth slider so soften the pattern bumps and make it look a bit more organic.
The next step is to clear the mask and simply inflate everything again to ‘tighten’ the gaps of the patter… This is pretty much the process to create these type of stuff but you can always refine it like using the GIO brush to carve the inner crevice a bit more and if you are worry about overlapping meshes you can re-dynamesh everything and then run another ZRemesher.

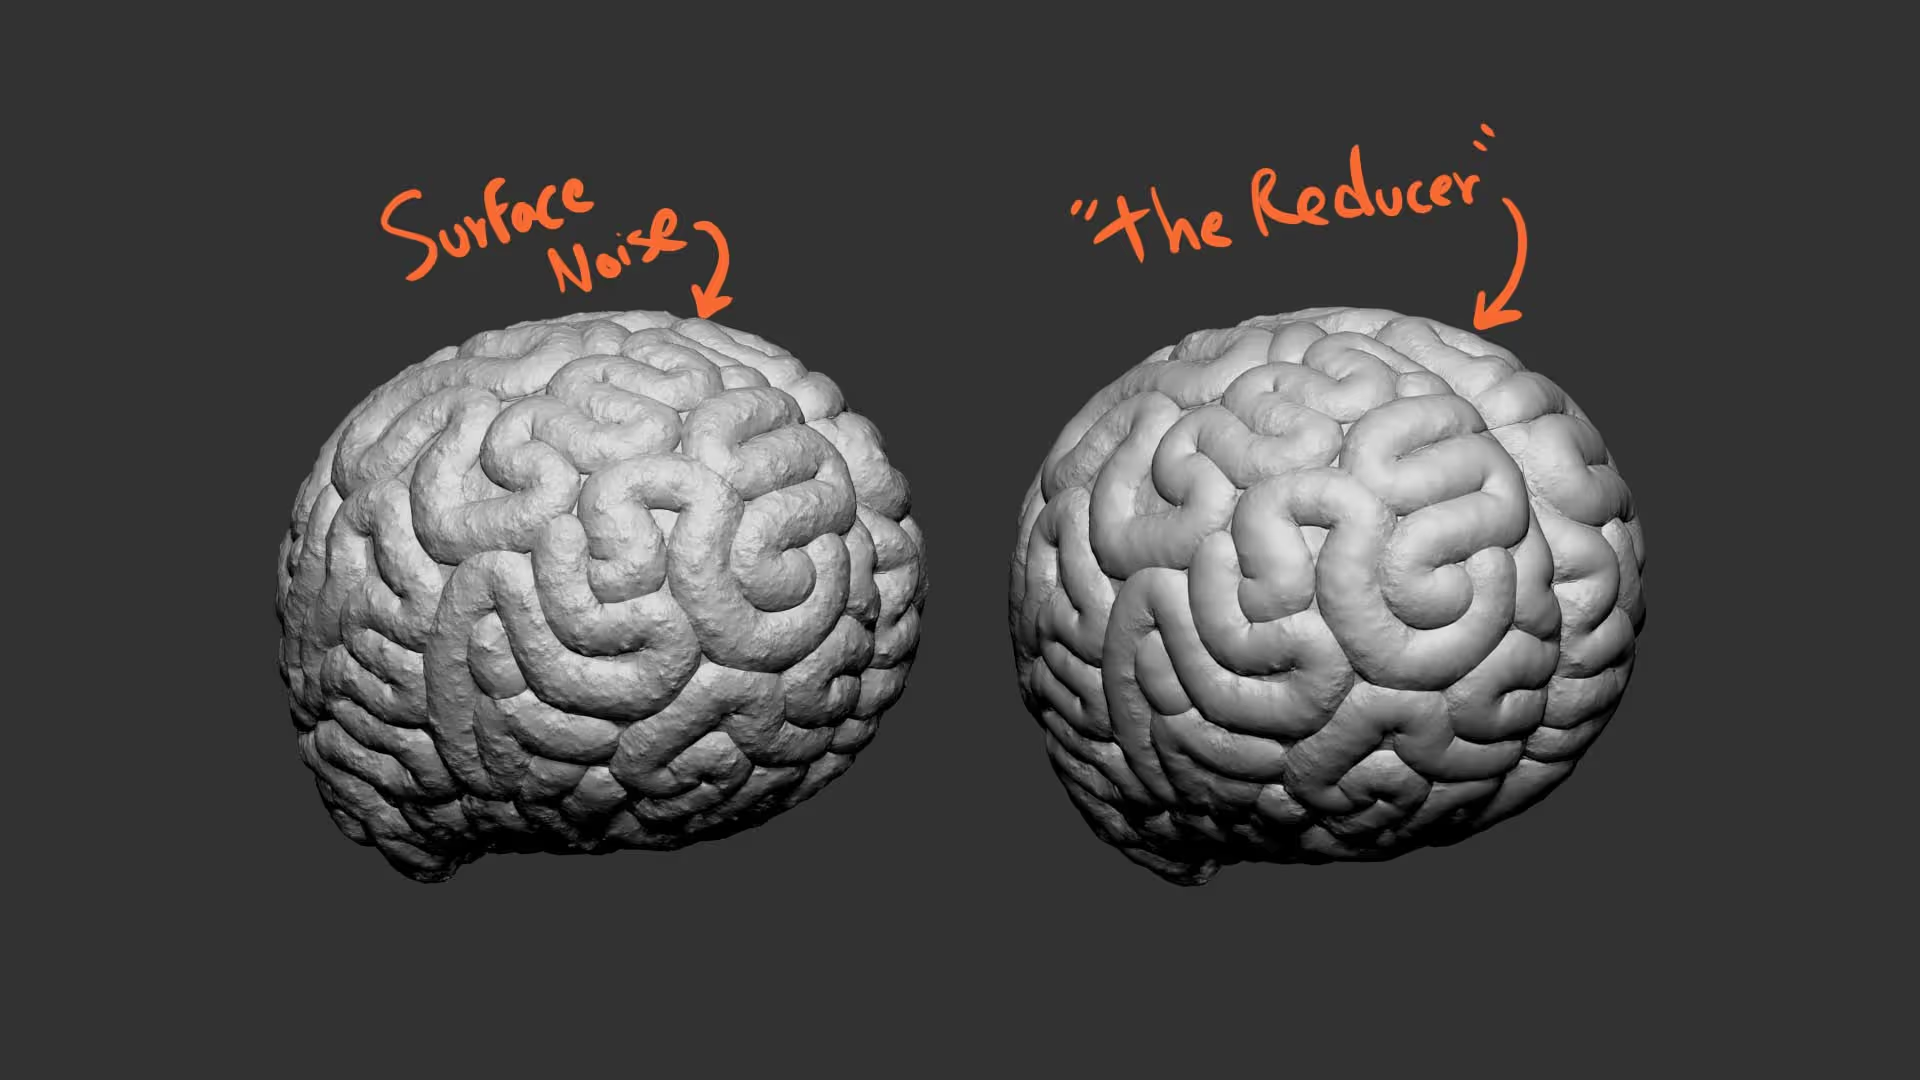
finally, and here is really the only point of the process where I used ‘The Reducer’… I used the surface noise palette to add some generic noise to the brain (make sure you apply it) and then I used the new brush to soften the intensity of the noise details. The difference with the smooth brush here, is that I didn’t want to completely remove the details and average the surface, I simply wanted to ‘reduce’ the effect but maintain some of the ‘bumpiness’ and underlying surfaces:
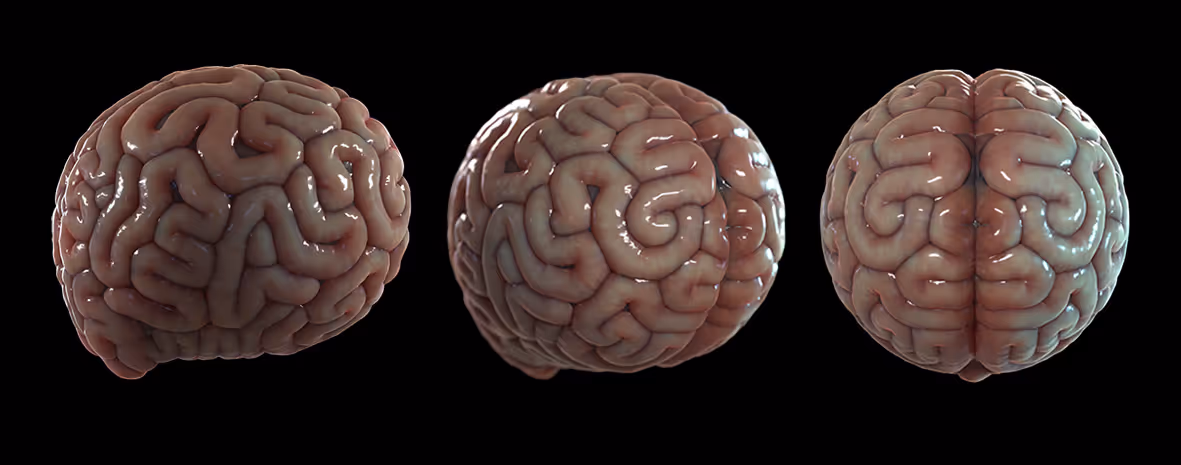
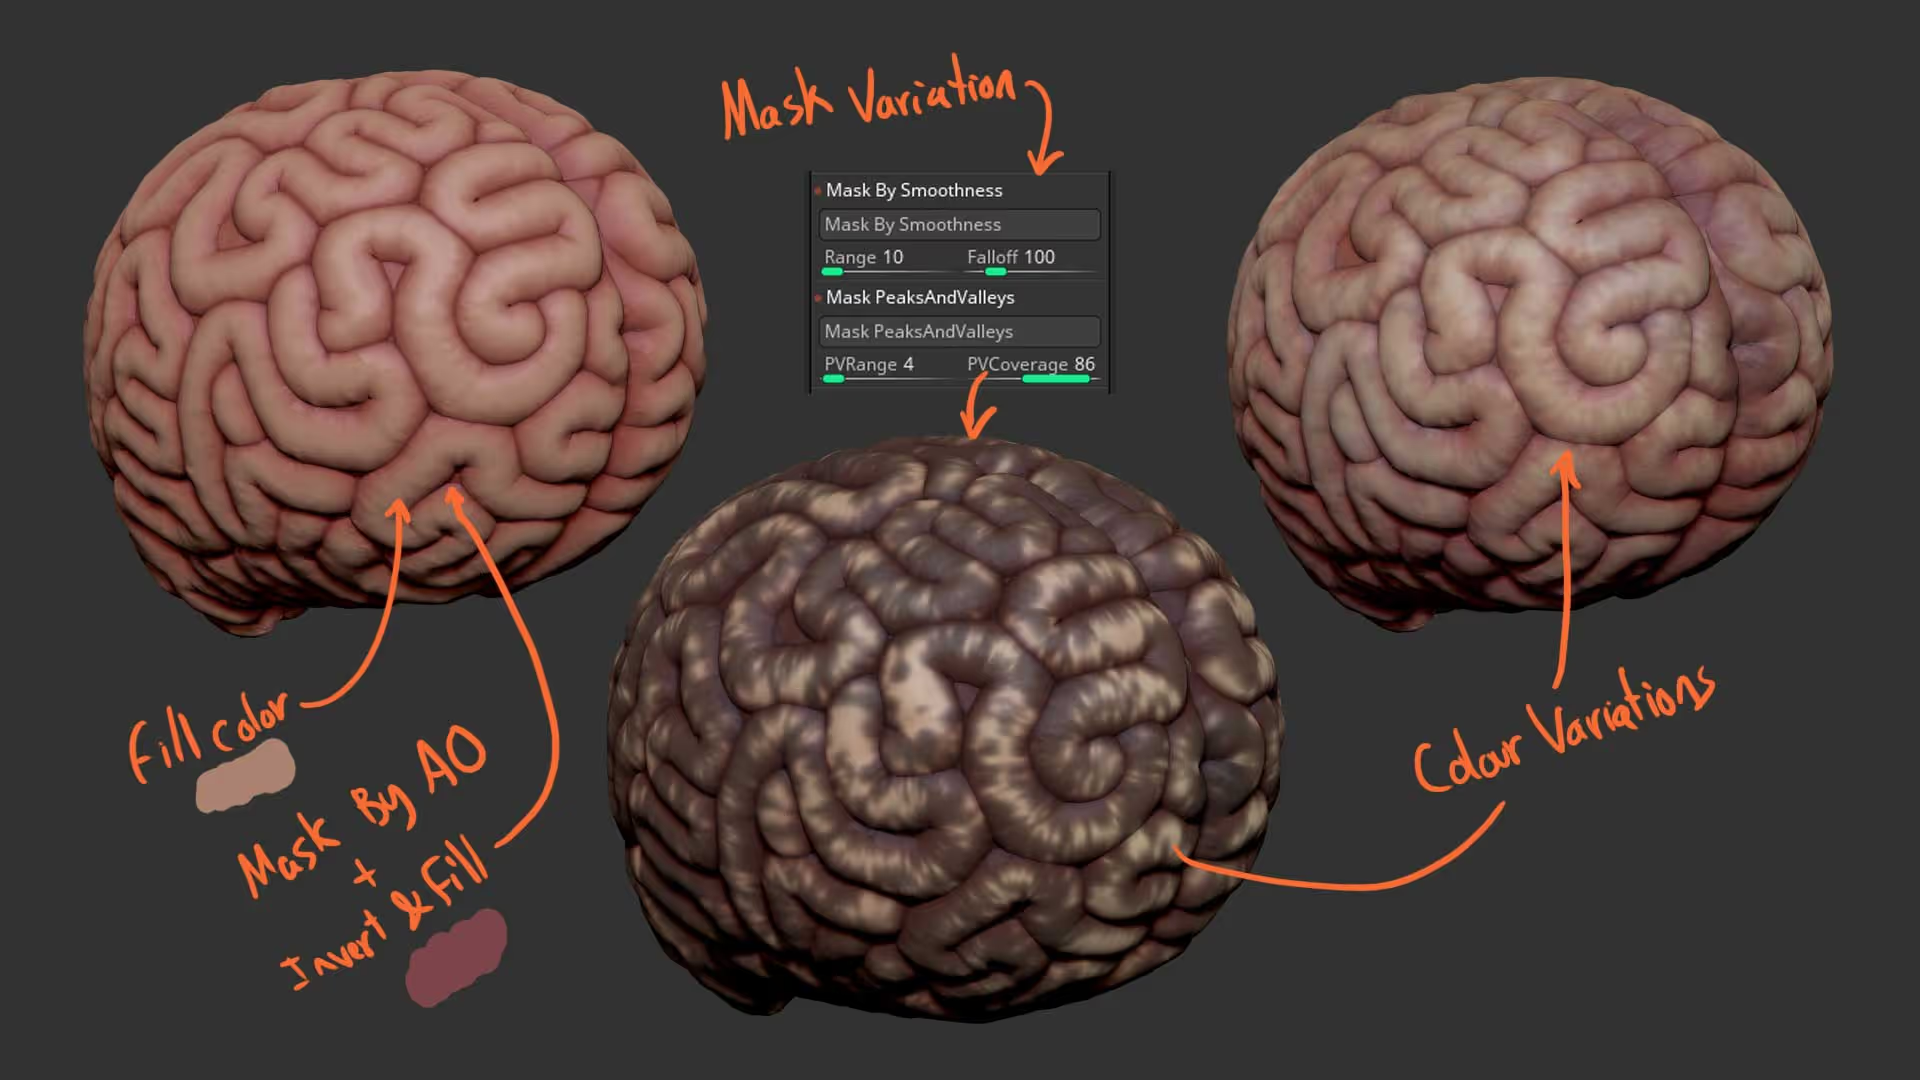
To complete the effect I filled the whole thing with a fleshy looking colour and use the mask by AO to also targe the inner portions of the brain with a darker red colour.
Also using some masking tools from the masking palette like the mask by smoothness and mask by Peaks and valleys, I generated more random masks to create variations of colour:
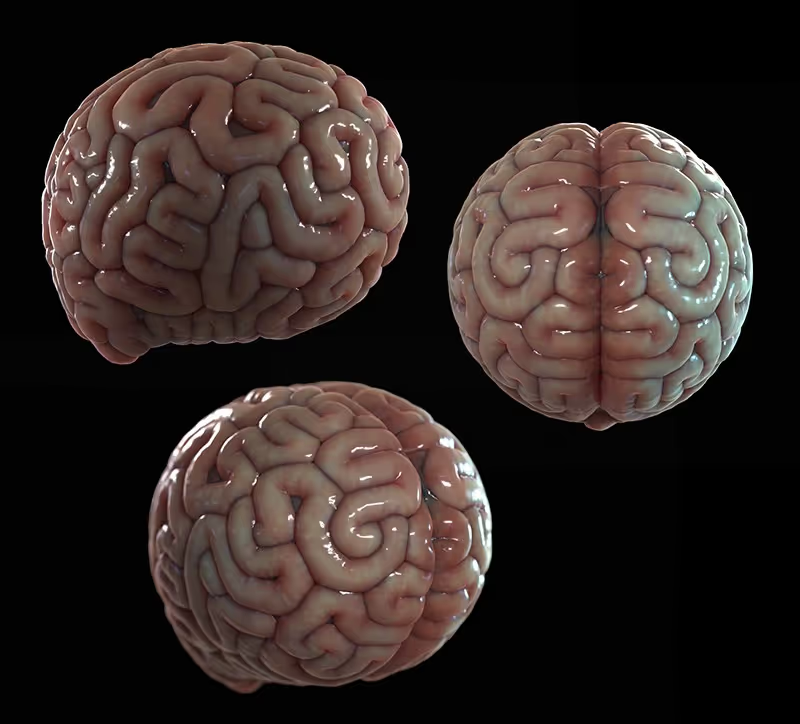
An that’s about it! the render I shared before was from marmoset toolbag 4 with the volumetric scattering effect ;)


.webp)

.webp)