
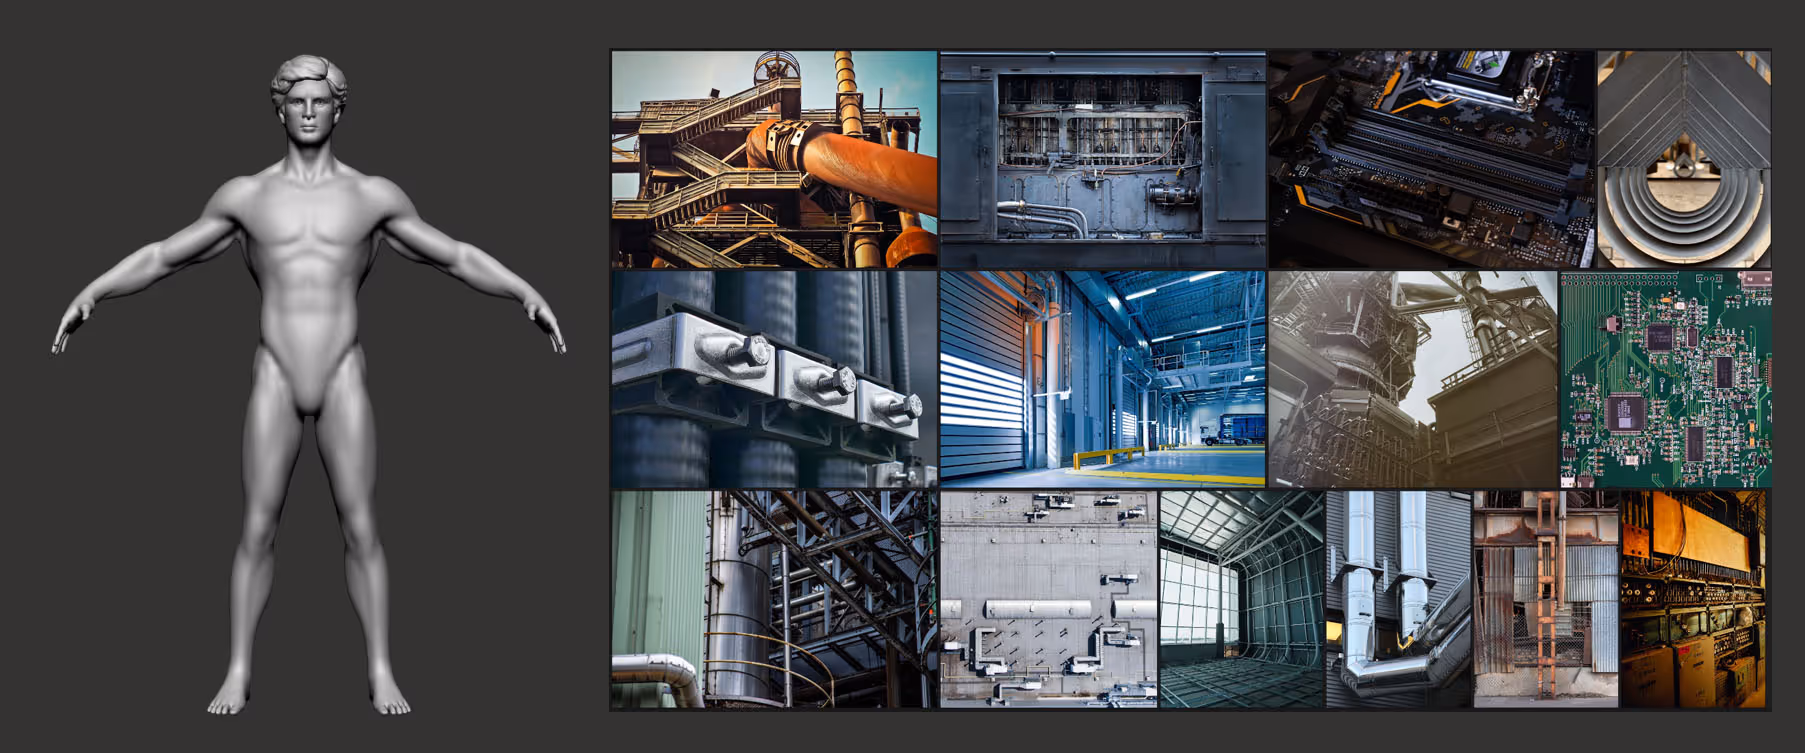
So the first thing to do is to load the ‘NickZ_HumanMaleAverage’ tool that comes with ZBrush (or any other base mesh you want to use). Also collect a few different images with different shapes, colours and contrast. Here are the images I collected for this tip:
Once you have your images, go ahead and load them into ZBrush from the Texture Palette > Import.
Then select them all (one by one) and add them to the spotlight tool in ZBrush:
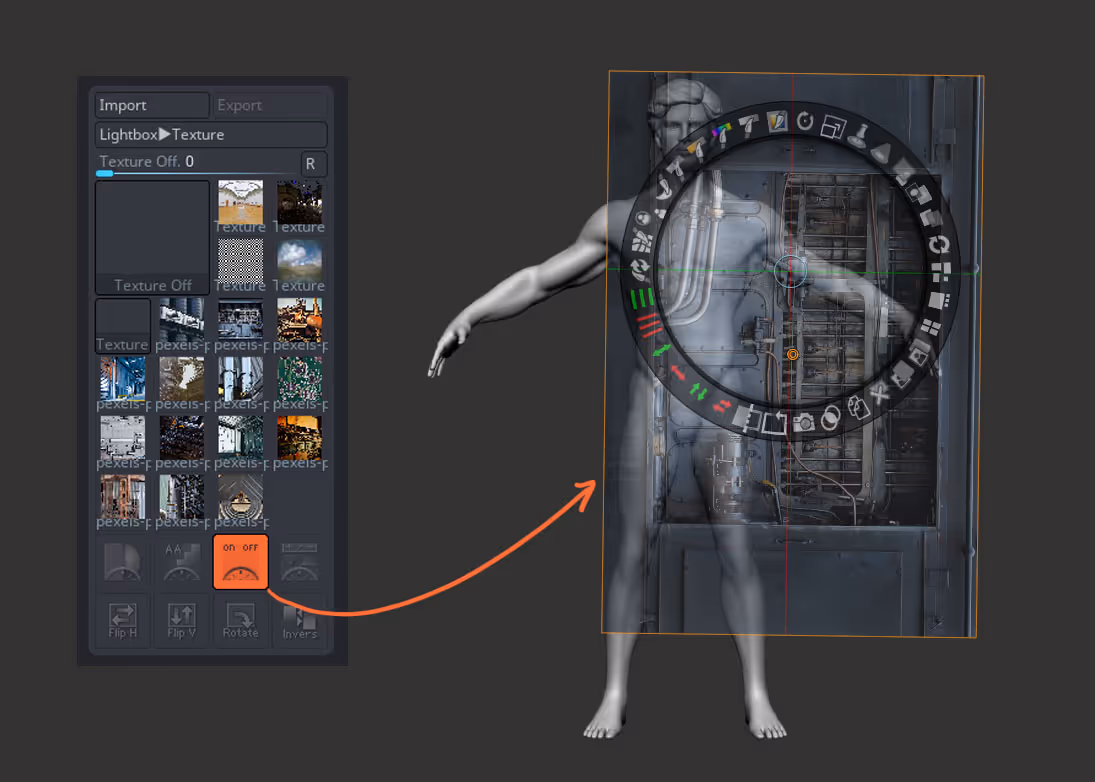
Choose an interesting image, enable symmetry and just project the image using polypaint into the mesh. Don’t worry to much about how perfect the projection is, just look for interesting contras of shapes (in my case I liked the rounded forms around the neck and chest from the first image).
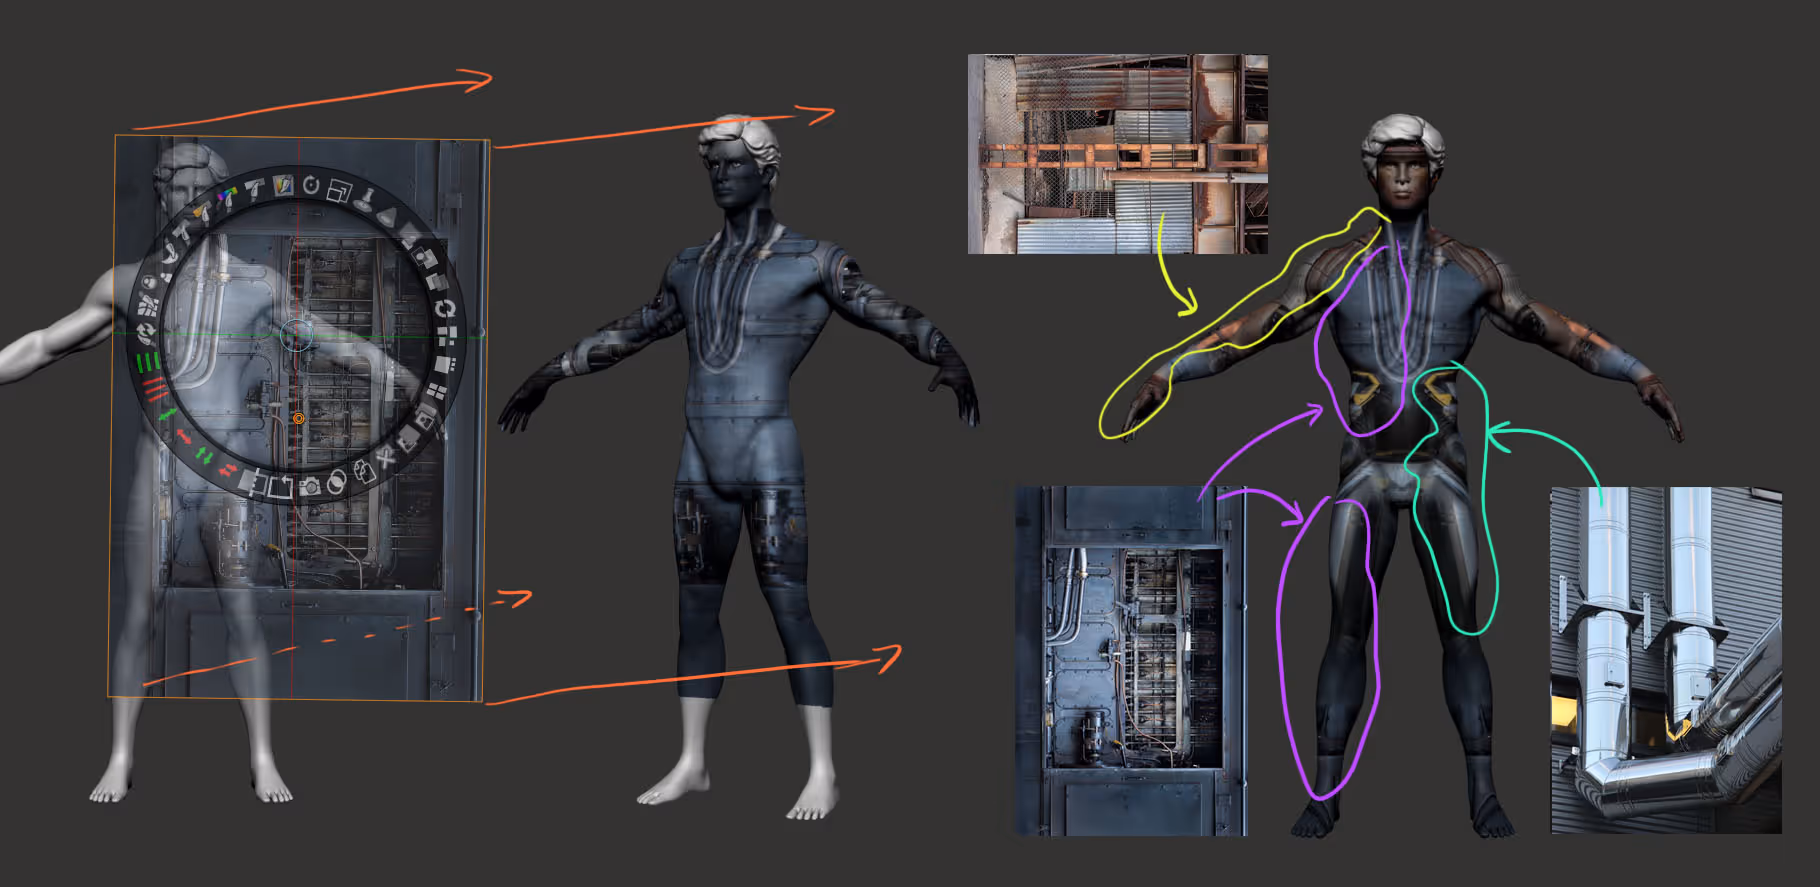
You can use other images to project into other areas of your mesh so make things interesting:
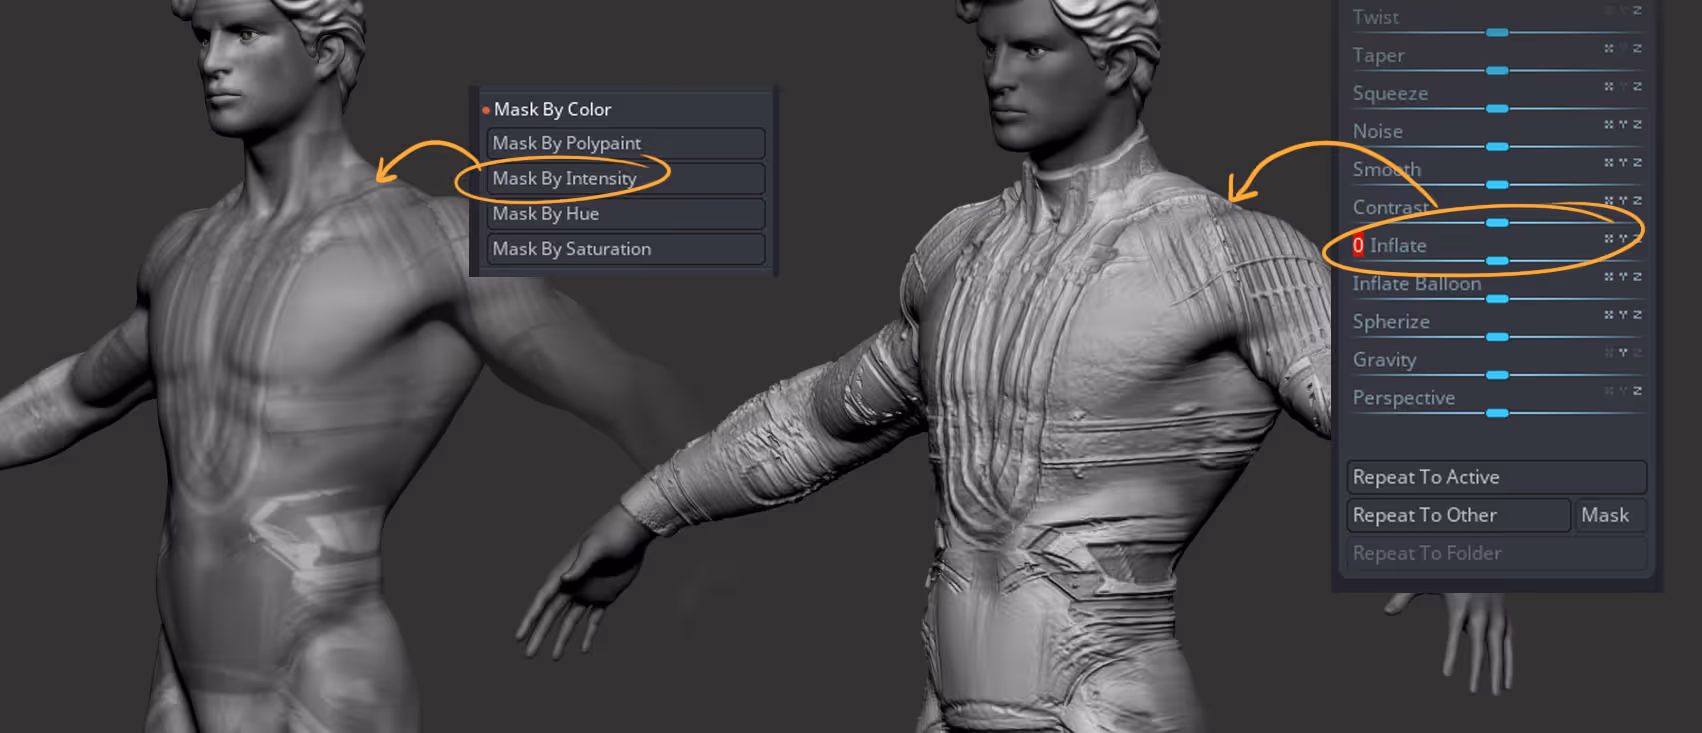
The next step is to go to the Masking palette, open up the ‘Mask by color’ section and click on ‘Mask By Intensity’. You can try other masking options but this one works great and it basically looks at the contrast and brightness in the polypaint (projected textures) and creates a mask.
Now with the mask created from the polypaint, you can just go to the deformation palette and use the Inflate slider to add some volume and push some details based on the unmasked areas!
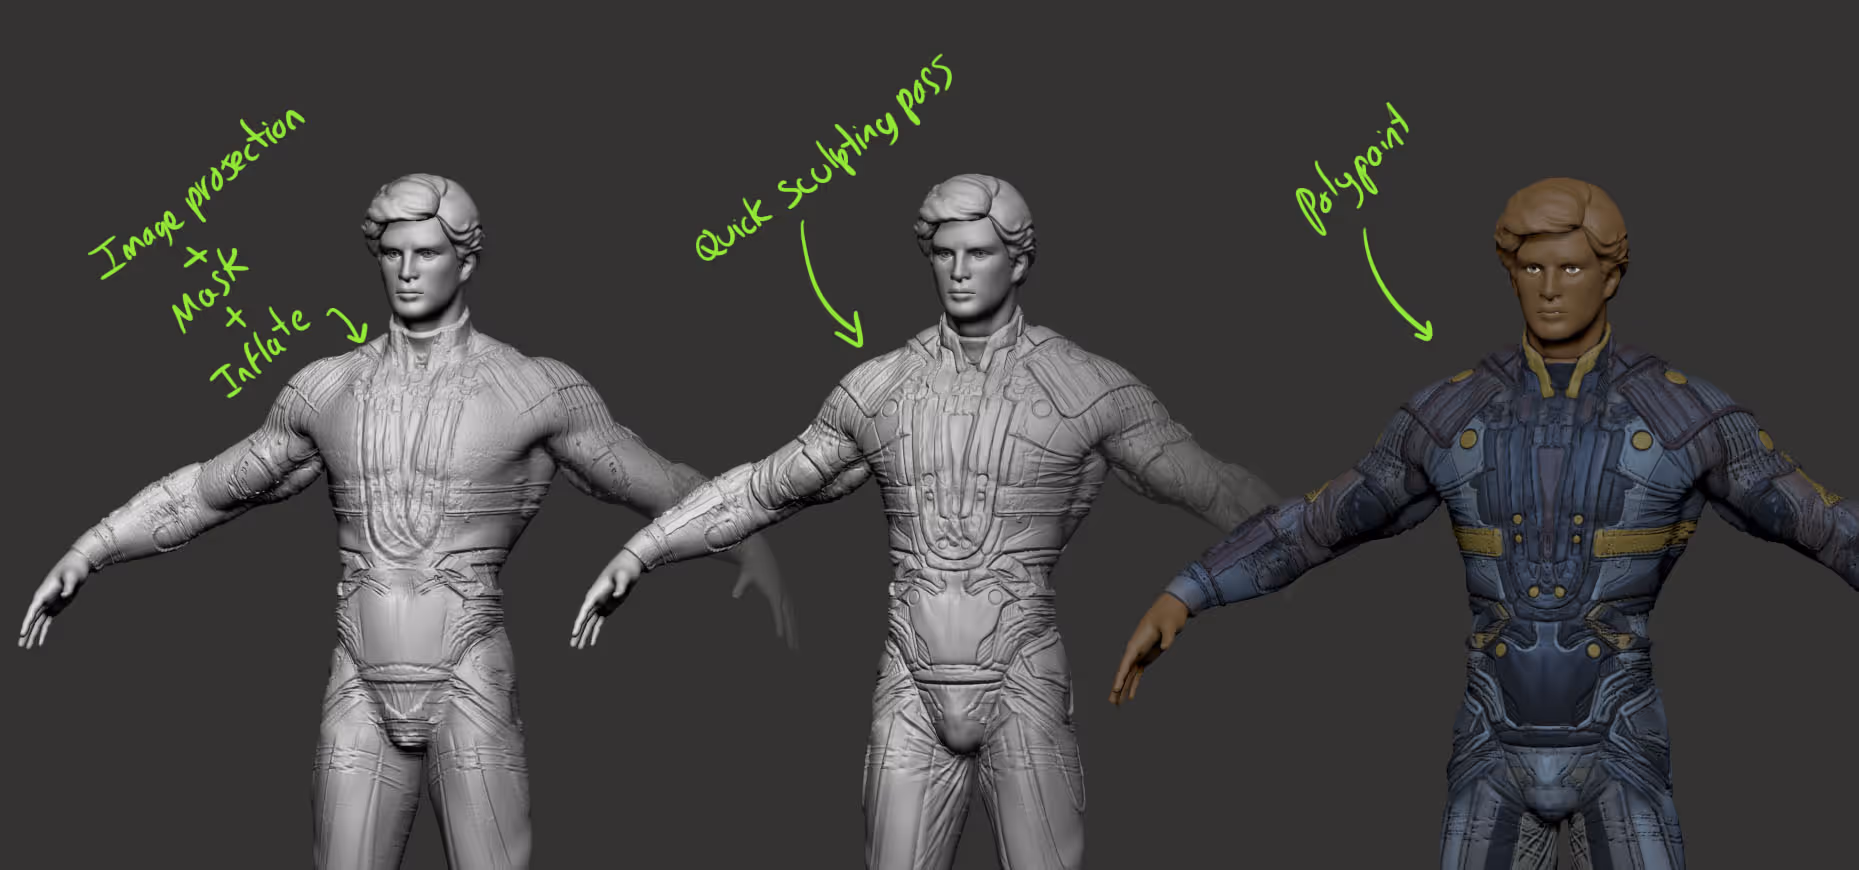
That’s about it really. The cool thing is that although it might not be perfect, you get some really nice lines and shapes that you can use as a starting point to refine with your sculpting brushes. Here are the 3 simple steps I followed:
- inflate to get the abstract details from the mask
- quick sculpting pass using Dam_standard brush to define panels and clay brushes
- refine the poolypaint from the textures to get some cool sci-fi suit:
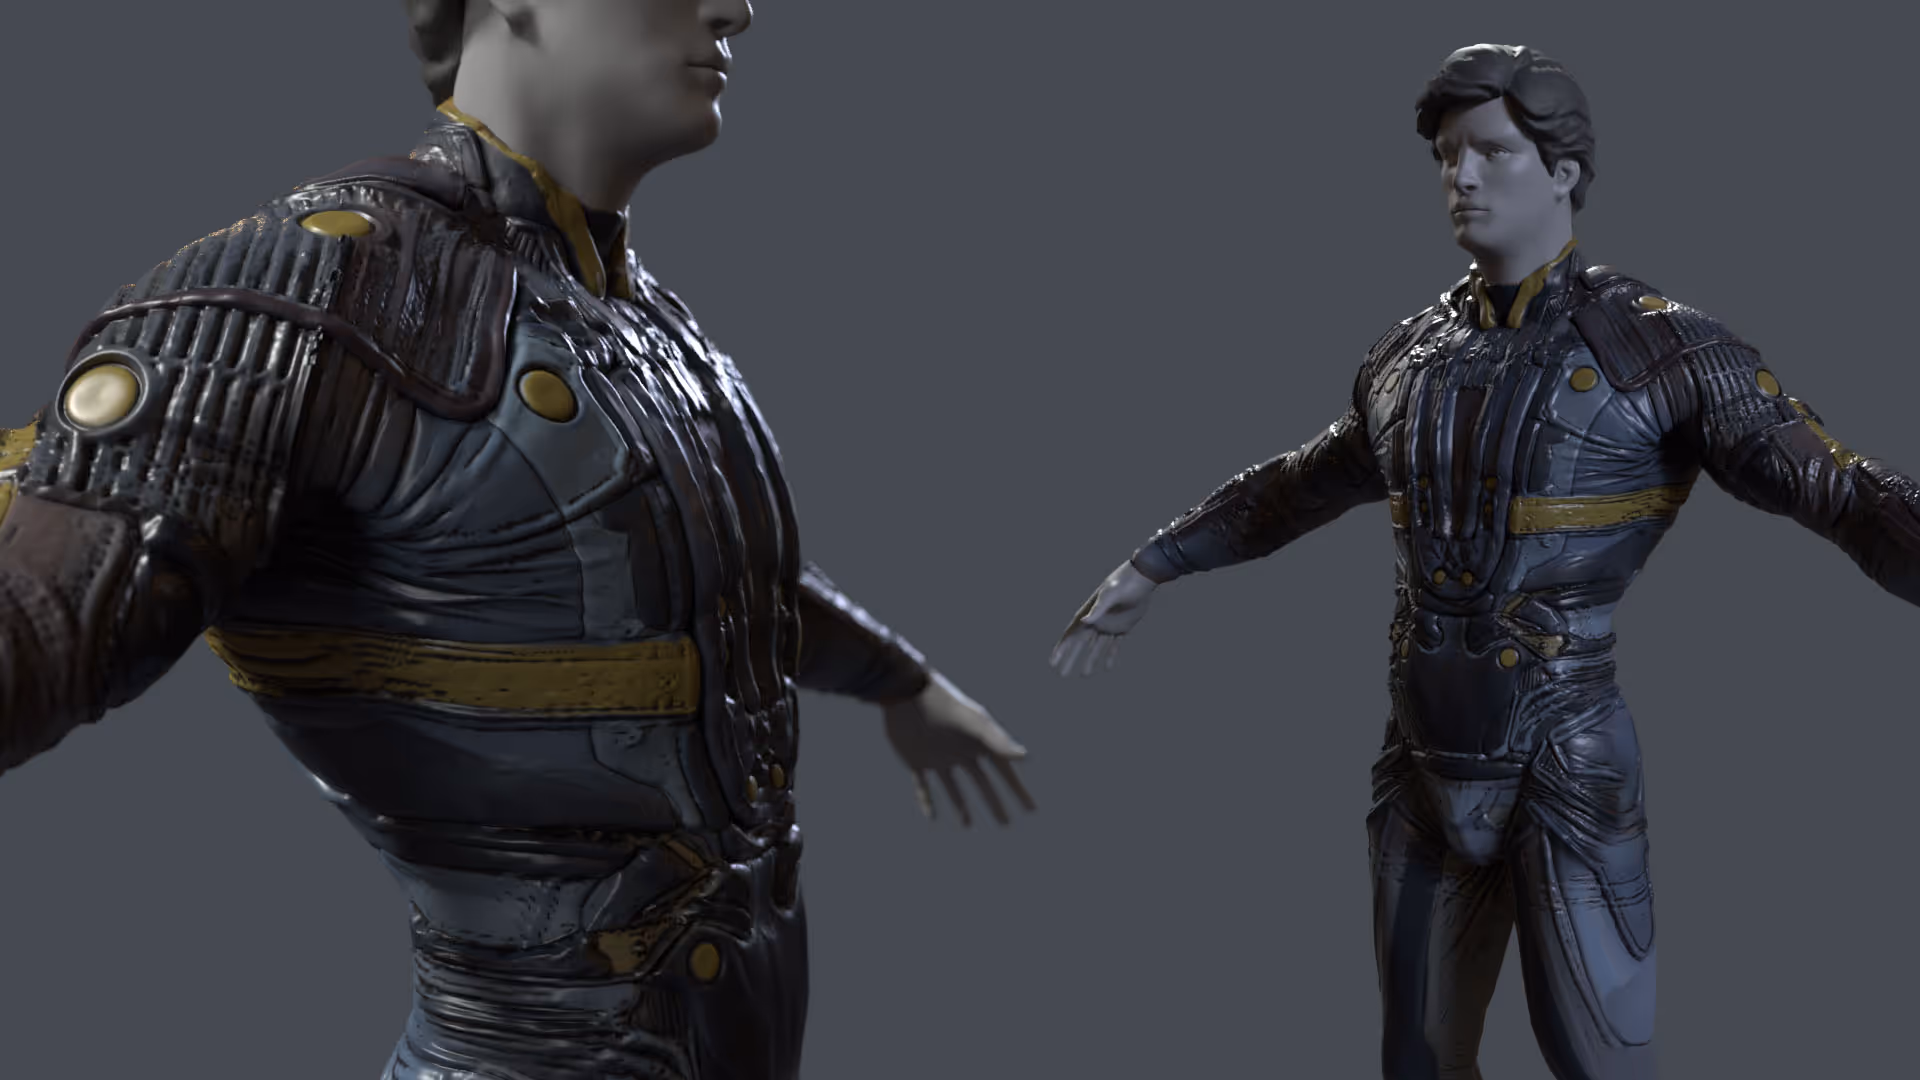
Here is a quick render of this sketch in marmoset… It obviously needs work, but as a quick concept or technique to generate ideas is very quick and really cool!


.webp)

.webp)