
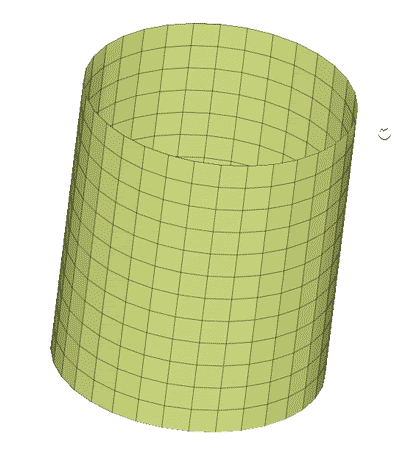
The idea is to create a portion of the rope using a very simple process. You can use anything, but a cylinder is pretty obvious as a starting point. All you need to do is make sure is open in both ends so that we can turn it into a curve later (tile it).
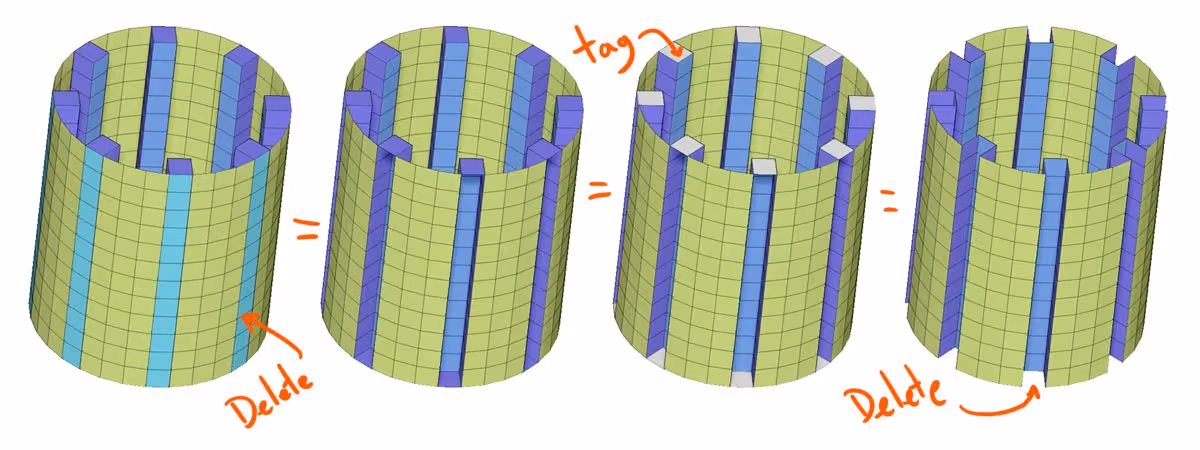
- From the Transform palette, enable Radial symmetry and turn the RadialCount to a value of 8.... (turn on polyframe to see what you are doing) select the ZModeler brush and holding the 'Alt' key, tag a vertical loop (with radial symmetry you save lots of time in this case).
- Make sure that you have QMesh selected as the Action and 'Polygroup All' as the target (right-click or space bar over a face while you have ZModeler selected).
- Now, click any of the 'tagged' faces and drag to extrude them in a bit. ZBrush will create different polygroups for the extrusion, so we can now select the 'Delete' option from the ZModeler action and delete the light blue polygroups in my case as well as the top and bottom faces of the extrusion.
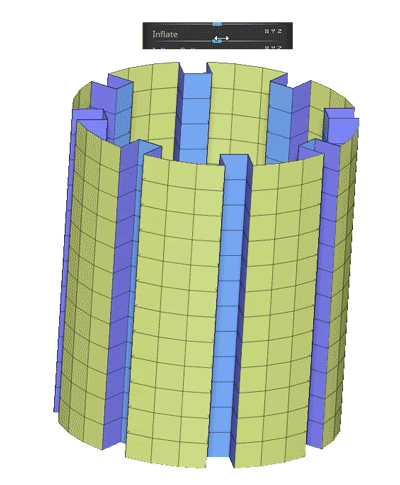
- All we need to do now is inflate everything a little bit to 'tighten' the gaps we created with the extrusion process... Tool palette > Deformation > Inflate:
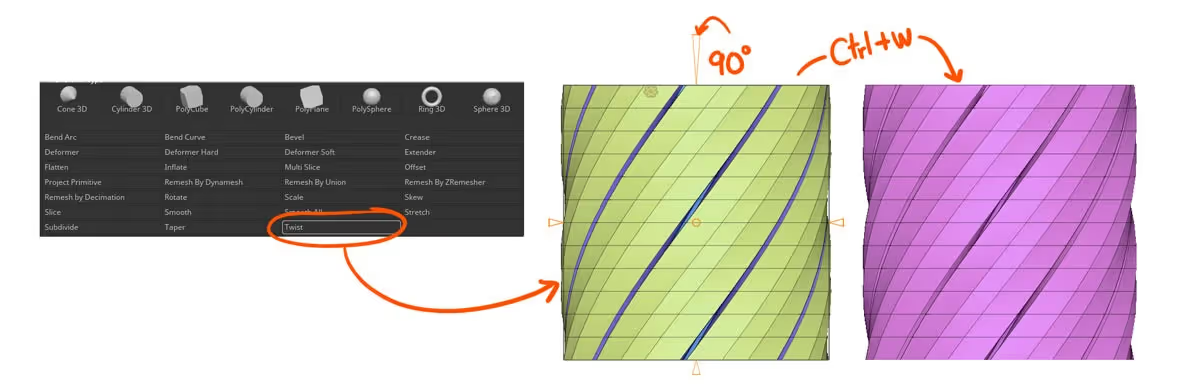
- And finally, to create the twisting effect, we can use the deformers from the Gizmot 3d. Click the 'cog icon' from the Gizmo 3d and select 'Twist'. grab the bottom or top orange 'cone' and drag it 90 degrees holding the Shift key. Click the cog icon again to hit 'Accept' and lock in the changes and assign a single playgroup.
NOTE: the rotation should be based on the radial count you choose in the first step so that the top and bottom of the cylinder can be tiled. 360 / 8 (radial count) = 45, so I can twist the cylinder by 45, 90, 135, etc... (90 was a good look for the twist).
That's it! from this point onwards, you have a very cool and simple piece that you can turn into a curve... so first turn off perspective and select a side view. From the brush palette, click on the 'Create InsertMesh' button and turn the new insert brush into a curve brush: Stroke palette > Curve > Curve mode switch.
NOTE: you should enable the 'Weld points' switch to merge the ends of the cylinder into the 'rope' otherwise it'll look like a bunch of detached cylinders (Brush palette > Modifiers > Weld Points)
You can also enable 'Stretch' and increase the Curve resolution slider to 12 or so.
I hope you find this tip useful!


.webp)

.webp)