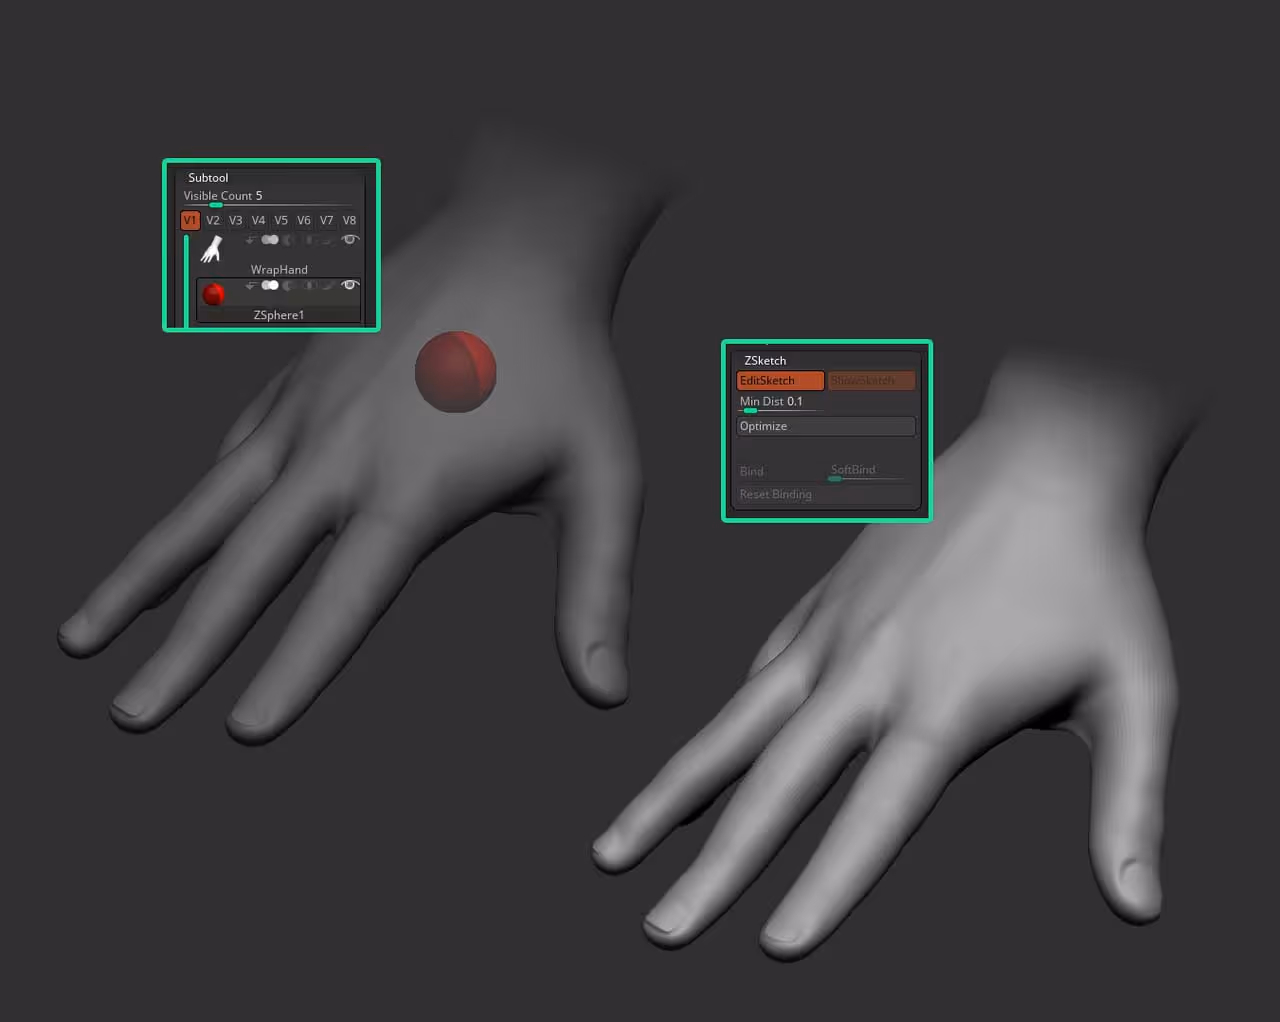
The setup is quite simple, all you need is your base mesh and add a ZSphere. The ZSphere can be placed anywhere but I usually just place it somewhere inside the mesh where I cannot see it. Then, with the ZSPhere selected, enable the ‘EditSketch’ switch from ZSketch subpalette (at the bottom of the tool palette).
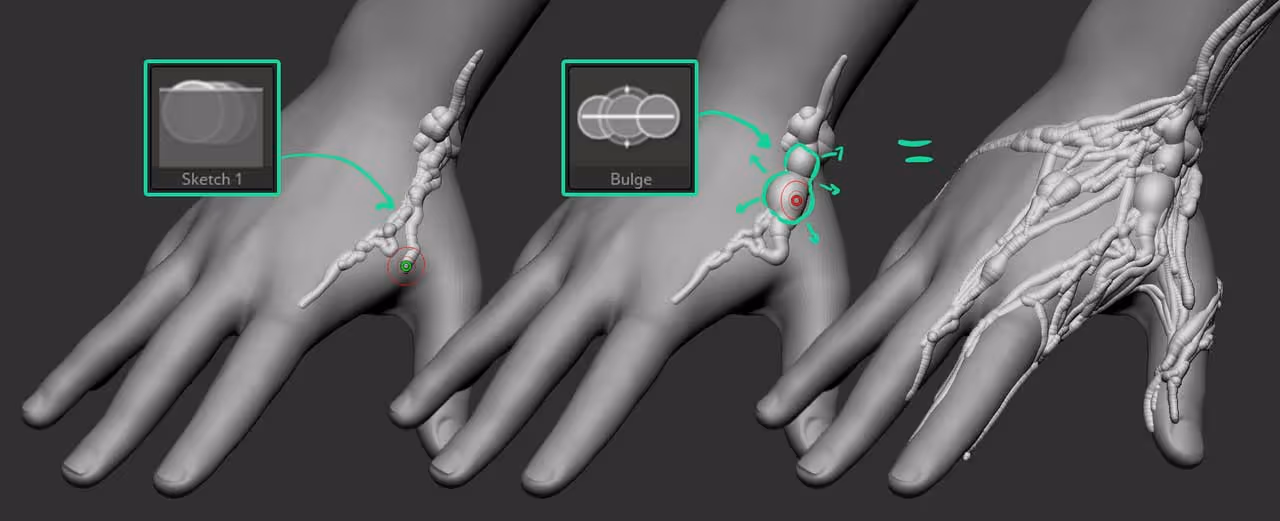
That is all you need to do to set it up. Now you can use the Sketch brushes (make sure you are in Draw), to literally ‘draw geometry’ over your mesh. You can use smooth brushes (shift) to soften the transition of the sketch armature.
You can select a few different brushes from the brush thumbnail. For instance, the ‘Bulge’ brush behaves a bit like the inflate brush but obviously it is only available for the ZSketch:
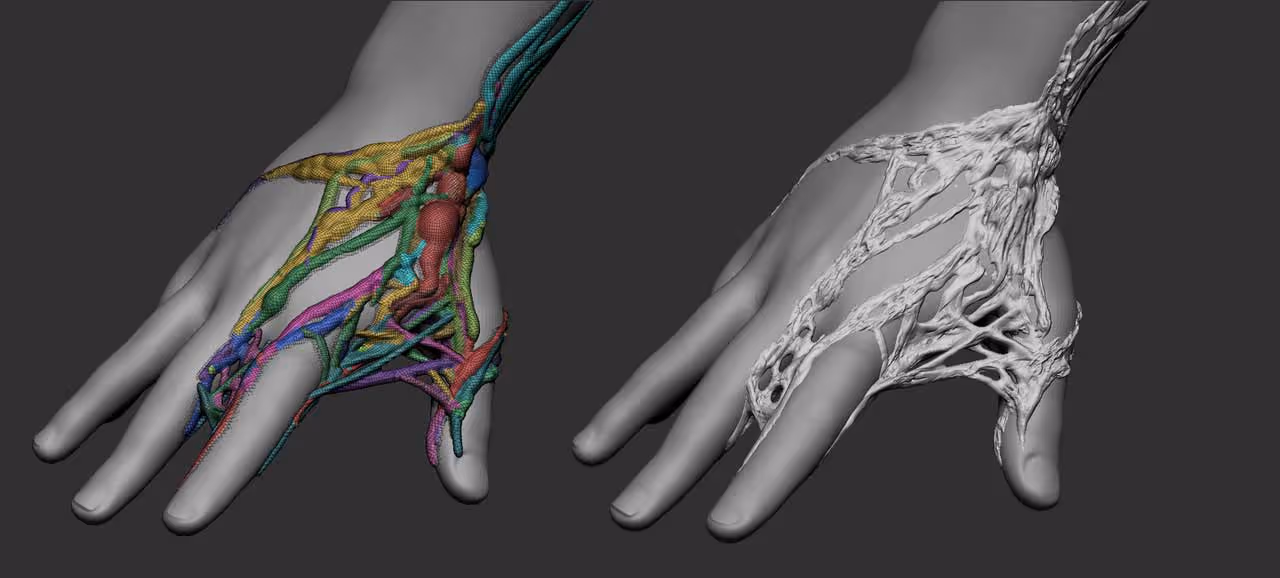
Another really useful brush is the ‘Armature’ brush. While the other brushes available in the ZSketch mode, follow the surface as you add the geometry, the Armature brush, lets you draw away from the surface. I used it in the example below to create those connecting ‘tendons’ in the hand.
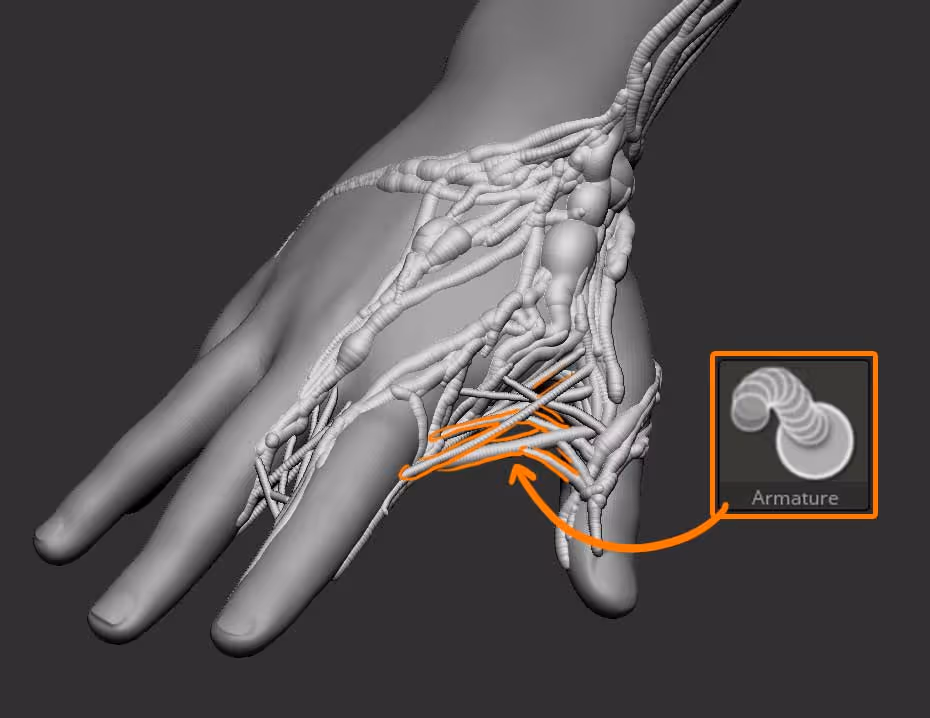
The Armature can be quite useful for things like arms or limbs ;)
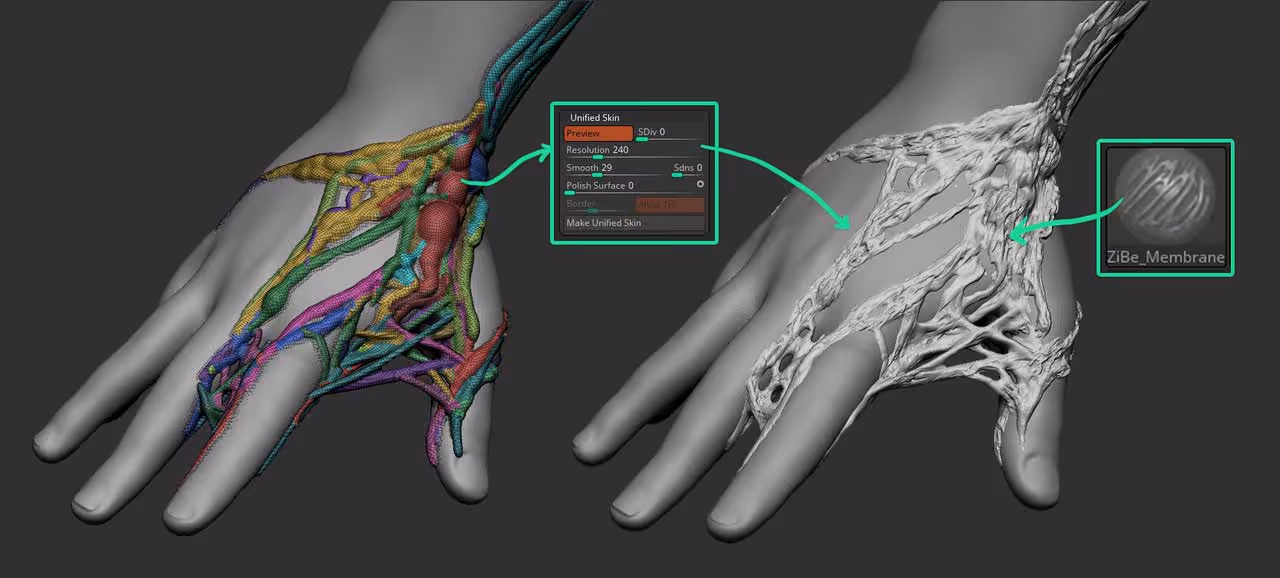
Once you are done sketching, you can convert the ZSketch into a sculptable mesh to continue the refinement process. From the Unified skin subpalette, you can enable the ‘preview’ button to see what the resulting mesh would look like so you can adjust resolution and smoothness from the sliders.
I see my resolution to 240 and then use the ZiBE_Membrane brush from the Giger and Beksinski pack to quickly add some extra holes and details to the mesh:
hope you find this useful!


.webp)

.webp)