You can simply draw a curve, and from the IMM viewer select different profiles and click on the curve to update it and test different options. This is absolutely fantastic and it allows you to create very complex shapes with a lot of control:
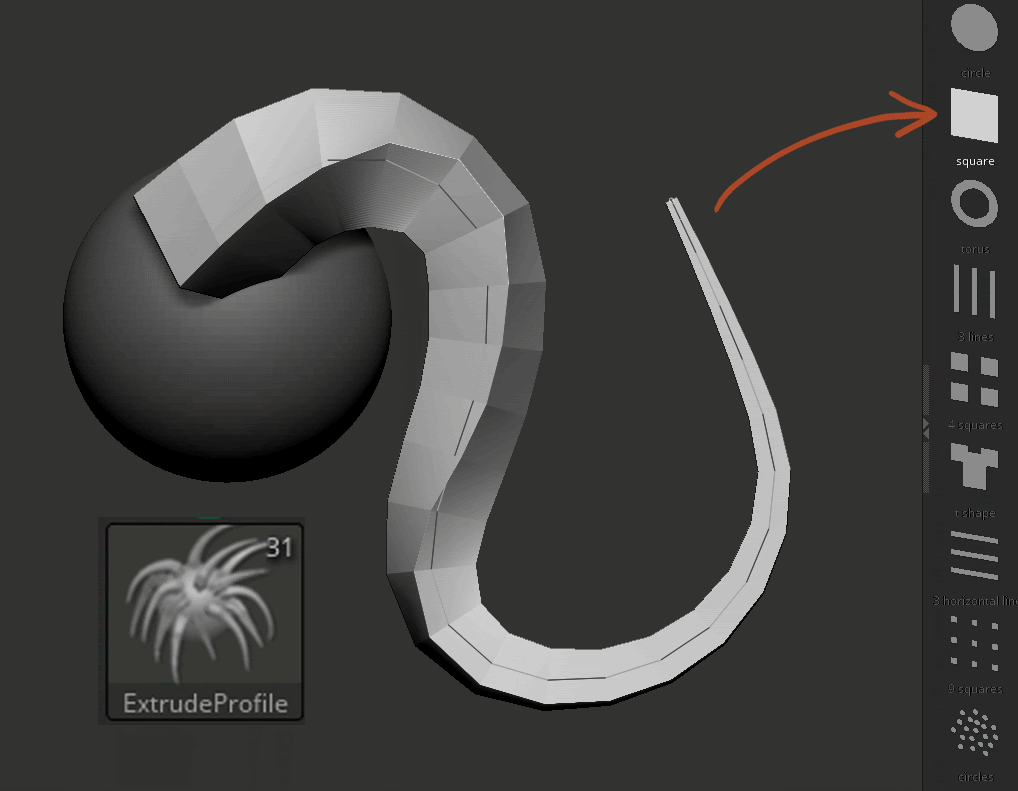
You can even create your own mesh profiles and add them to the curve or create your own
- Grab any mesh and to to the Alpha Palette and click on the 'From Mesh' button
- Click OK to Create the alpha from the transformed alpha 3D window
- Select the newly created alpha, enable the new 'Flat' switch and click on the 'To Mesh' button
- now you have a flat single-sided version of the mesh... to add it to the curve:
- Go to the brush palette and click on the 'From Mesh' button.
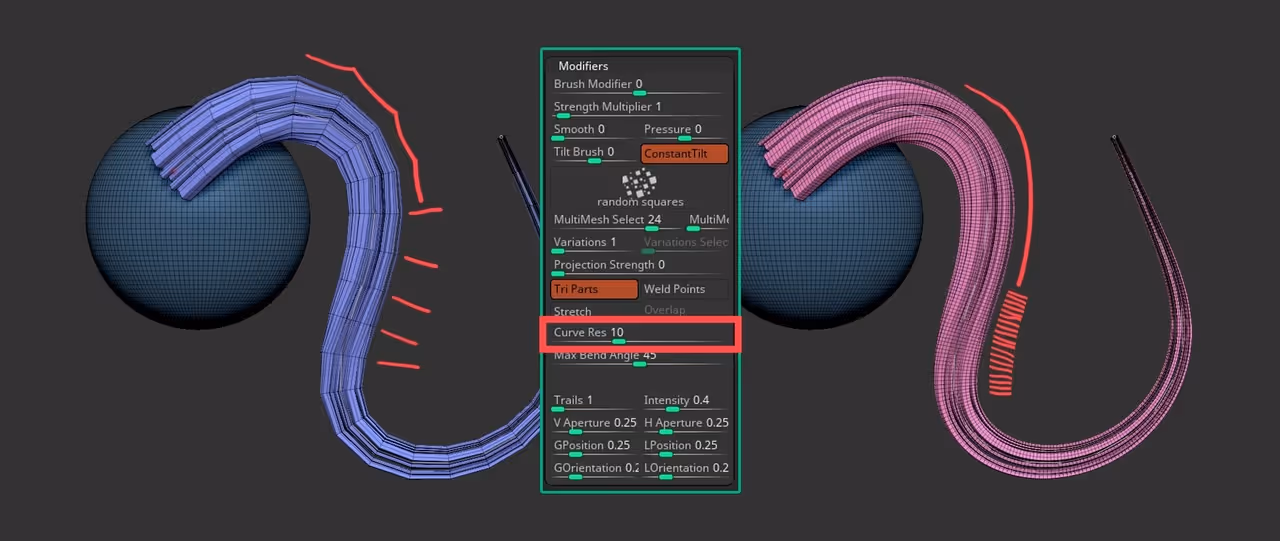
TIP #1: tweaking resolution
One of the things you notice with these new curves is that there might be quite a bit of resolution alongside the curve and that is simply because of the resolution in the 'profile' mesh, but you can also tweak the resolution or loops perpendicular to the curve from the brush palette.
Draw a curve with any profile you want, open the Modifiers sub-palette from the brush palette, and increase the value from the 'Curve Resolution' slider. This controls the number of loops so that you can get a smoother curve:
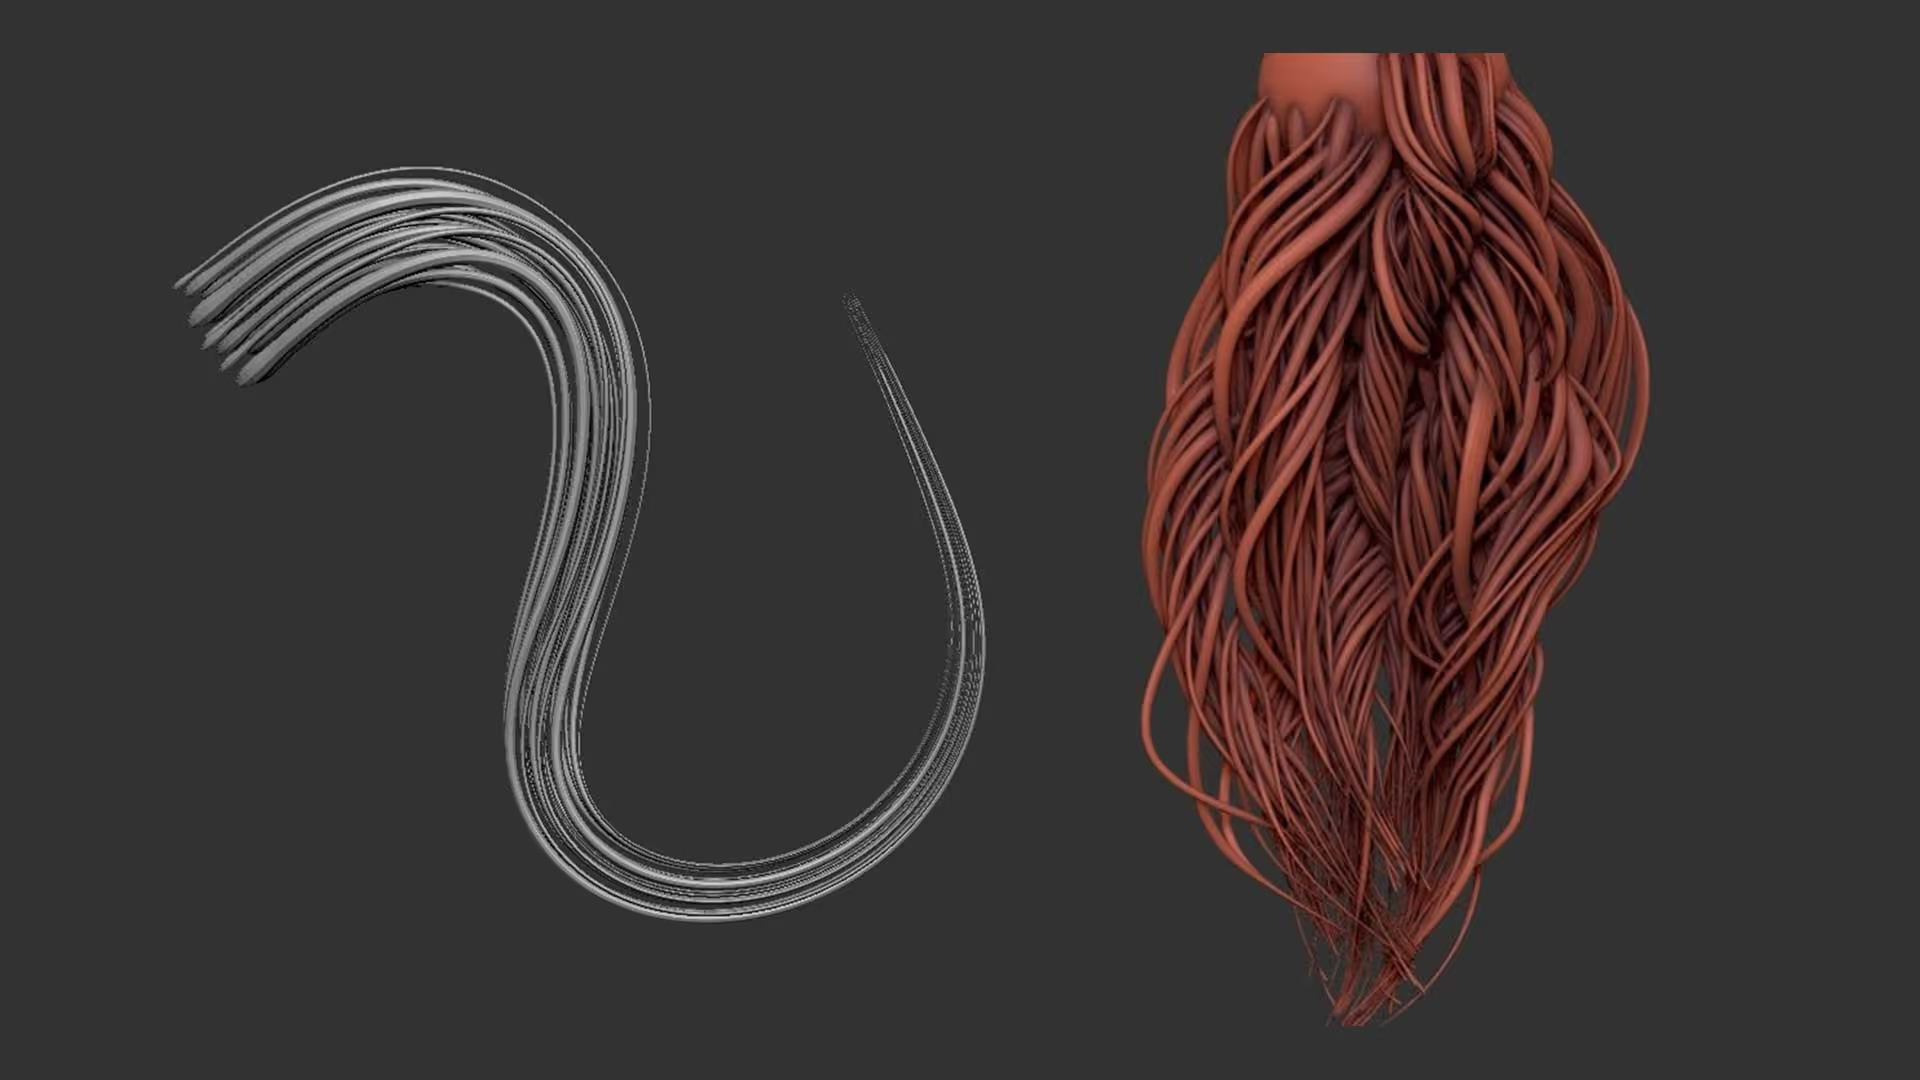
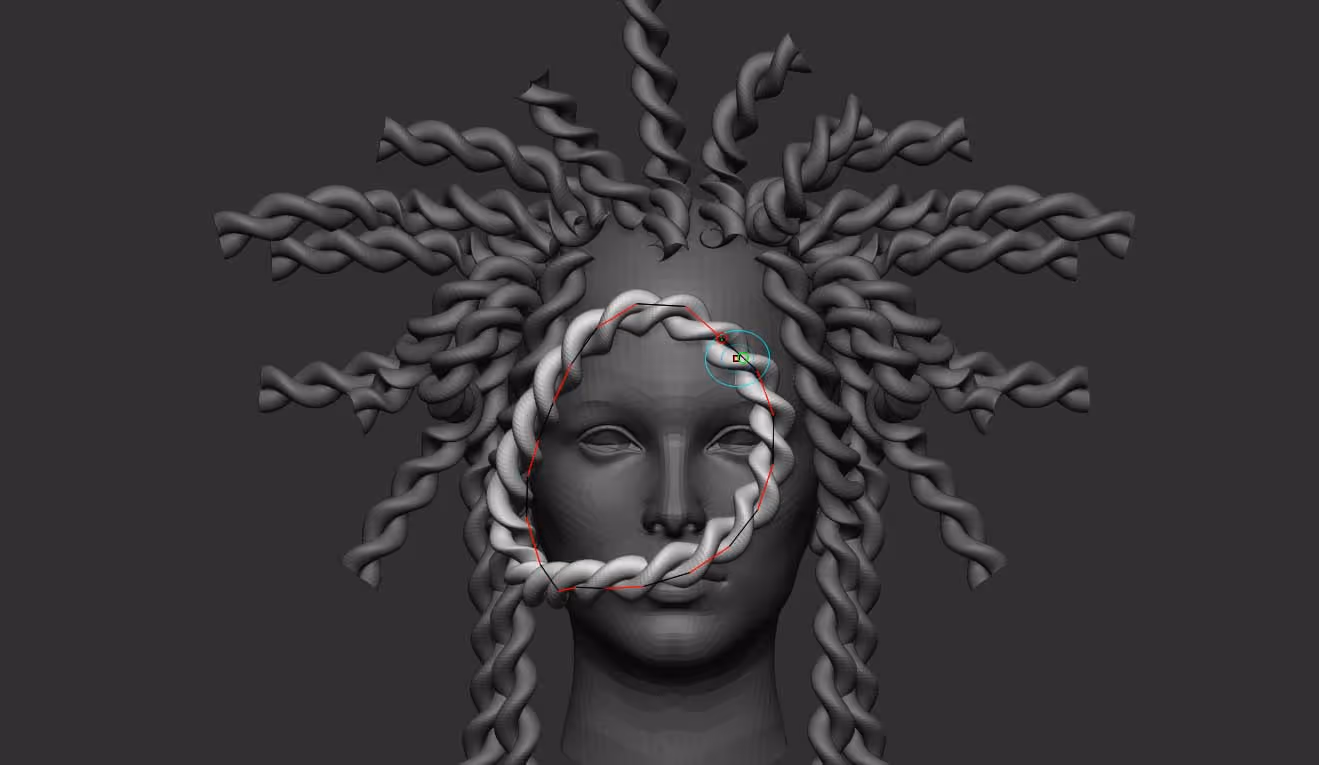
TIP #2: Curly hair with a twist
Although there are heaps of different application for the new brushes, probably the most obvious use for the new extrude profile curves are the creation of stylised hair strands. So I thought I share a simple tip to create curly strands of hair using some of the features that have been in ZBrush for a little while.
From the Stroke palette, you have a few new switches that give you a lot more control over how you manipulate the curve brushes and there are some 'hidden' features for the curves that allow you twist the curve and smooth it with the 'Ctrl' and the 'Shift' key respectively.
Basically, you can simply draw a curve, then click on the curve as if you were going to manipulate it, then hold the 'Ctrl' key and drag:

The size of the editing courses (the light blue one) determines the reach of the 'twist'.
That's pretty much it, you can of course use something like the polish or the smooth sliders to improve the look of your stylised hair strands:

Ray-trace AO
Another unrelated tip but that I think is super cool is that there is a new way to generate Ambient Occlusion inside ZBrush (from the ZPlugin palette) and it works as a mask so it is fantastic to do a quick polypaint

That's it for today's tips! I hope you find them useful.


.webp)

.webp)