For a bit of context, I wanted to show you how you can re-purpose assets… So to detail the horn in this tip, I’m actually using the brushes from the new ‘ZBrush Bark & Wood’ pack. The idea with this technique is to concetrate on a small section and then repeat it:
- First I created a short cylinder and turned it into a Dynamesh object.
- With the Bark & Wood brushes in this case, I enabled radial symmetry in the Y axis and added some details around the cylinder before decimating to reduce the polycount.
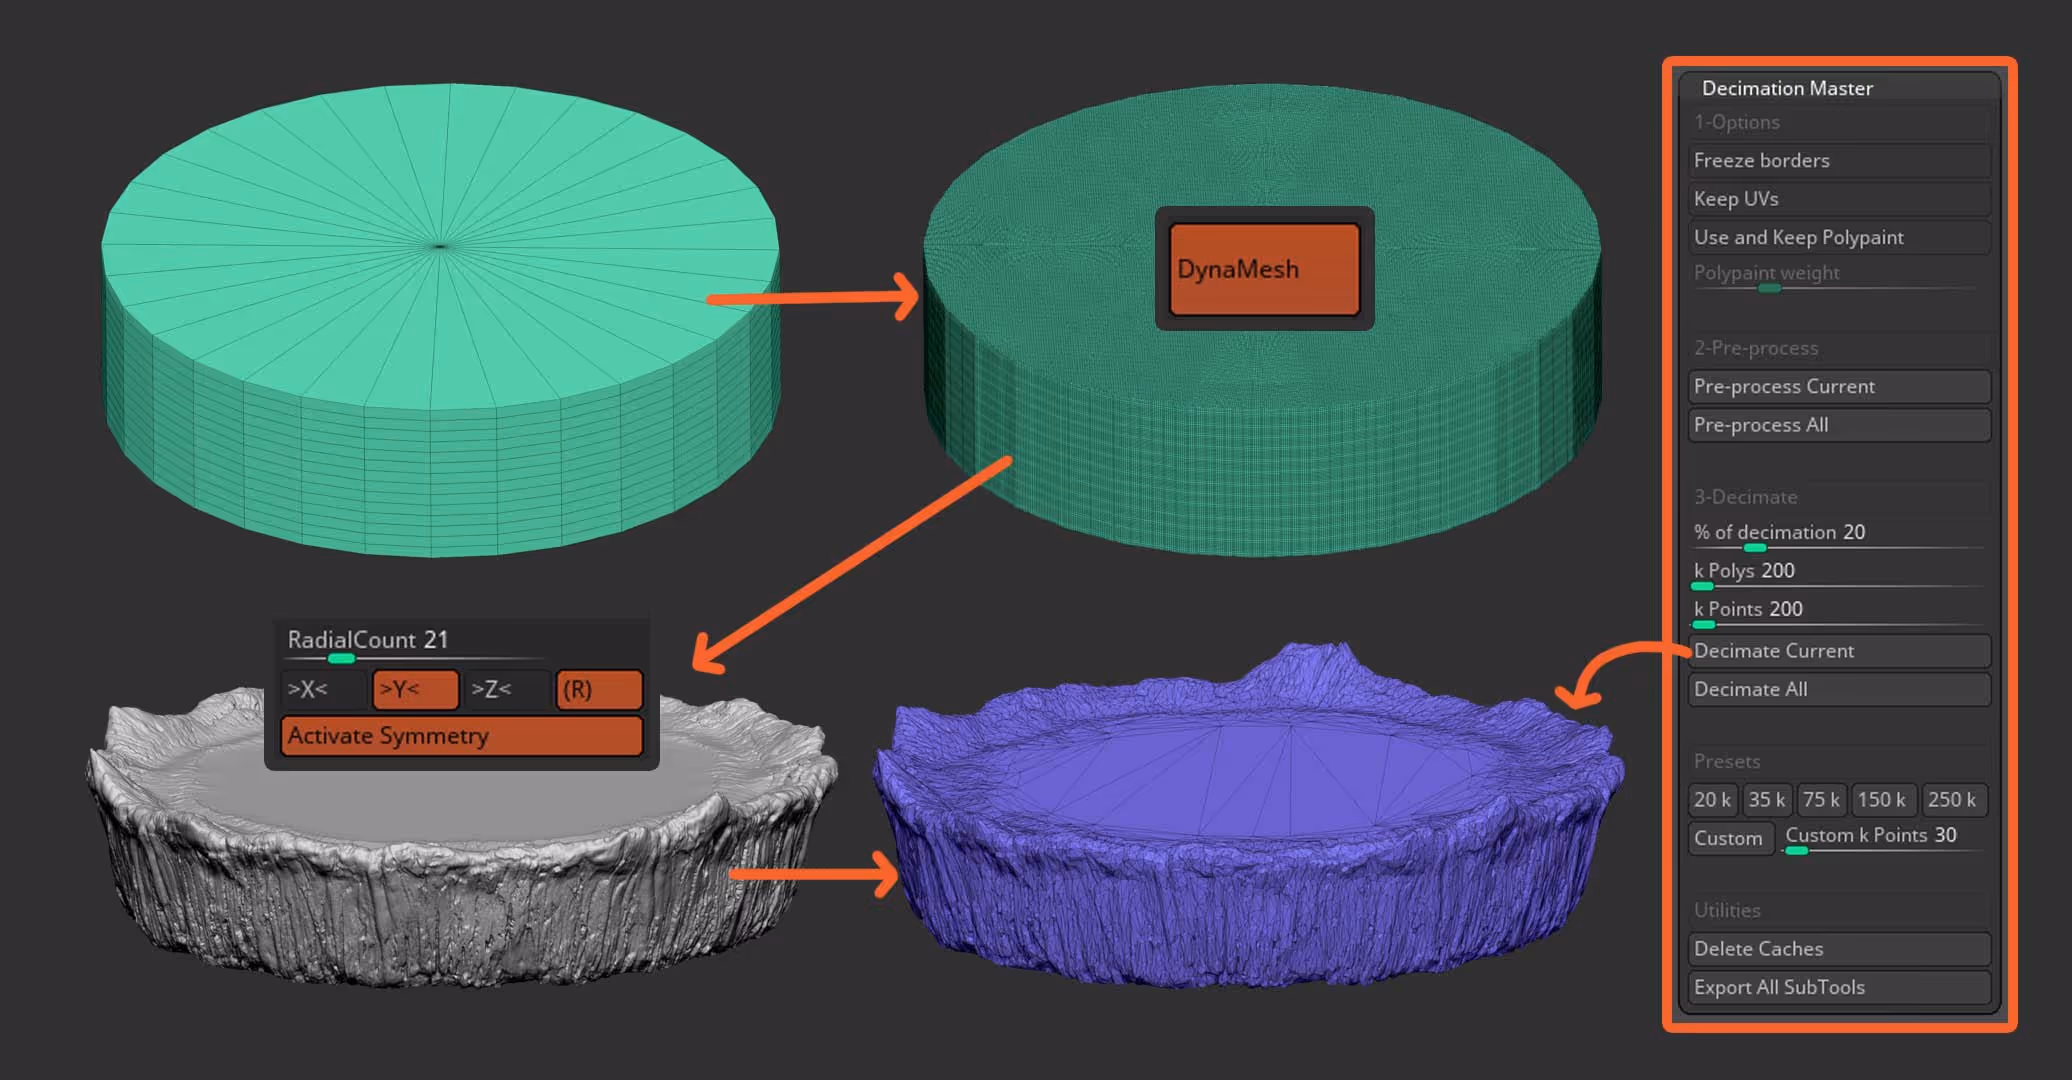
Here is a quick reference of how easy is to setup the details with some of the custom brushes… As an extra tip: if you use the Smooth Peaks on the details that some of the Bark & Wood brushes give you, you’ll end up with a very cool surface detail that look like bone!
That’s about it in terms of setting up the ‘piece’ or section for the horn. The next will be to repeat it and there are plenty of ways to do this but I thought I try something new:
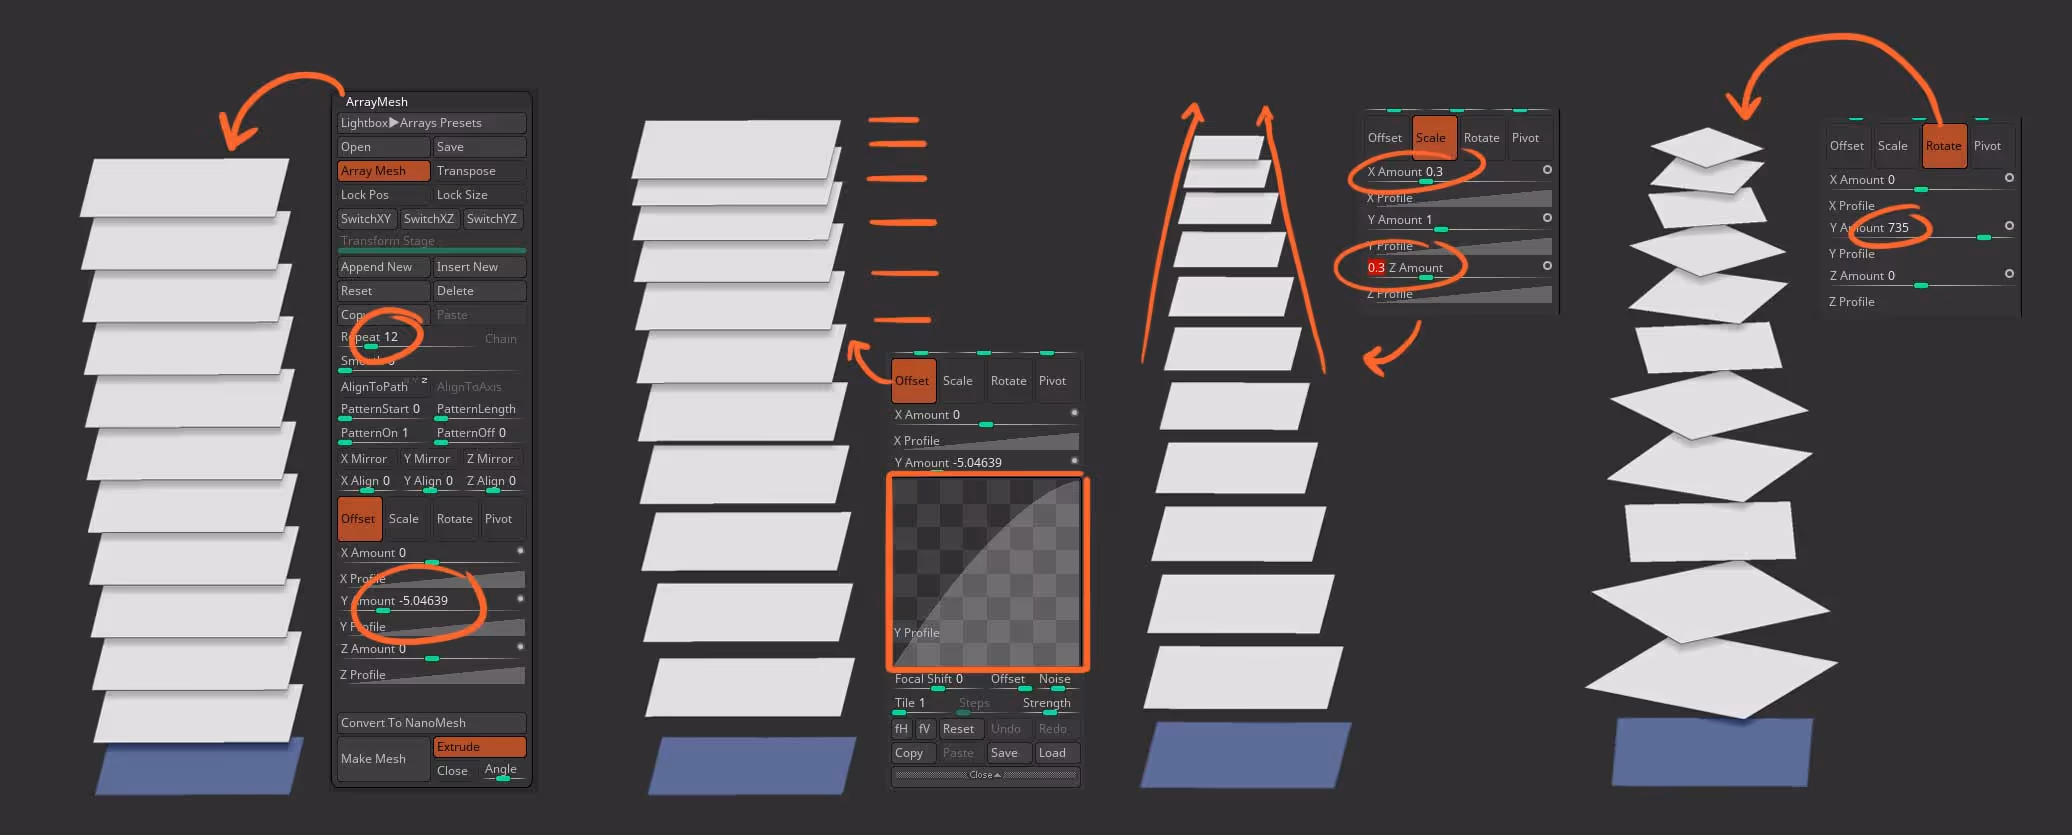
First I created a new tool with a simple plane (literally 4 vertex). Then I used the Array Mesh to create instances of the plane taking advantage of the ‘ArrayMesh’ features
Basically I create 12 instances, spread them apart in the Y axis, and then use the curve to create a nice offset. I also use the scale and the rotate function to create a nice random ‘pile of planes’:
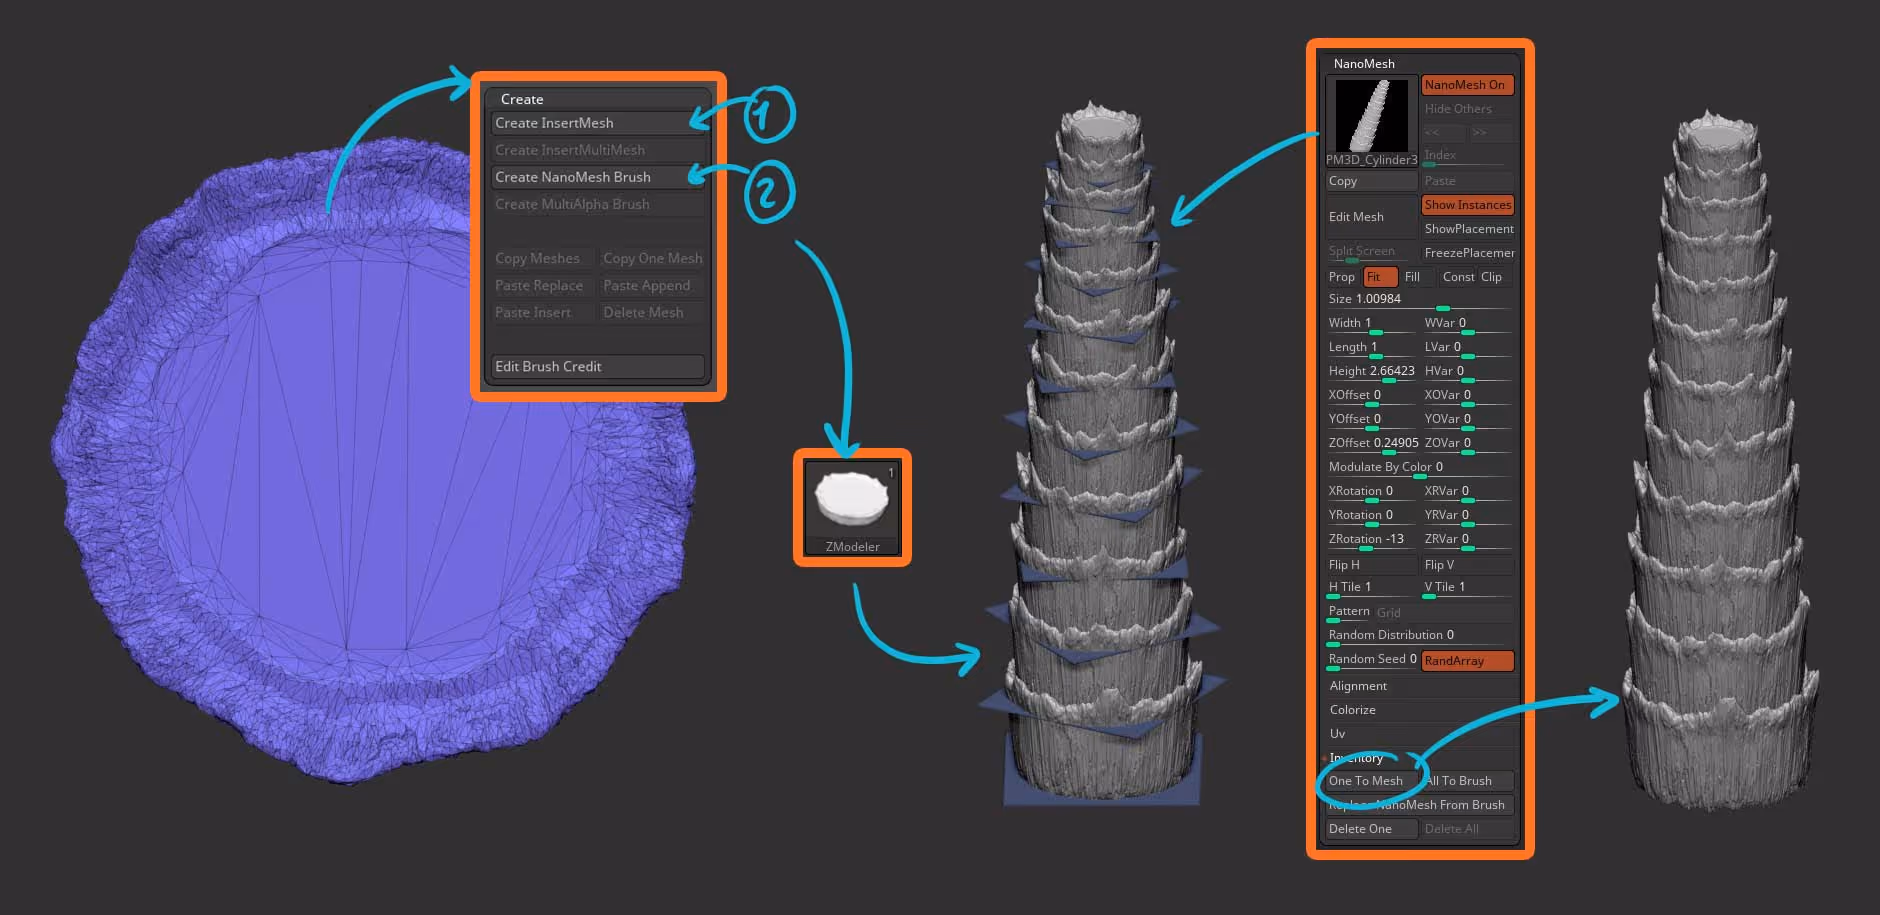
The next step is to the the detailed and decimated cylinder piece and conver it to a NanoMesh brush (first you need to make it into an IMM brush). Once you have your NanoMesh brush, you can add an instance of if into the plane with the Array Mesh.
The cool thing is that you can have control of the shape from the ArrayMesh but you can also tweak things from the NanoMesh settings… After a bit of additional tweaking to remove spacing, I convert everything into a mesh that can be further sculpted.
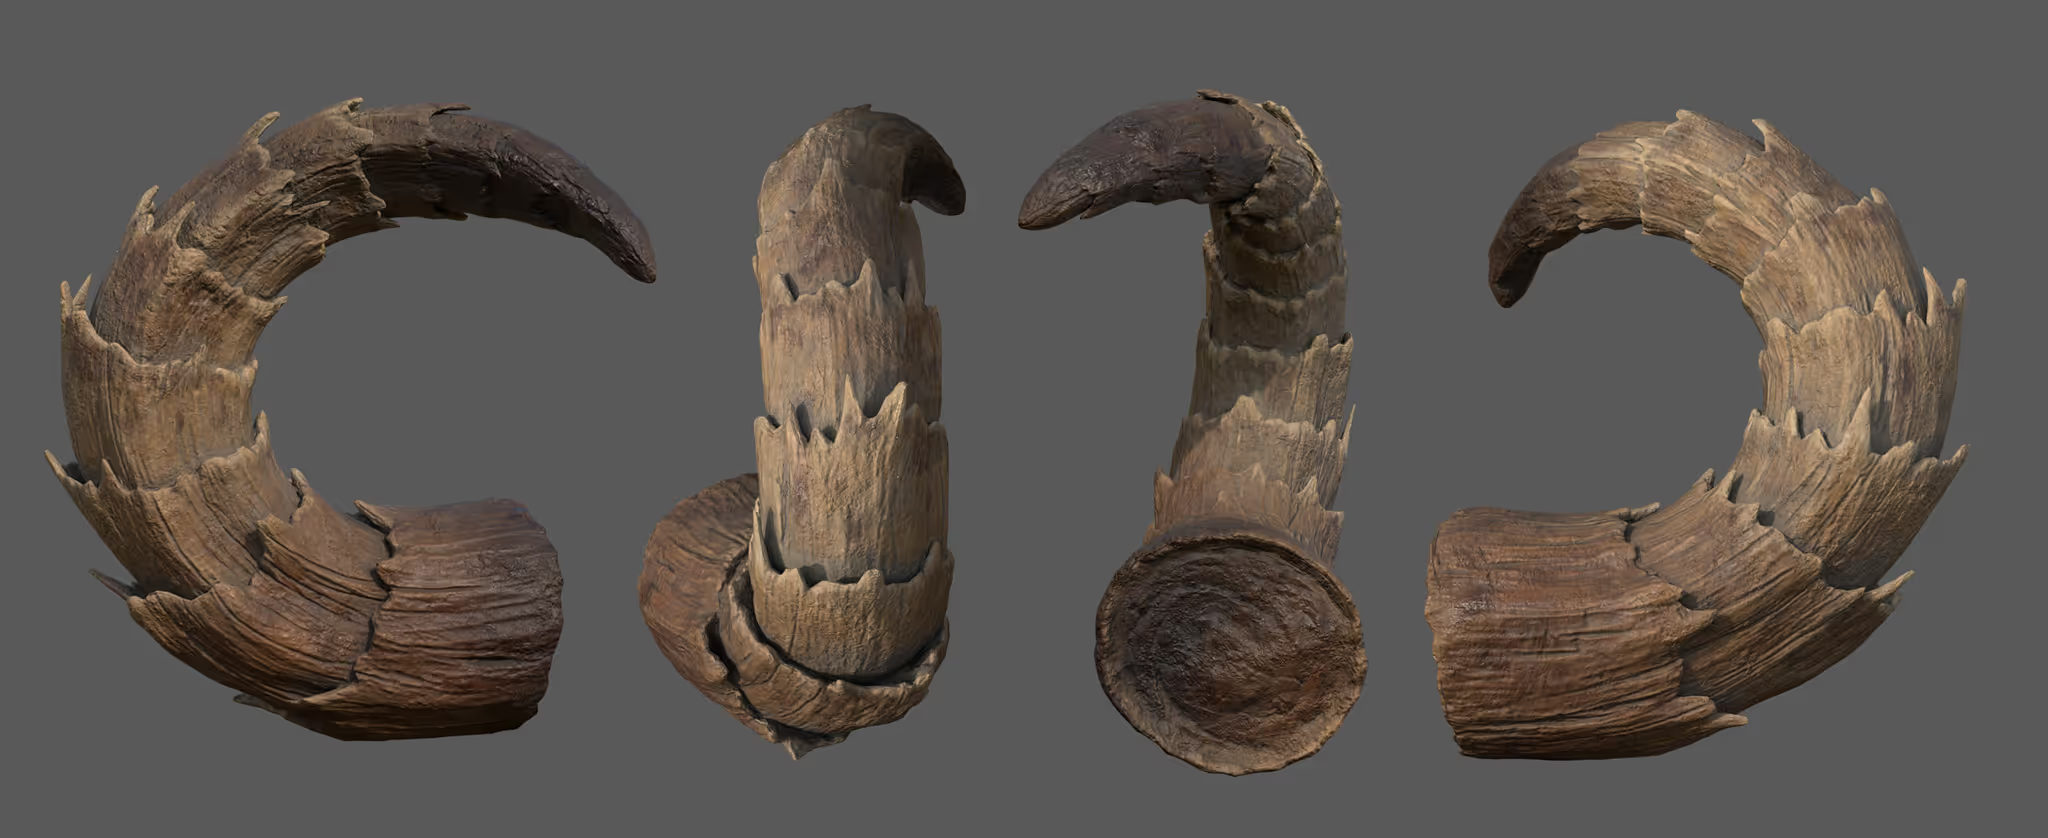
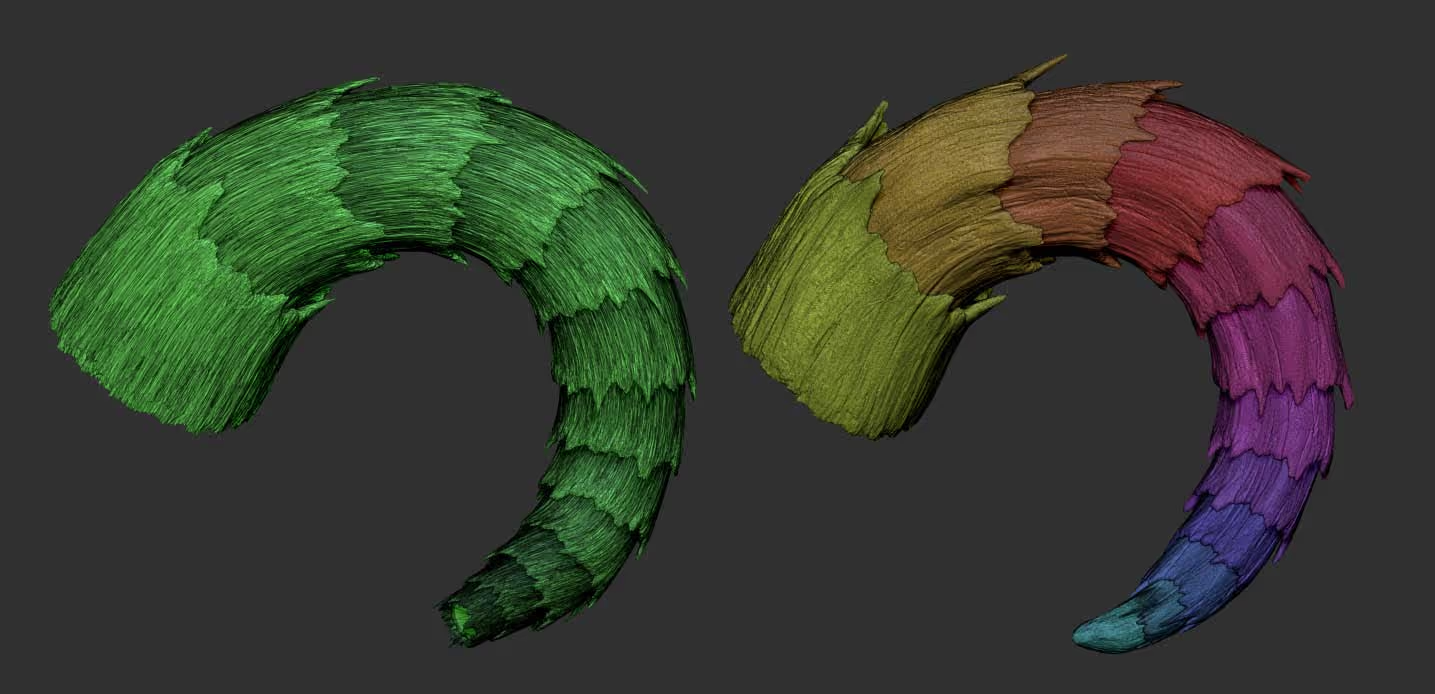
At this point I used the Bend Curve deformer to give the shame and additional rotaion.
You could just leave it like that… OR, if you want to polish it even further, you can dynamesh the whole thing again to make it a watertight mesh:
And then use ZRemesher and the usual process to project back the details.
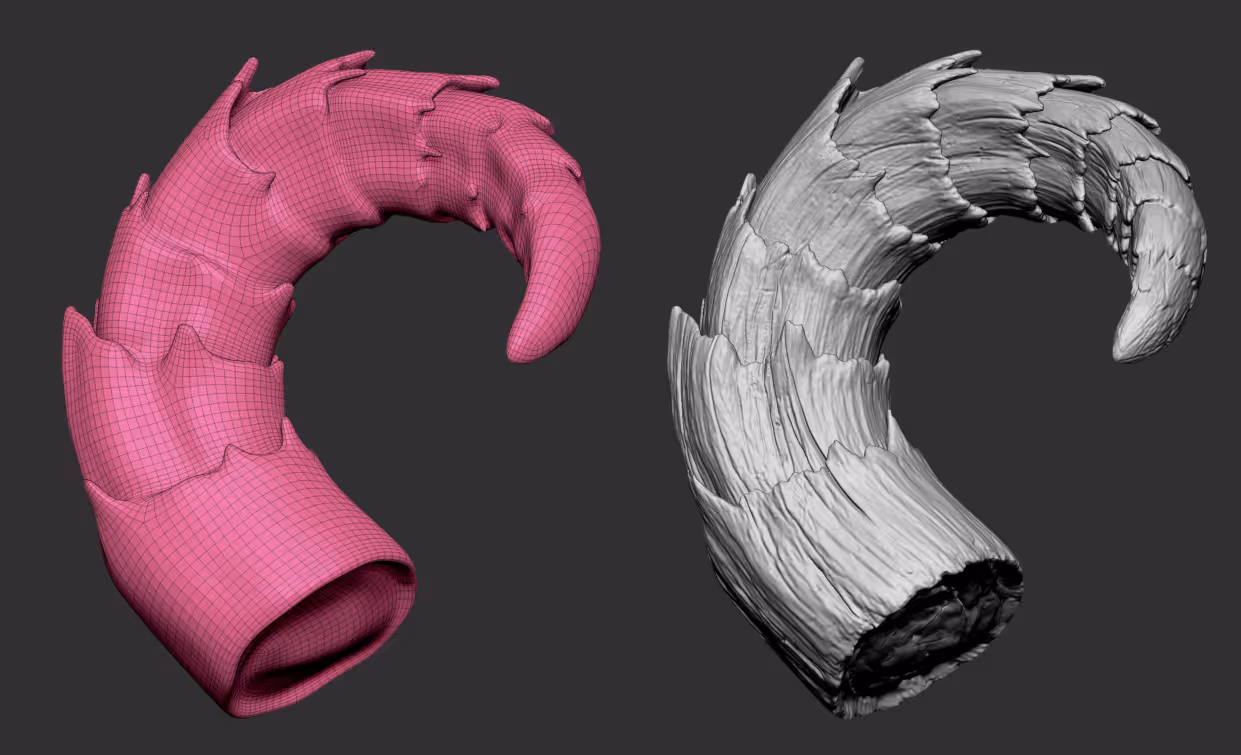
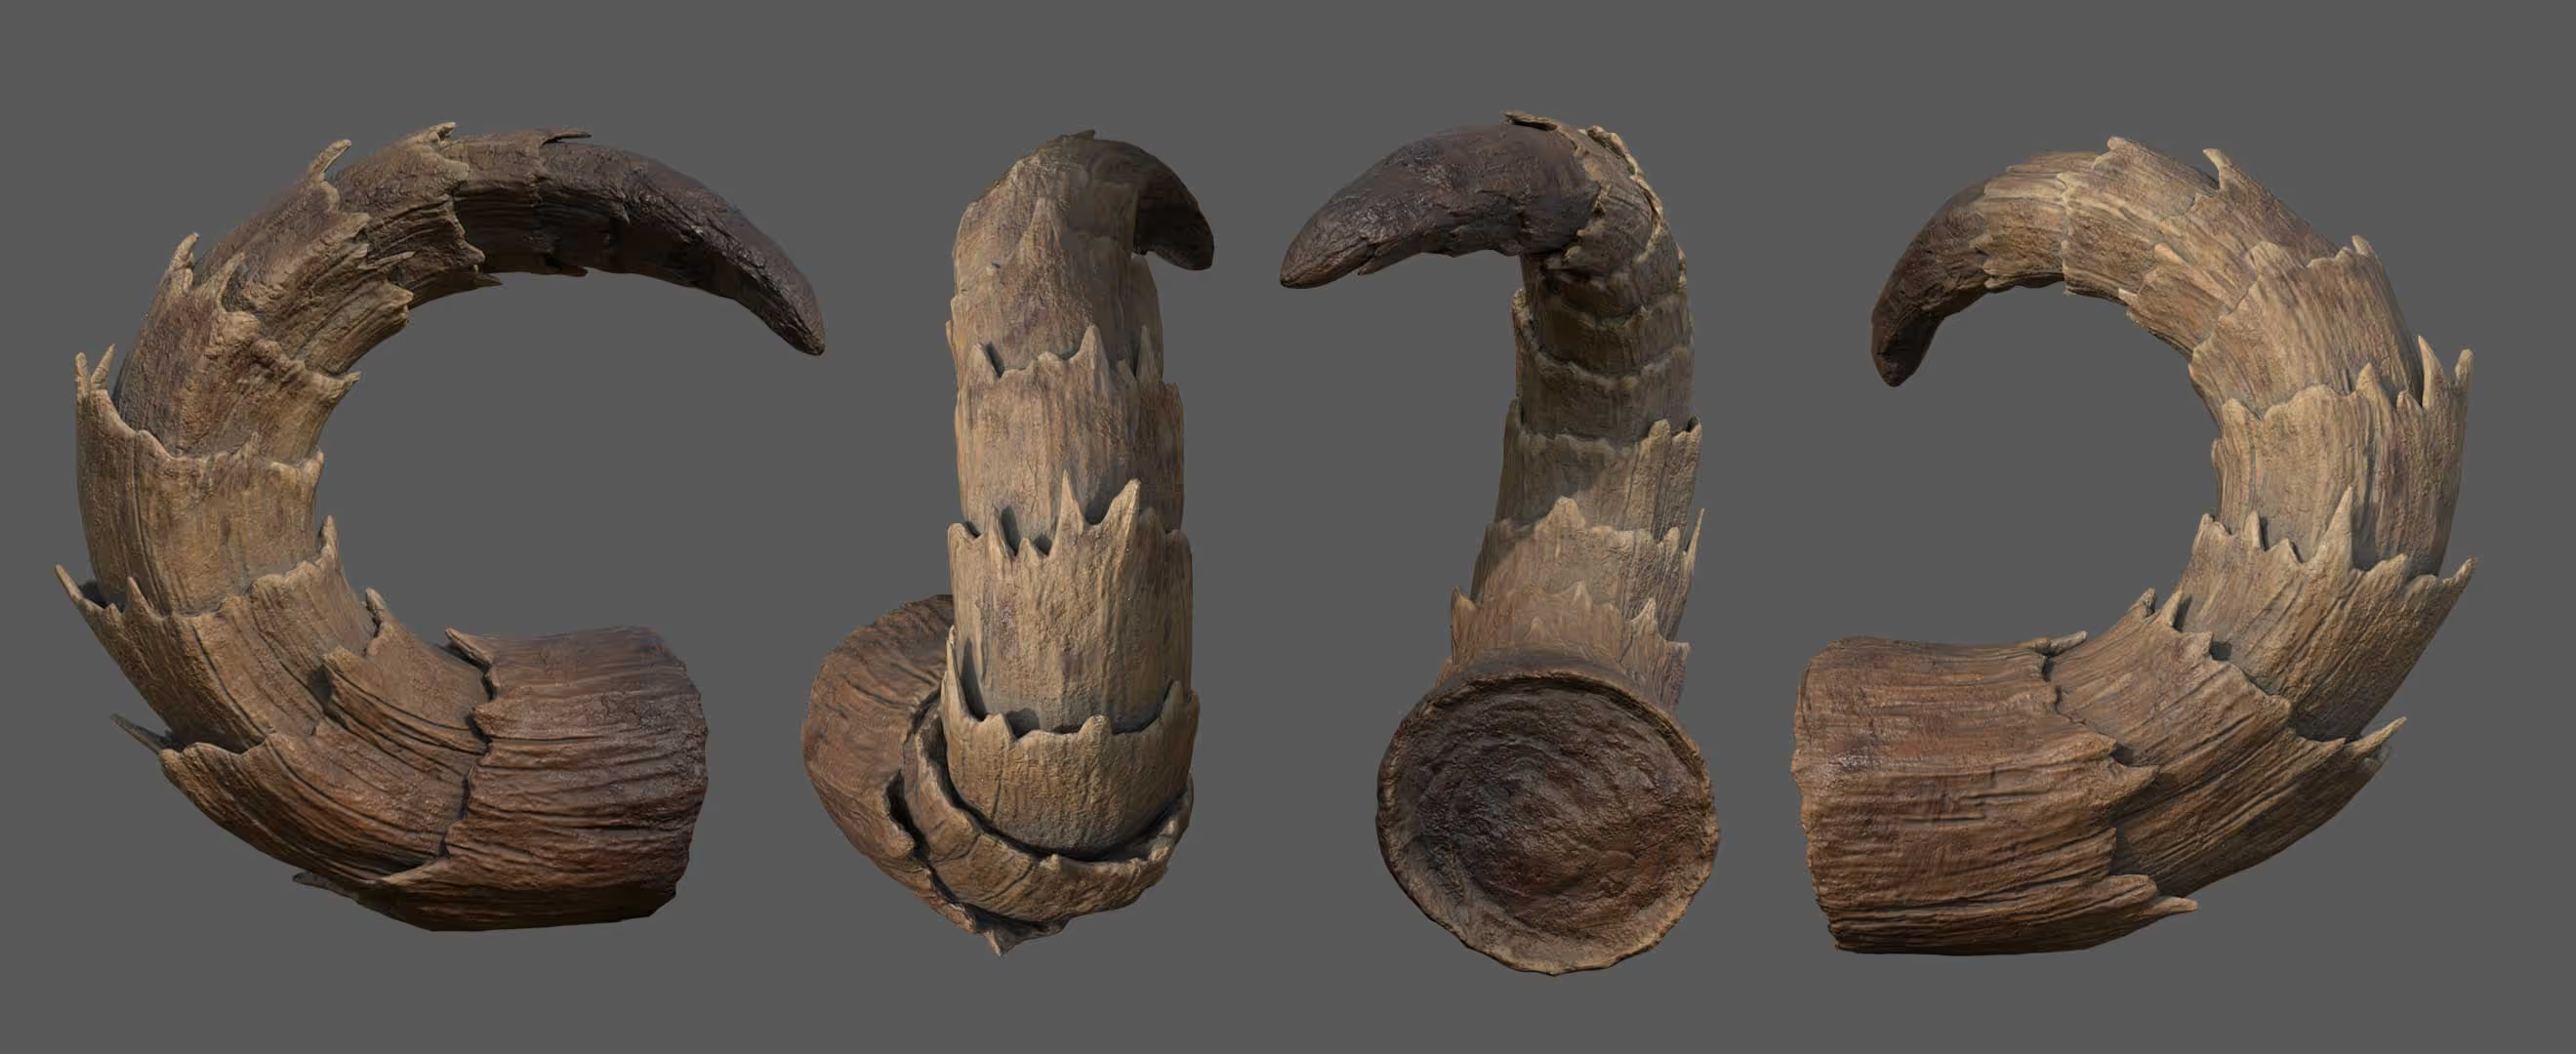
This is the low res mesh (from the pink screenshot above) with the baked details and some quick textures in 3D Painter:


.webp)

.webp)