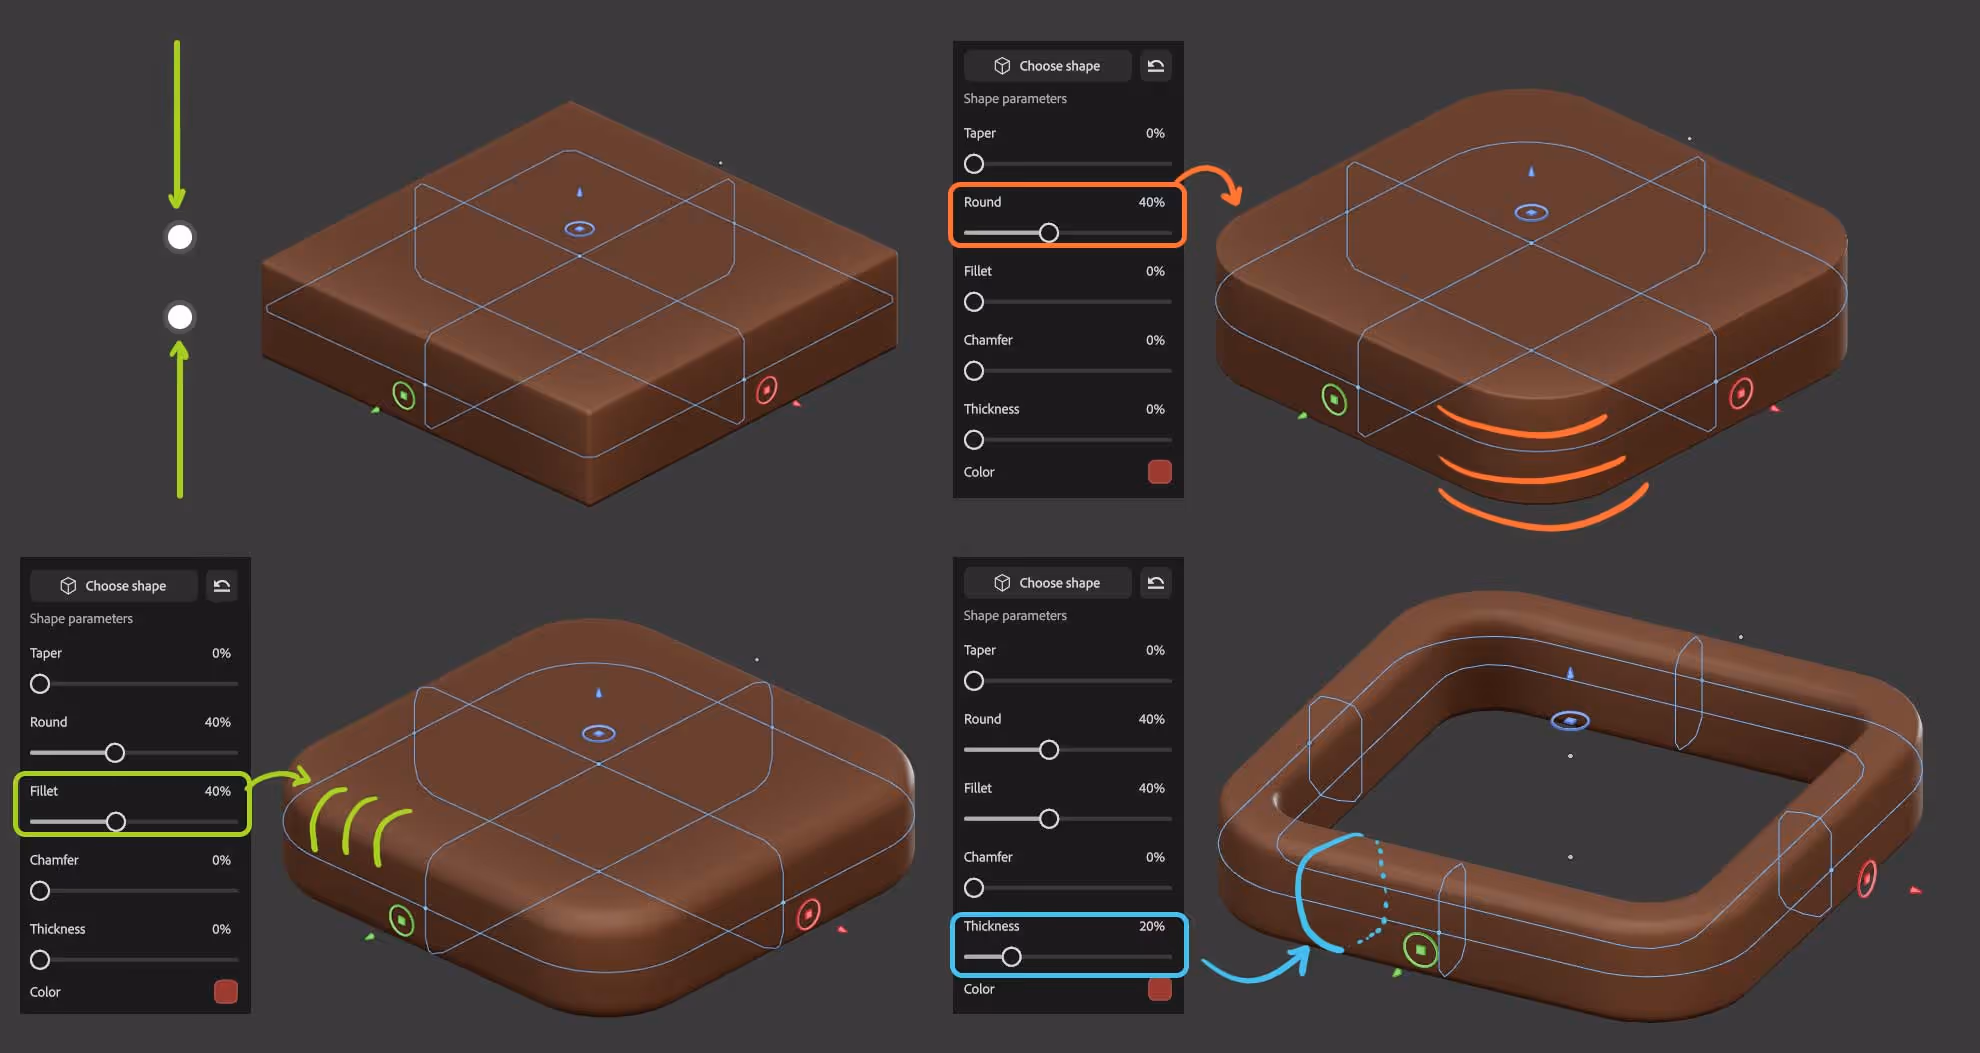
STEP 1: Learn the BasicsStart by exploring the main shapes (spheres, cubes, etc.) and their adjustable settings. These primitives are your building blocks, so take time to understand the options. Each object has different settings so you can adjust the initial shape to be more in-line with what you want to create (think about the larger forms or volumes first).
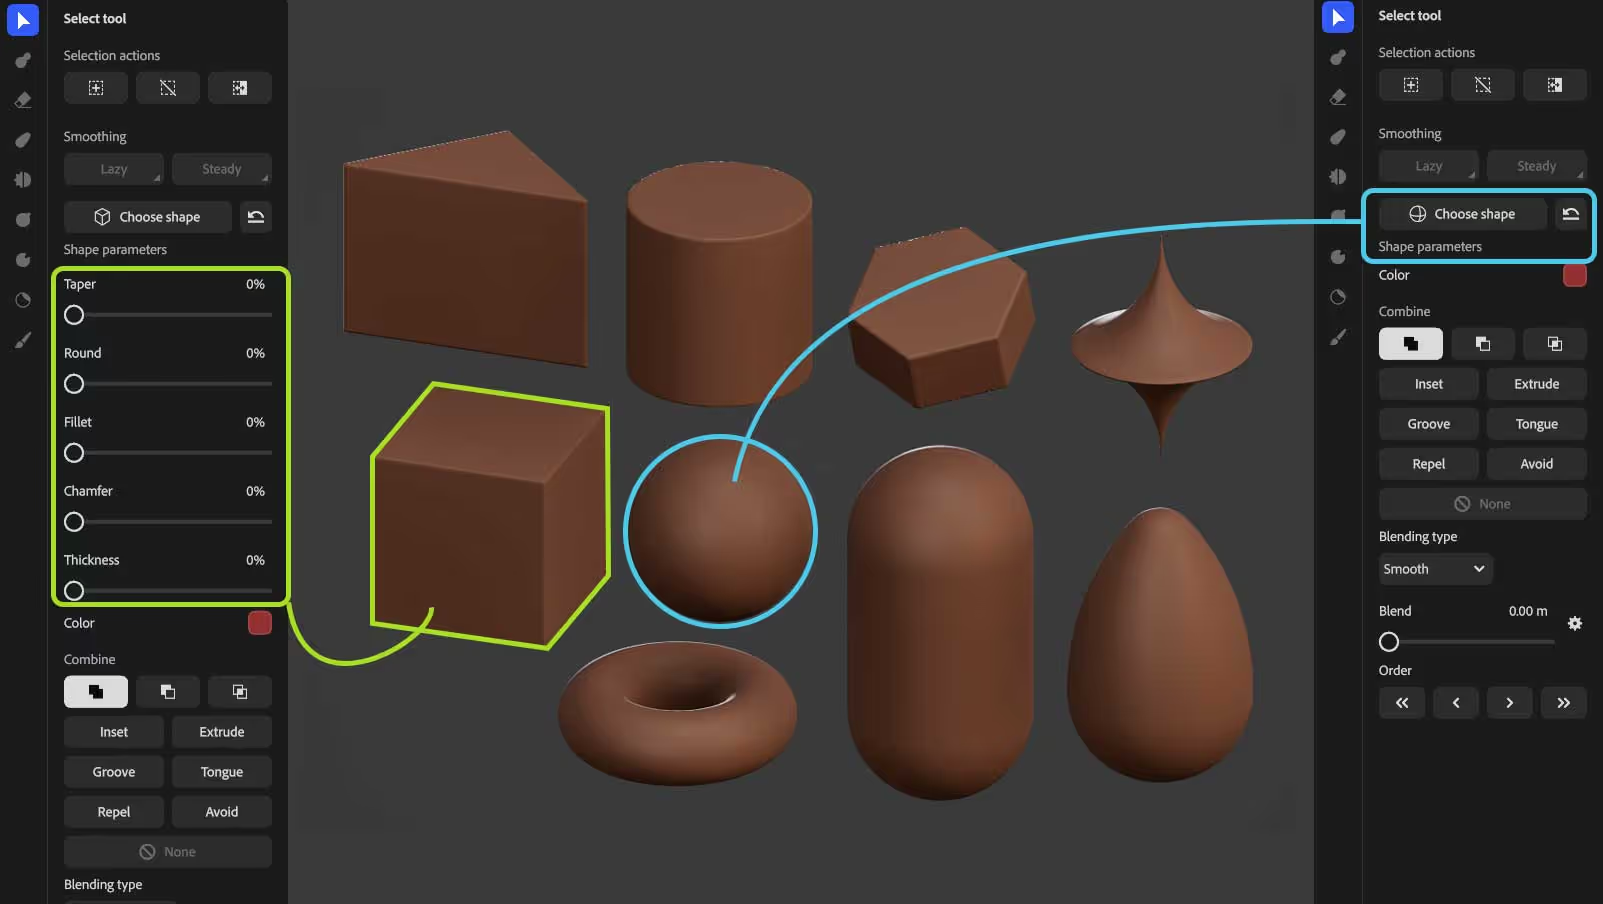
For instance, with the ‘sphere’ you have no parameter, but with the ‘cube’ you can taper it, you can round the corners, add fillet or changer and create thickness! - using the sliders you can create a more complex shape in seconds:
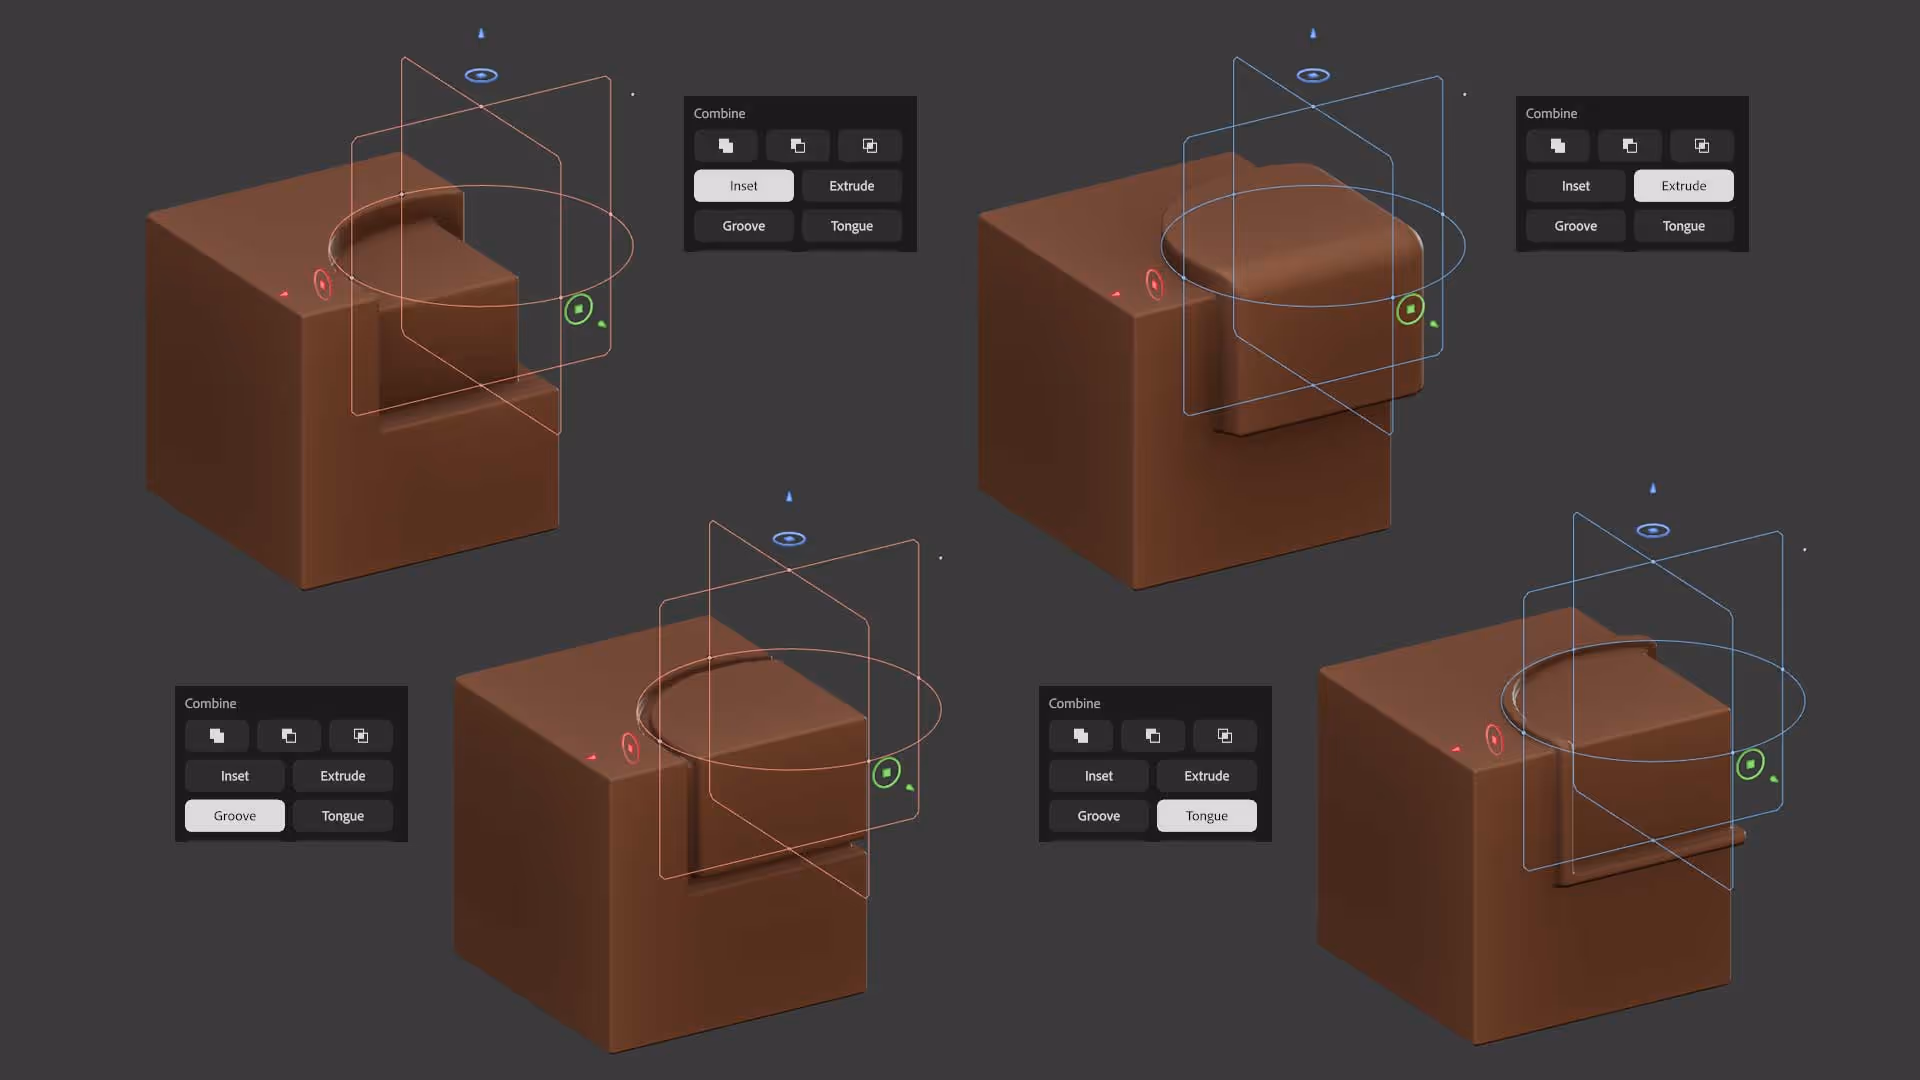
STEP 2: Understand BooleansNow, ‘booleans’ is where the magic happens… so just play with a couple of objects to see what you can do… there are 3 basic operations you can use like add, subtract, or intersect objects to create a more complex design:
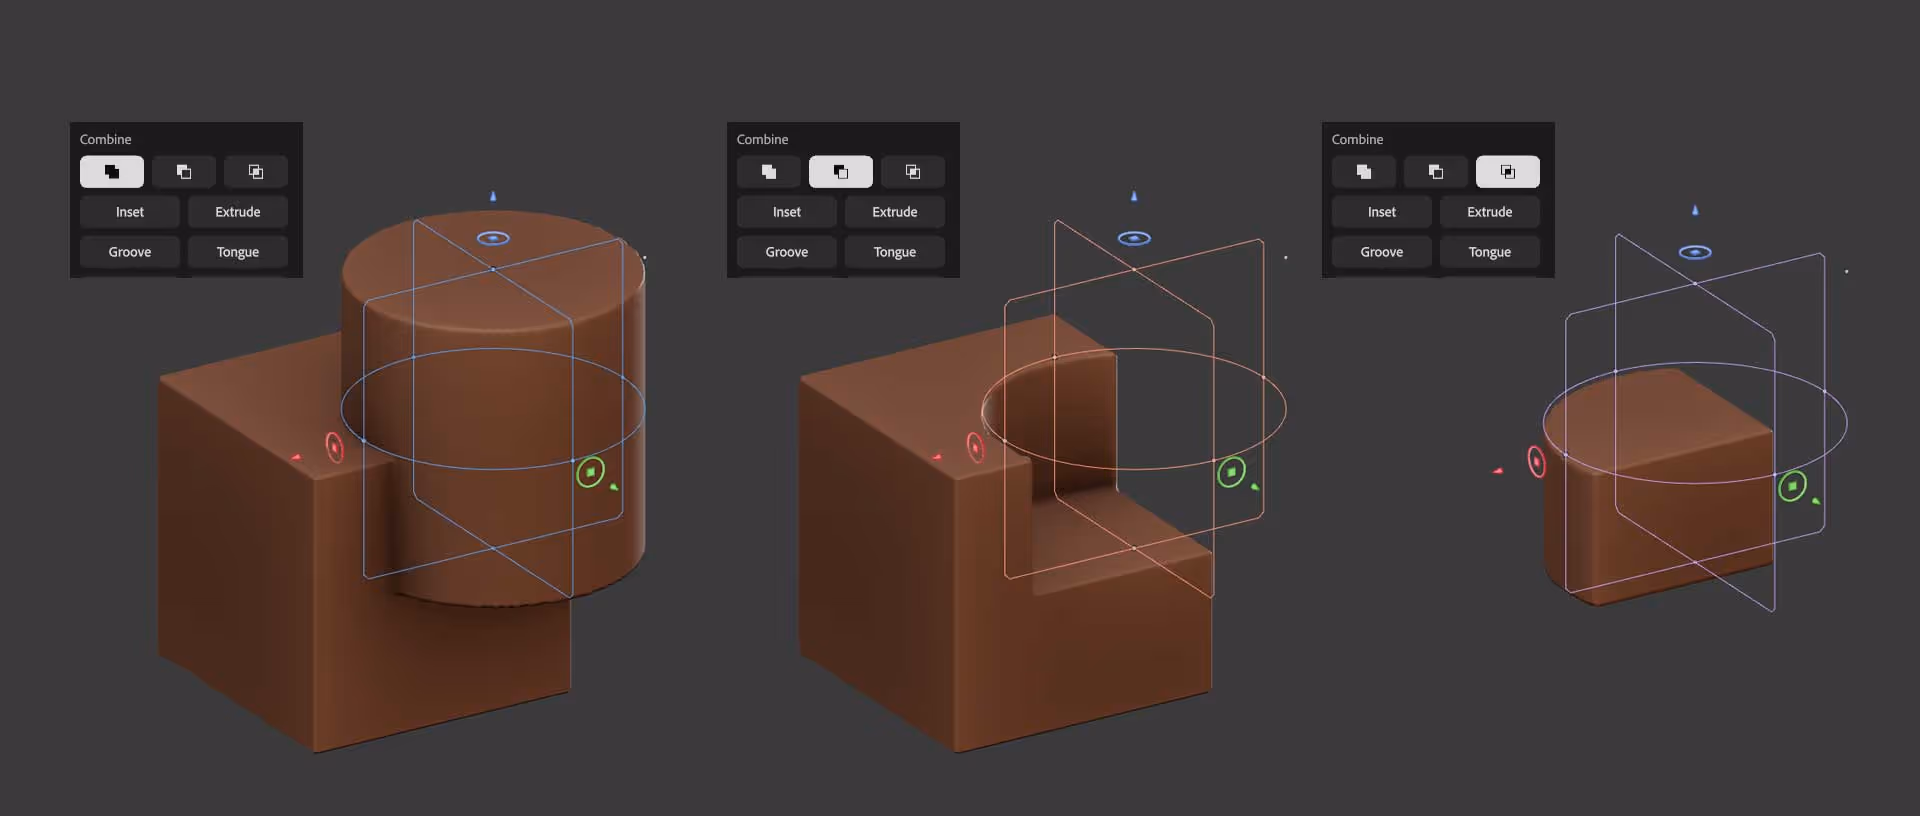
These are the ones that have been there for a while but in the Beta there are also other boolean opetions you can play around with like inset, Extrude, groove and tongue. These are fantastic to add details or a ‘paneling’ effect in your hard surface concepts:
The way booleans work in 3D modeler is really awesome… not only you can keep the editing capabilities of each shape but you can also adjust the way objects blend with each other.
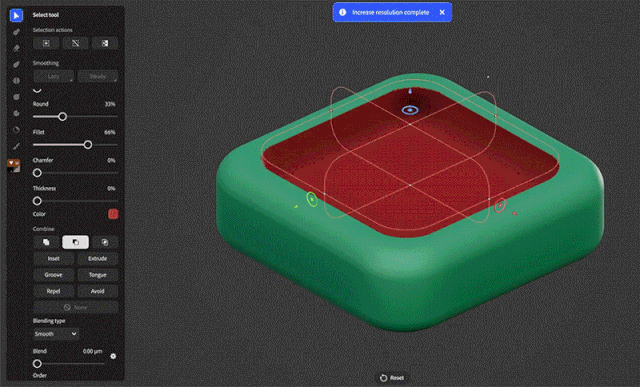
another cool thing… you can blend things with smooth for a nice soft effect or switch to chamfer and create a nice flat angle between the intersections of primitives… This feature is in my opinion, what really sets this workflow apart from any other boolean tools… So easy and looks really cool:
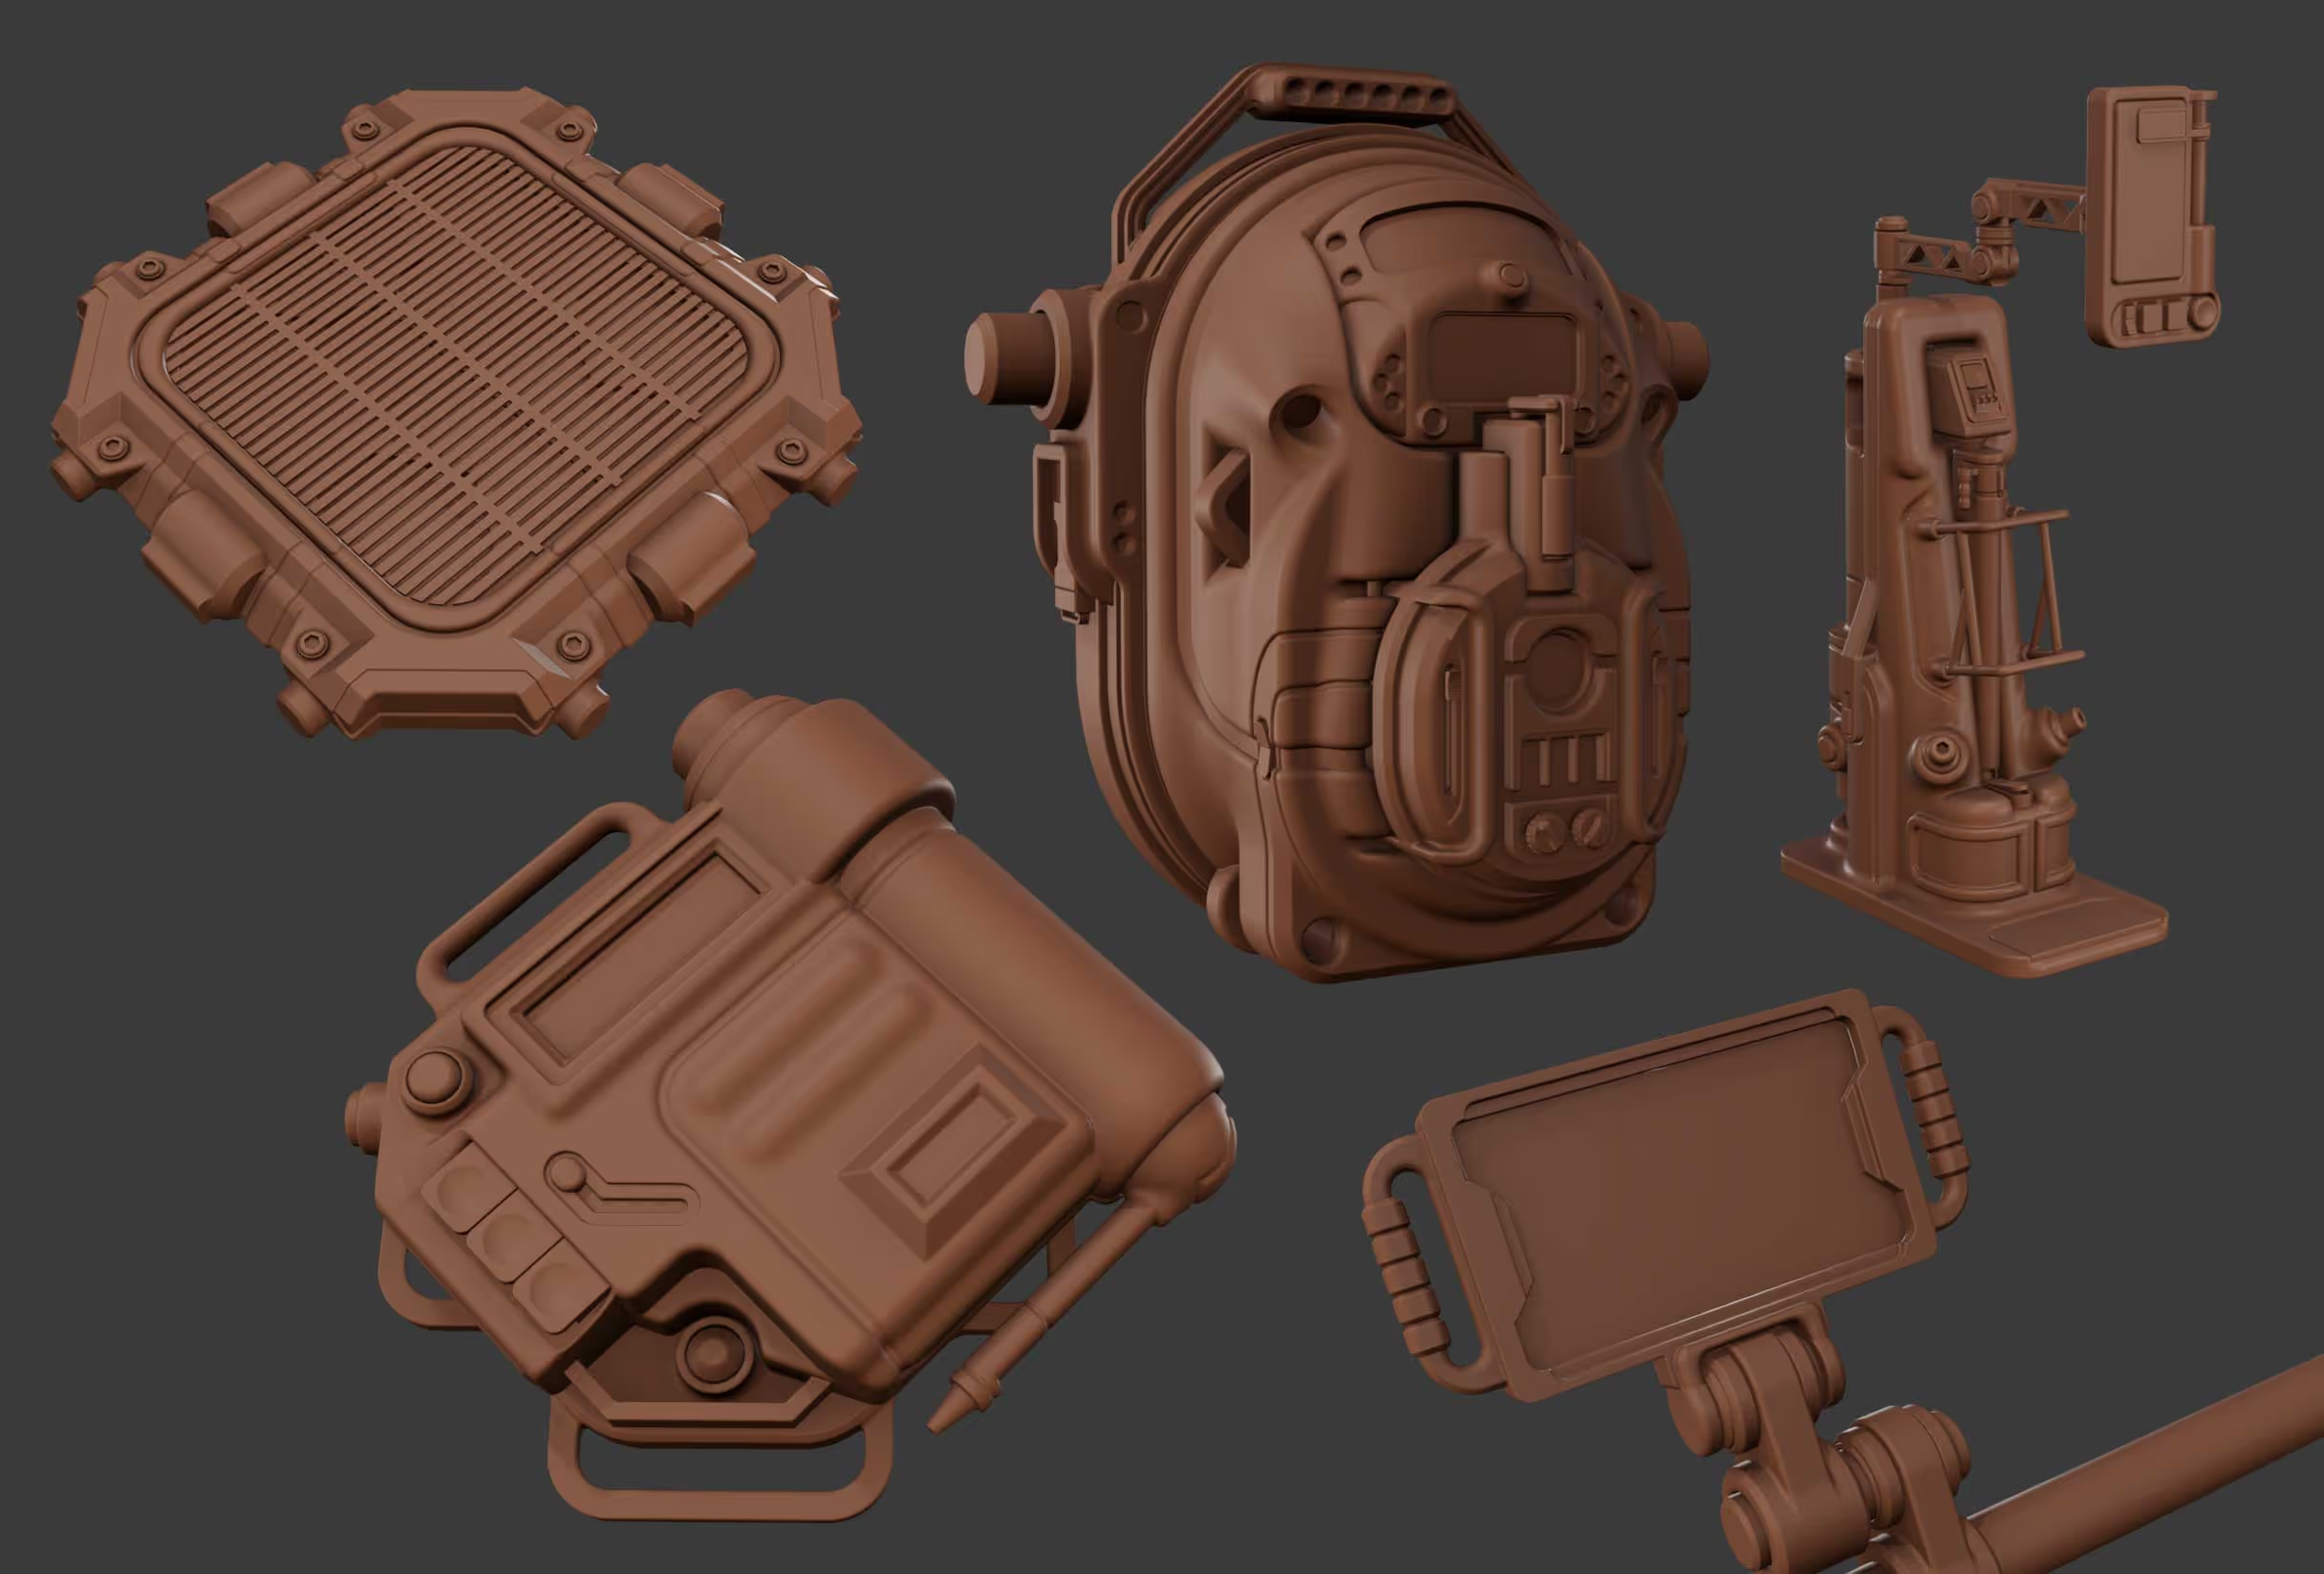
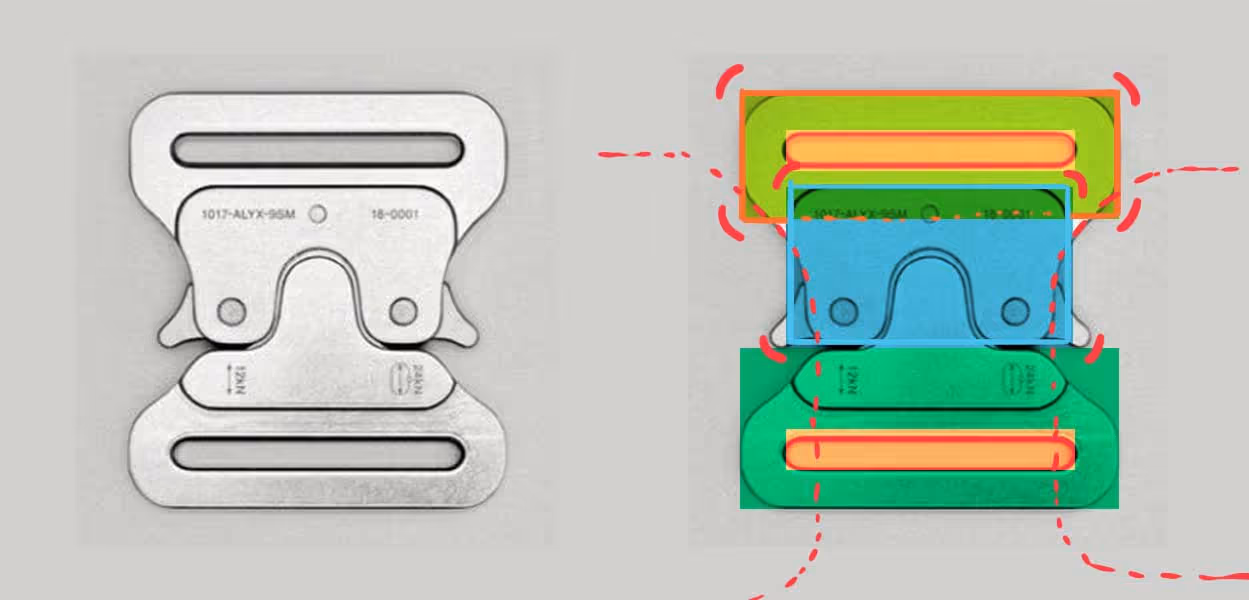
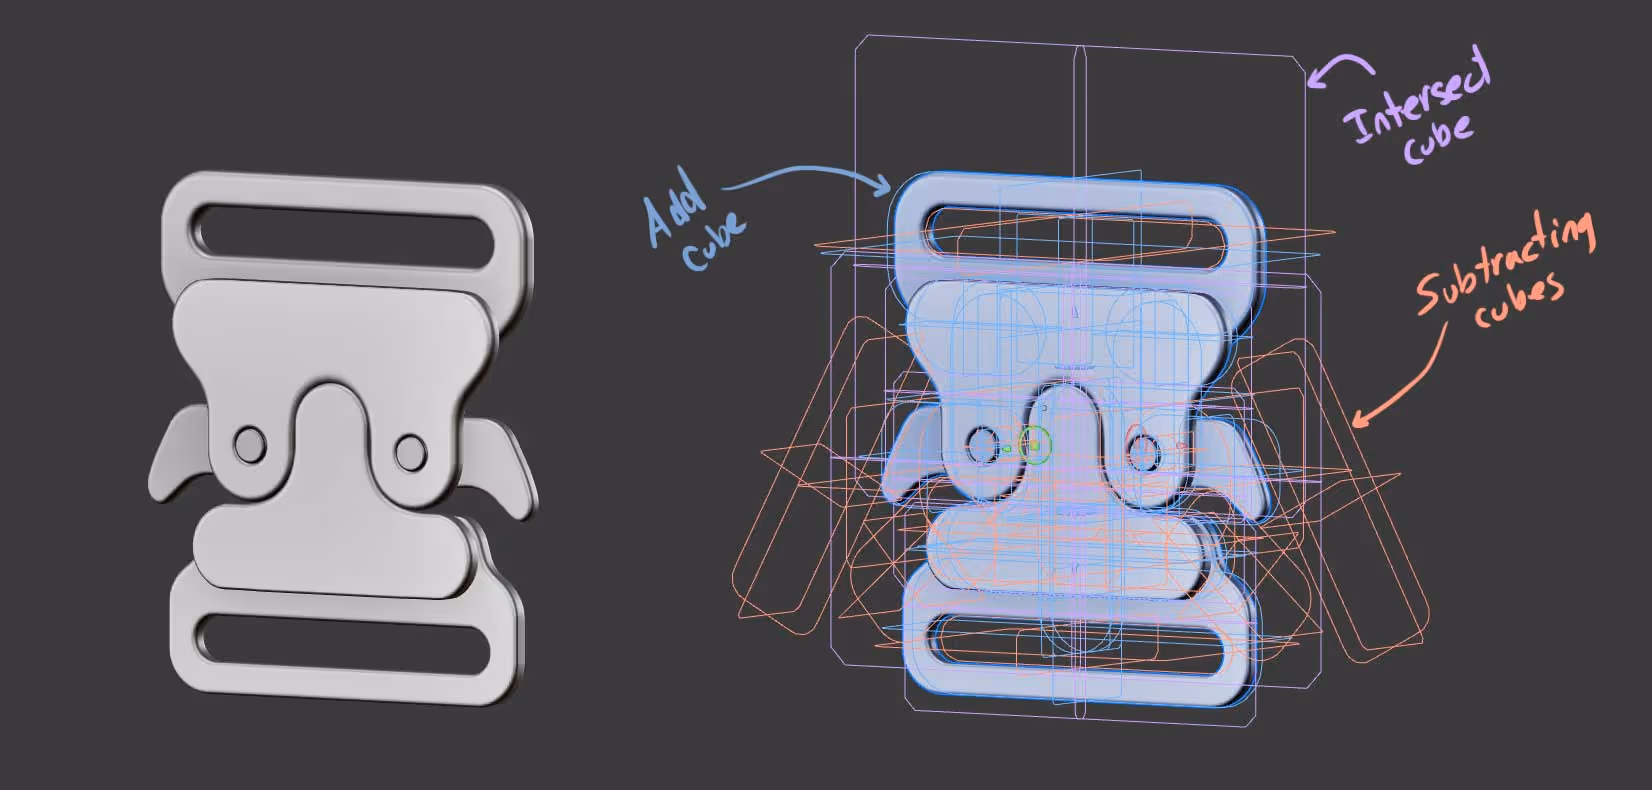
STEP 3: Create Complexity from SimplicityExperiment with combining shapes using Boolean operations to build more complex models. It’s all about stacking and subtracting layers in creative ways… At the end, if you where to break down one of the examples I show you before, it is not more than a bunch of cubes adding or subtracting pieces in different angles. For instance take this buckle as an example (on the right a quick paint over):
So just for reference her is how I approached the more complex shape and curves… Start with a narrow cube to subtract and create a hollow area, then round the edges of the cubes and create one narrow cube to blend it with the rest and create the nice soft transition… don’t worry if it inflates other areas:
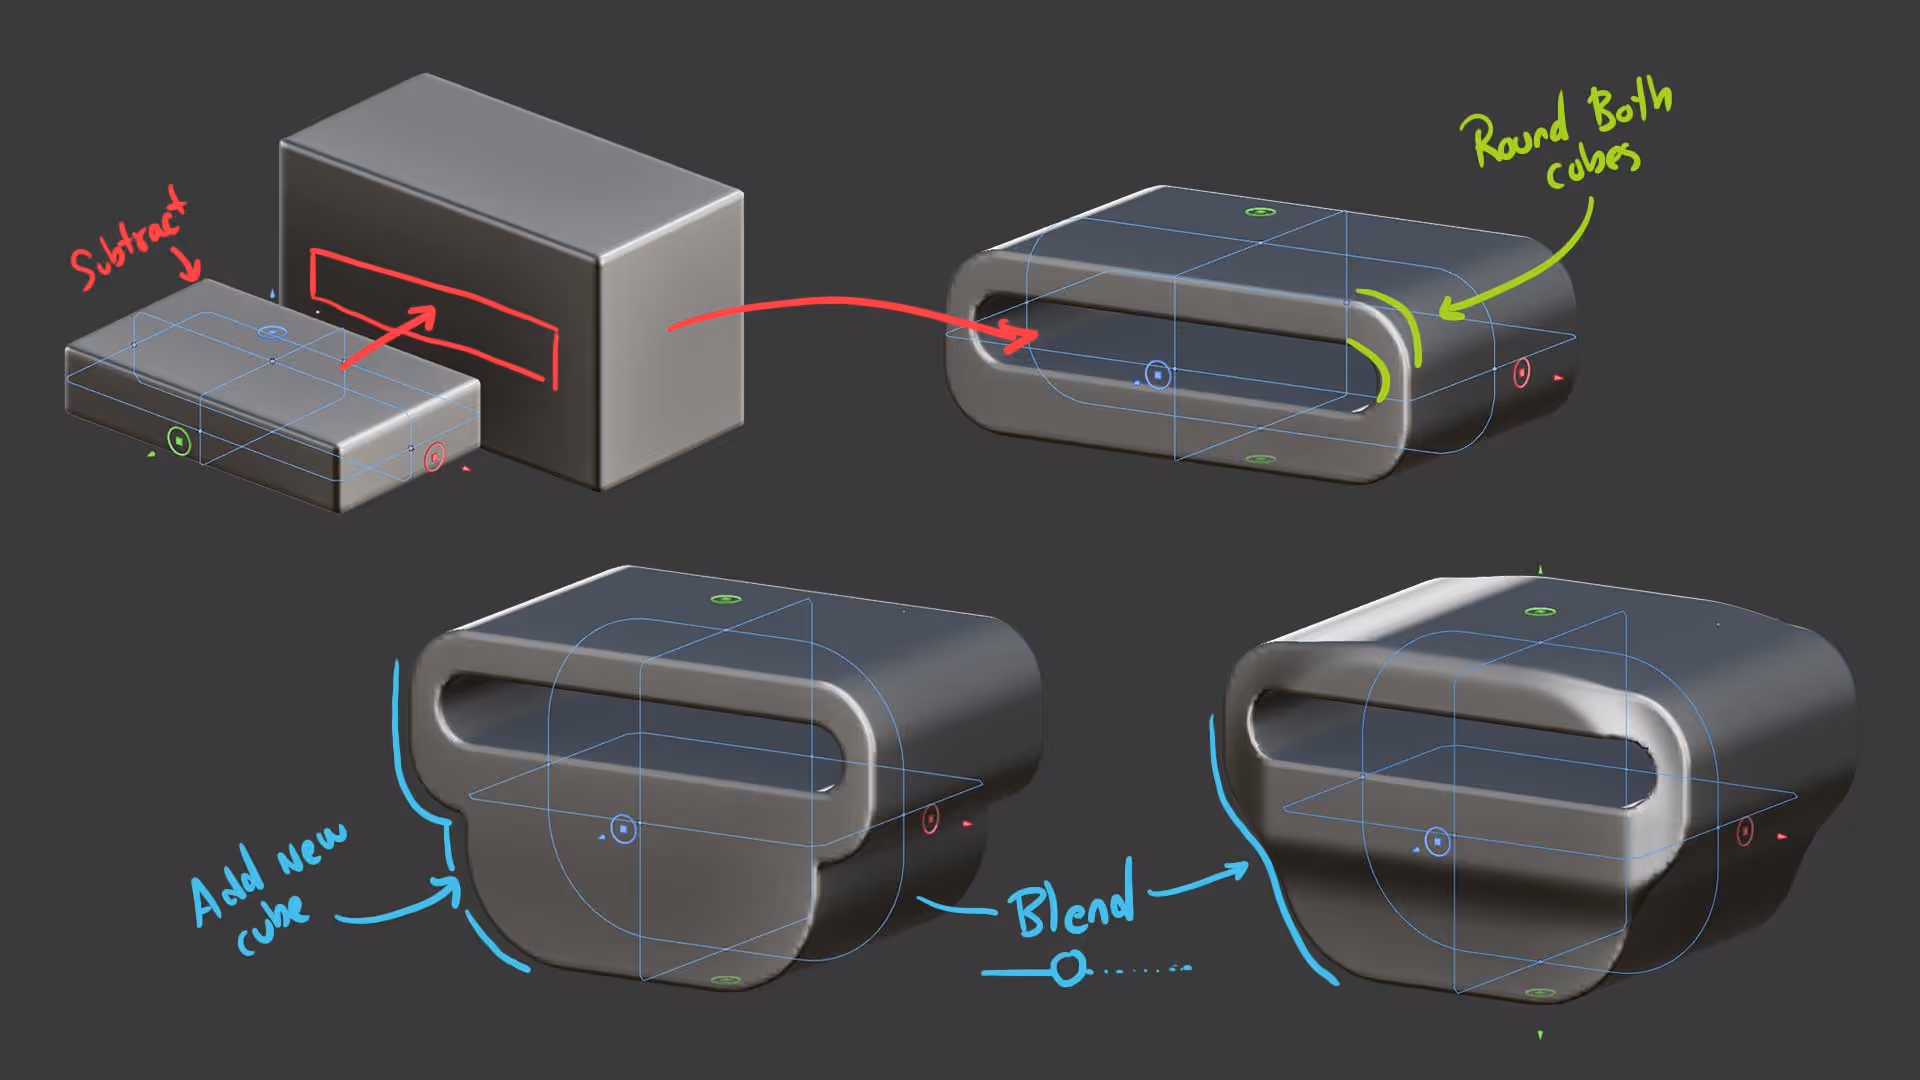
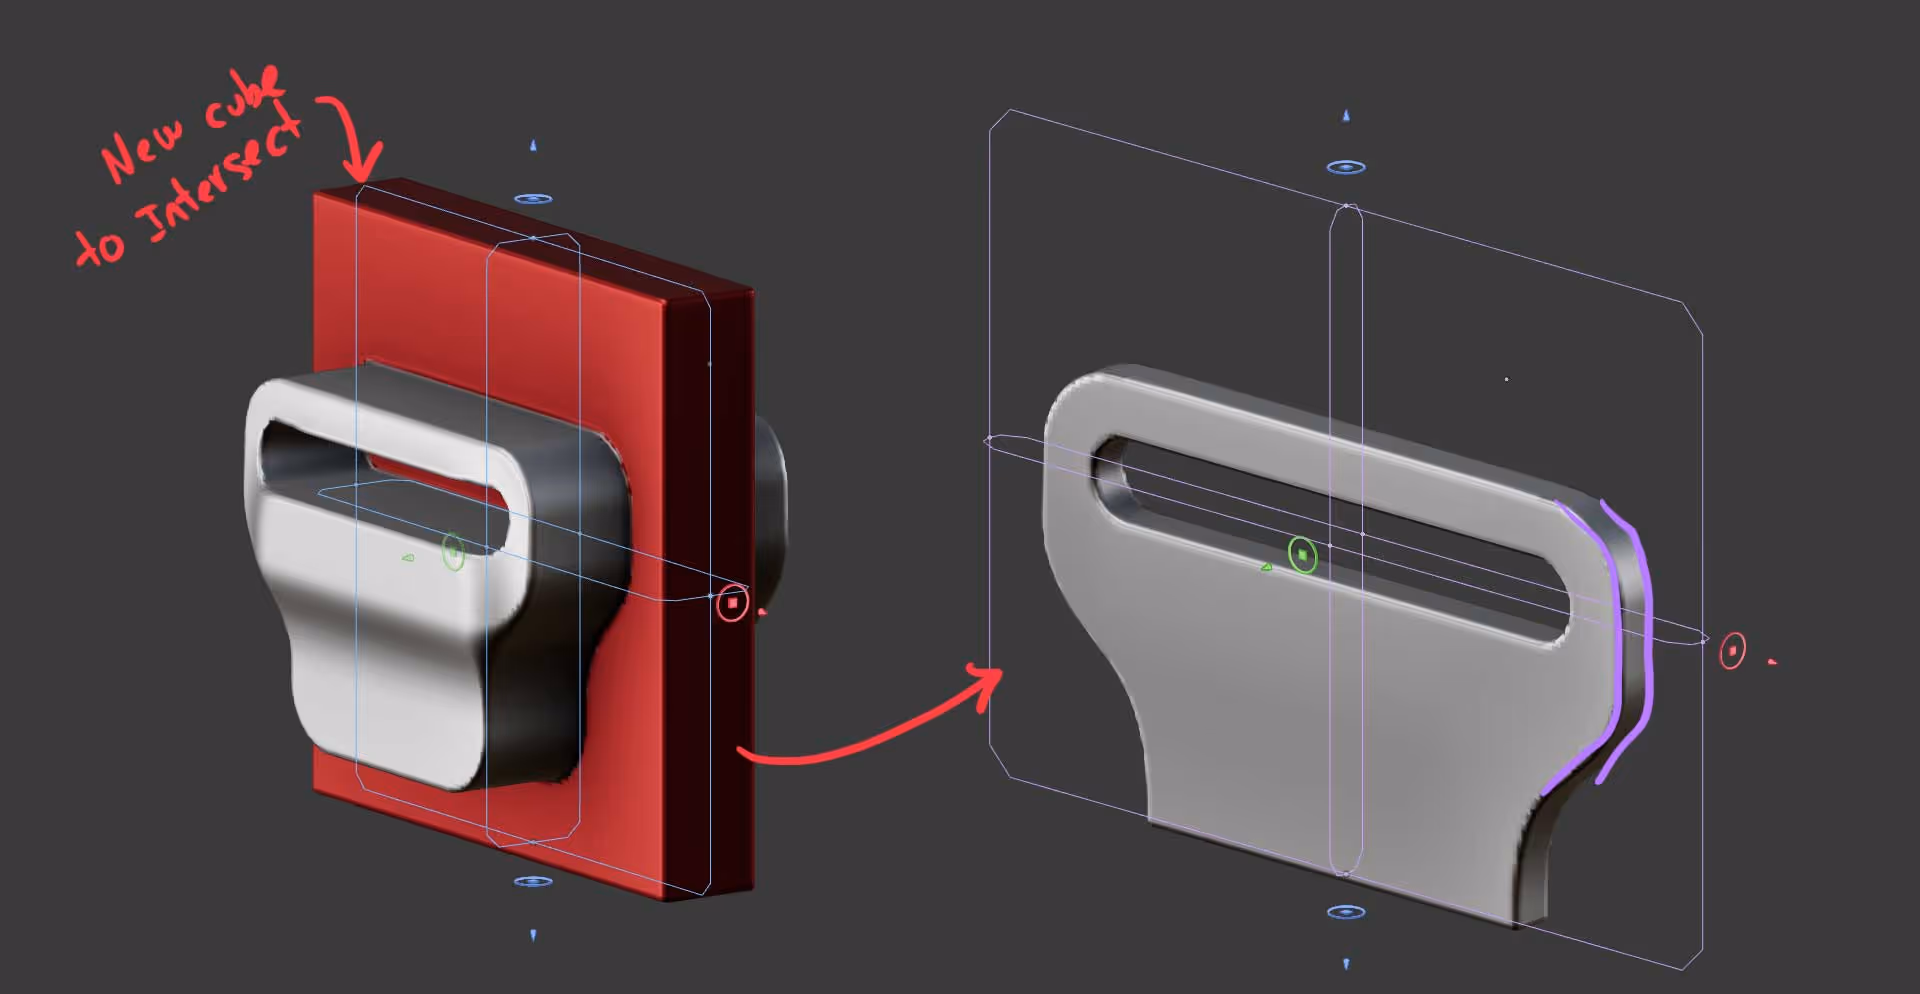
you can then use a another flatter cube and intersect the entire set of cubes to determine the thickness of the piece while keeping all the nice soft transitions:
This is why is important to start with the larger forms to get the volumes right and then you can add smaller primitives to create more complexity with tiny shapes. Extra tip: You can go up and down in resolution… it is also non-destructive so you can work on low res and increase it at the exporting time)
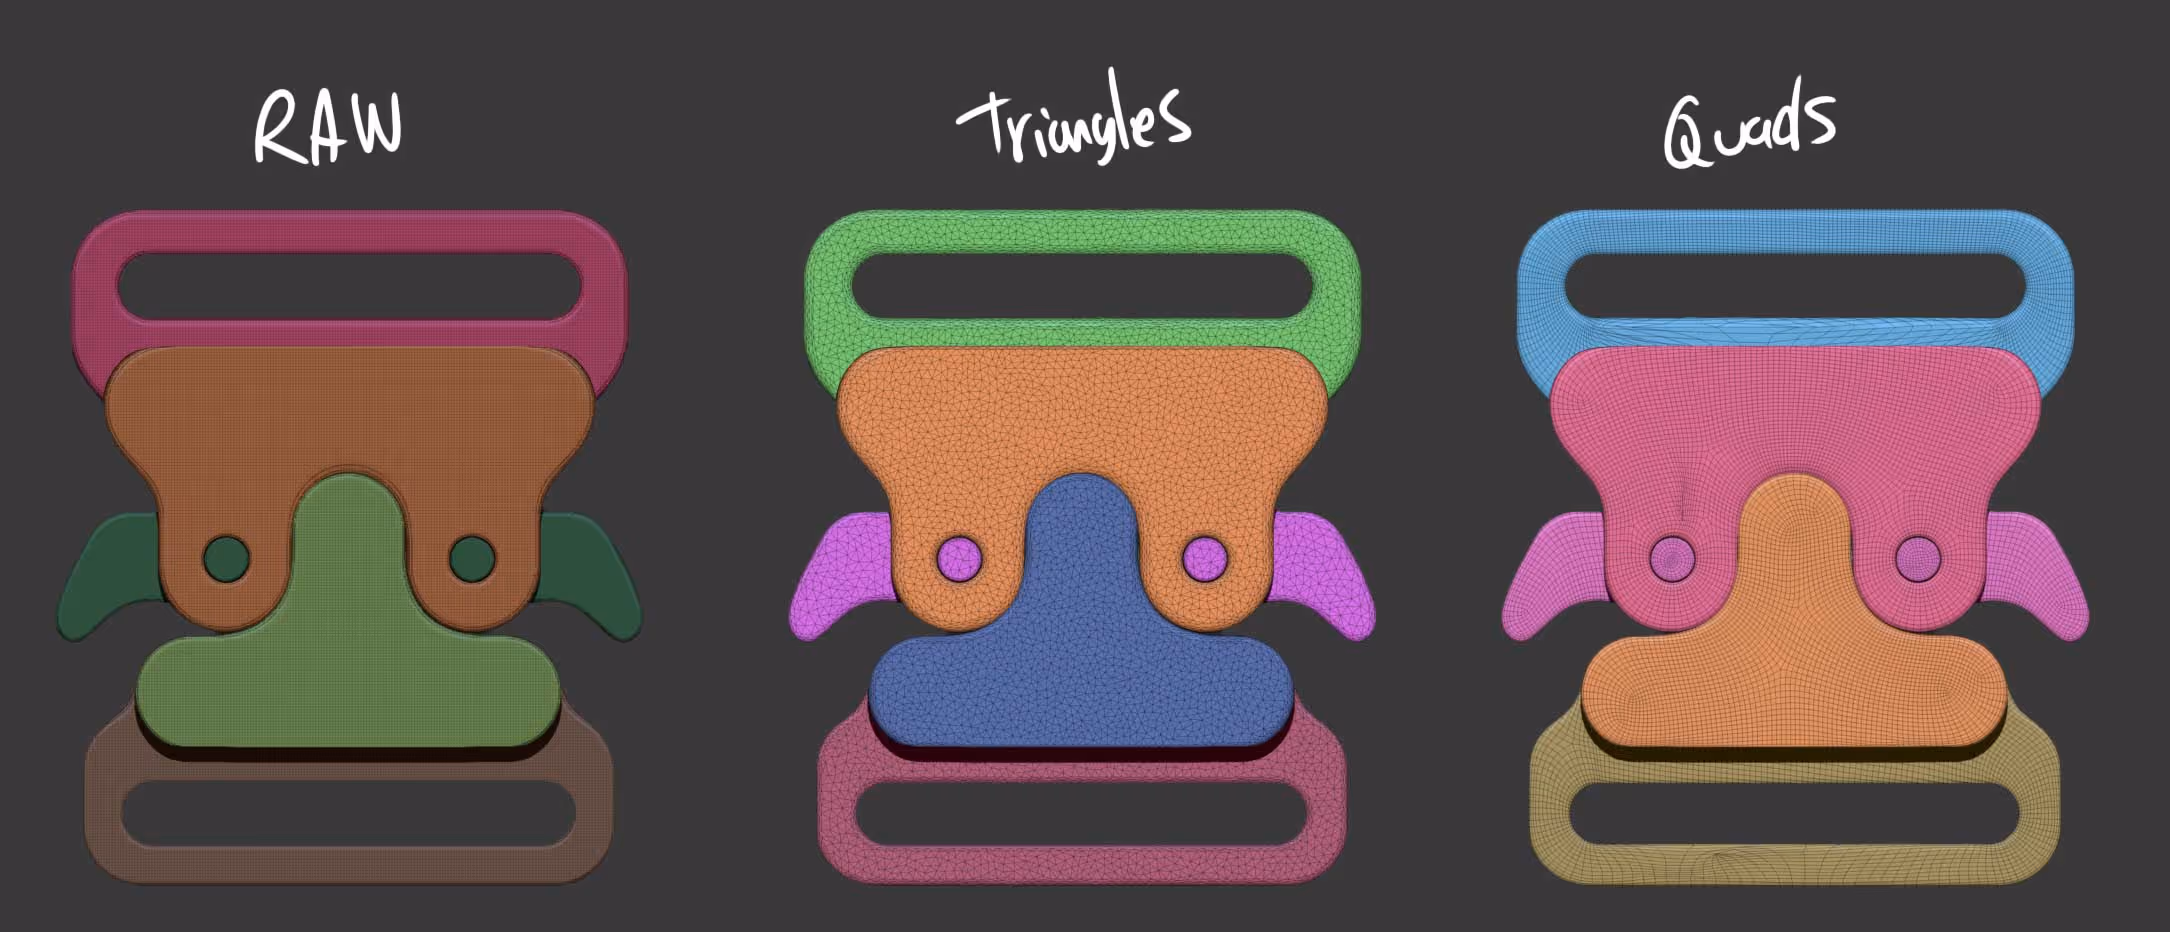
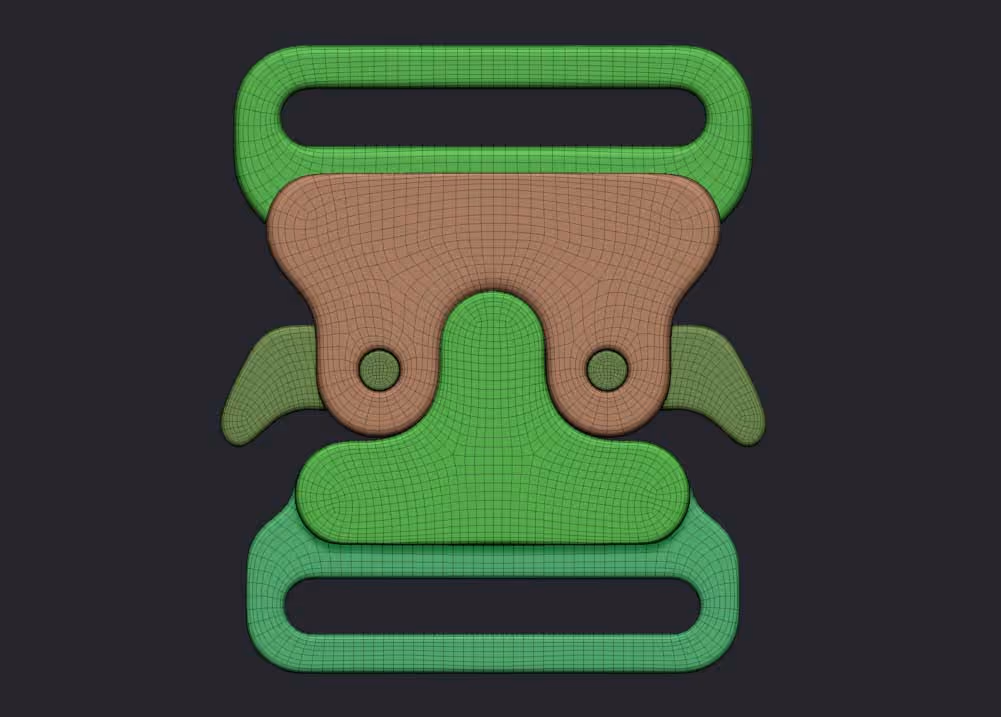
Step 4: Export for Baking and TexturingOk, here is where most people have questions about… what can you do with this model? The truth is that 3D modeler is mainly a concepting tool so the mesh won’t have a perfect topology but is the same as concepting with Dynamesh in ZBrush… so Once your model is ready, you can export it as a Raw mesh, decimated with triangls or even quads:
Bonus Tip: Retopology in ZBrushHere’s a final trick: export your raw mesh which is your ‘high res mesh’ as an FBX. Import it into ZBrush and save a state in the undo history (Ctrl and click on the undo history). Then use ZRemesher for a quick retopology, subdivide the resulting mesh a bit and click on the ‘project history’ button from the Project subpalette to recover the smoothness and details from your raw mesh… is the same process as retopologising a Dynamesh object or similar ;)
Alright, that’s it for this tip…


.webp)

.webp)