I'm going to show you how to automate the custom masking of an object, keep the mask saved in a layer (no need for UVs) and re-use that mask when you need to.
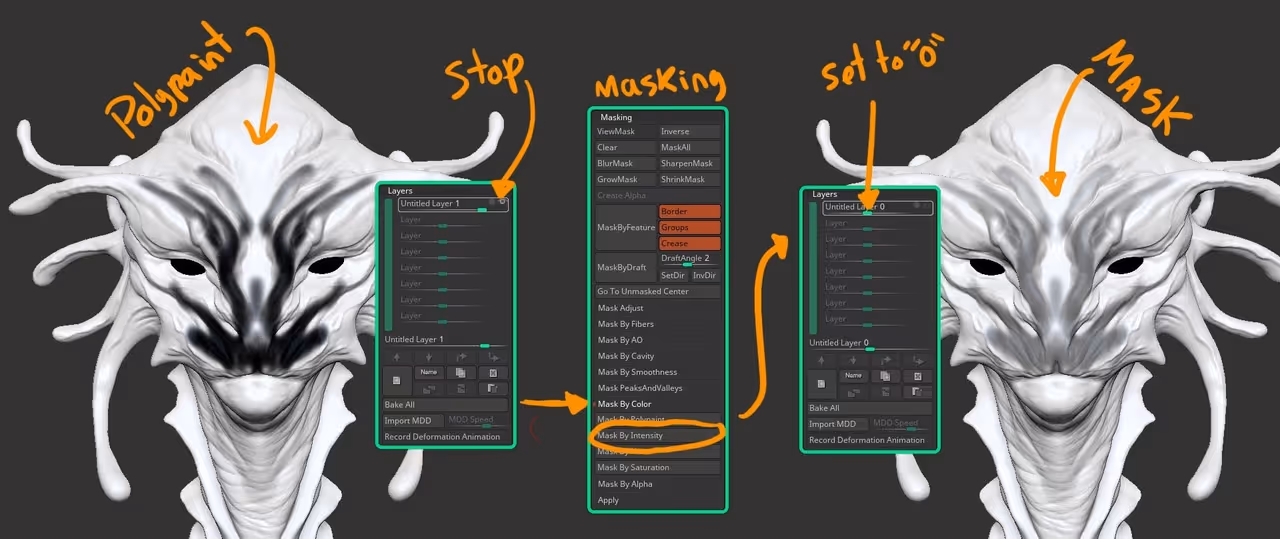
The process we'll automate is to tweak a brush, create a layer for polypaint, paint a mask, stop recording in the layer and extract the mask from the intensity of the polypaint. The key idea is to save the black and white mask in the layer so that it can be retrieved at any point... Let's do it:
- Before recording the macro, make sure you have the Move brush selected (or something other than the Standard Brush). Also, make sure you choose a random colour other than black or white.
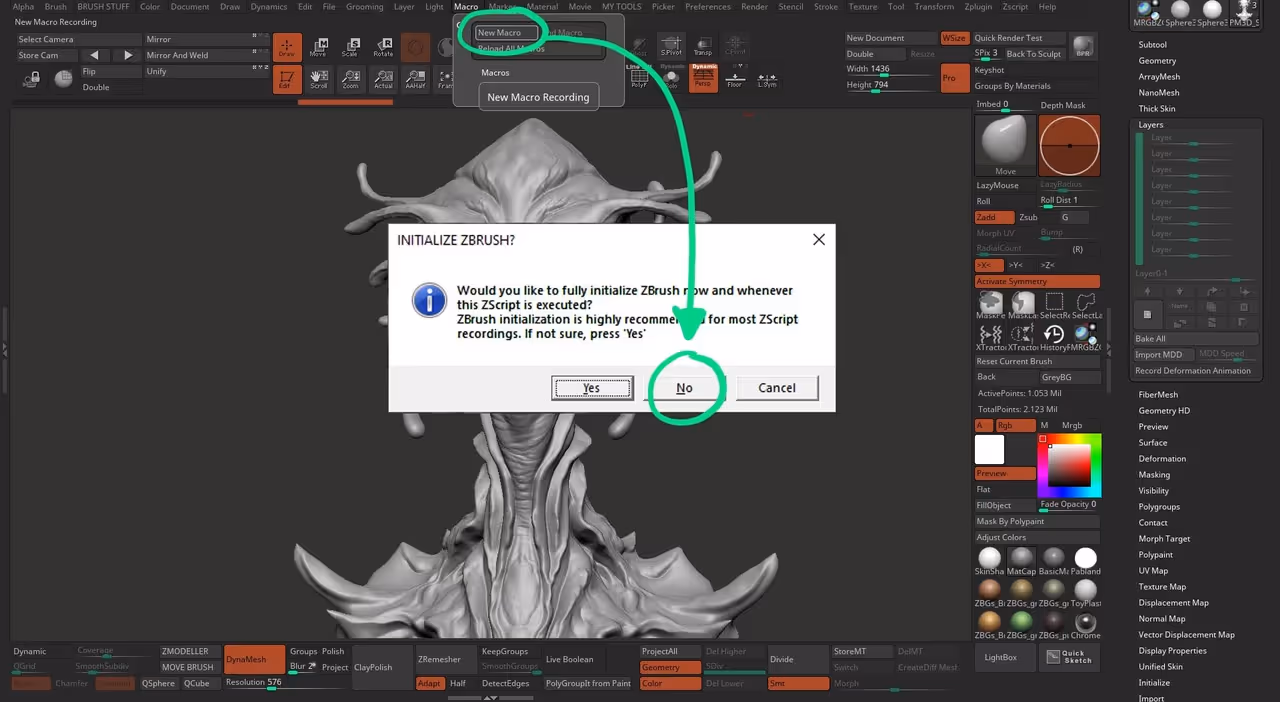
- Now we'll go to the Macros palette and create a new macro. Click 'no' from the pop-up you get.
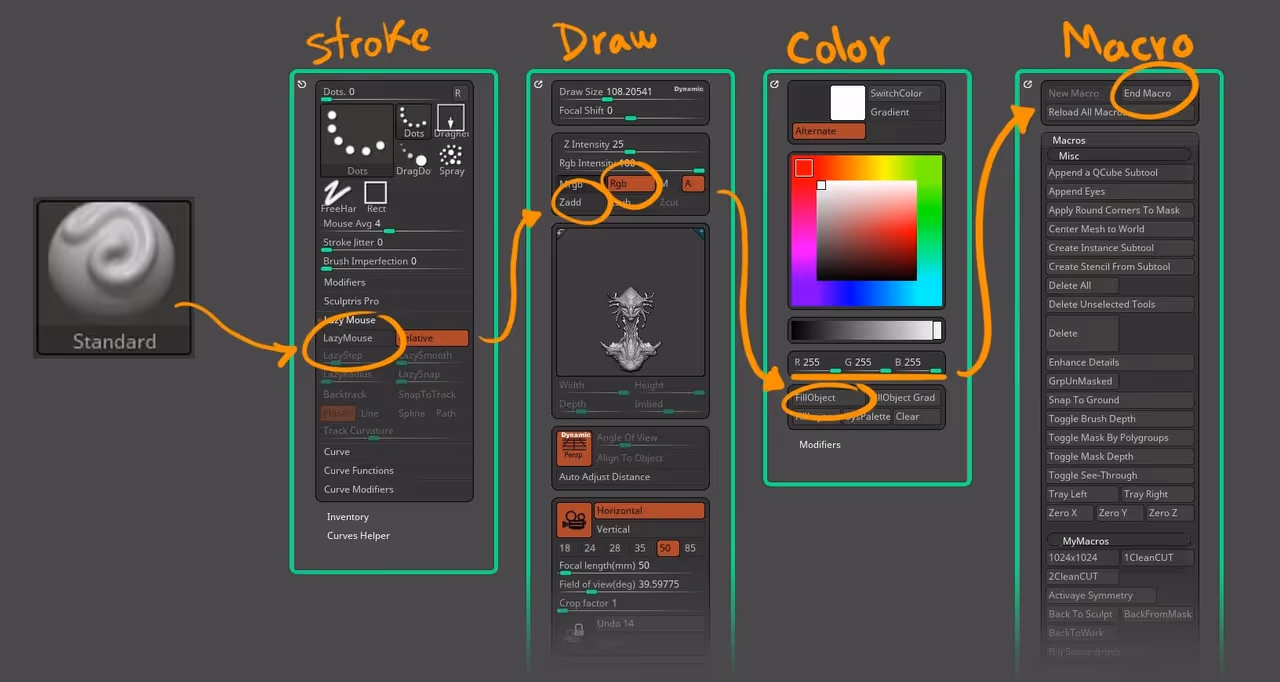
- From this point... anything you click or do in ZBrush will be part of the macro, so make sure you only do the steps required... First, we need to select the standard brush and convert it to a polypaint brush, so select the Standard Brush (don't use shortcuts, click on the brush thumbnail and select it manually).
- Now, from the stroke palette, turn off the Lazy mouse (up to you), From the Draw palette, turn ZAdd off and RGB on... that's it for the brush.
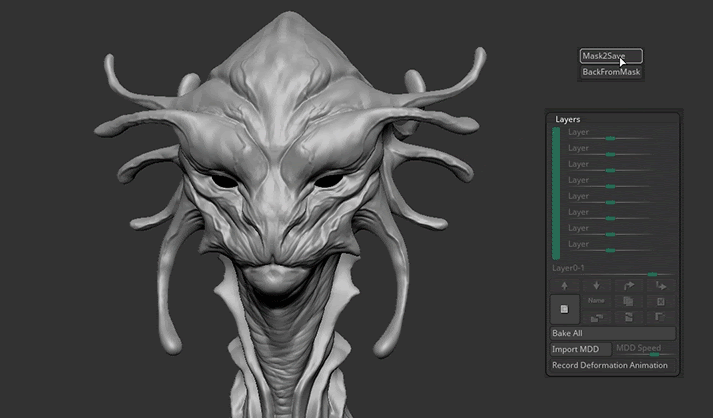
- Click on the 'New Layer' button to create a new layer, it'll start recording by default. The next thing is to go to the Colour palette and select a pure white colour, then click 'Fill object' and then select a pure black colour.... that's it, we now have the first macro setup... go to the Macro Palette, click on 'end macro' and give it a name in the Macros folder of ZBrush.
- At this point, you can just start painting the mask with black and it'll be recorded in the layer. So all we have to do now is create another macro to go back to where we were... So click on New Macro like before.
- First, we need to reset the Standard brush, so from the Brush palette, at the very bottom of the palette click on 'Reset current brush'.
- Now, to grab the mask from the polypaint, we need to stop recording on the layer, so just click on the 'record' icon from the layer... Then go to the Masking subpalette (from the tool palette) and expand the 'Mask by colour' section. Click on the Mask by intensity and that should give you a mask based on the difference between the black and white colours we used in the polypaint.
- Finally, go back to the layers and click on it and type '0' to 'hide' the polypaint and view the mask.... that's it. go ahead and click on 'end macro' and save it.
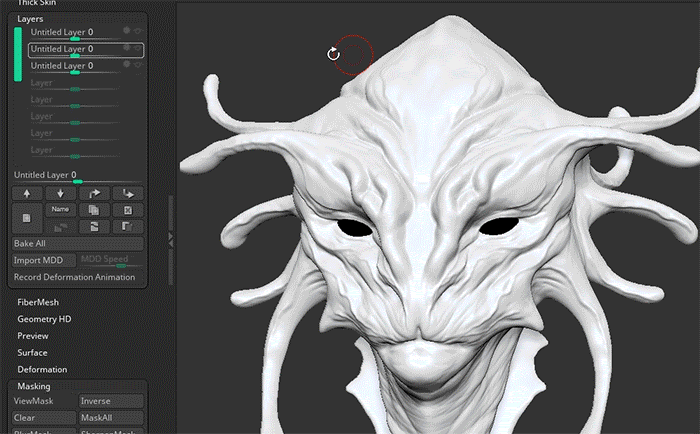
ZBrush will create the macros with the name you gave to the file and you can now arrange your two buttons in your UI for easy Access... what's awesome about this process, is that now you can click the first macro and work on an intricate mask pattern and it will be saved on its own layer. You can repeat the process multiple times for multiple masks and every mask will be saved on different layers.... what even more useful, is that you can toggle any layer (or combining them) and produce a new mask by using the 'mask by colour' > Intensity feature!
Obviously you can add or remove steps from this process to fine-tune your macros but this is a super handy feature in ZBrush that allows you to customise and automate your process!


.webp)

.webp)