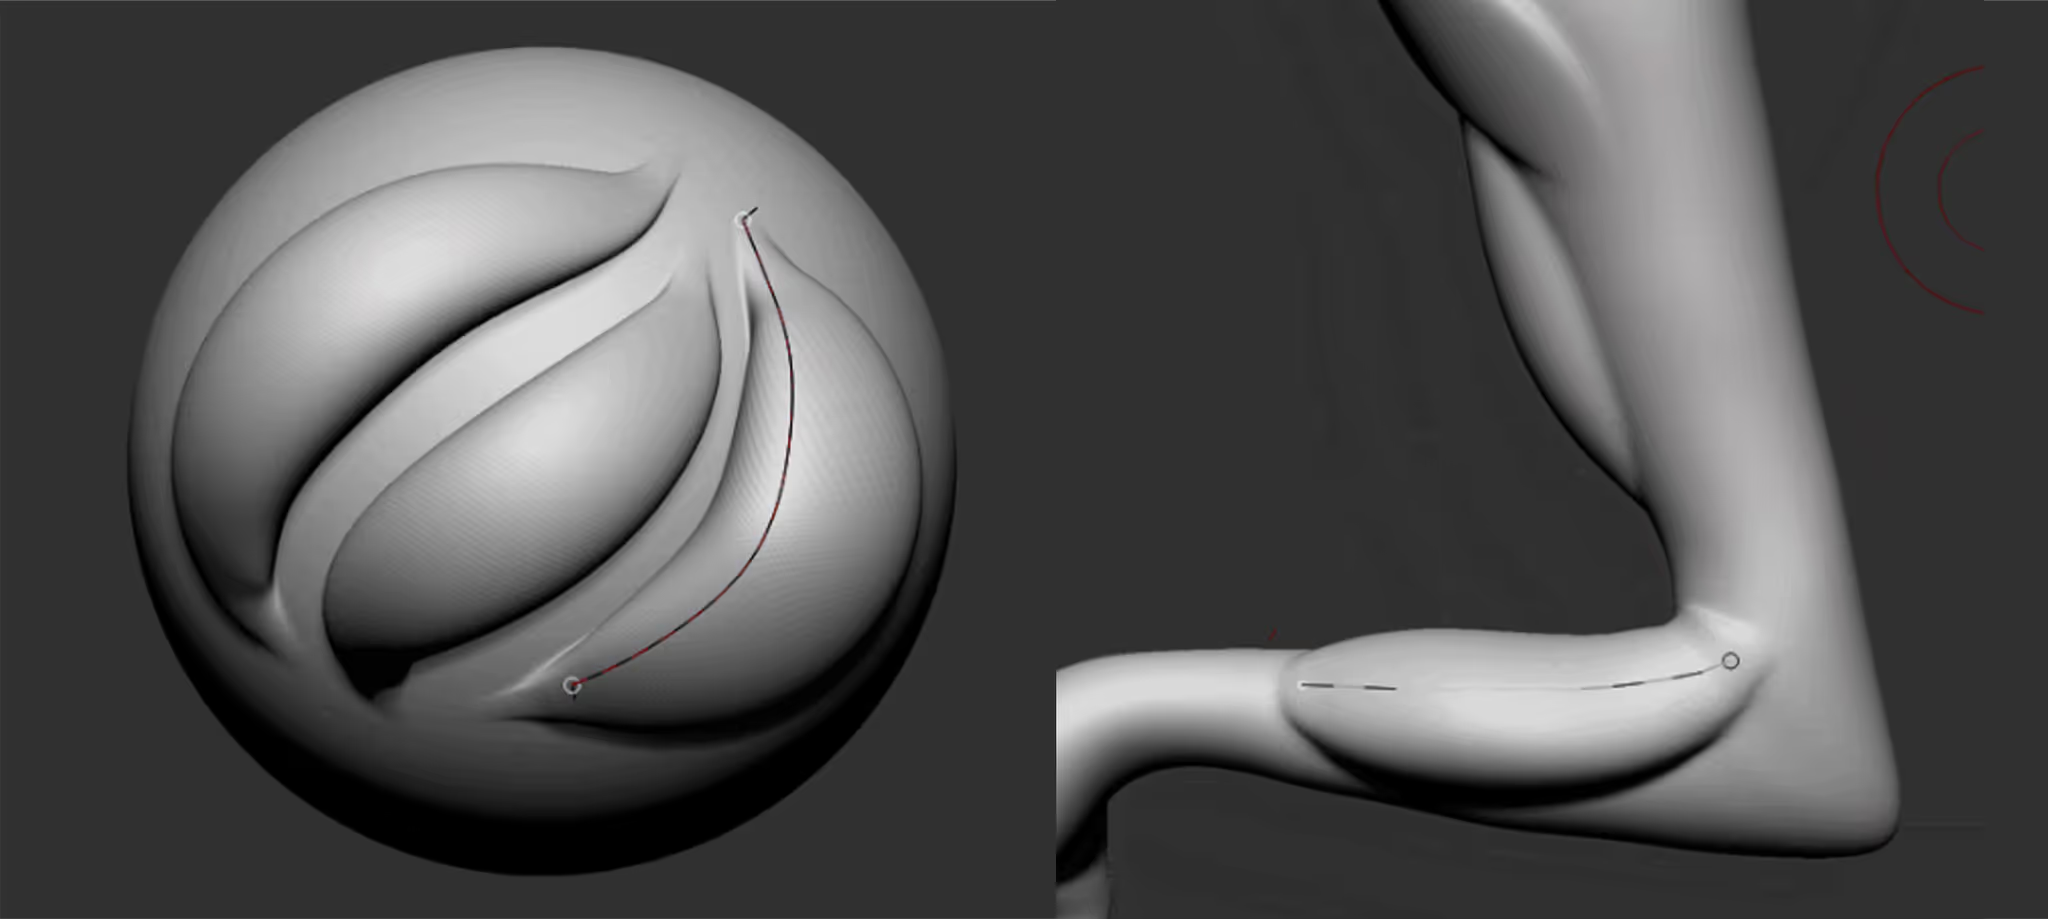
This brush basically allows you to draw a curve in the ‘direction of a muscle’ and then you can pull the end of the curve and you’ll see the volume forming and inflating towards the centre of the curve you drew.
So in context, I was using it to add volumes on a creature project but it could work really well to block out some muscles like the biceps on a creature’s arm:
You can download the brush here if you want to try it out (works with ZBrush 2022.0.5 and above).
The next resource is similar but the advantage is that it adds new geometry so you can quickly block out some muscles and then adjust them with the move brush. This one is pretty simple actually and you can create it yourself from the CurveTubes brush.
The only features you need to update is to change the Once Z to Cont Z from the Picker palette so that the curve follows the surface of the volume. Then you can enable the Size switch in the Stroke palette and adjust the profile curve (that is how you get the tapering effect).
Also as an extra tip that you probably didn’t know, you can adjust the value from the ‘Brush Modifier’ slider from the Modifiers section of the brush palette, and this value will adjust the number of subdivisions that are created when you draw the tube!
And finally for the third trick… this is one of my ultimate favourite things when sketching something. This next tip is the closest equivalent to adding ‘chunks of clay’ when working with traditional clay, but in 3D.
First, choose the MeshBalloon brush. This brush is actually a Masking brush so when you select it, it will become your active brush when you press Ctrl on your keyboard… The cool thing about the brush is that you can click and drag while holding control to quickly create a volume base on the area masked:
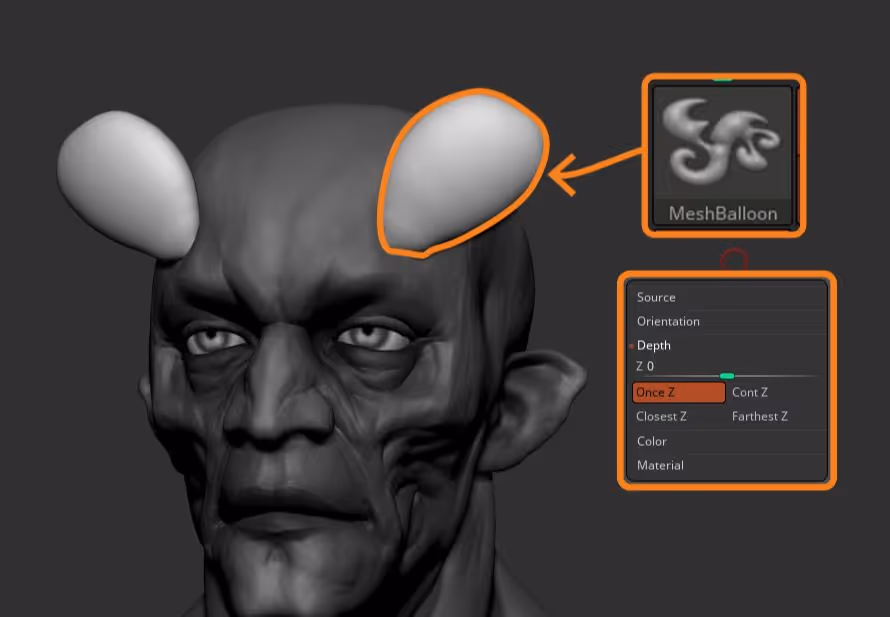
Now, the only step you need to make this brush the most useful blocking brush, is to hold Ctrl (so you can access the brush), then go to the Picker palette and switch from ‘Once Z’ to ‘Cont Z’. This simple update to the brush will allow you to draw the new volumes while following the surface of the volume:
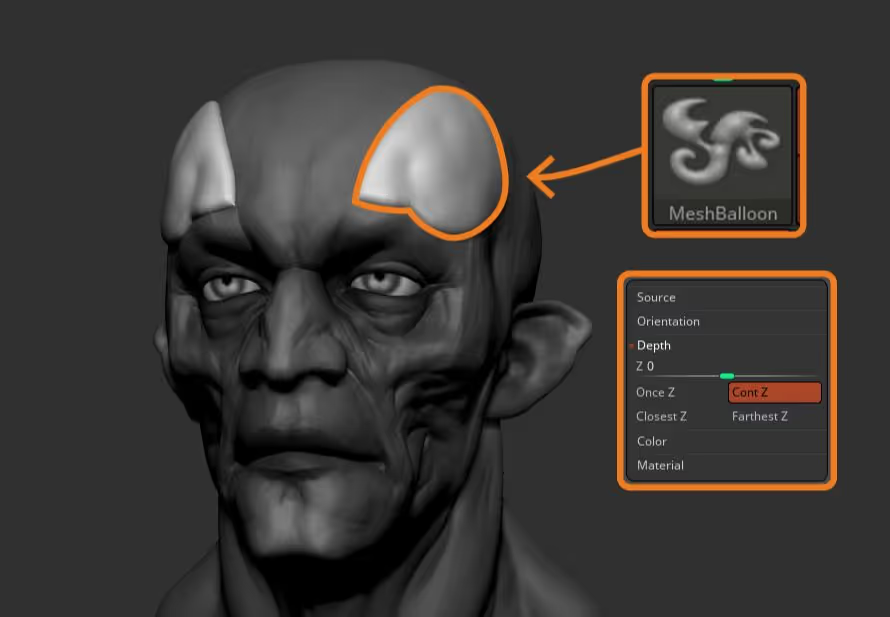
So with this brush you can very easily add quick one pieces of clay to your sketches in 3D. Even better, if you select the move brush you can adjust each ‘chunk of clay’ you add before you add the next one since every time you add one, the rest gets automatically masked!


.webp)

.webp)