
This is something that you can even do from the ZBrush BPR so I’ll use it as an example, but it works great for anything. This is a simple head rendered in ZBrush with the Normal Matcap and it is all you need:
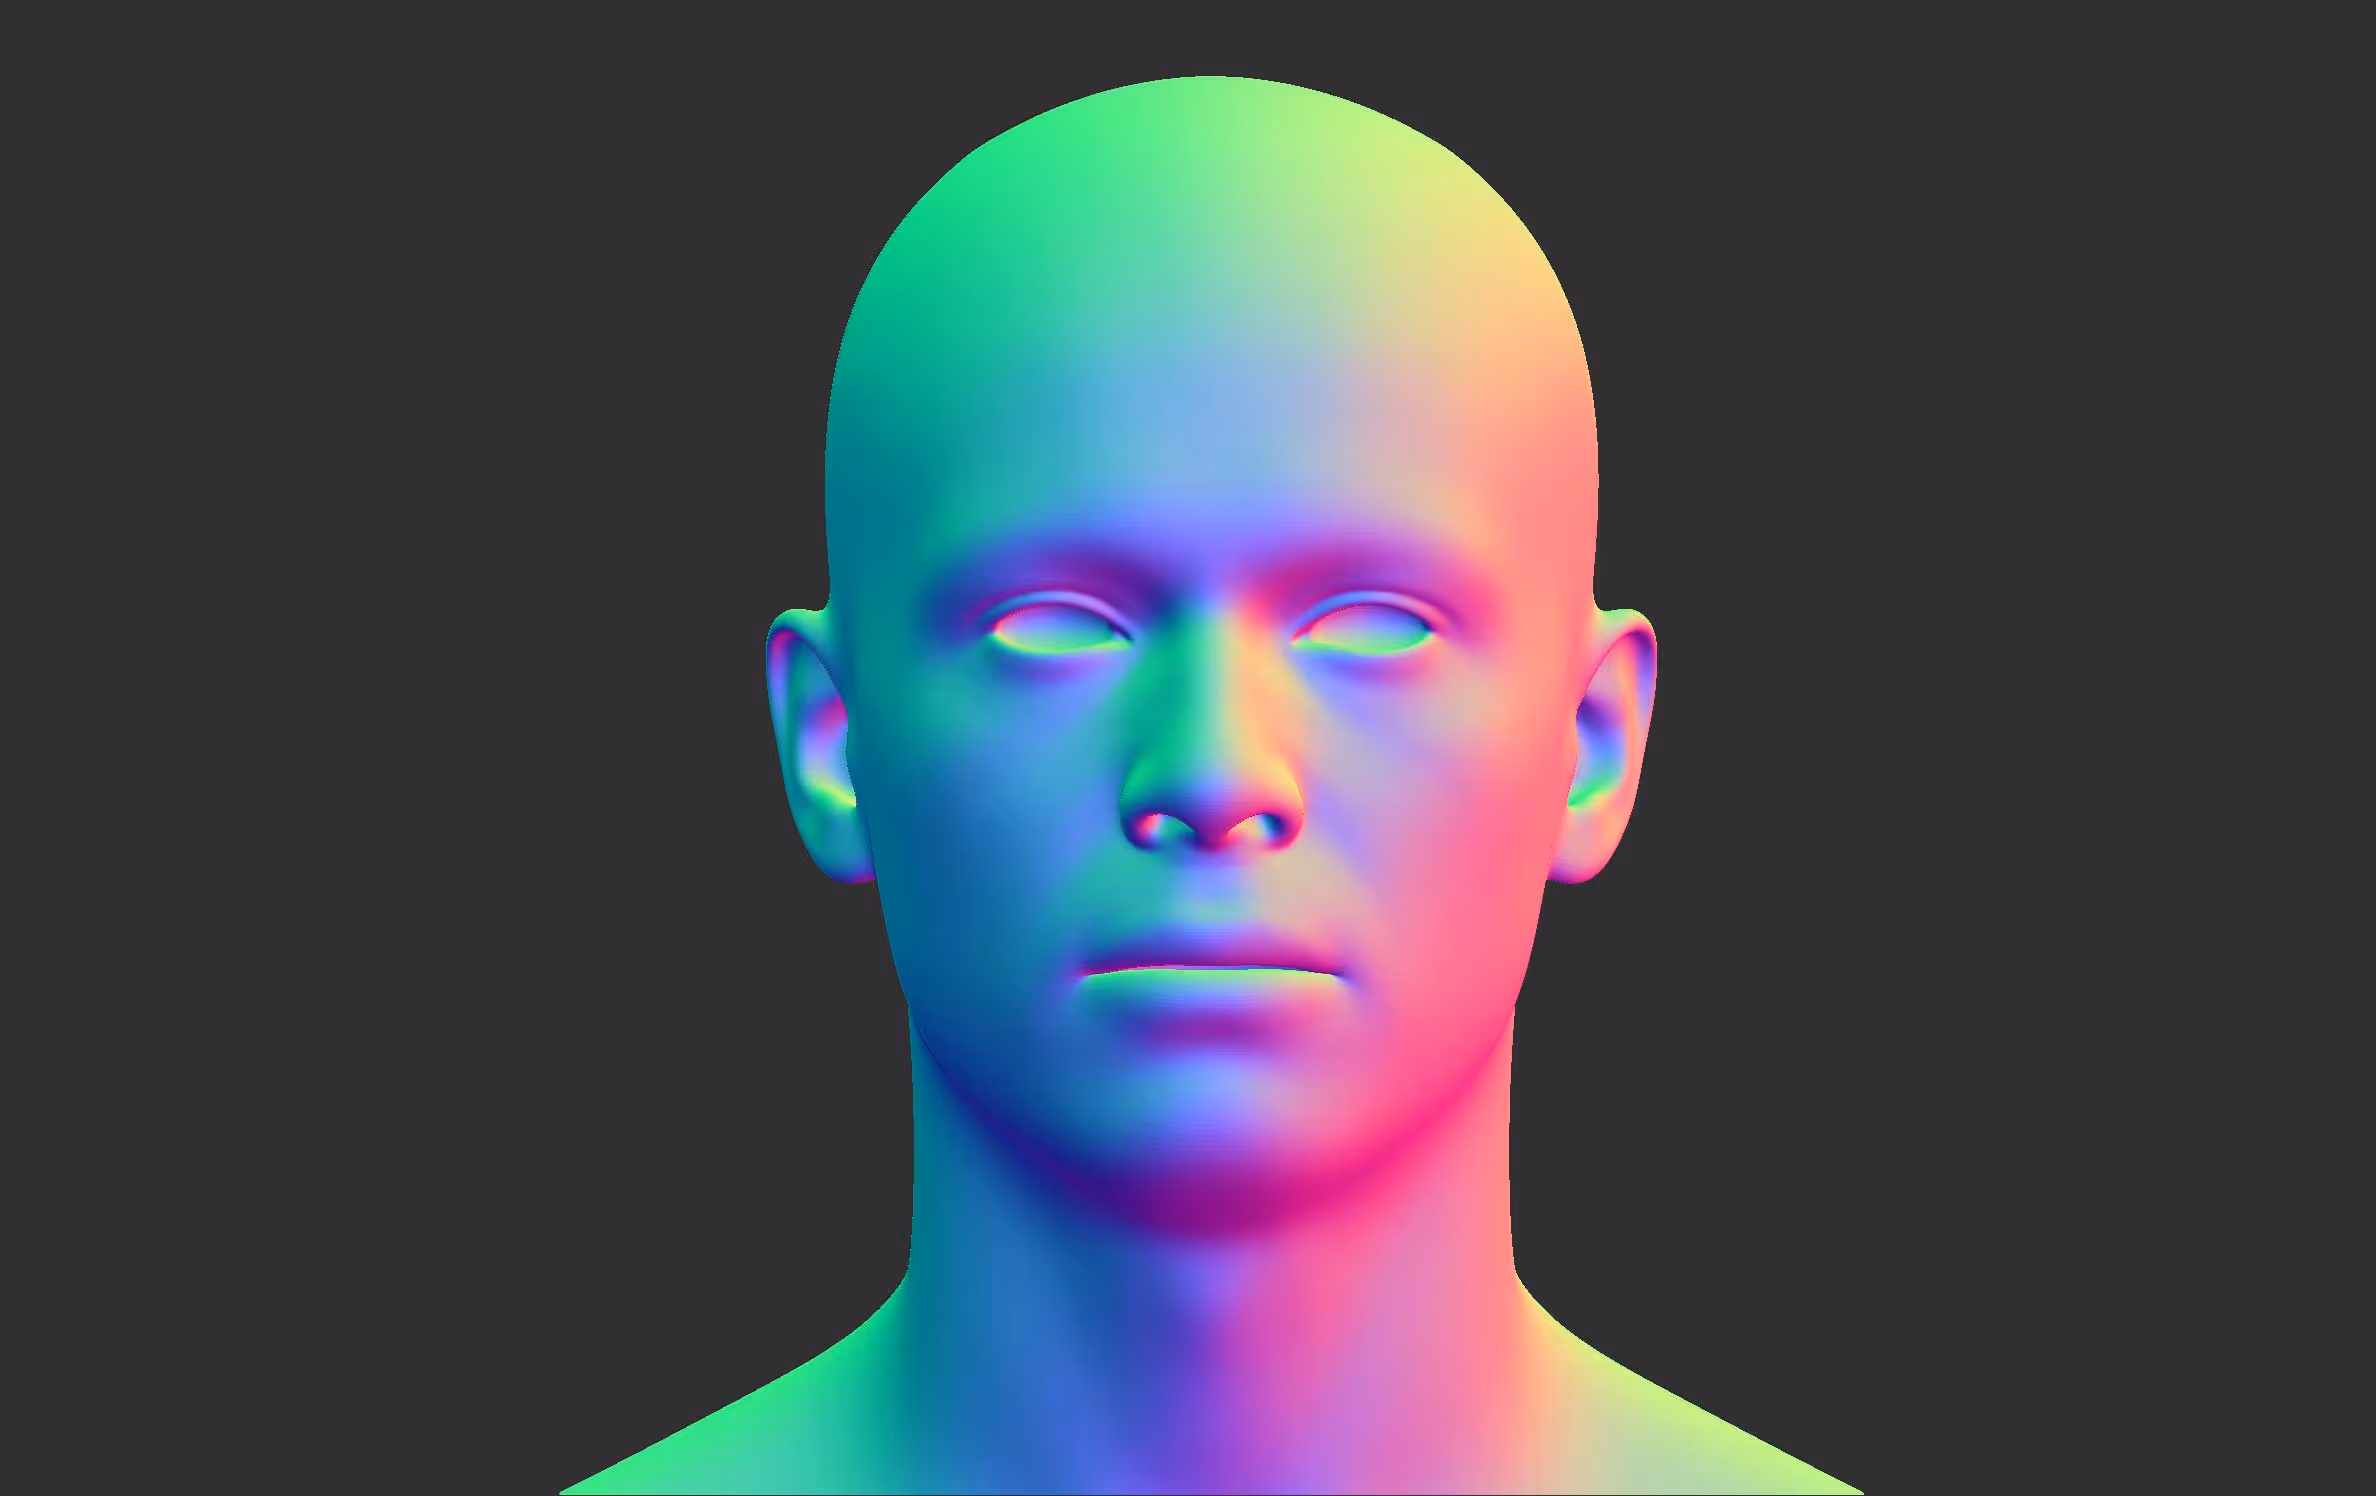
So there is the trick straight away… The normal pass render is ultimately a ‘map’ of the volume defined by three channels: RGB. Red (light coming from the right), Green (light coming from the top), and Blue (light coming straight from the camera view). The additional hues you see (pink, yellow, etc) are hues that are produced by the combination of the ‘three light sources’.
Anyway… with a normal pass, you can use the Select > Select Colour range tool in Photoshop to pick a specific hue from the image which will represent the specific direction of the light based on the surface normal… This is literally a single JPEG and choosing different colours from the normal pass:
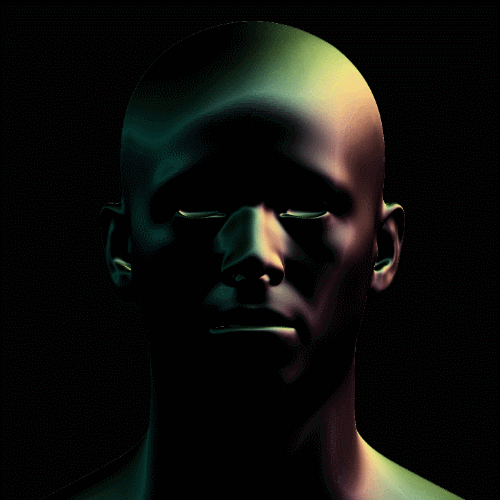
The point is that you can use that normal pass to select a colour (or light source angle) and create a mask from the selection range. This way you can basically re-light a render using colour balance and levels in Photoshop.

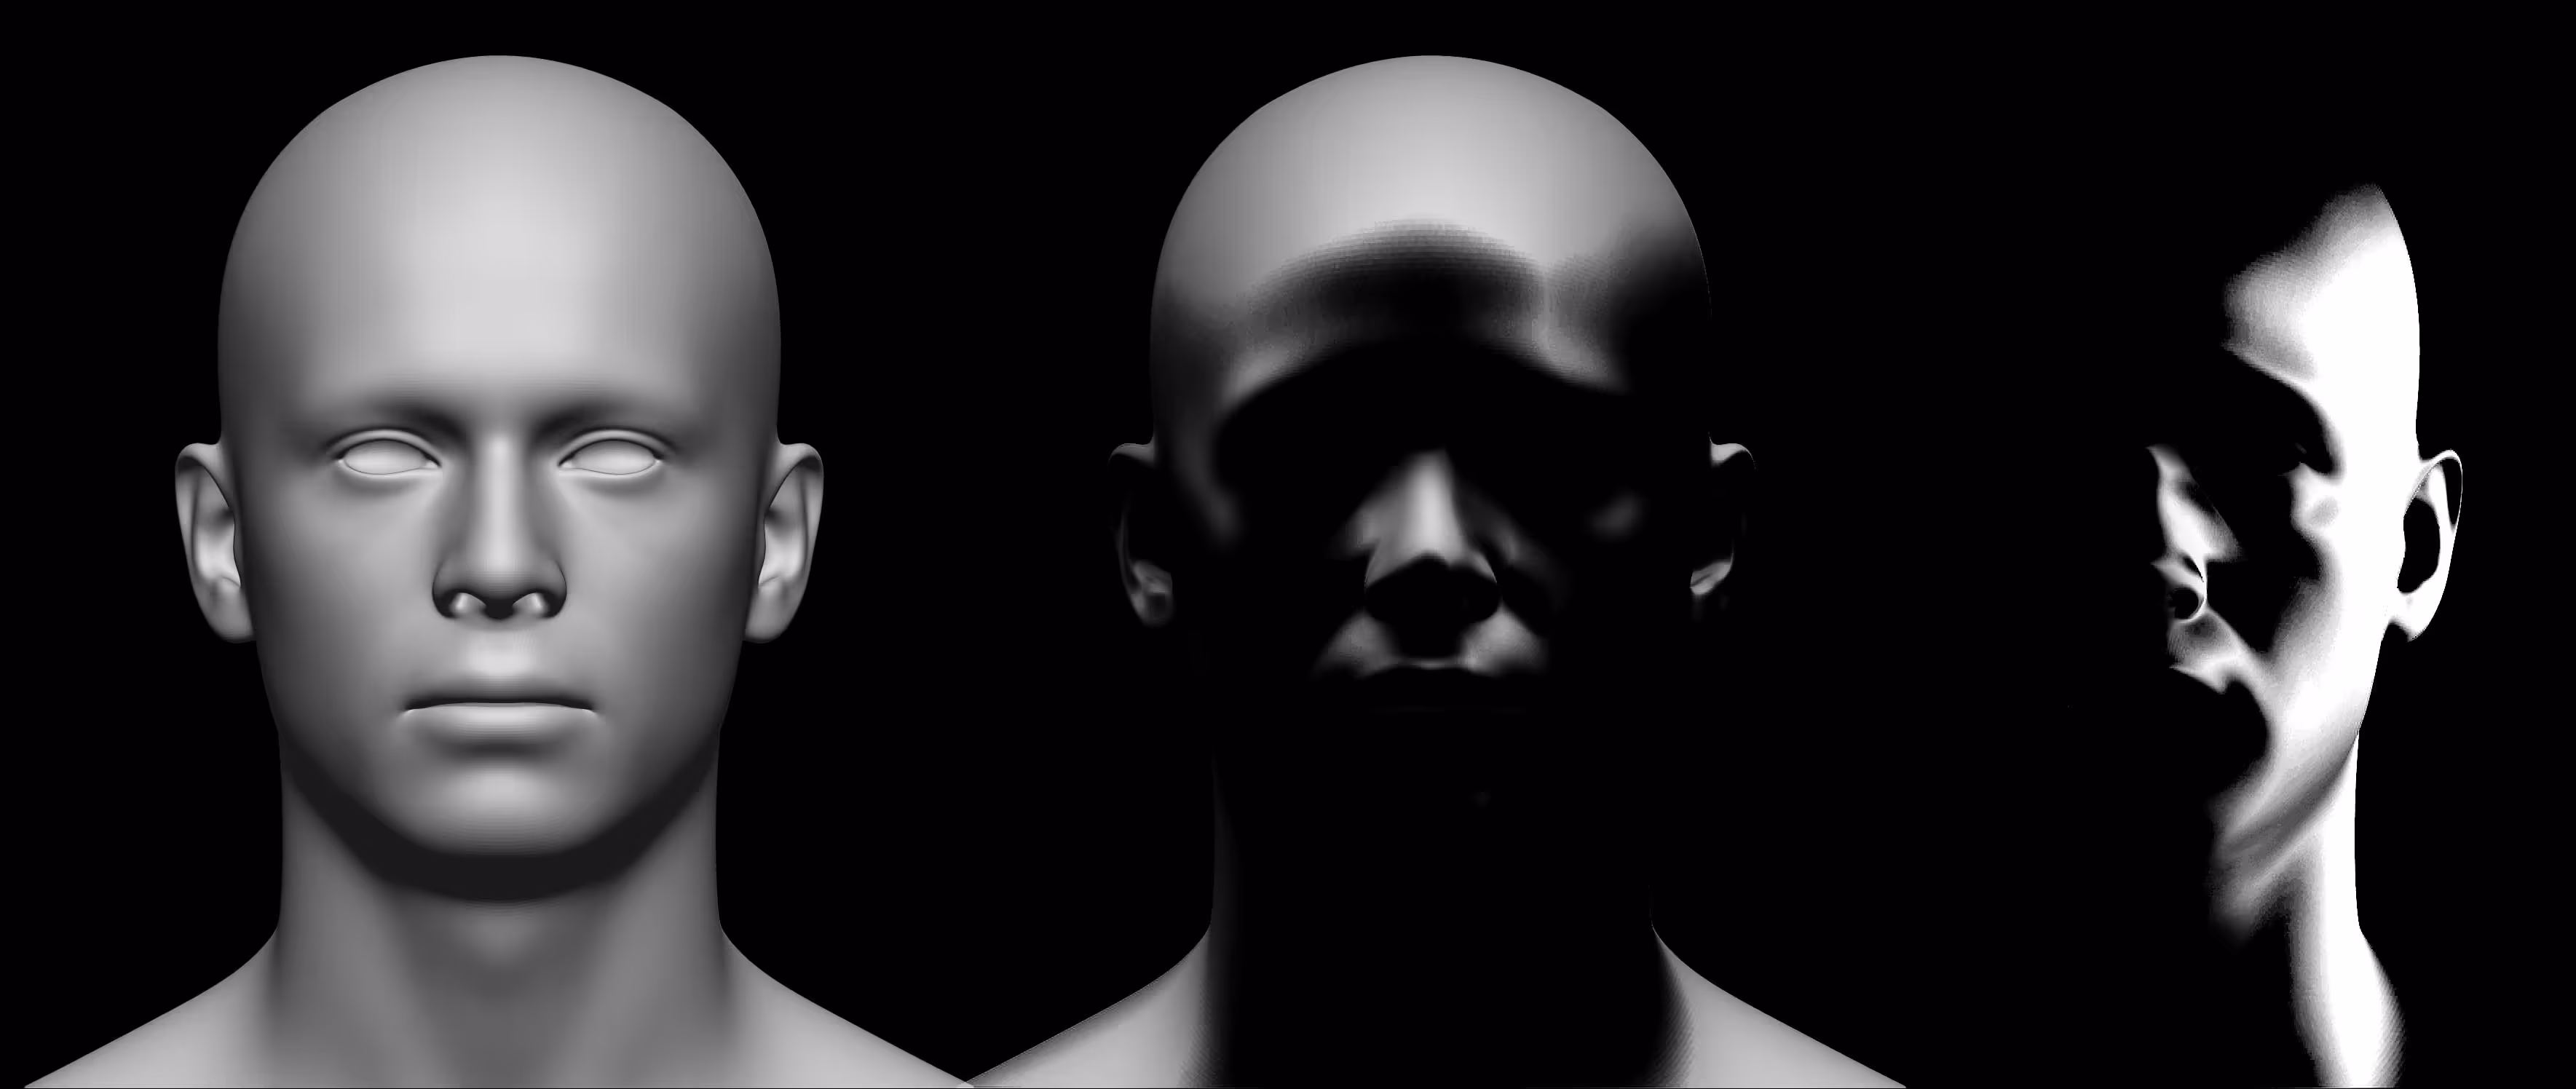
You can completly change the mood of the original render. Here is a simple render of the head on the left, and a couple of simple masks generated from the normal pass:
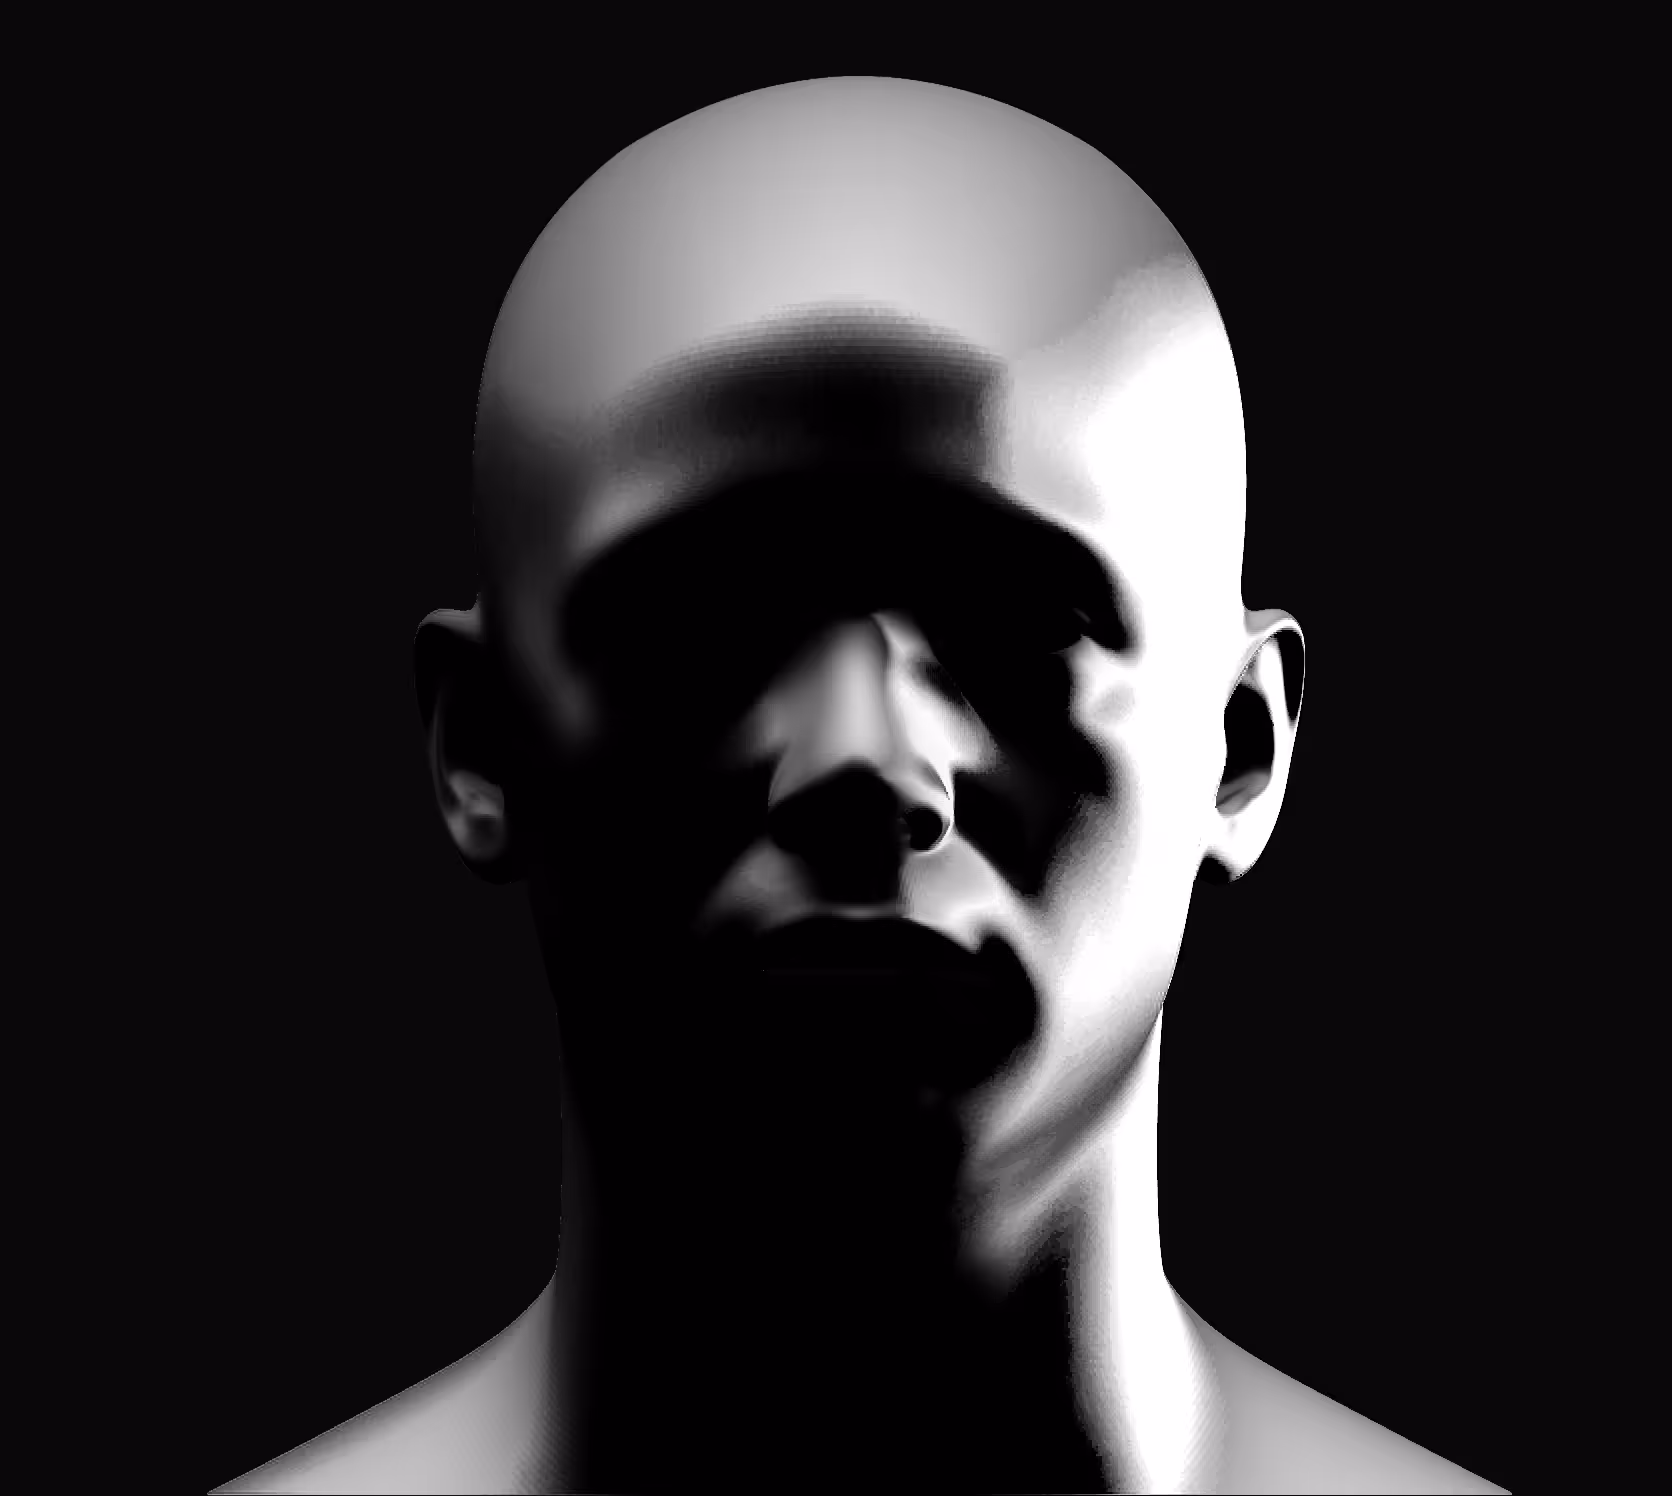
Then I just set one to multiply and the other one to screen and here is a very different type of render:
That’s it! A very simple but powerful technique that you can use in any sort of render. I always render a normal pass even if I don’t end up using it.


.webp)

.webp)