Detailing Brushes
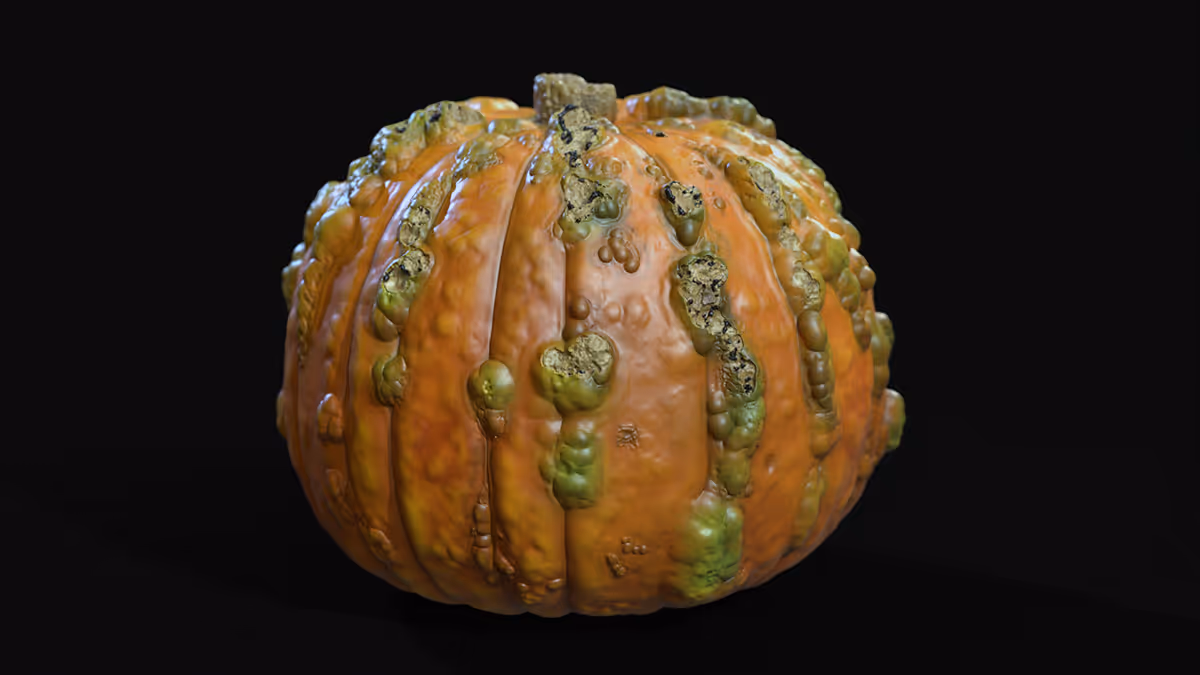
So the first step is to block out the general shape of the pumpkin. For this you can take a 3D Sphere, make it a polymesh 3D and use the Slice Curve brush to cut up the sphere to create polygroups for those prominent indentations of the pumpkin.
Once you polygroups, you can use the PanelLoops feature to turn each of the polygroups into its own mesh with thickness… you can play with the sickness but anything other than 0 should be fine.
Once you have the ‘cuts’ we can shape it a bit better using Deformers. I used the taper deformed to squash the sphere a bit and then used the move brush to push in the top and bottom of it so it looked more like a pumpkin.
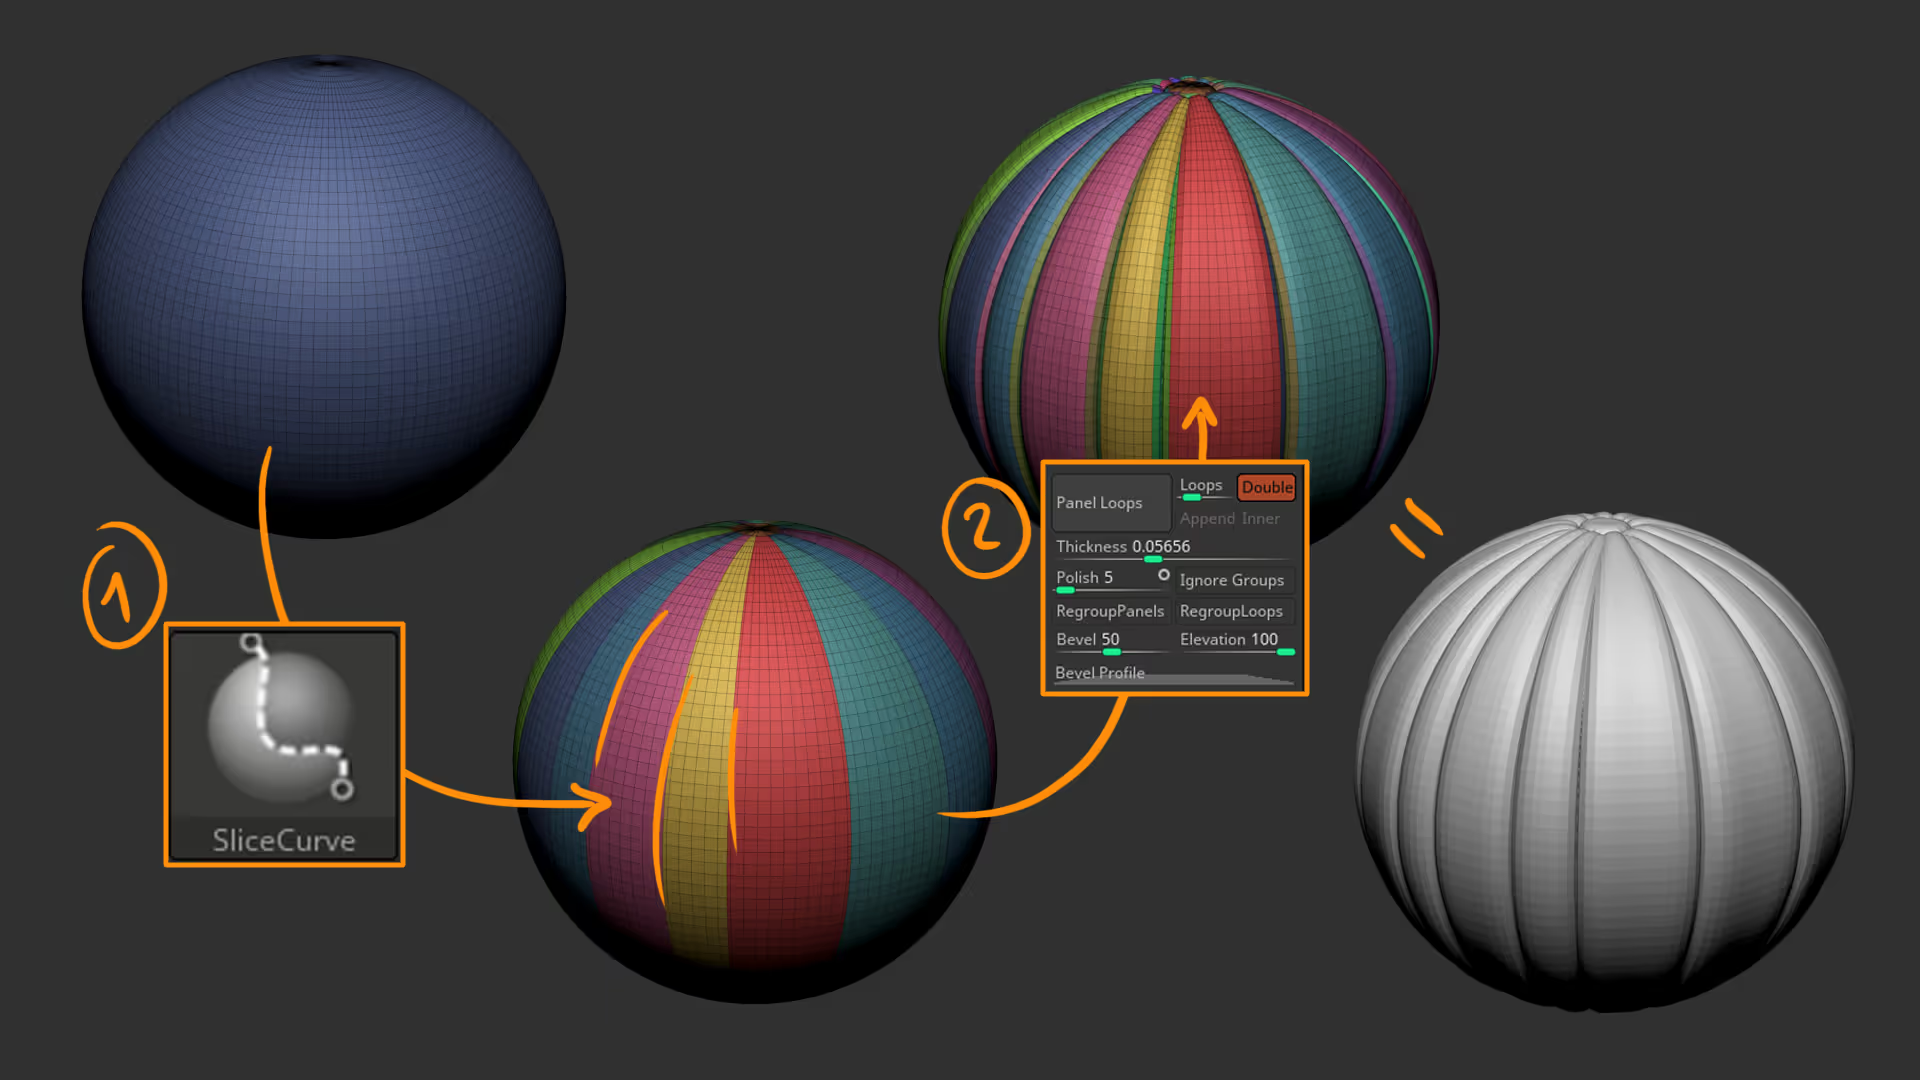
The next step is to add a bit of surface variation… I subdivided the geometry and with the Standard brush, the Spray stroke and Alpha 07 sculpted some large bumps around the surface to make it more uneven (I used a large brush and low Z intensity).
The final pass was to Dynamesh the whole thing into a high resolution to make it into a solid mesh and add a bit of Surface noise. This will add a bit of sharpness to the details:
At this point, you should have a decent base and you can start with the more manual sculpting… in my case, I wanted to replicate some weird creepy pumpkin I found in my local market so I created 4 custom brushes to help me achieve the effect (I’m sharing them with you too).
💡 Important: These 4 brushes I’m going to show you work much better with sculptris pro enabled.
The first brush is the Pumpkin blubber: This brush will help you create those ‘inflated’ growths on the pumpkin skin (also ideal for creepy creature stuff). The secret of this brush is to go over the same are in circular motions with multiple strokes, every new stroke will push and inflate the geometry more:
The second brush is called Pumpkin blubber2: This brush is just like the first one but it allows you to have control. This one is ideal for more ‘featured’ blobs and you can use the pressure in your tablet to control the ‘thickness’ of the stroke to make it more prominent or more like a weird vein:
Then we have the Pumpkin Carver: this one is pretty simple… similar to a ‘clay brush’ that pushes geometry in, but this brush has an inverted inflate effect which is pretty strong so every time you add a stroke it will push the geometry more and more. Be careful with this one because it can cause some very thin areas that look weird so keep your smooth brush handy to fix those areas.
And finally, we have the unsharpen knife… this is like a very strong Dam Standard brush or similar but it produces a very uneven an organic edge around the deep cut. You can use this to add cracks or cuts into the pumpkin… lots of different uses for this one, just make sure you have sculptris pro enabled as well ;)
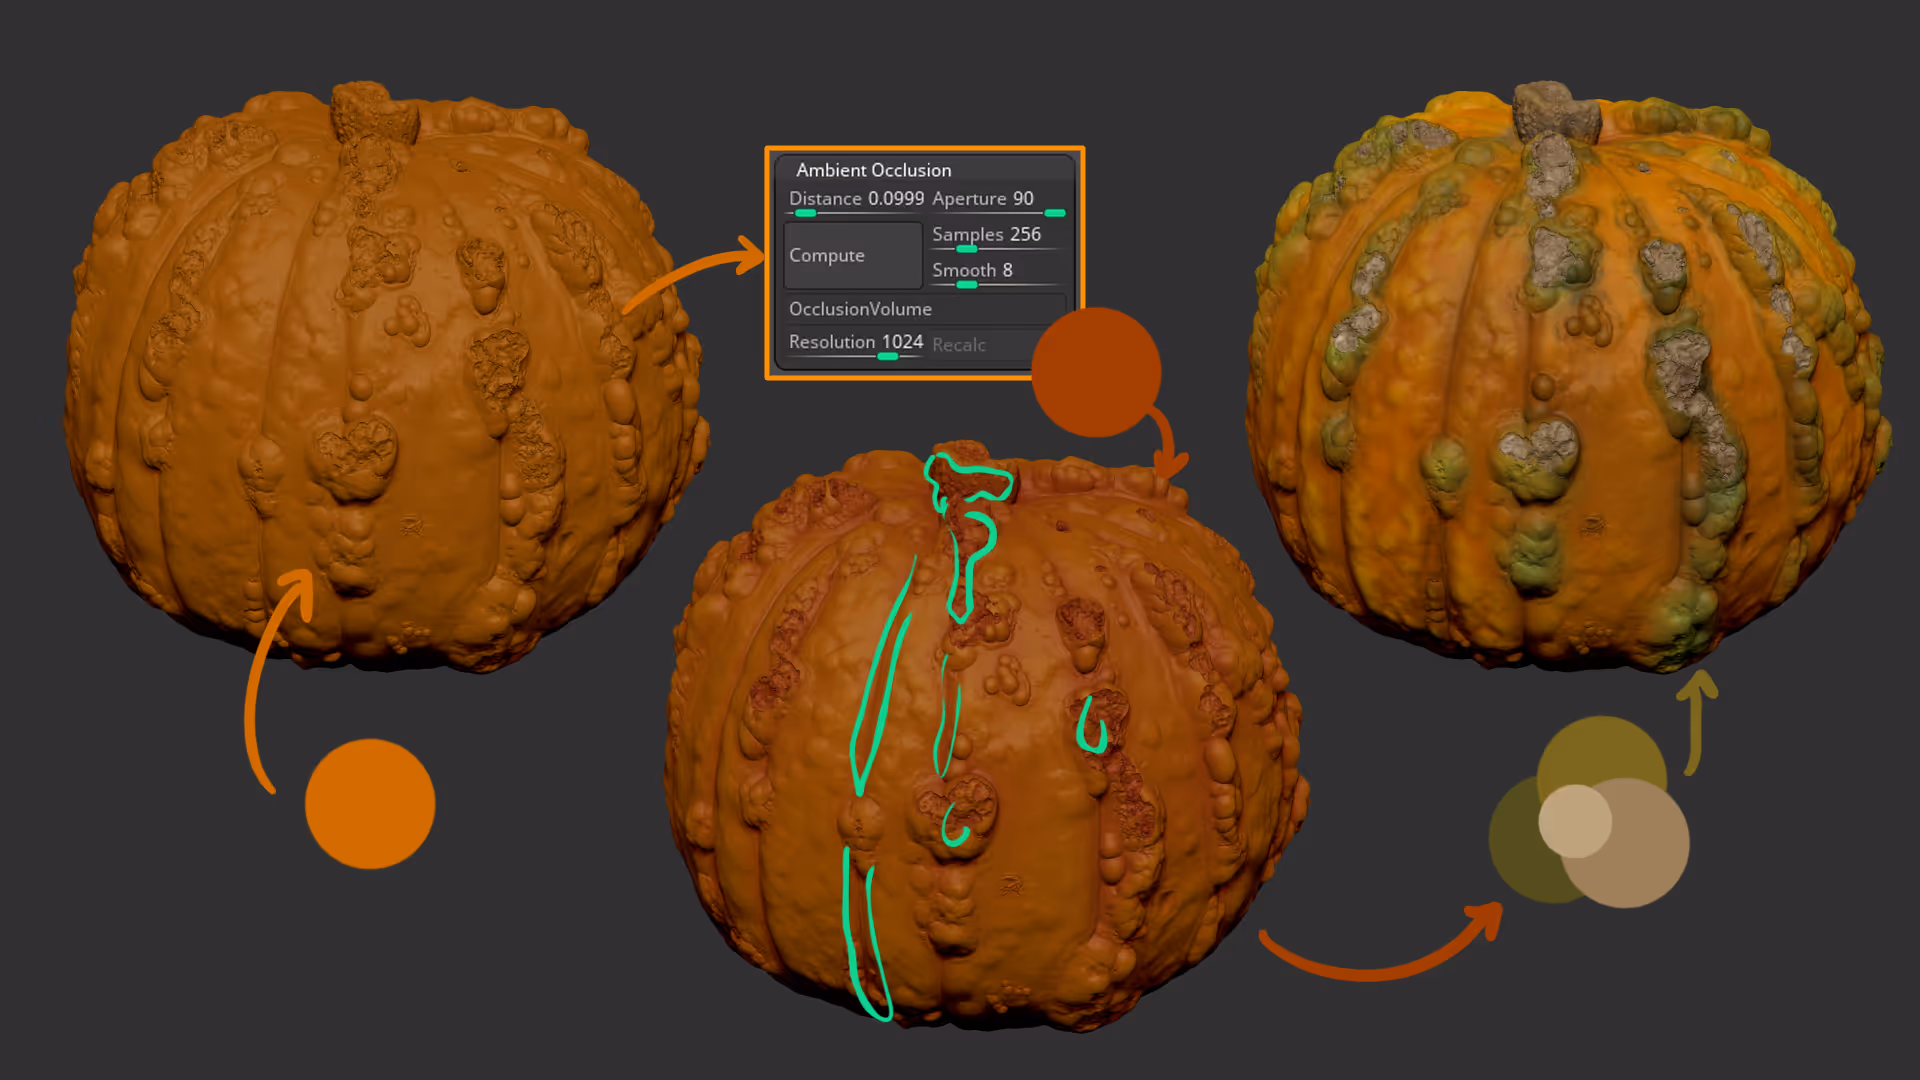
Ok, so to wrap this little project up, after I finished with the manually sculpted details, I added a bright orange colour as a base and then masked the pumpkin with the Ambien Occlusion plugin to add some darker tones around the contact areas and crevices.
The rest is more of the same, with a simple polypainting brush I added some greens and pale yellows around the ‘growths’ to complete the effect:


.webp)

.webp)