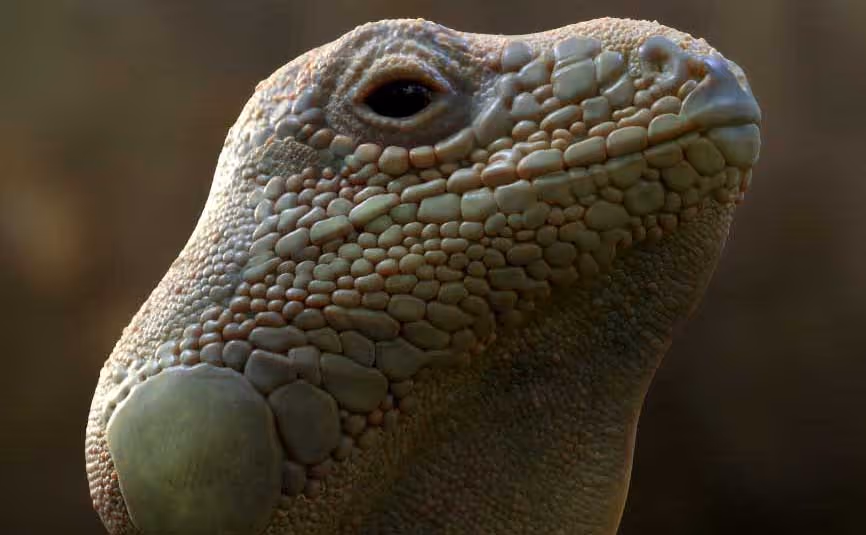
Here I just downloaded this reference image from Unsplash and did a very rough blockout of the head of the iguana in ZBrush using Dynamesh. To help you set up a quick base mesh using reference, you can use the 'See-Through' feature in the top right corner of the ZBrush UI.
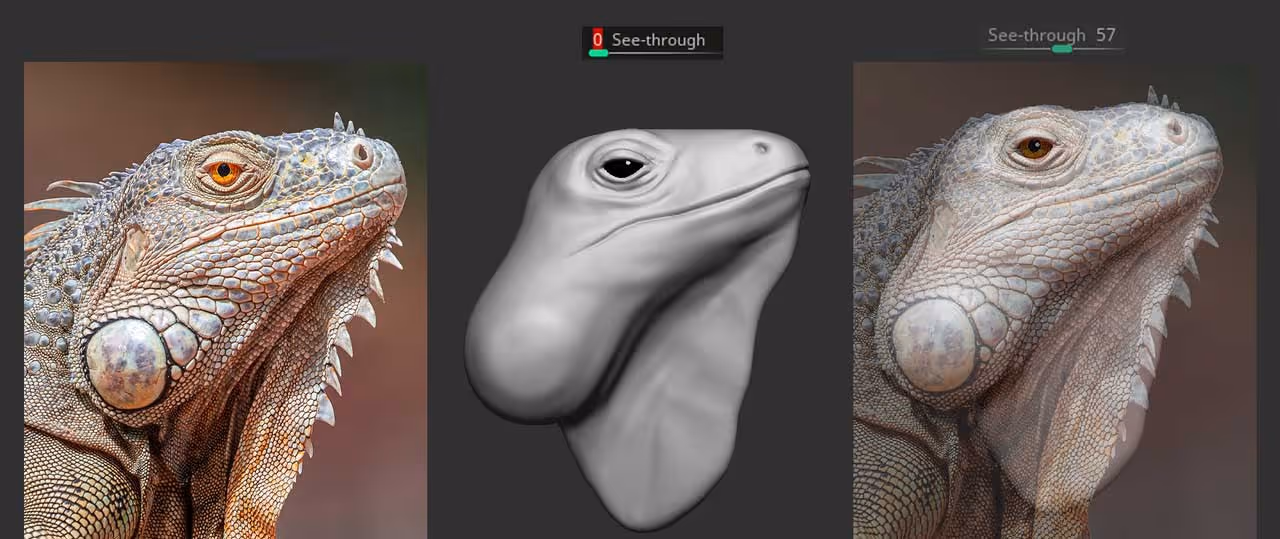
I like to open my reference image in Photoshop, and then lower the opacity of my ZBrush UI and use the background image (in the Photoshop document) as my reference to set up the sketch.
The second step is where we actually start with the interesting workflow... Fill the entire mesh with white colour, then take any brush you want (I used the standard brush with no RBG pressure) and literally start tracing the crevices and lines from the reference image.
I also suggest you save a camera once you match the sculpt with the image and lock the camera as well while you paint the crevices:
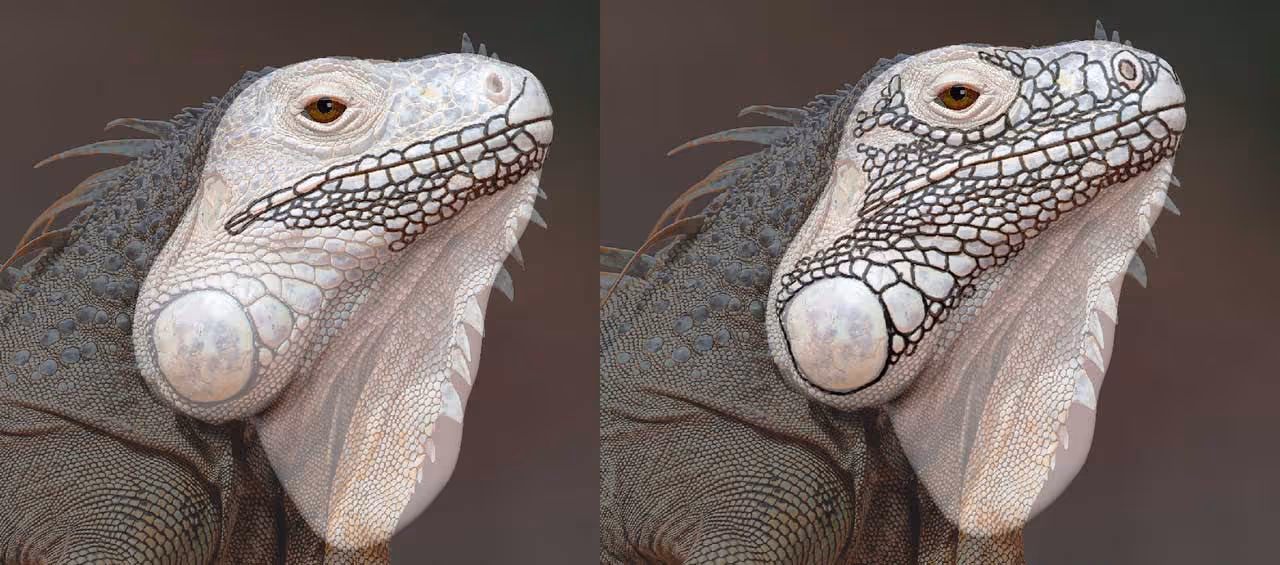
I'd suggest you focus on the larger details... ovisouly it depends on what image you use as reference, but some of the smaller details can easily be done later on with a simple alpha. This workflow works a lot better for secondary details.
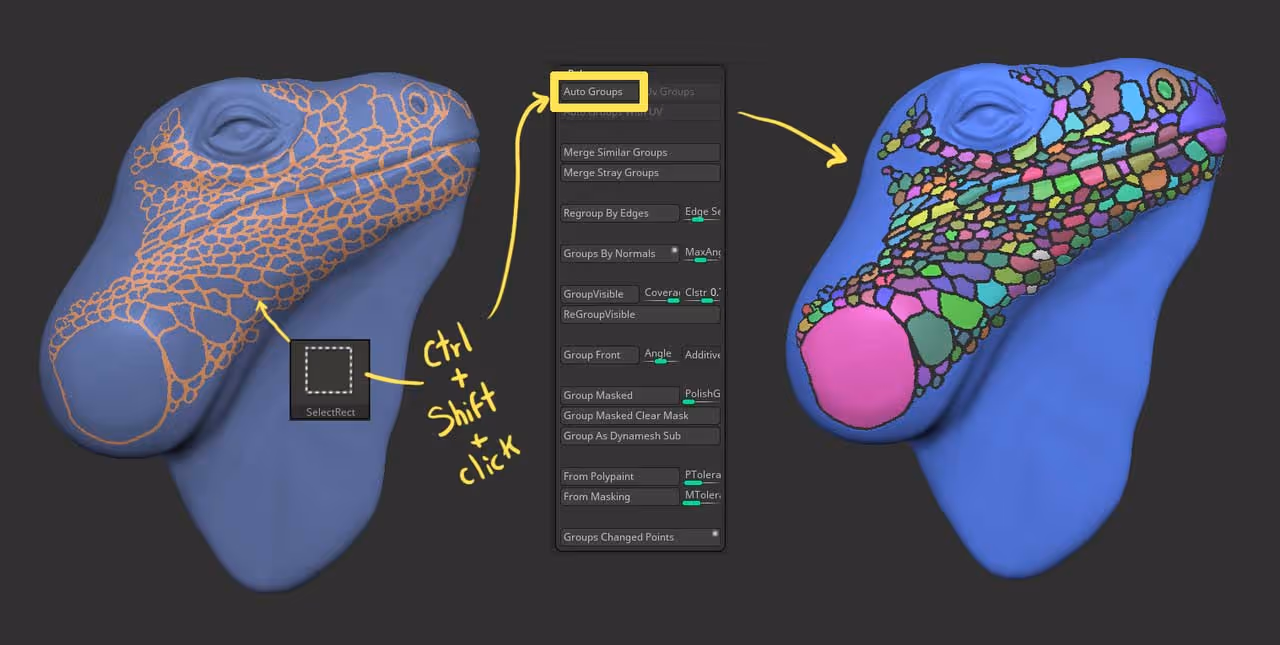
Once you have defined your black outline with Polypaint, you can convert that polypaing into mask using the 'Mask by Intensity' under the Masking > Mask by Color palette. This will create a clean mask based on the difference of the colour intensity so now you use Group Masked (Ctrl + W) to assign a unique polygroup to the painted areas ;)
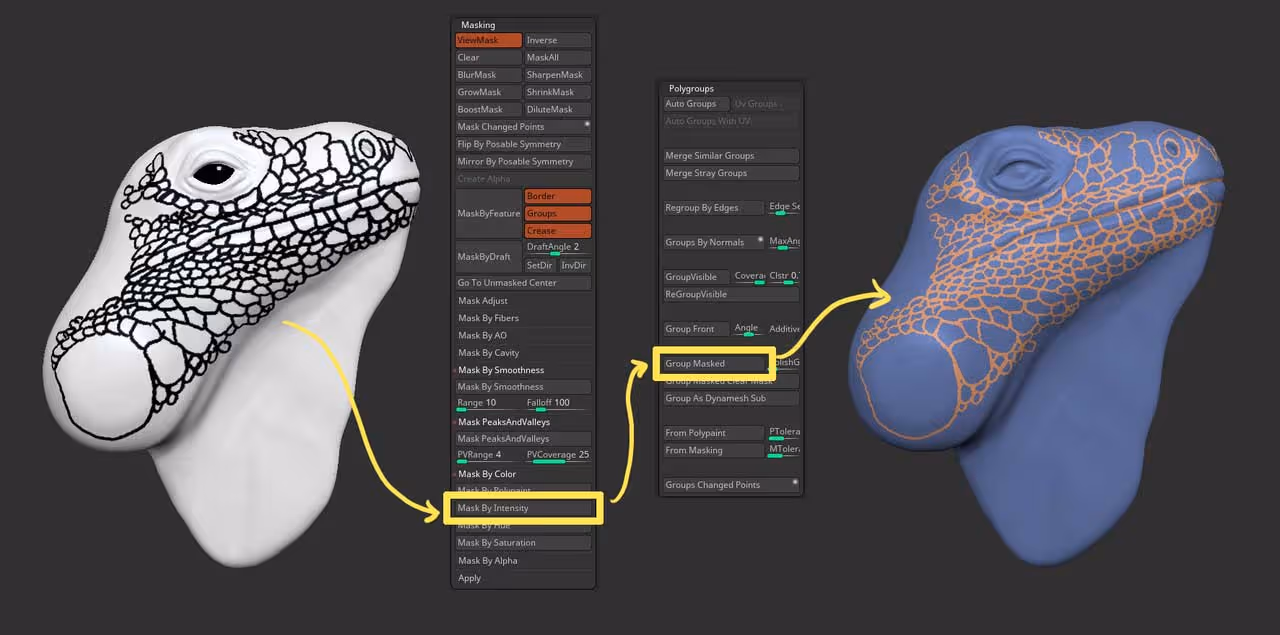
The next step is to hide the polygroup we just created (the outlines) with the selection brush, then go to the Polygroup subpalette and hit the Auto Groups button. Now, because non of the scales are connected (visually), ZBrush will assign a different group ID to every scale!
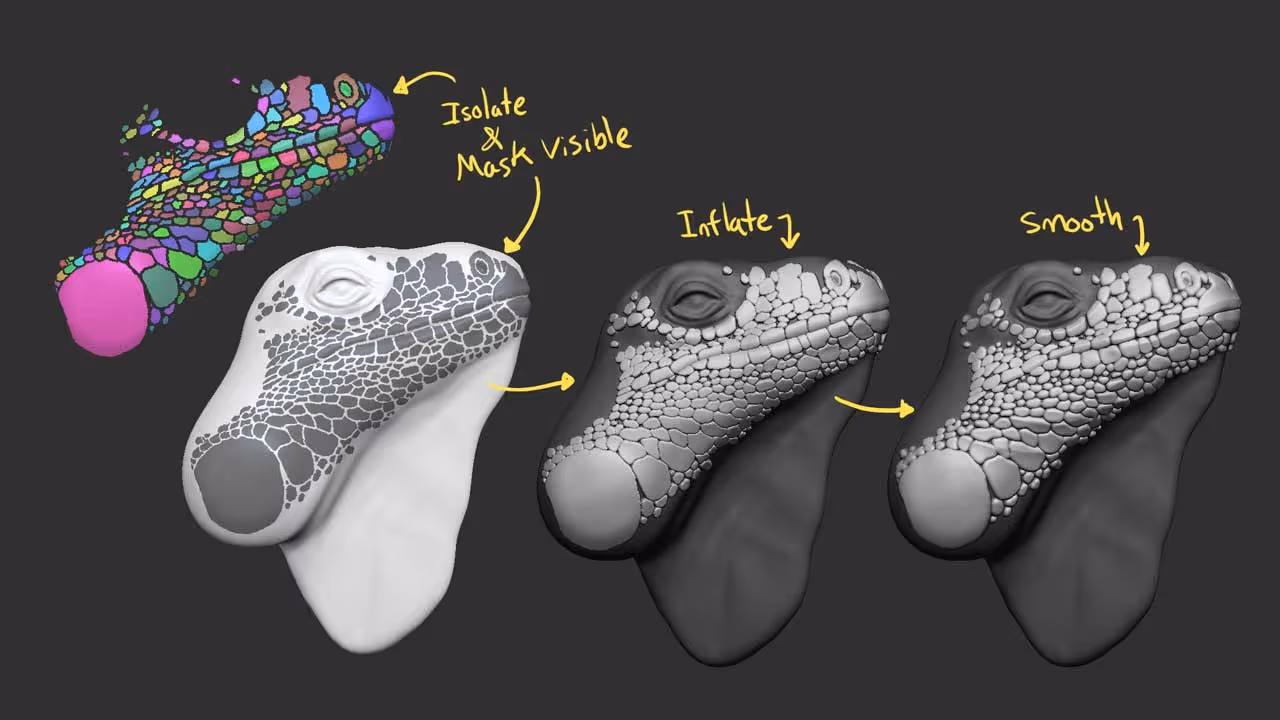
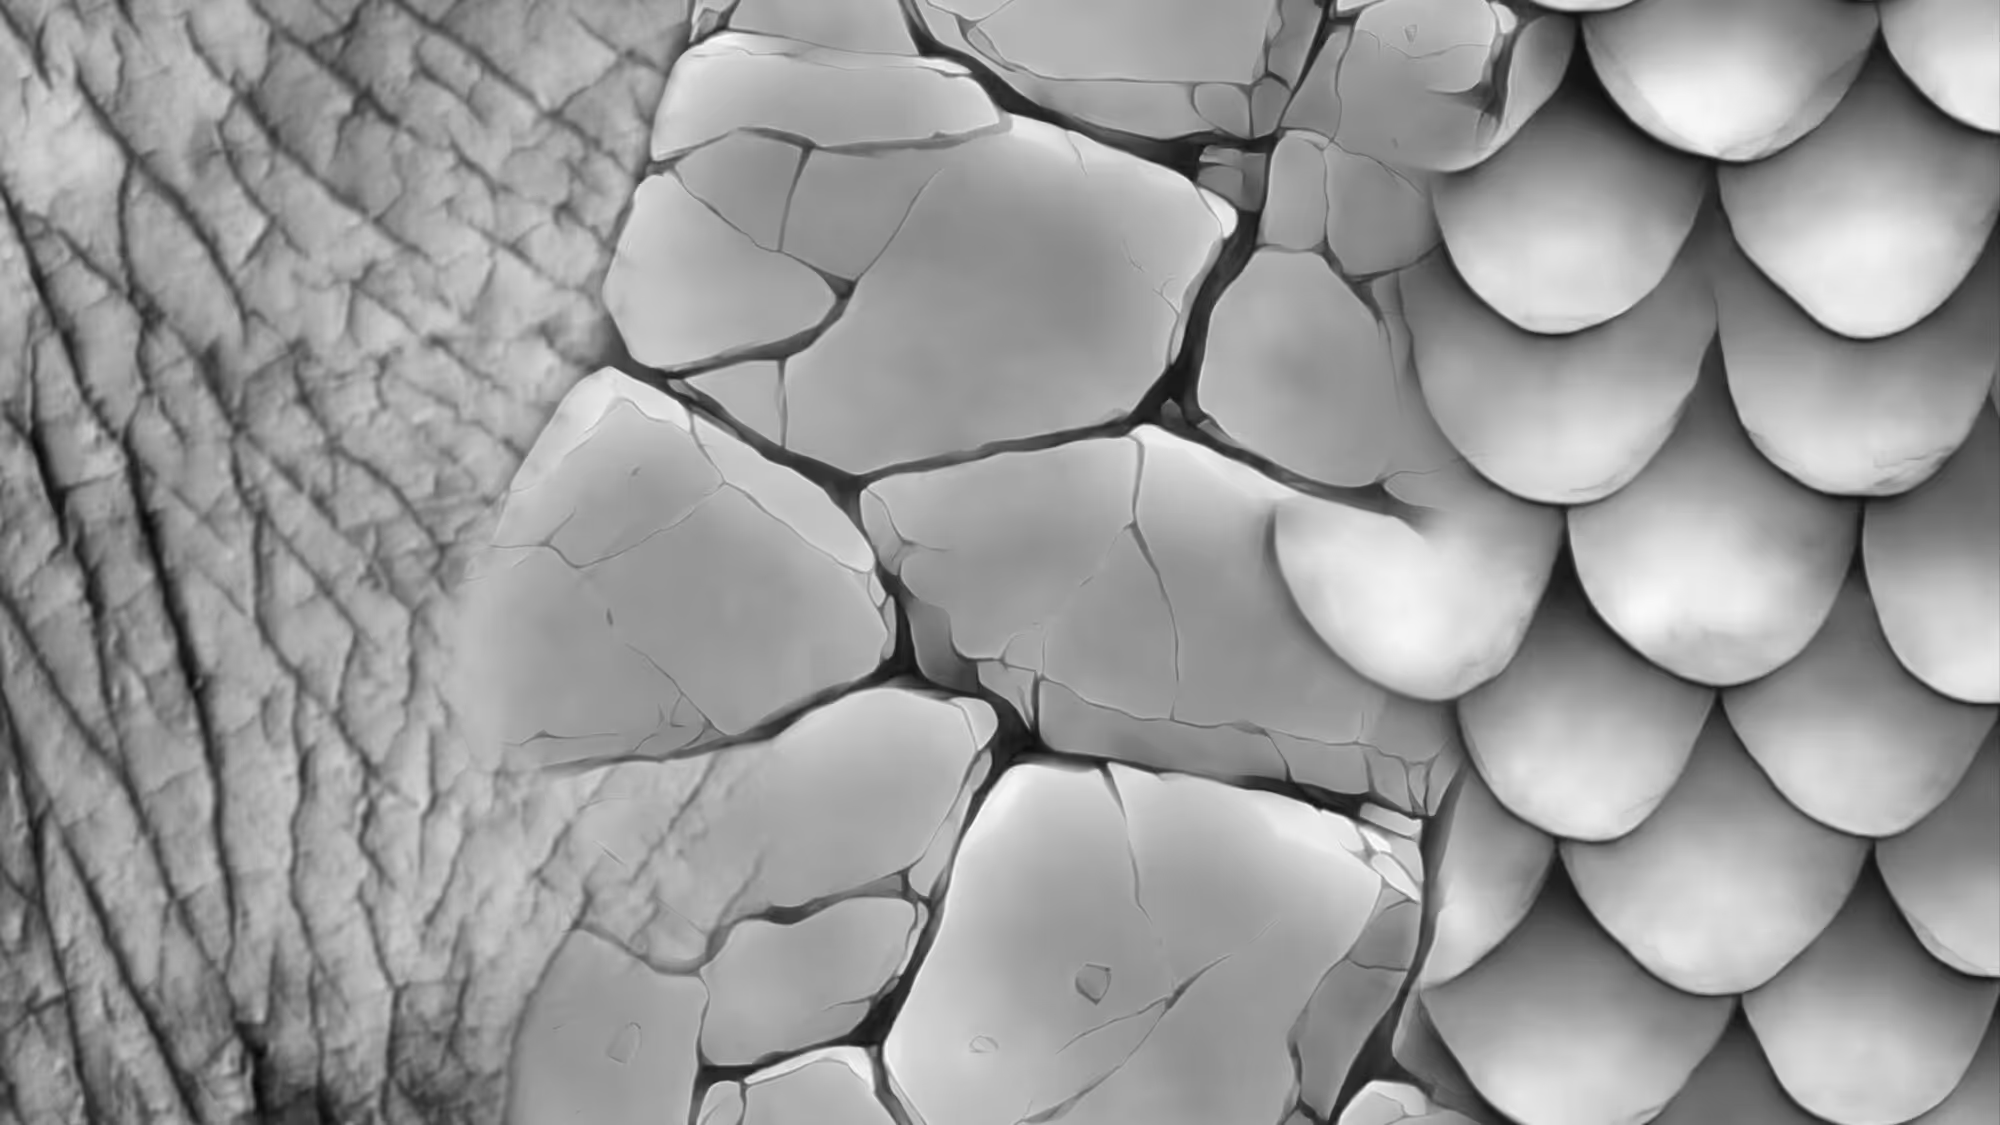
At this point, I'm sure you already have ideas on how you can use this technique, but to wrap up this quick tip, you can hide everything but the 'scales', Mask the visible areas, unhide everything and invert the mask.
So now, you have everything in your mesh masked except the scales. The next step could be to inflate everything (from the deformation palette of with the inflate brush manually) and then a quick smoothing pass to refine the edges of the inflated 'bits'.
also keep in mind that each scale has a different polygroup now, so you can isolate only one and refine it separately... maybe pull it using the move brush to overlap some?
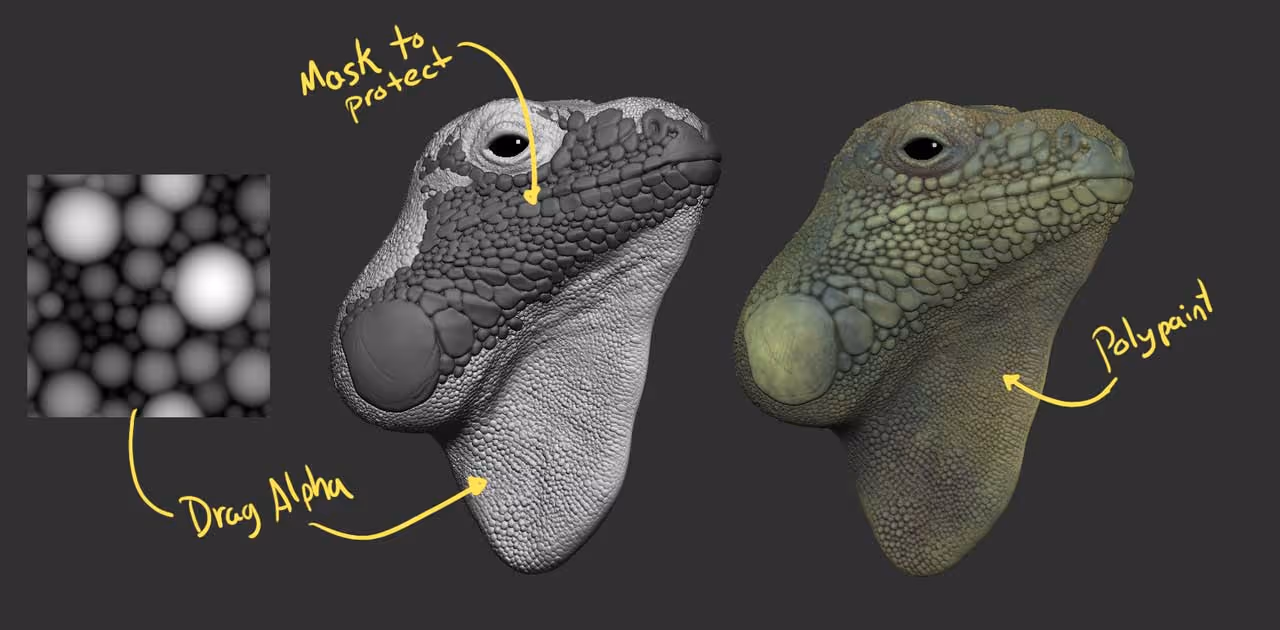
As mentioned before, the rest of the details can be done with a simple alpha. You can follow the same process to isolate and mask just the areas you want to apply the effect of the alpha and to finish it all up, do a quick polypaint pass.
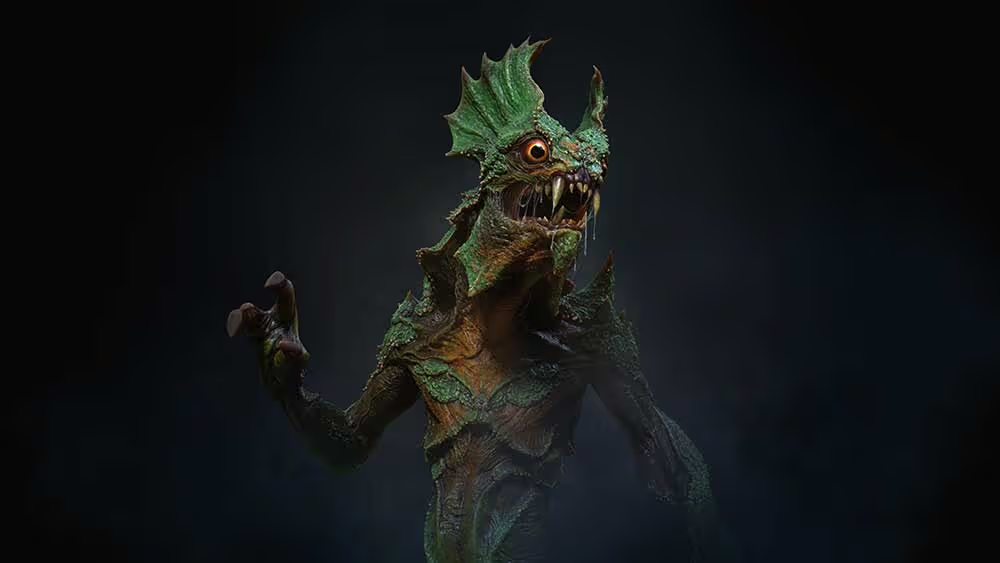
Here is a render from the dynamesh sketch with colour... obviously is very sketchy and pretty rough sill, but for 10 min work is not bad ;)

I hope you find this quick tip useful!


.webp)

.webp)