


Every ZBrush User Needs to Know These 5 Hidden Tricks
In this tutorial, I’m sharing five little-known but super handy ZBrush tricks that can quietly transform your workflow. These aren’t flashy features that grab your attention immediately, but once you start using them, you’ll wonder how you ever worked without them. Whether it’s lighting, mesh resolution, fiber mesh control, or cleaning up your files, these tips will help you work smarter and get better results faster.
Let’s dive into these gems and see how you can use them in your own projects.
Tip 1: Interactive Light — Move Your Light Source with Ease
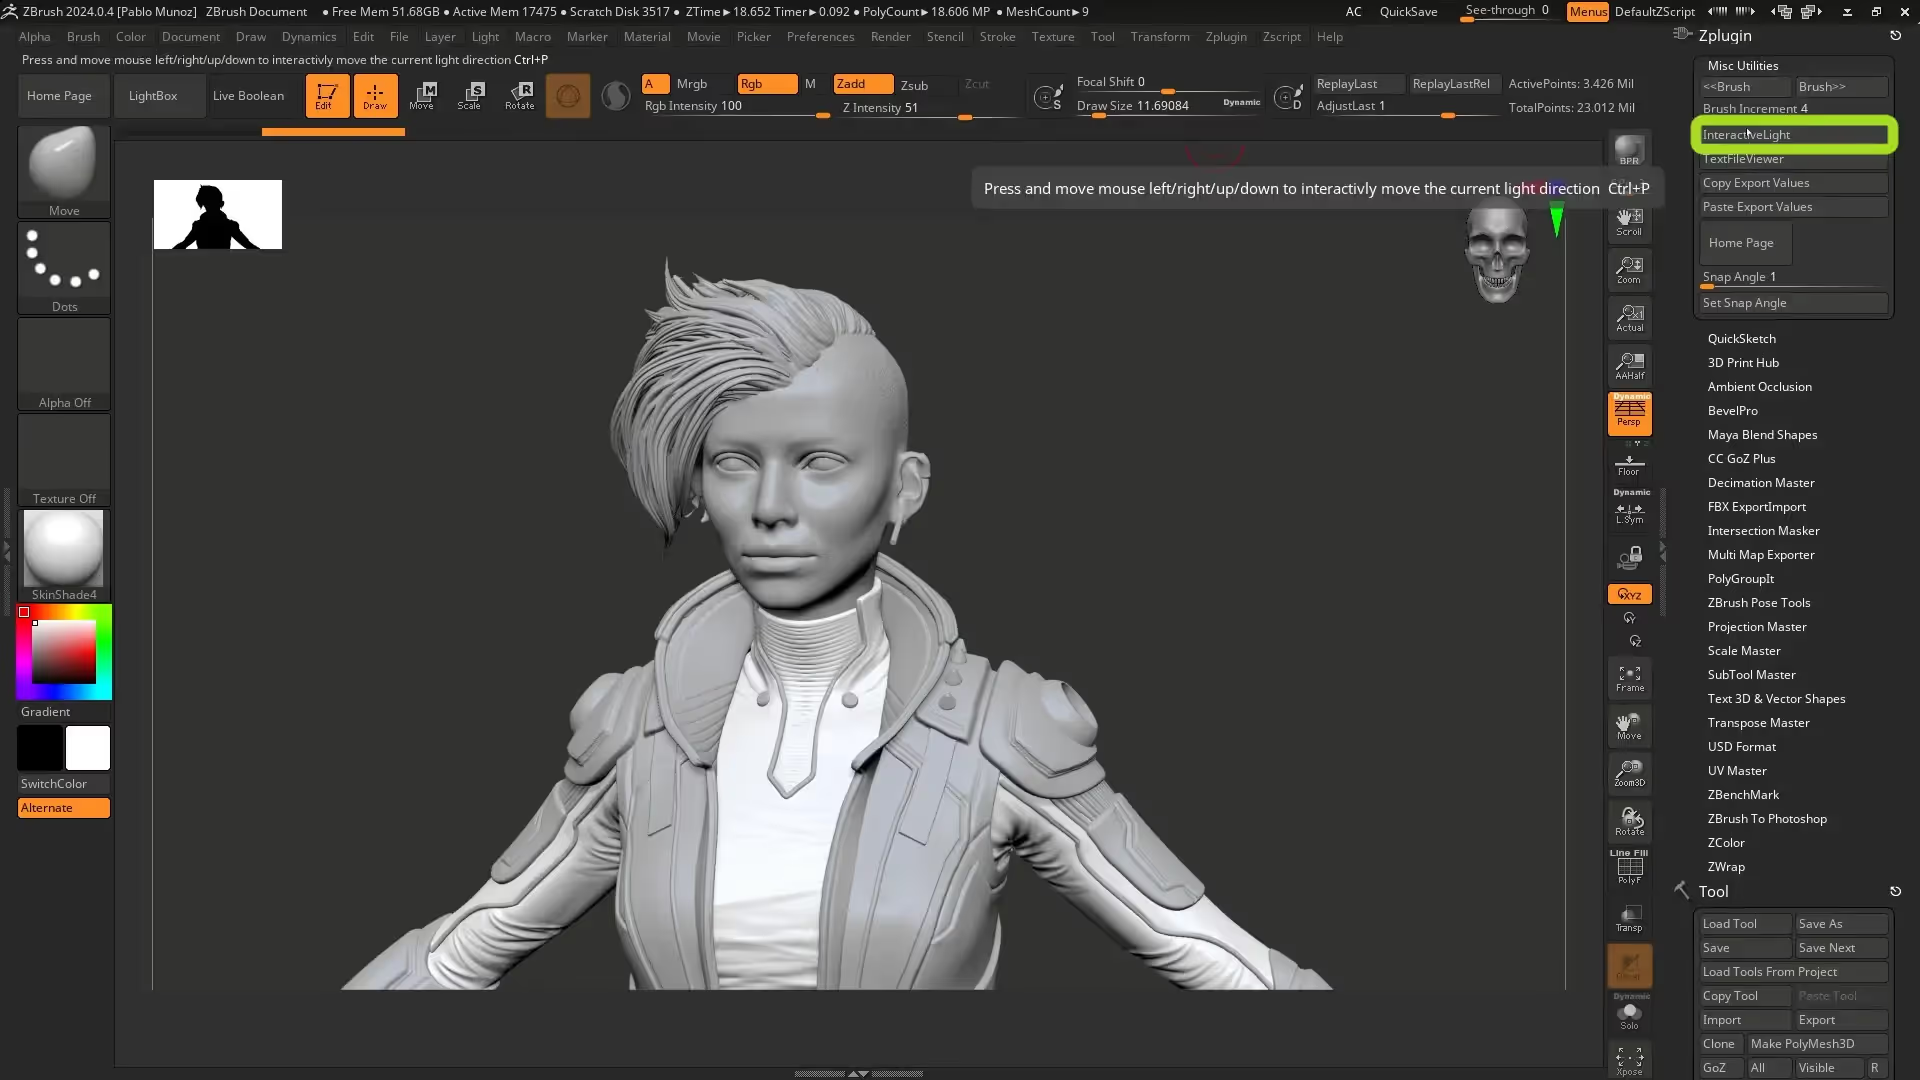
Lighting can make or break a render, but adjusting lights in ZBrush isn’t always straightforward. One of my favorite hidden tricks is the interactive light feature. It lets you move your light source interactively by simply moving your mouse — no digging through render or light palettes.
Here’s how to use it:
- Switch to the standard UI for easier navigation.
- Change your material to something like Skin Shade 4 to better see the lighting effects.
- Go to the ZPlugin palette > Miscellaneous Utilities and find Interactive Light.
- Click the button to activate it, then move your mouse around to reposition the light source in real time.
- Press Escape to exit.
There’s also a shortcut: hover over the interactive light area and press Ctrl + P to toggle it on or off quickly.
This trick is great because it works no matter what material you’re using, and it gives you instant feedback on how your lighting affects your model’s surface during render previews.
Tip 2: Dynamic Dynamesh Resolution — Match Your Mesh Details Perfectly
Dynamesh is a staple tool for sculpting in ZBrush, especially when you want to sketch without worrying about topology. But setting the right Dynamesh resolution can be tricky — too low and you lose detail, too high and your mesh becomes heavy and sluggish.
Here’s a neat trick to get the perfect resolution for your Dynamesh every time:
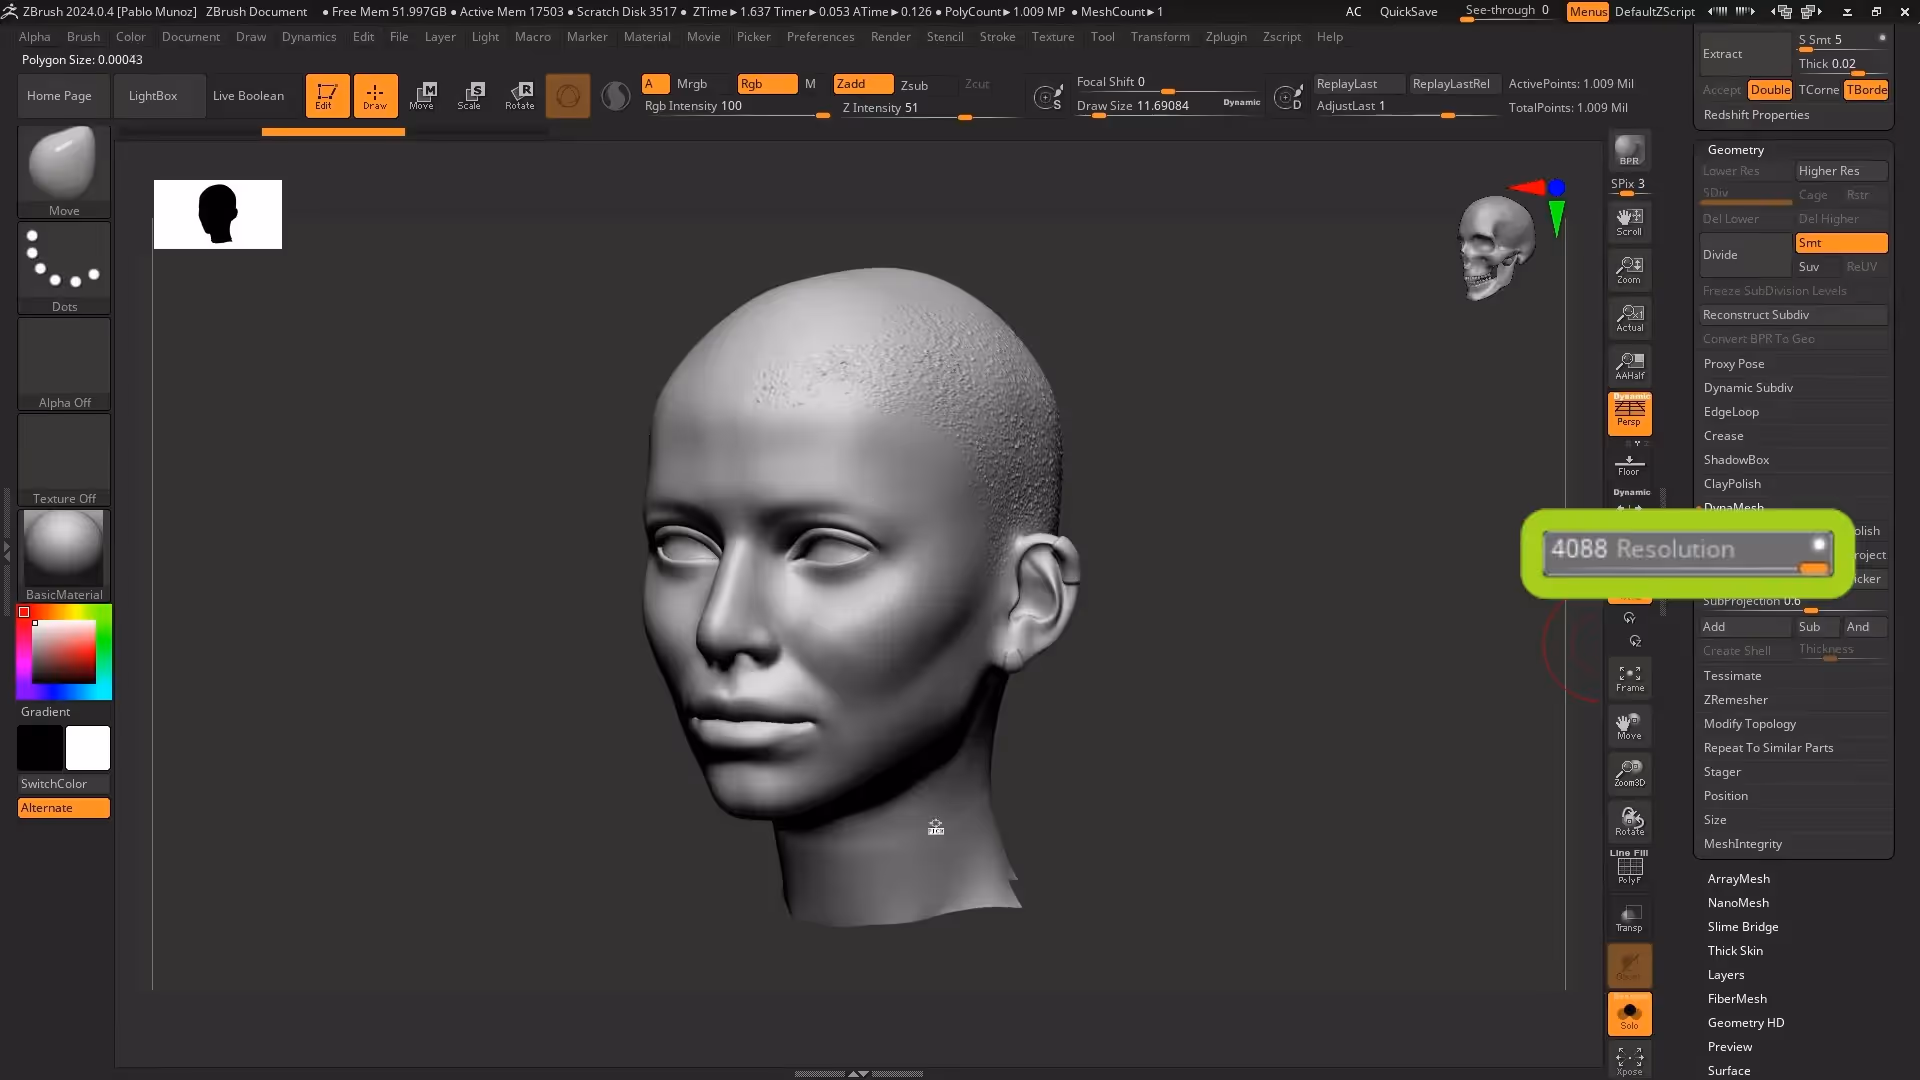
- Isolate the part of your mesh you want to Dynamesh, like the head, and clone it.
- Delete all subdivision levels on the clone to start fresh.
- Go to the Dynamesh resolution slider.
- Click and hold on the resolution number, then drag your mouse towards your mesh in the viewport.
- You’ll see the resolution value dynamically change based on the mesh’s polygon density in that area.
- Pick a resolution that captures the detail you want (for example, 4088 for high detail).
- Click Dynamesh to remesh your model with that resolution.
This approach lets you match Dynamesh resolution directly to your model’s detail level instead of guessing. You can adjust the slider while looking at your mesh to find the sweet spot between detail and performance.
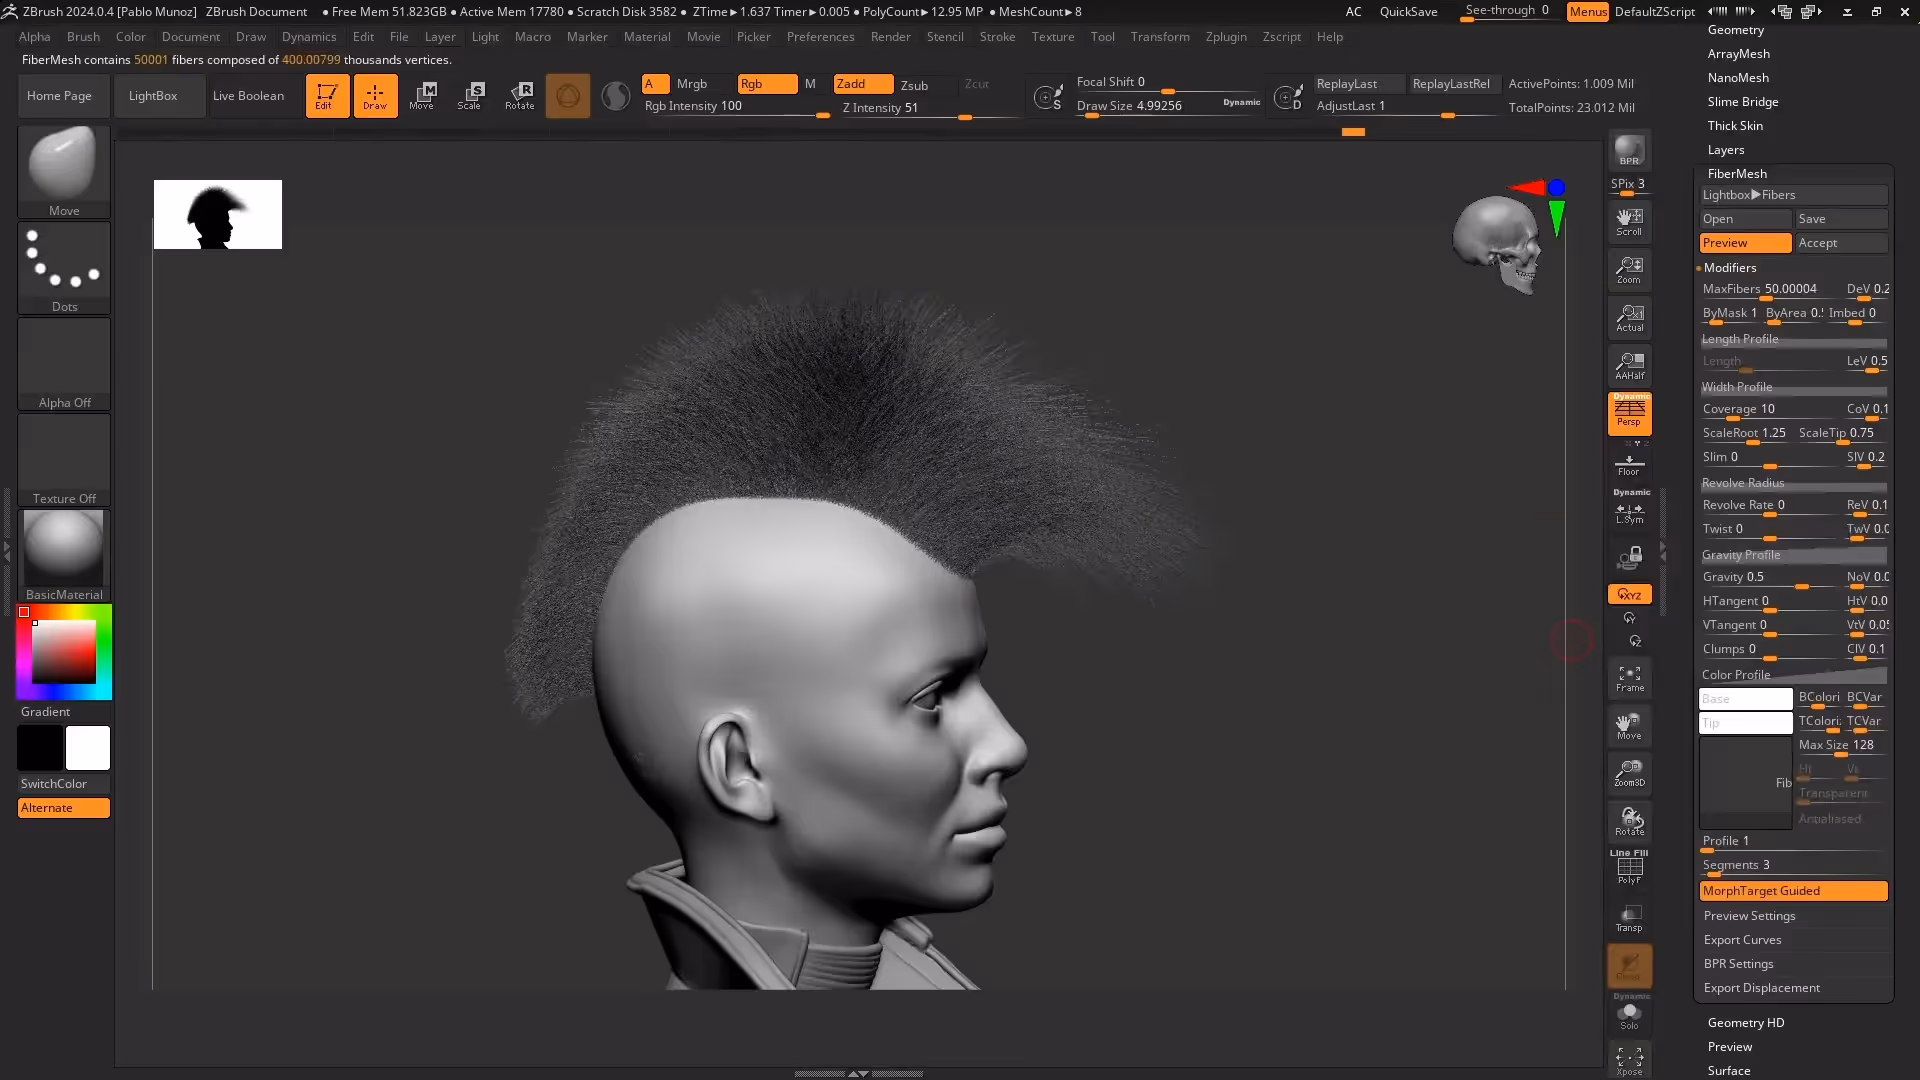
Tip 3: Controlled FiberMesh Growth Using Morph Targets
FiberMesh is ZBrush’s tool for generating hair, fur, or fiber-like structures. Usually, you create FiberMesh by masking the area where you want the fibers and clicking preview. But what if you want your fiber growth to follow a custom sculpted volume, like a Mohawk with a specific shape?
Here’s how to guide FiberMesh growth precisely using morph targets:
- Mask the area where you want fibers (like a Mohawk section).
- Go to the Morph Target palette and store a morph target to save your current mesh state.
- Invert the mask and use the Gizmo or Move brush to sculpt the volume shape you want your fibers to follow (e.g., push and scale the Mohawk volume).
- Clear the mask and toggle between the stored morph target and the sculpted version to check your shape.
- Go to the FiberMesh panel, hit Preview to generate fibers.
- In the FiberMesh modifiers, enable Morph Target Guided. This will make the fibers grow following your sculpted volume shape.
- Adjust fiber settings like twist, color, and gravity to fine-tune your look.
- Click Accept to finalize your fiber mesh as a new subtool.
Once your FiberMesh is created, you can use grooming brushes (including custom ones like the “bender” or “sharp clumper”) to style and shape the hair further for a polished look.
This method gives you much more creative control over fiber growth, letting you sculpt the volume first and have the fibers follow your exact shape.
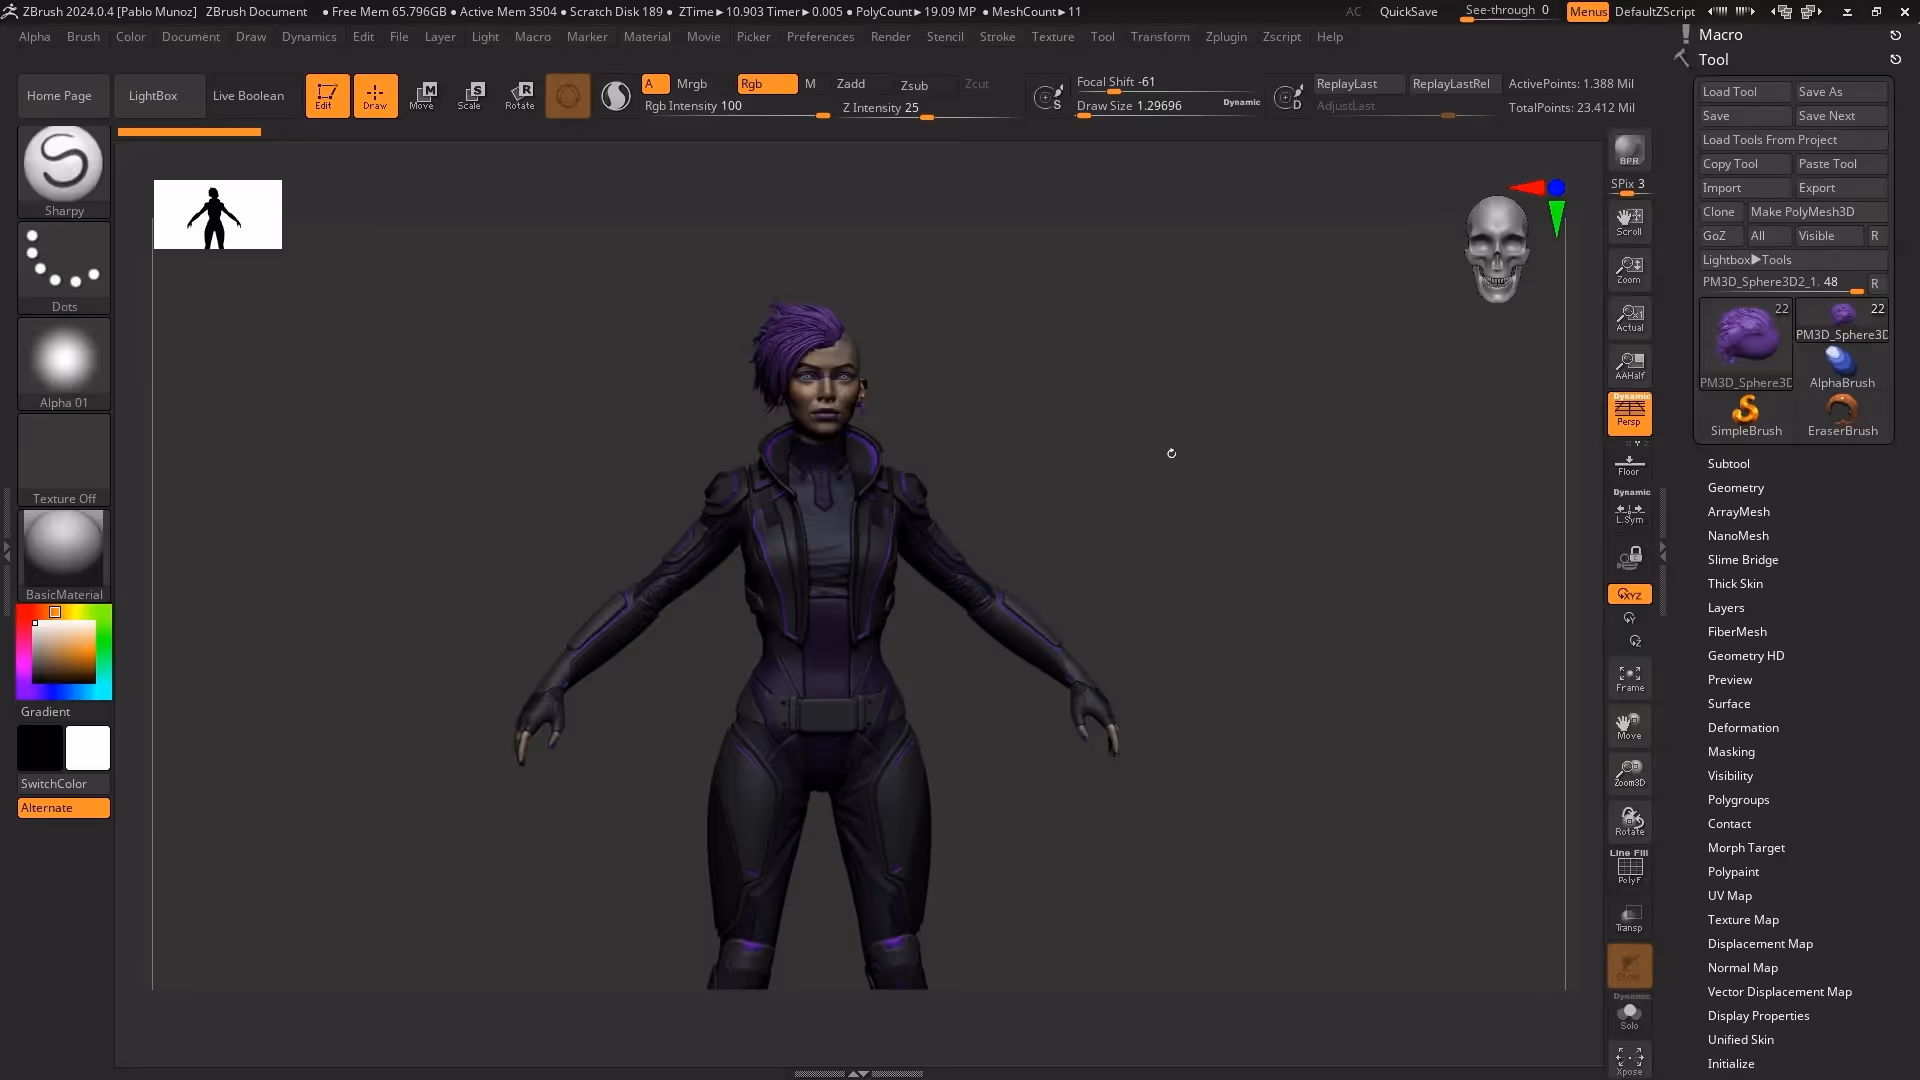
Tip 4: Quickly Delete Unused Tools to Clean Your Scene
When working on complex characters or props, you often have multiple tools (subtools) in your ZBrush project. Over time, these tools accumulate and can clutter your scene, making it harder to manage. But deleting unwanted tools one by one can be tedious.
Here’s a simple way to delete all unused tools and keep only the one you’re working on:
- Select the tool you want to keep.
- Go to the Macro palette (dock it for easy access).
- Under Miscellaneous, find and click Delete Unselected Tools.
- Confirm the pop-up warning to proceed.
- ZBrush will delete all other tools except the one selected.
This saves you from manually deleting each tool and cleaning your scene before saving. Just be aware that this action removes your undo history, so save carefully.
If you want to delete all tools (not just unselected), there’s also a Delete All macro for that.
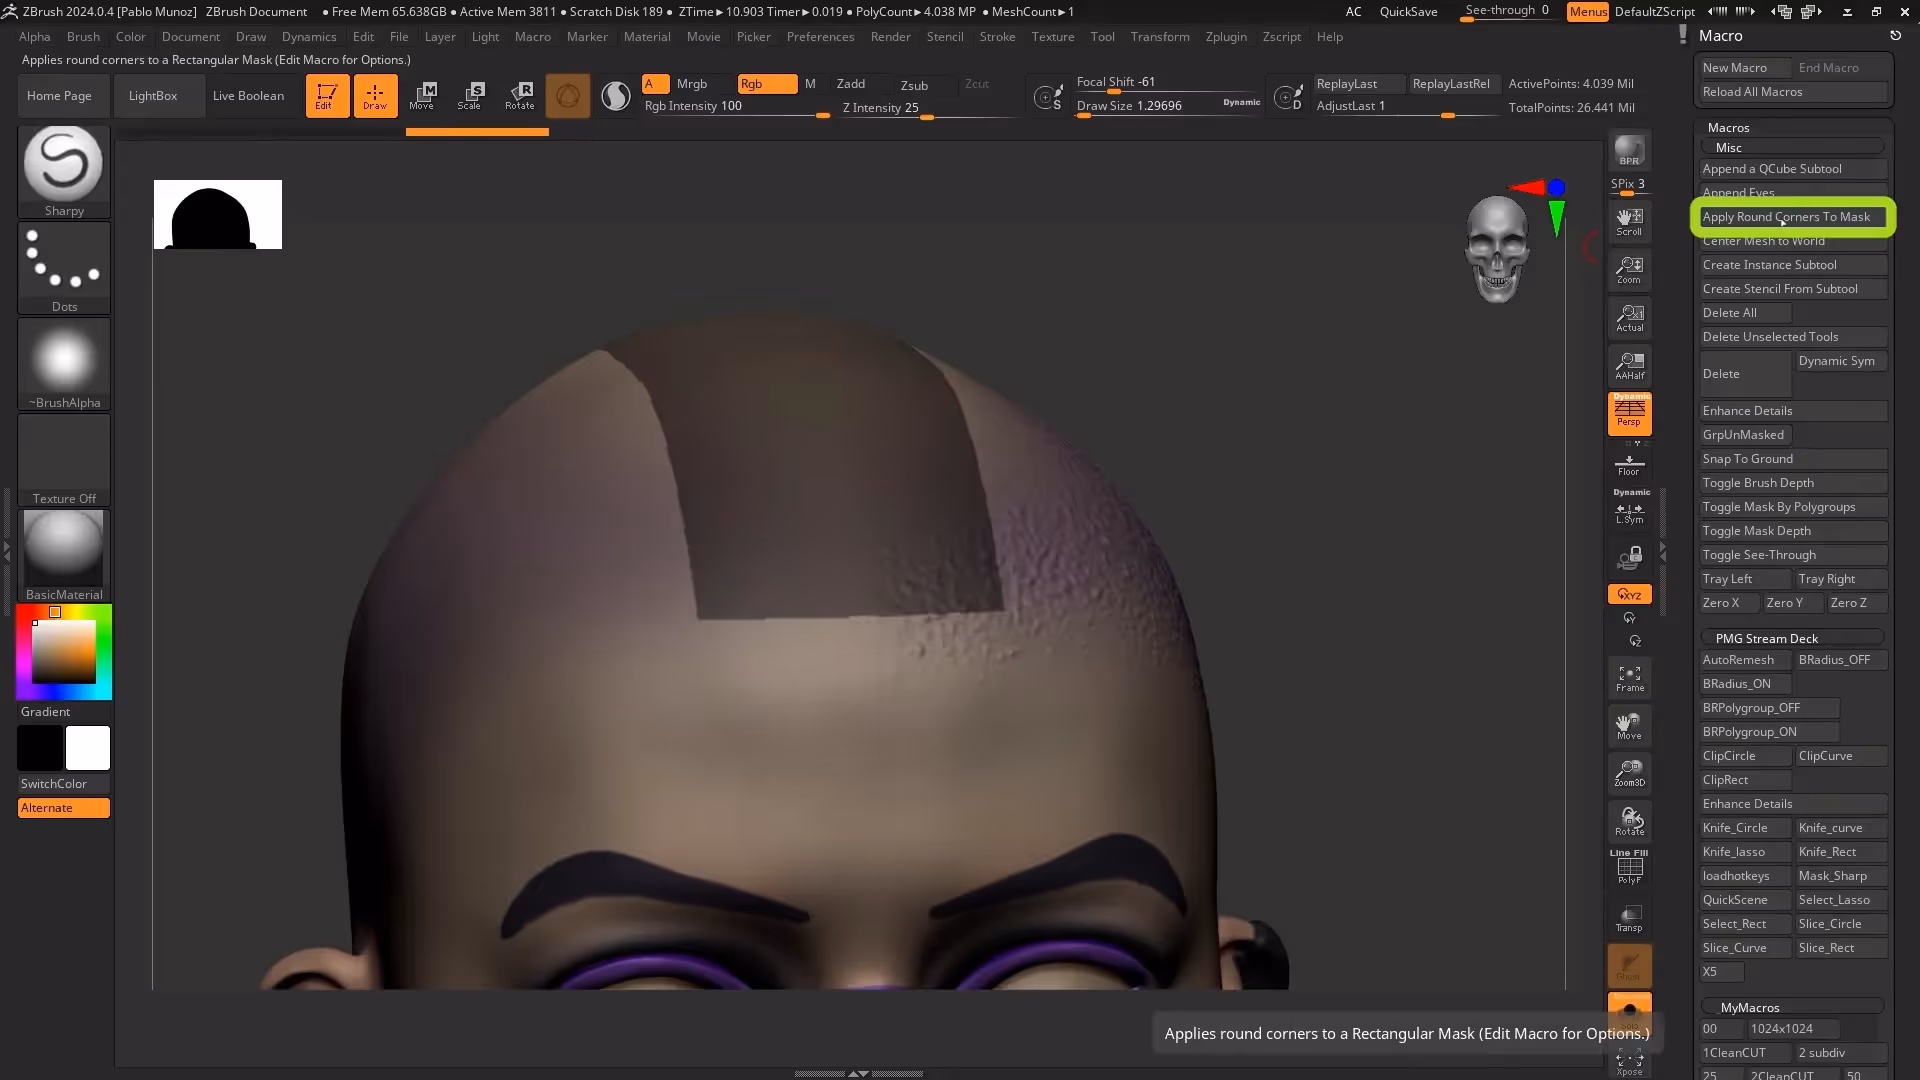
Tip 5: Round Mask Corners Easily with a Macro
Creating clean masks with smooth, rounded corners can be challenging, especially when masking for panel extractions or hard surface details. Instead of manually blurring and refining the mask, ZBrush has a handy macro that automates rounding mask corners.
Here’s how to use it:
- Create your mask with sharp corners.
- Optionally, subdivide your mesh to increase polygon density for smoother results.
- Find the macro called Apply Round Corners to Mask in your macros palette.
- Click it once to round the mask corners slightly.
- Click multiple times to increase the rounding effect.
This macro is a great time-saver if you’re working on hard surface models, panels, or any place where you want clean, rounded mask edges for extraction or deformation.
For example, mask a panel area, run the macro several times, invert the mask, and then use the deformation tools like inflate or polish to create smooth, clean panels.
Bonus Tip: Run a ZBrush Benchmark to Test Your Computer’s Performance
Wondering how well your computer handles ZBrush, especially with millions of polygons? ZBrush includes a built-in benchmark tool that tests performance and gives you a score.
You can find it here:
- Open the ZPlugin palette.
- Scroll down to C Benchmark.
- Click it to start the benchmark test.
The process takes a few minutes and then outputs a score that reflects how well your system performs with ZBrush. It’s a useful way to check if your hardware can handle heavy sculpting sessions or if you might need an upgrade.

Wrapping Up
These five ZBrush tricks might be small, but they quietly improve your workflow and give you better control over your projects. From interactive lighting to dynamic Dynamesh resolution, fiber mesh control through morph targets, cleaning your scene quickly, and smoothing mask corners — these tips are quality-of-life boosters every ZBrush user should know.
And if you want to dive deeper into masking techniques, I have a dedicated playlist on my channel covering masking tips and tricks in ZBrush — check it out for more handy workflows.
Thanks for tuning in! If you want to see these tips in action, check out my YouTube channel where I share ongoing livestreams and tutorials to help you level up your 3D skills.
FiberMesh Grooming Kit
A collection of 26 custom grooming brushes for ZBrush FiberMesh to shape, groom and refine hair for your characters and creatures. This pack also comes with specialized brushes to deal with short hair or fur.
Get resource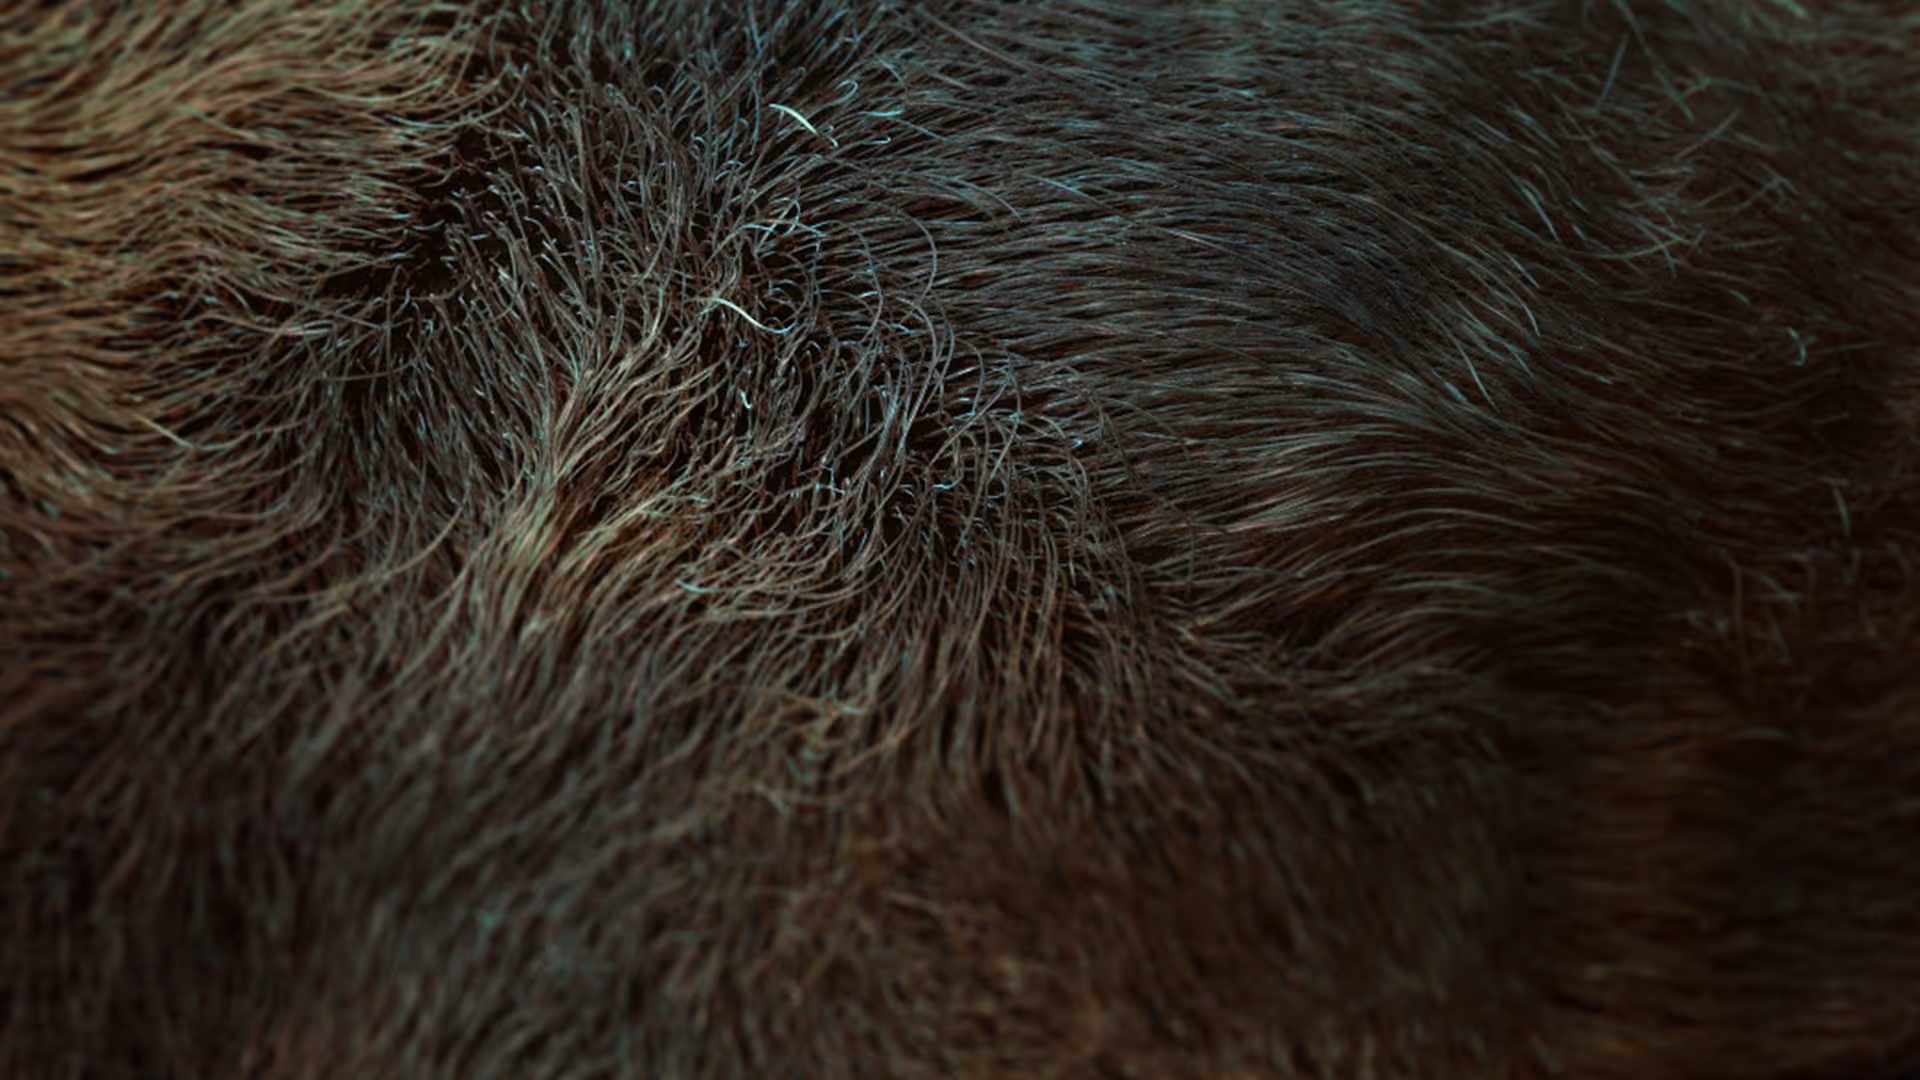
Low poly hair cards from FiberMesh
A mini tutorial series covering FiberMesh for long hair and baking ‘hair maps’
Check it out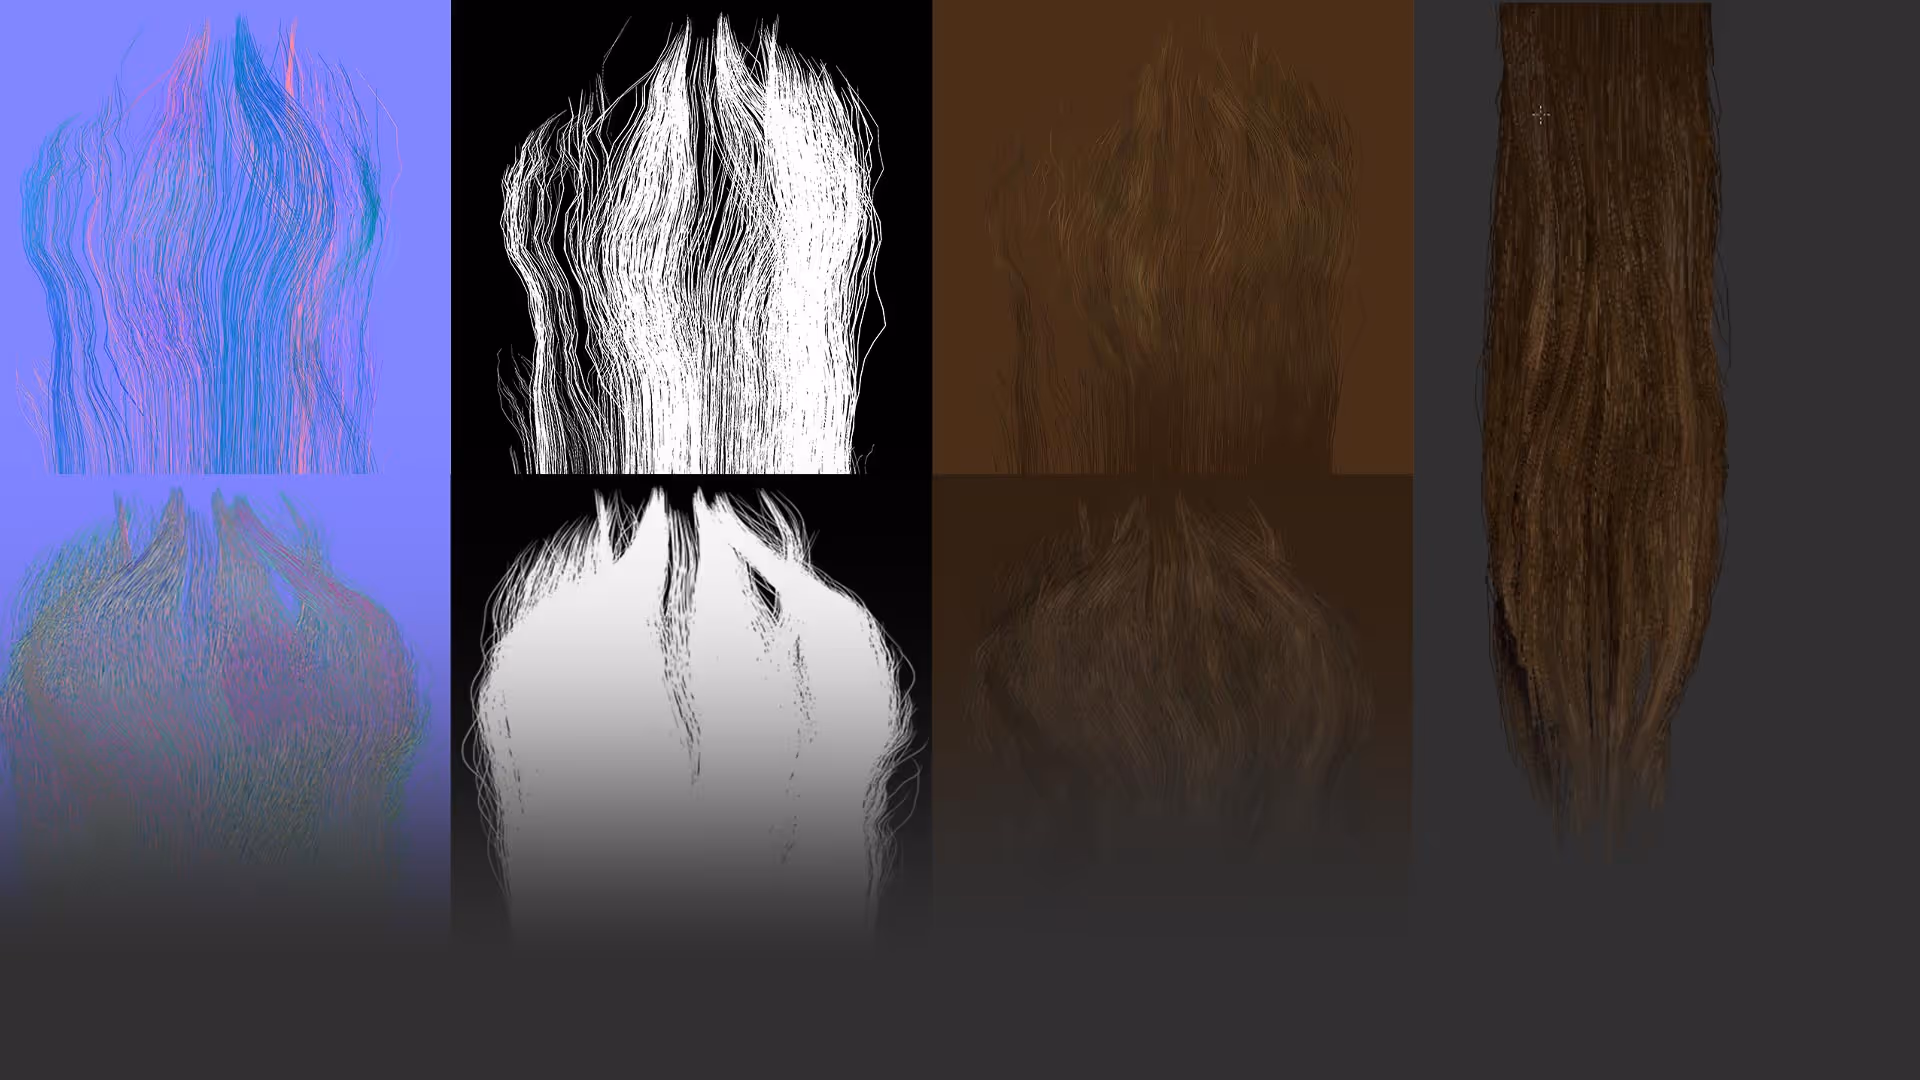


.webp)

