

In this tutorial, I’ll guide you through the fundamentals of anchor points in Substance Painter. You’ll learn how to set them up properly so your layers communicate exactly as expected, and how to leverage their power to revolutionize your workflow.
Understanding Anchor Points: A Simple Analogy
Before diving straight into Substance Painter, let’s break down the concept of anchor points using a familiar tool: Photoshop.
Imagine you paint some scribbles on a gray background in Photoshop. Now, if you convert this painting into a smart object, you’ve essentially created an anchor point. Why? Because you can duplicate that smart object multiple times, and each duplicate references the original artwork.
For example, you might apply different filters to each duplicate—like a Gaussian blur on one, a color balance adjustment on another. Then, if you update the original smart object by painting a new shape, all duplicates automatically update to reflect that change.
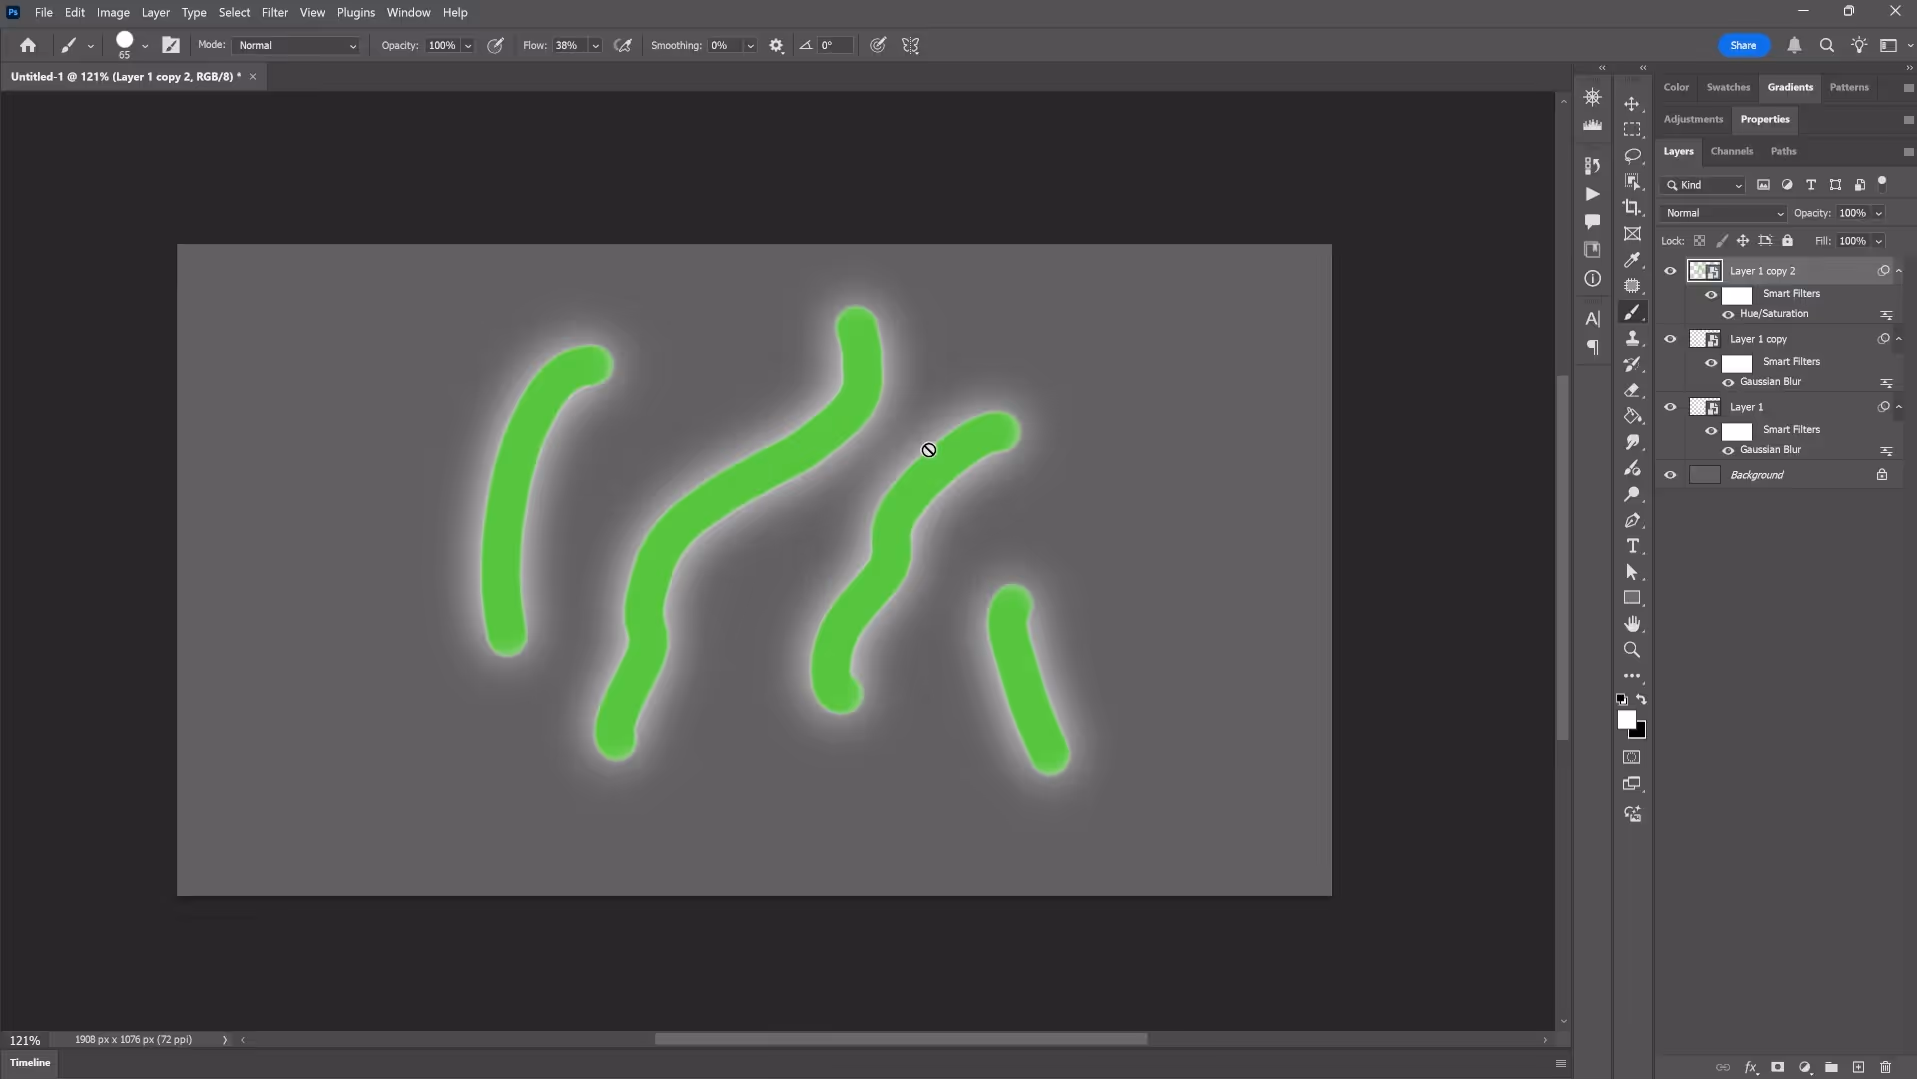
This is the essence of anchor points in Substance Painter: a single source of truth that multiple layers can reference, allowing you to apply different effects non-destructively while maintaining full control.
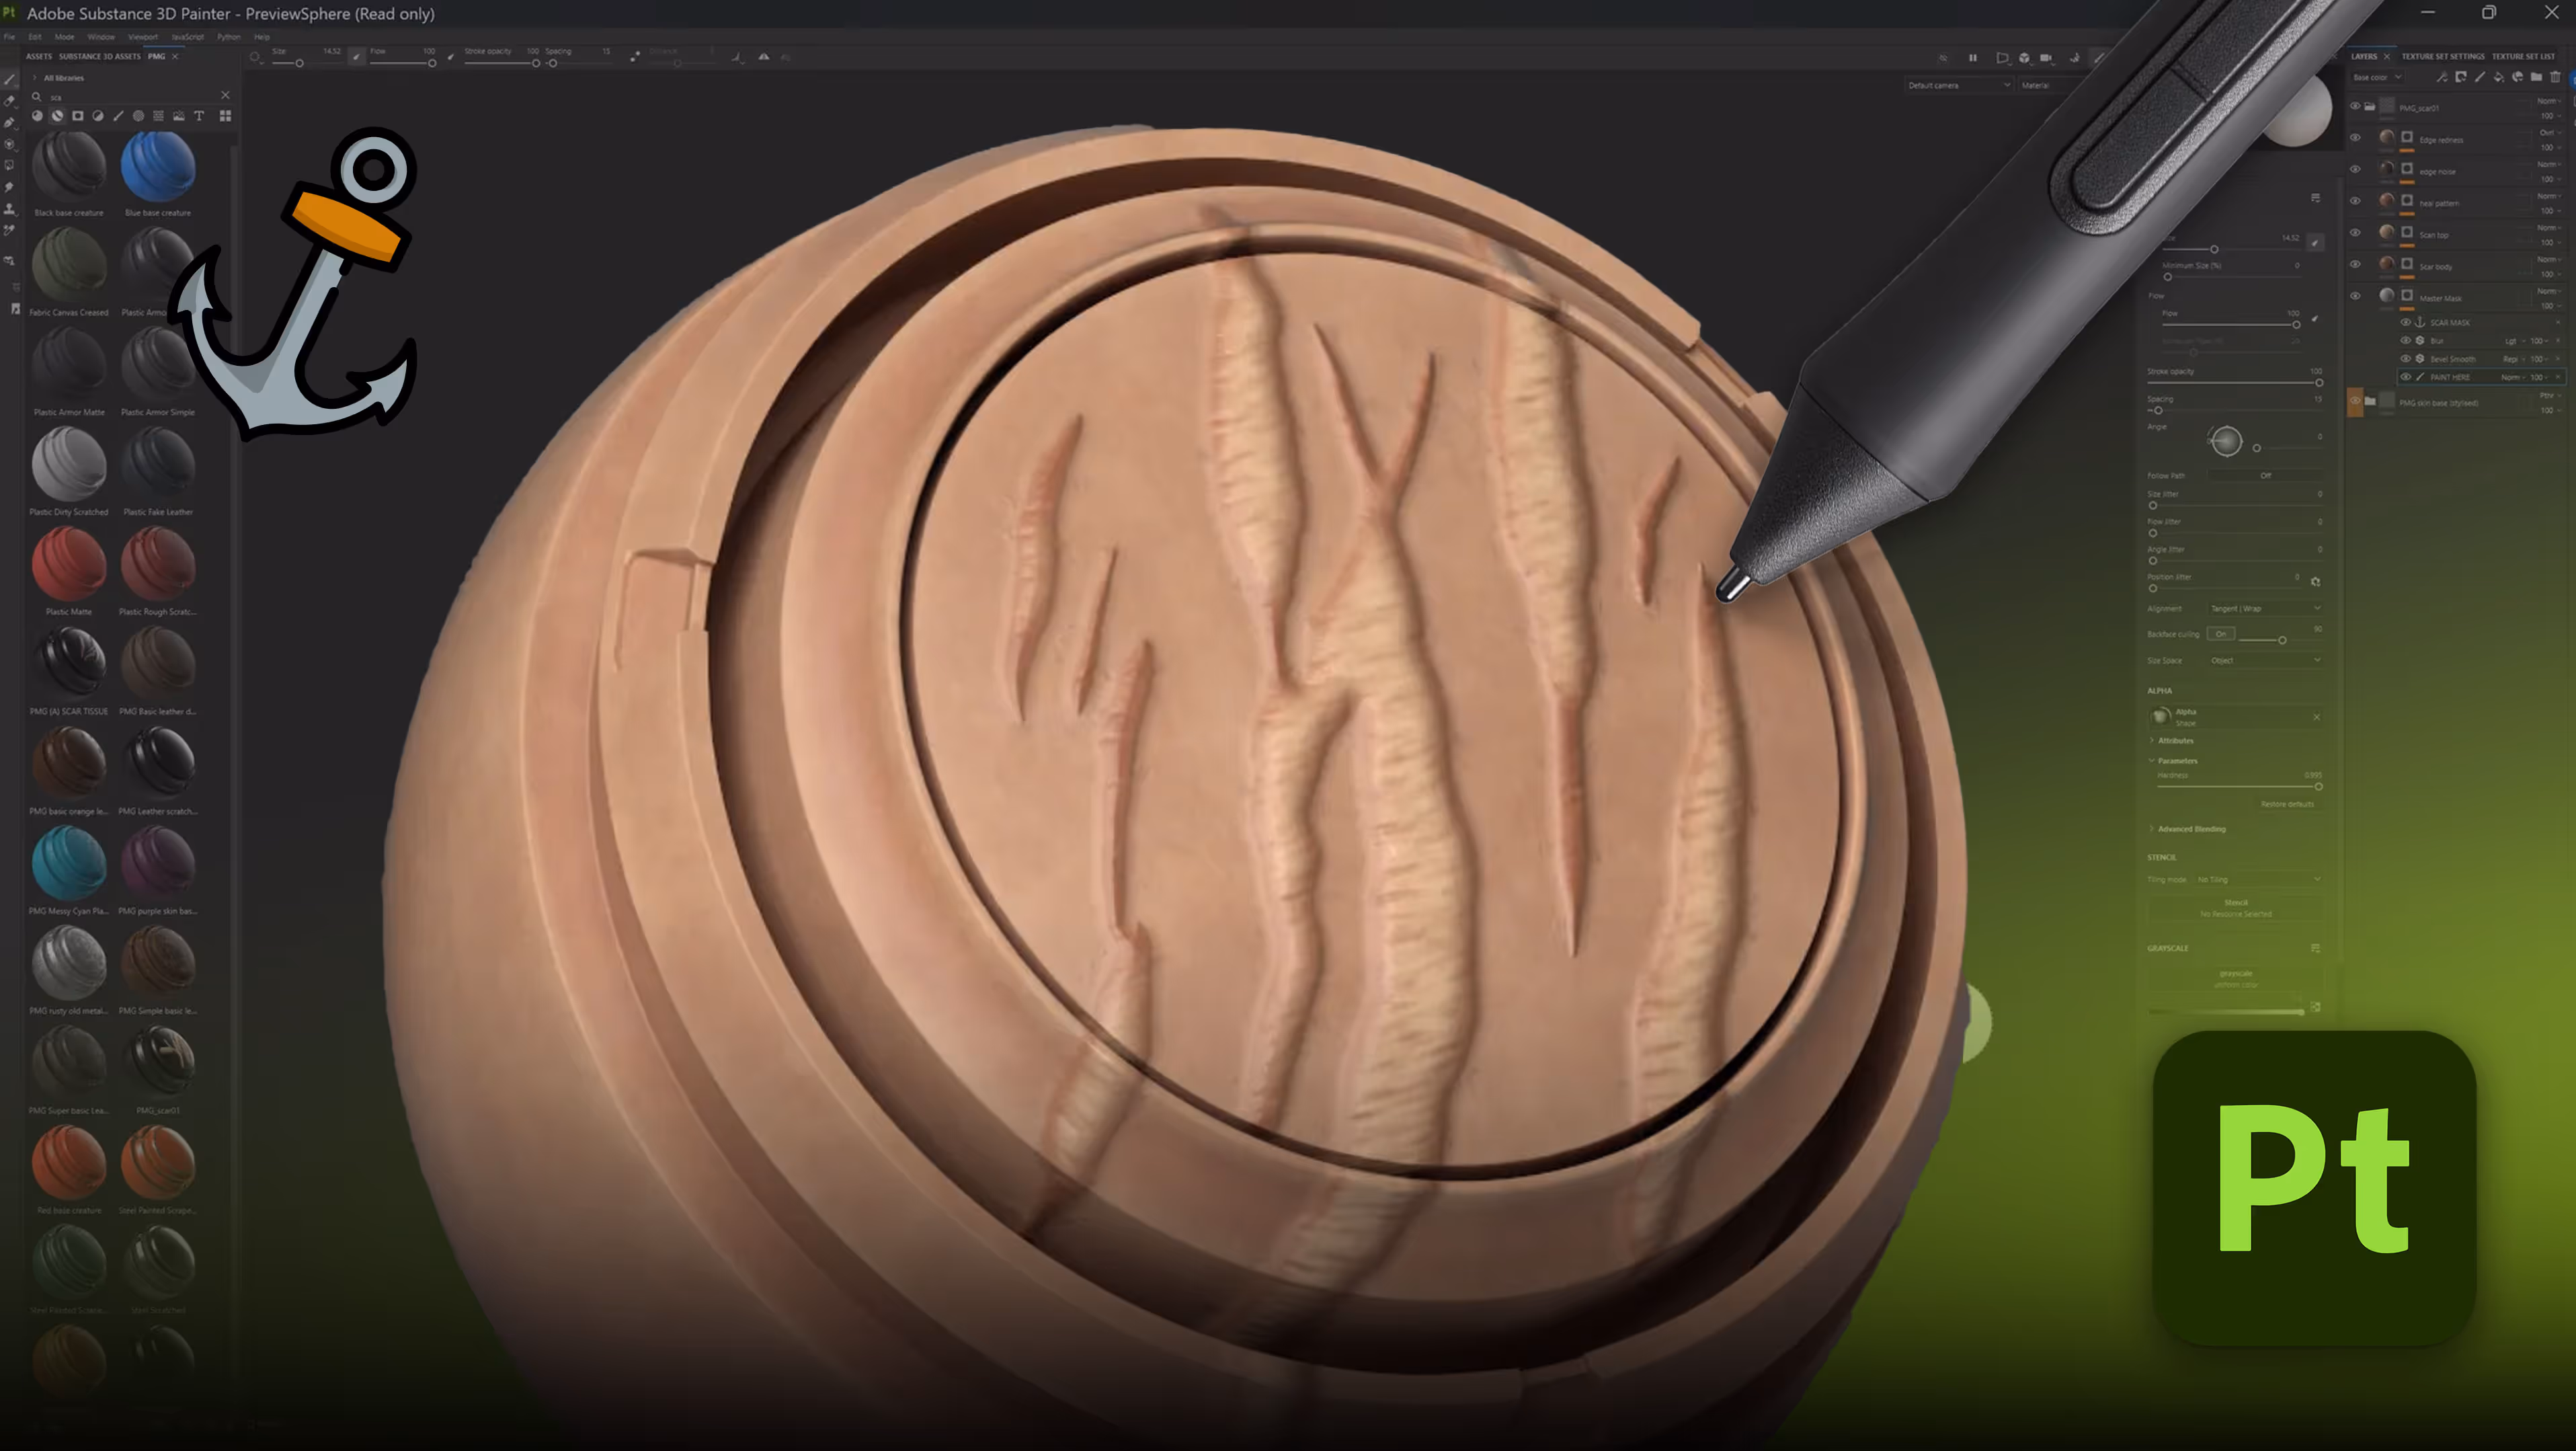
Anchor Points in Substance 3D Painter: The Basics
Now, let’s translate that concept into Substance Painter.
Here’s how it works:
- Create a master mask layer. This layer contains only the mask—no color or other properties.
- Within this master mask, add an anchor point and a paint layer underneath it. This paint layer is where you create the black-and-white mask that defines your texture’s shape.
- Any layer above this master mask can then reference this anchor point in its mask, allowing it to “read” the shape you painted and apply different material properties such as height, roughness, or color.
This setup means you only need to paint your mask once. Every layer that references the anchor point will update automatically, saving you tons of time and ensuring consistency across your texture.
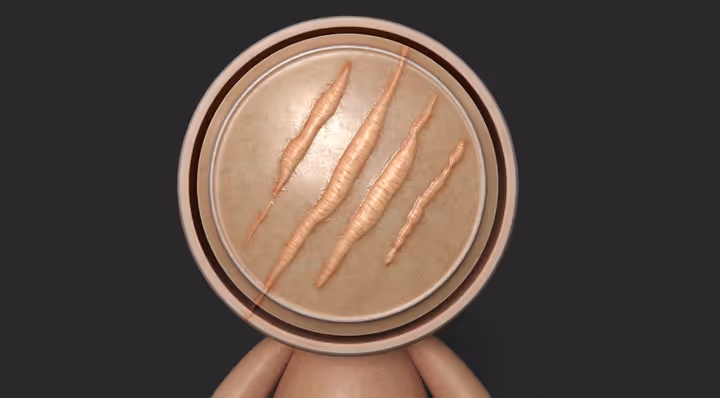
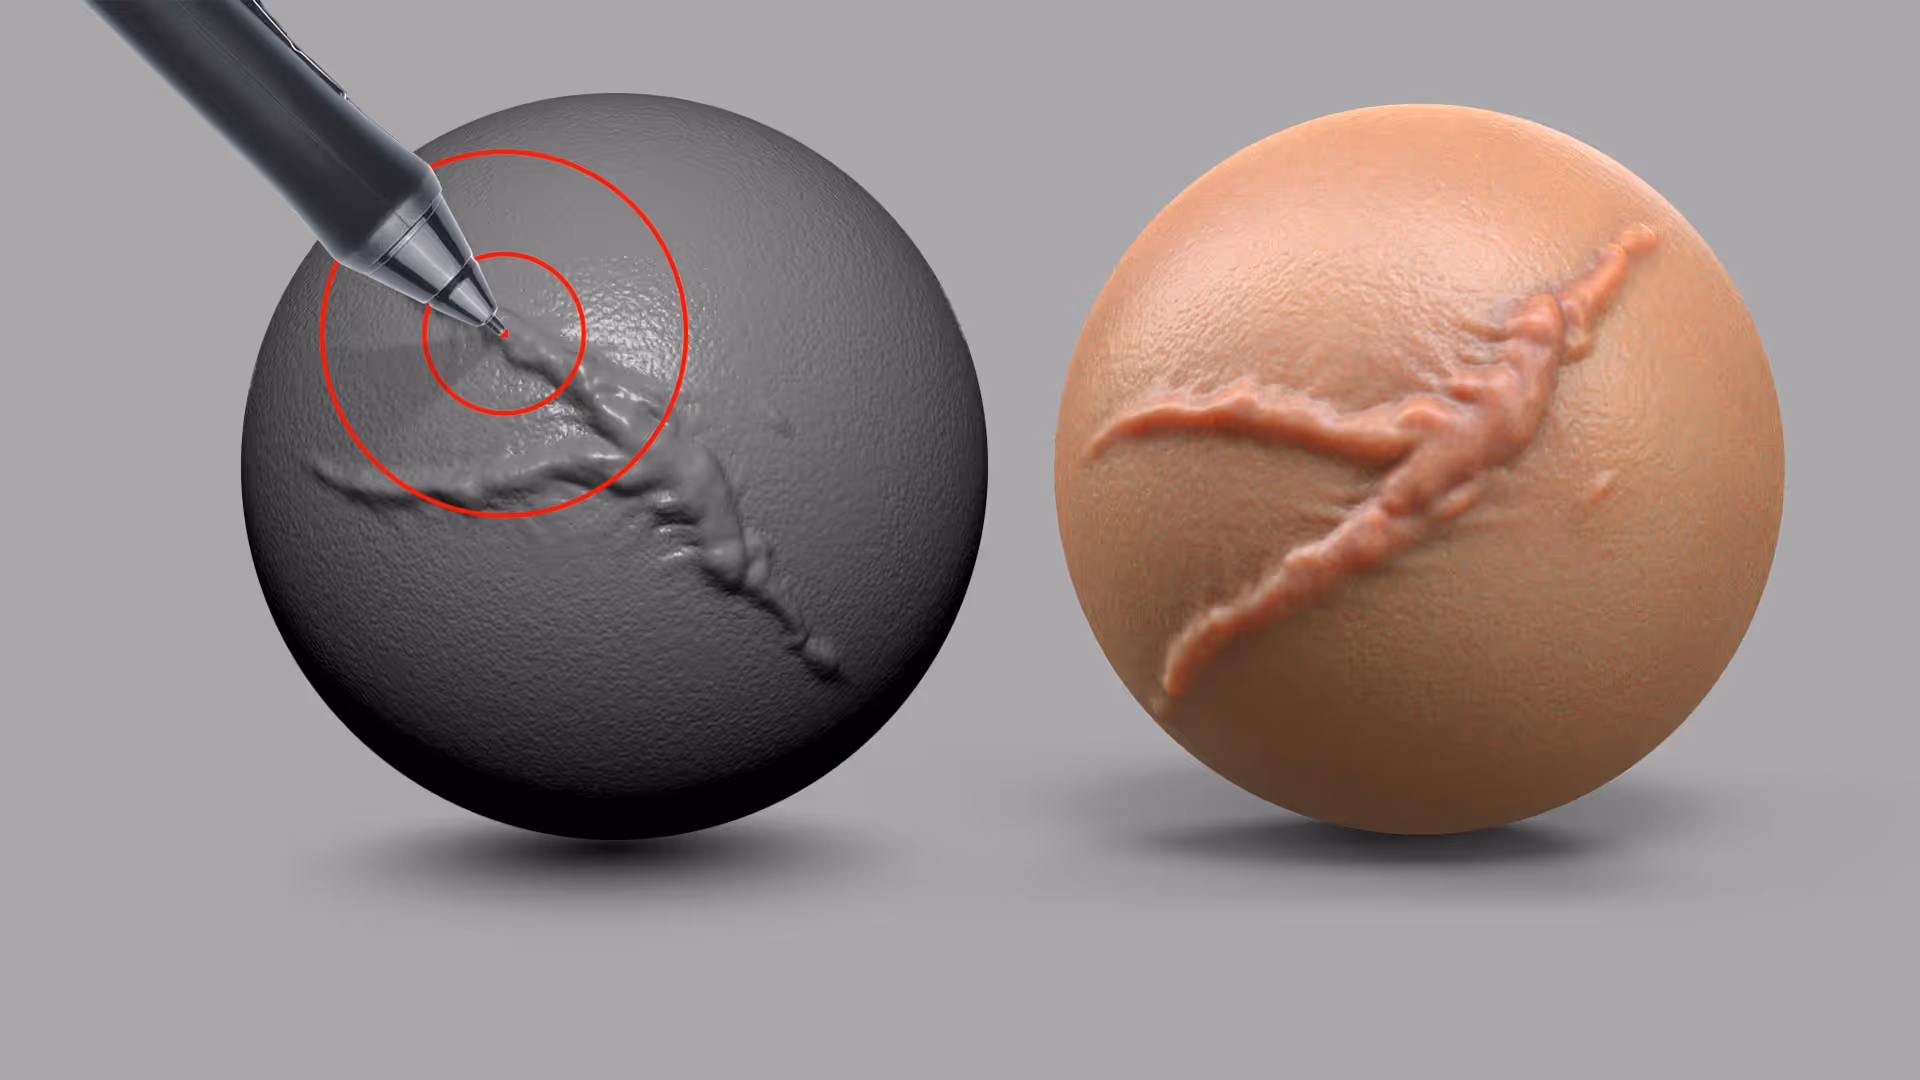
Creating Scar Tissue Using Anchor Points
Let’s see this in action by creating a scar tissue effect step-by-step:
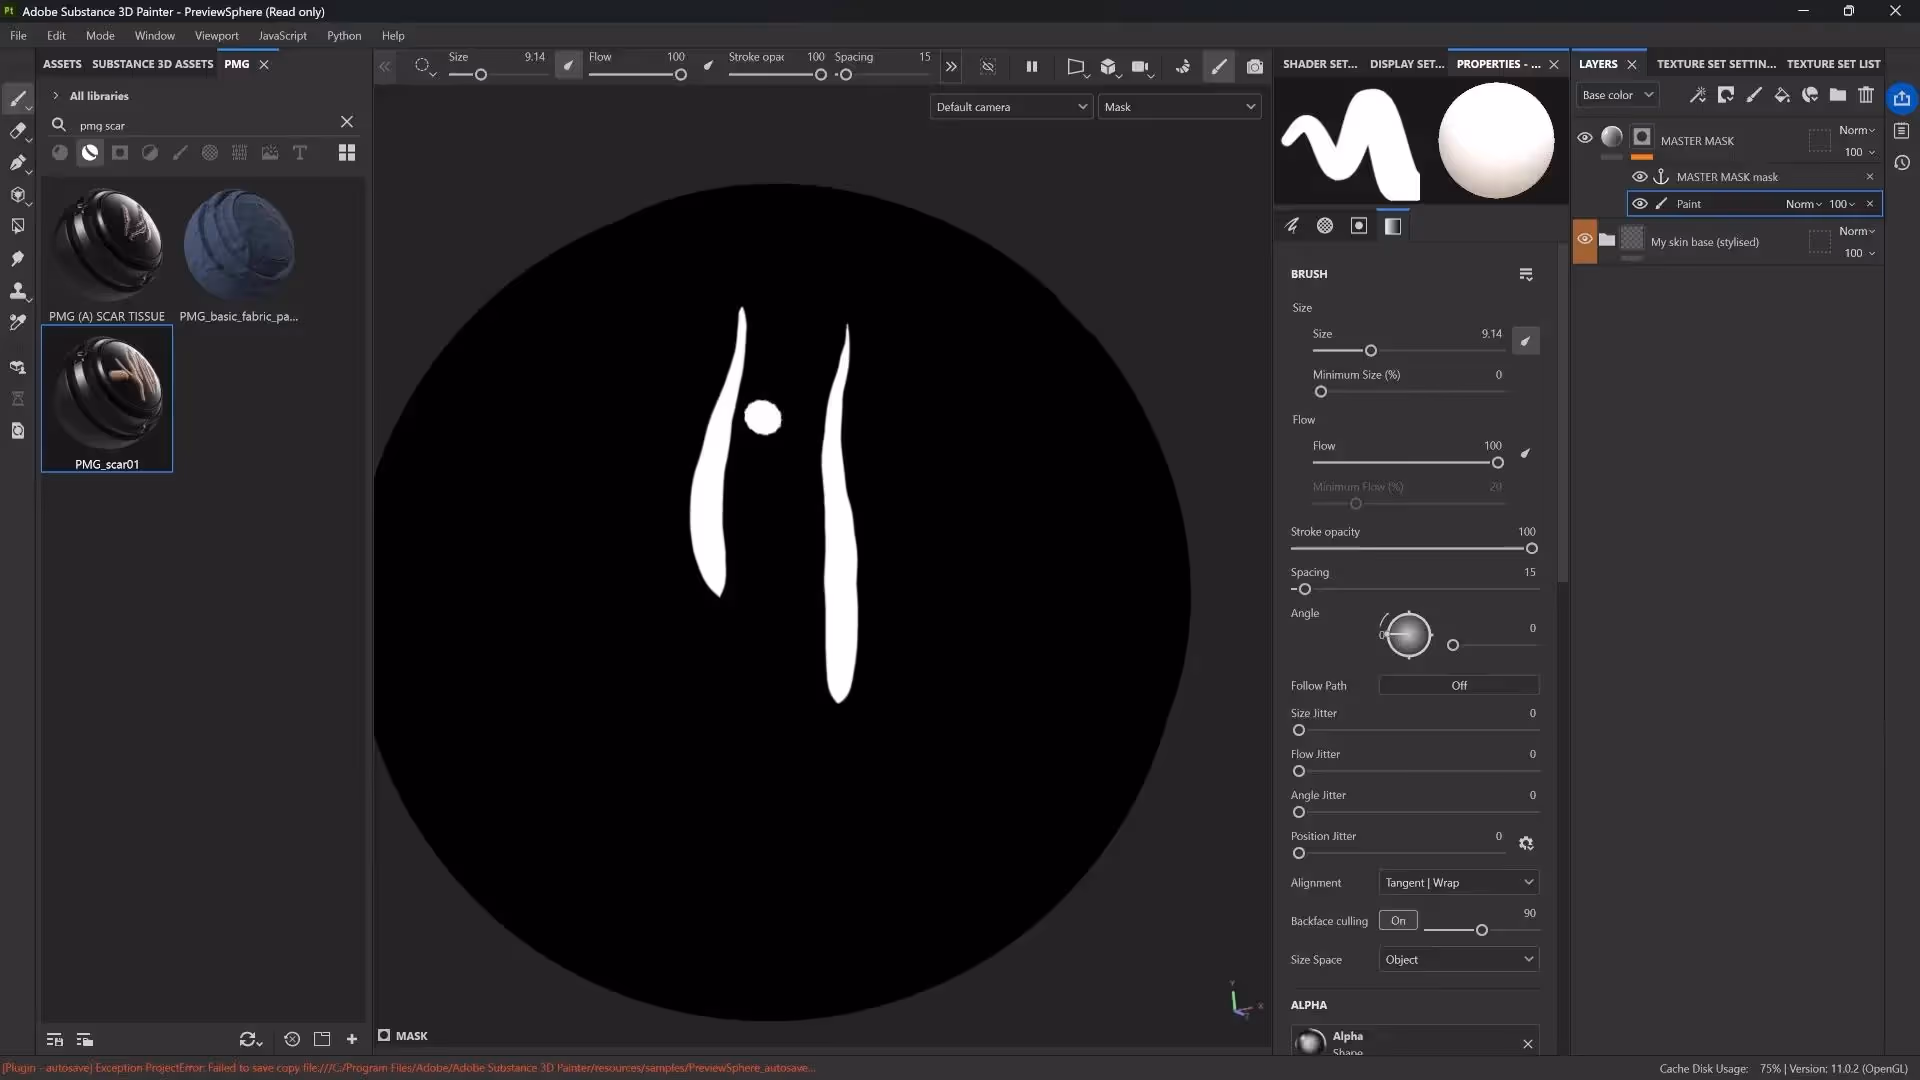
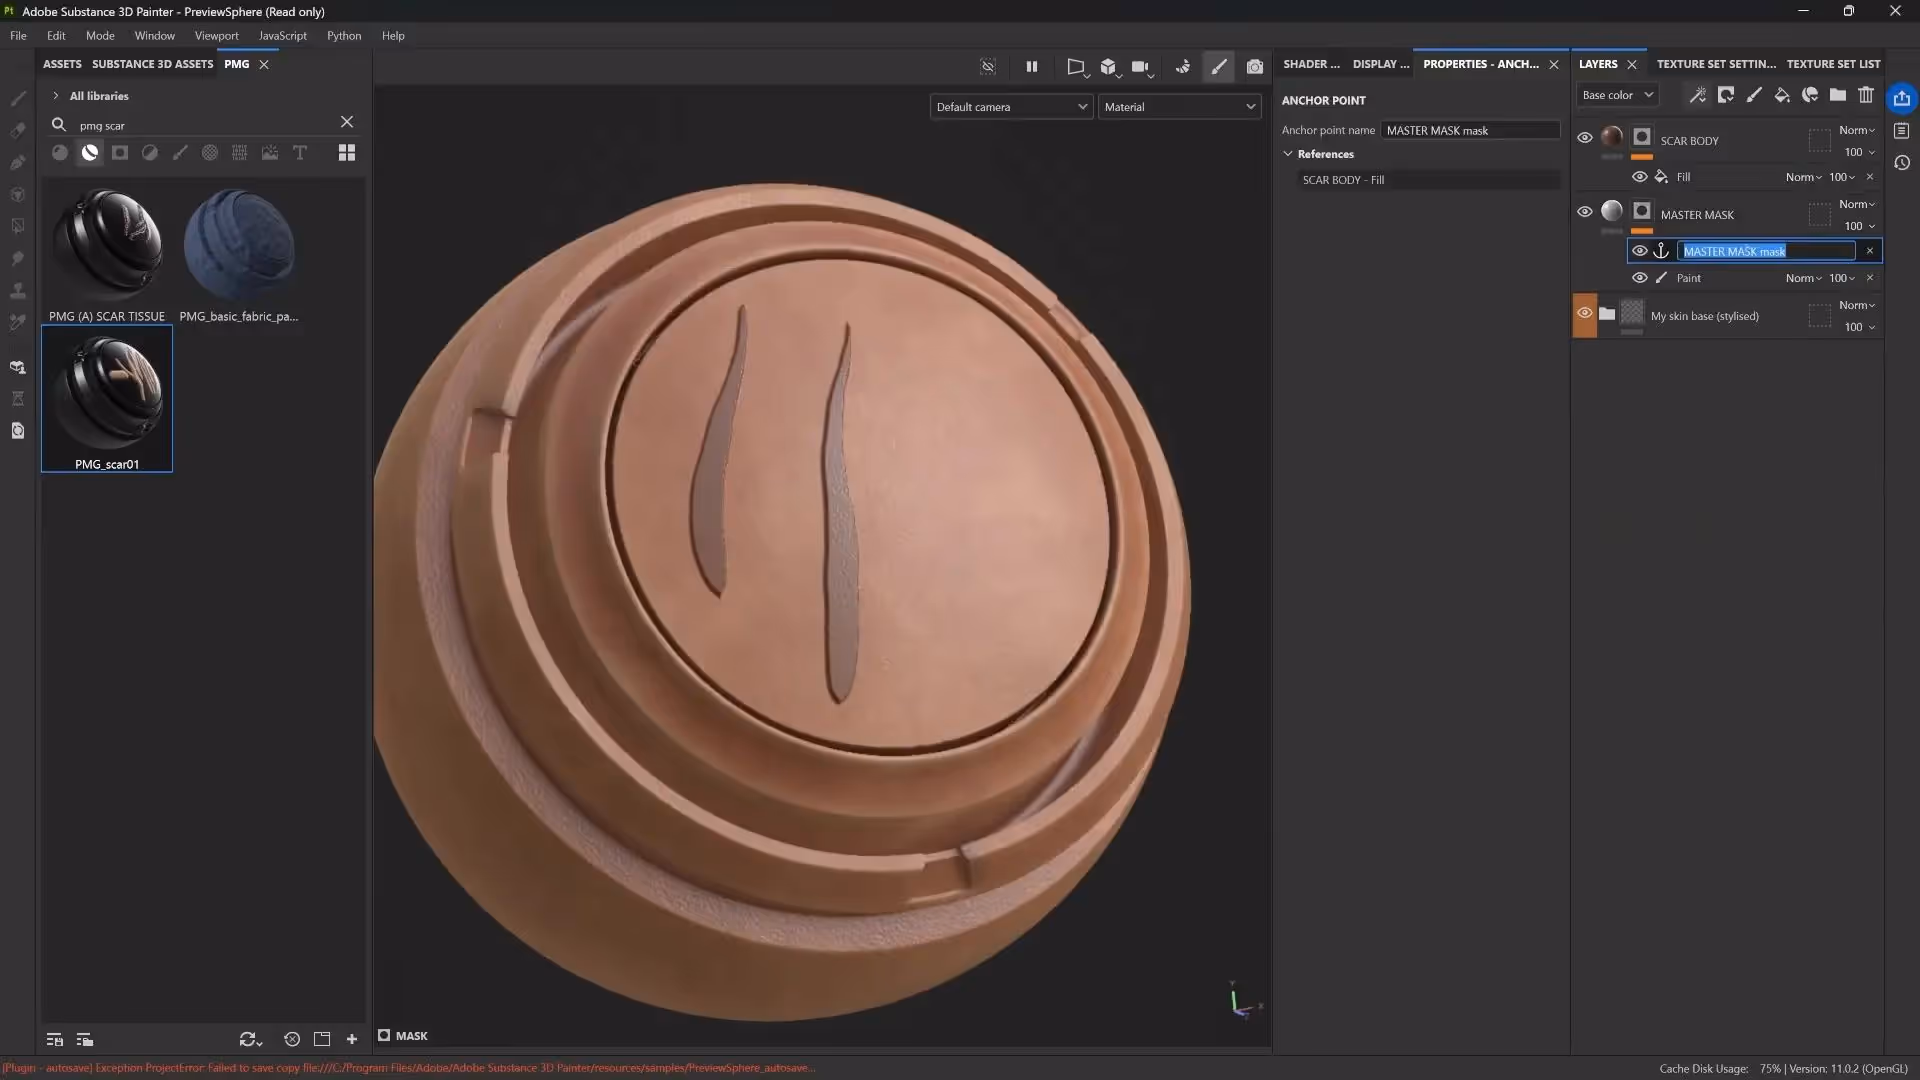
- Create the Master Mask: Add a fill layer, rename it to master mask, toggle off color channels so it only contains a mask, and add a black mask.
- Add an Anchor Point and Paint Layer: Insert an anchor point and a paint layer below it. Paint the scar shape in black and white using a hard brush for clarity.
- Create the Scar Body Layer: Add a new fill layer, rename it scar body, and set some basic color (reddish), height, and roughness values so the effect is visible.
- Reference the Master Mask: In the scar body layer’s mask, add a fill layer and select the master mask anchor point from the grayscale channels. You’ll see your painted mask shape appear here.
Now, when you paint or modify the mask in the master mask paint layer, all referencing layers update in real time. This non-destructive workflow is a game-changer.
Adding Depth with Bevels and Filters
The scar body looks a bit harsh initially, so let’s add finesse:
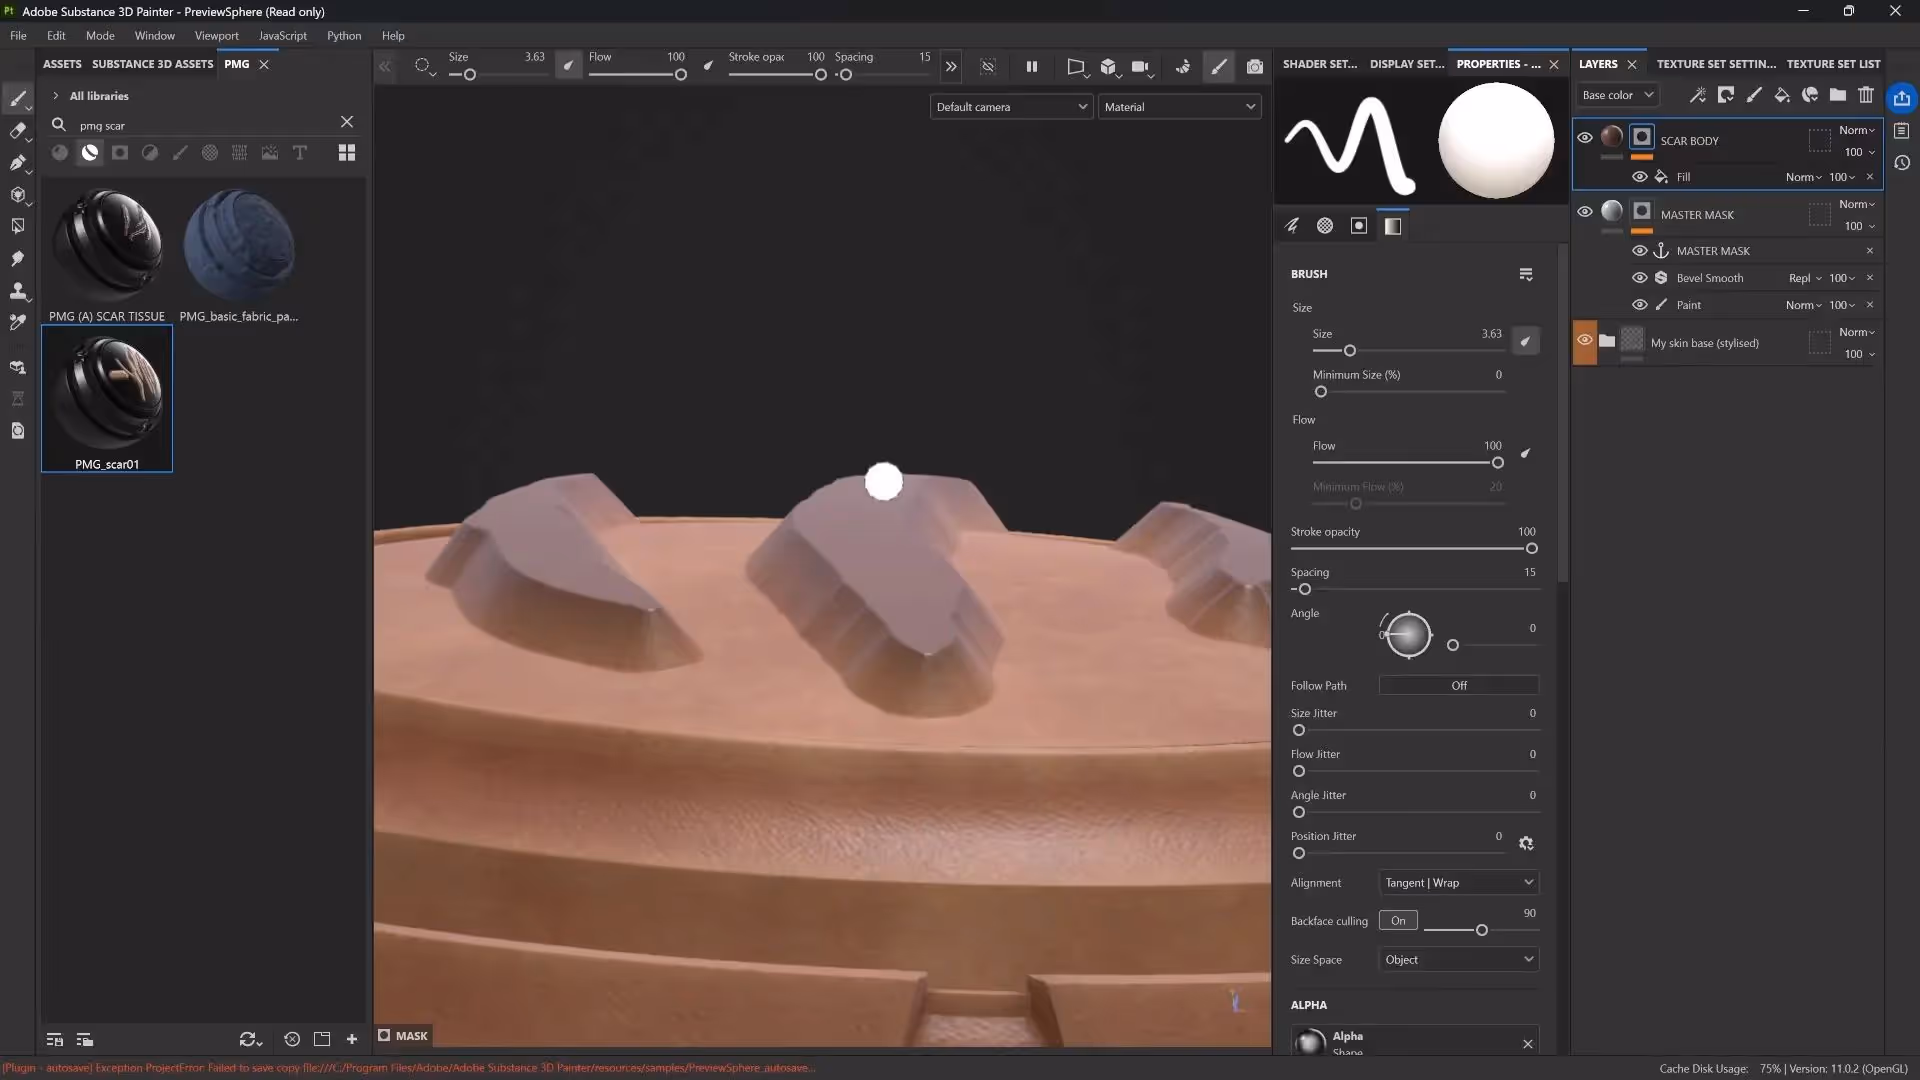
- Add a Bevel Smooth filter to the scar body mask to soften edges and add realistic depth.
- Adjust displacement and subdivision settings in the shader properties to enhance height effects.
- Fine-tune parameters like curve shape, mask threshold, distance, smoothing, and curve offset to shape the bevel precisely.
- Reduce the height and tweak roughness and color to achieve a believable scar tone.
By manipulating the mask rather than the paint itself, you maintain full flexibility and control.
Layering Effects for More Realism
Anchor points allow you to build complexity by stacking effects that all reference the same base mask:
- Duplicate the scar body layer to create a scar top layer with a lighter, yellowish tone. Adjust height and roughness to differentiate it.
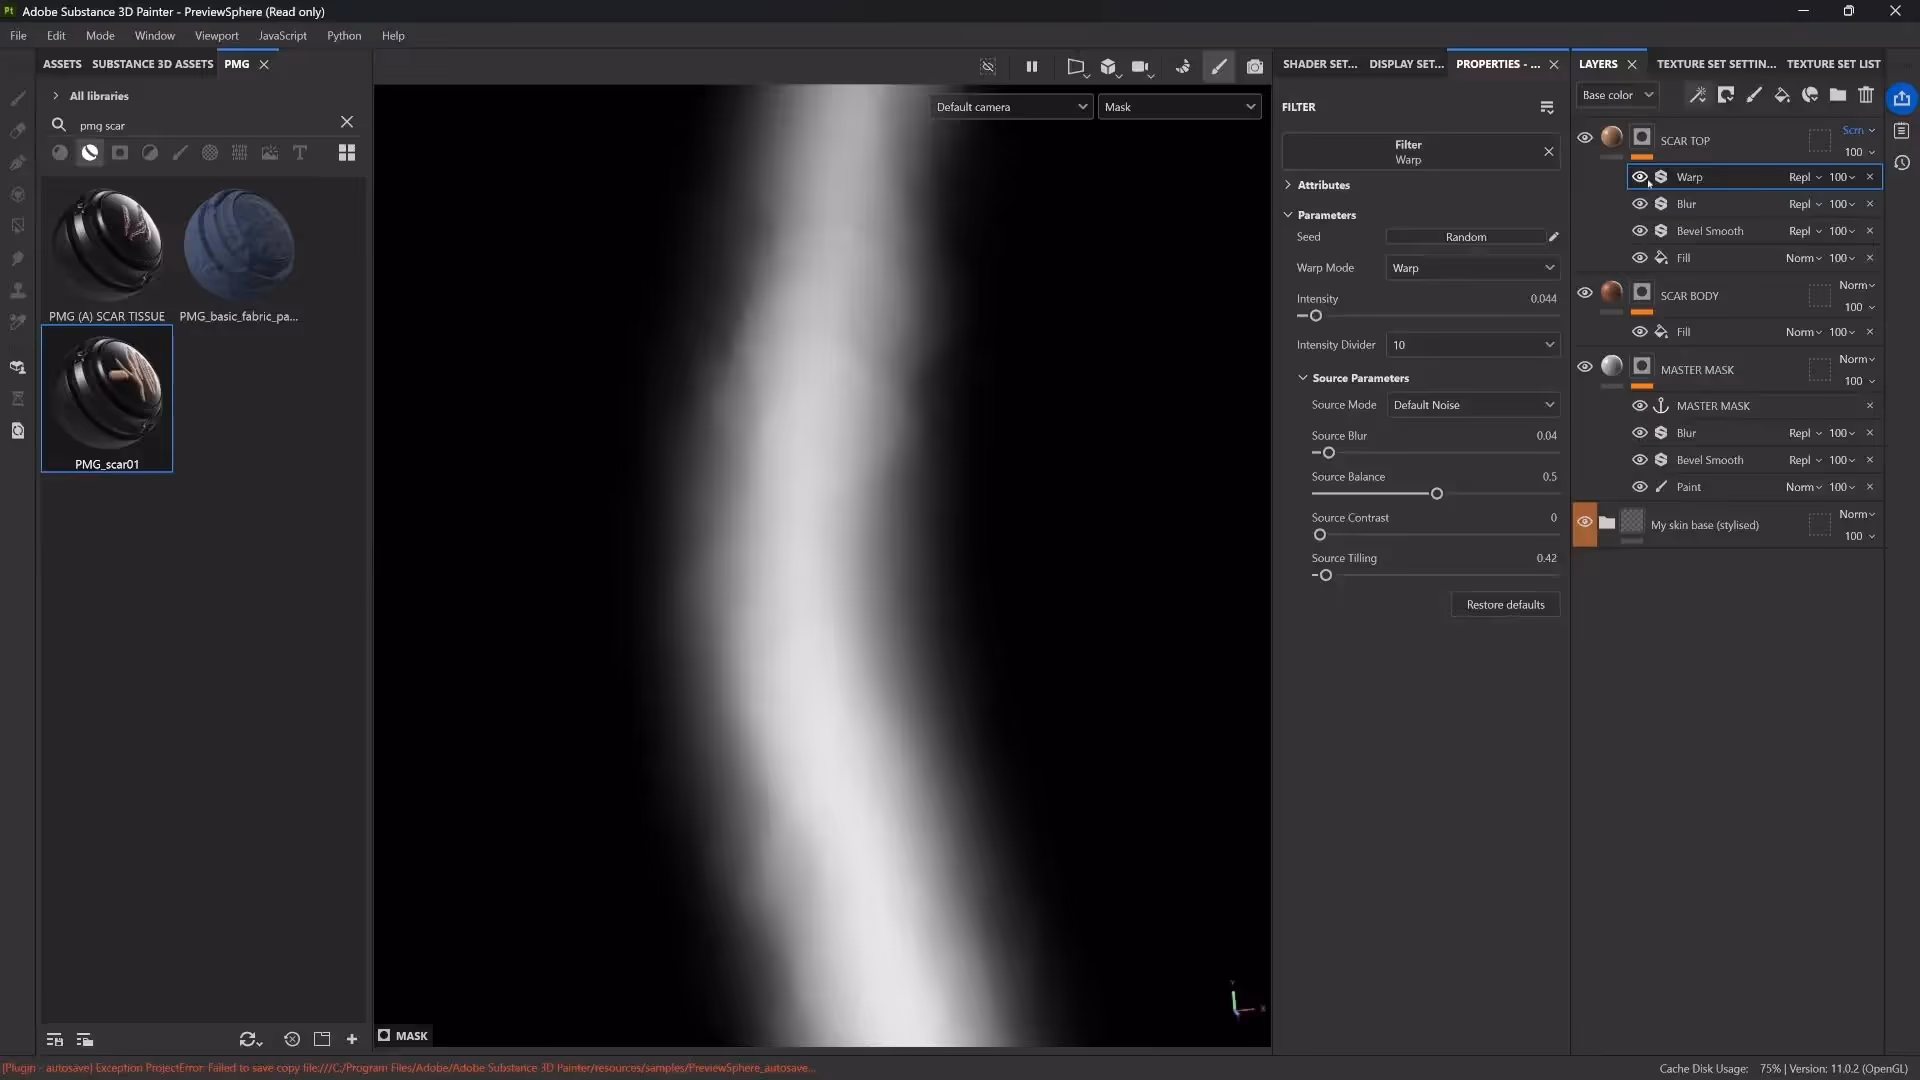
- Add a Bevel Smooth and Blur filter to this new layer’s mask to create a soft fade between the scar’s top and body.
- Experiment with blending modes like Screen, Multiply, or Linear Burn on mask layers to control how effects blend organically.
- Add a Warp filter to introduce subtle distortion, breaking up harshness and creating natural variation.
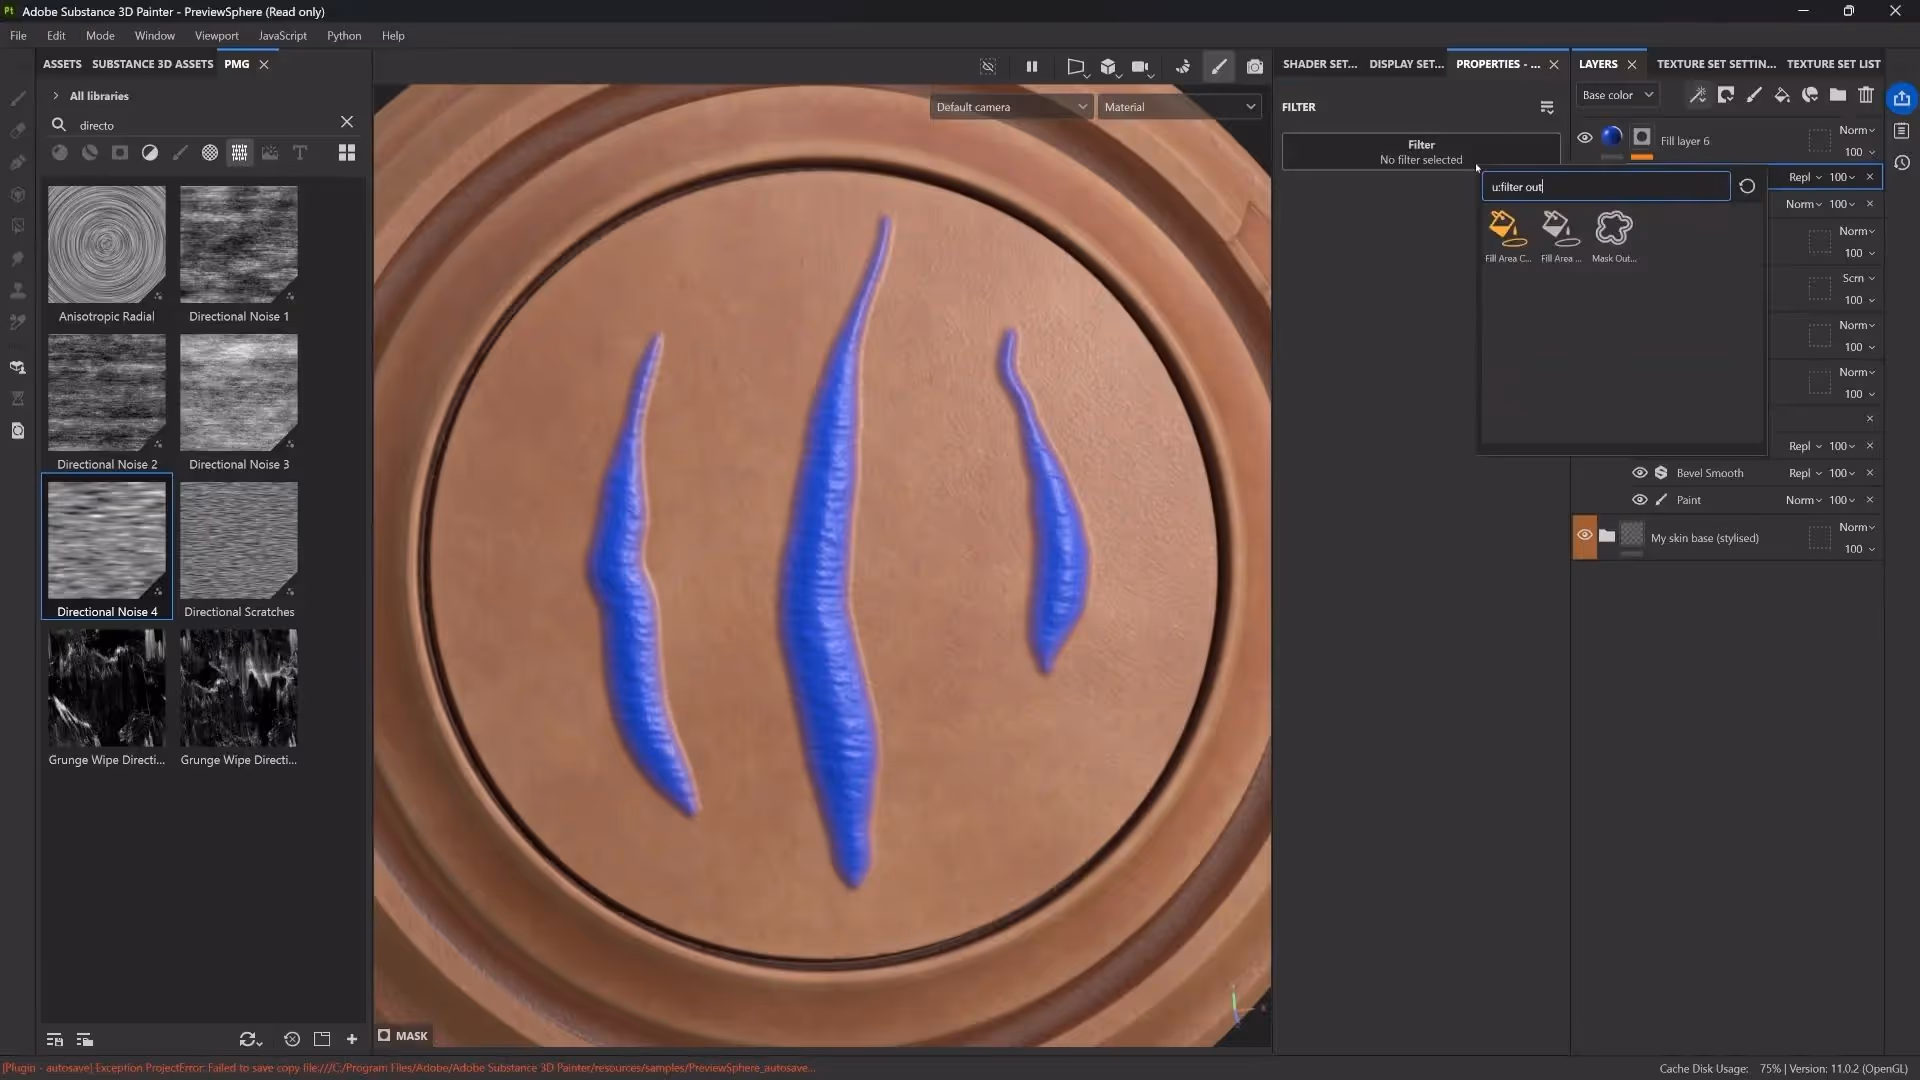
Adding Fine Details: Connective Tissue Lines
To simulate the delicate connective tissue often visible in scars, you can add another layer that references the master mask:
- Create a new fill layer with a black mask.
- Reference the master mask anchor point again in the mask fill layer.
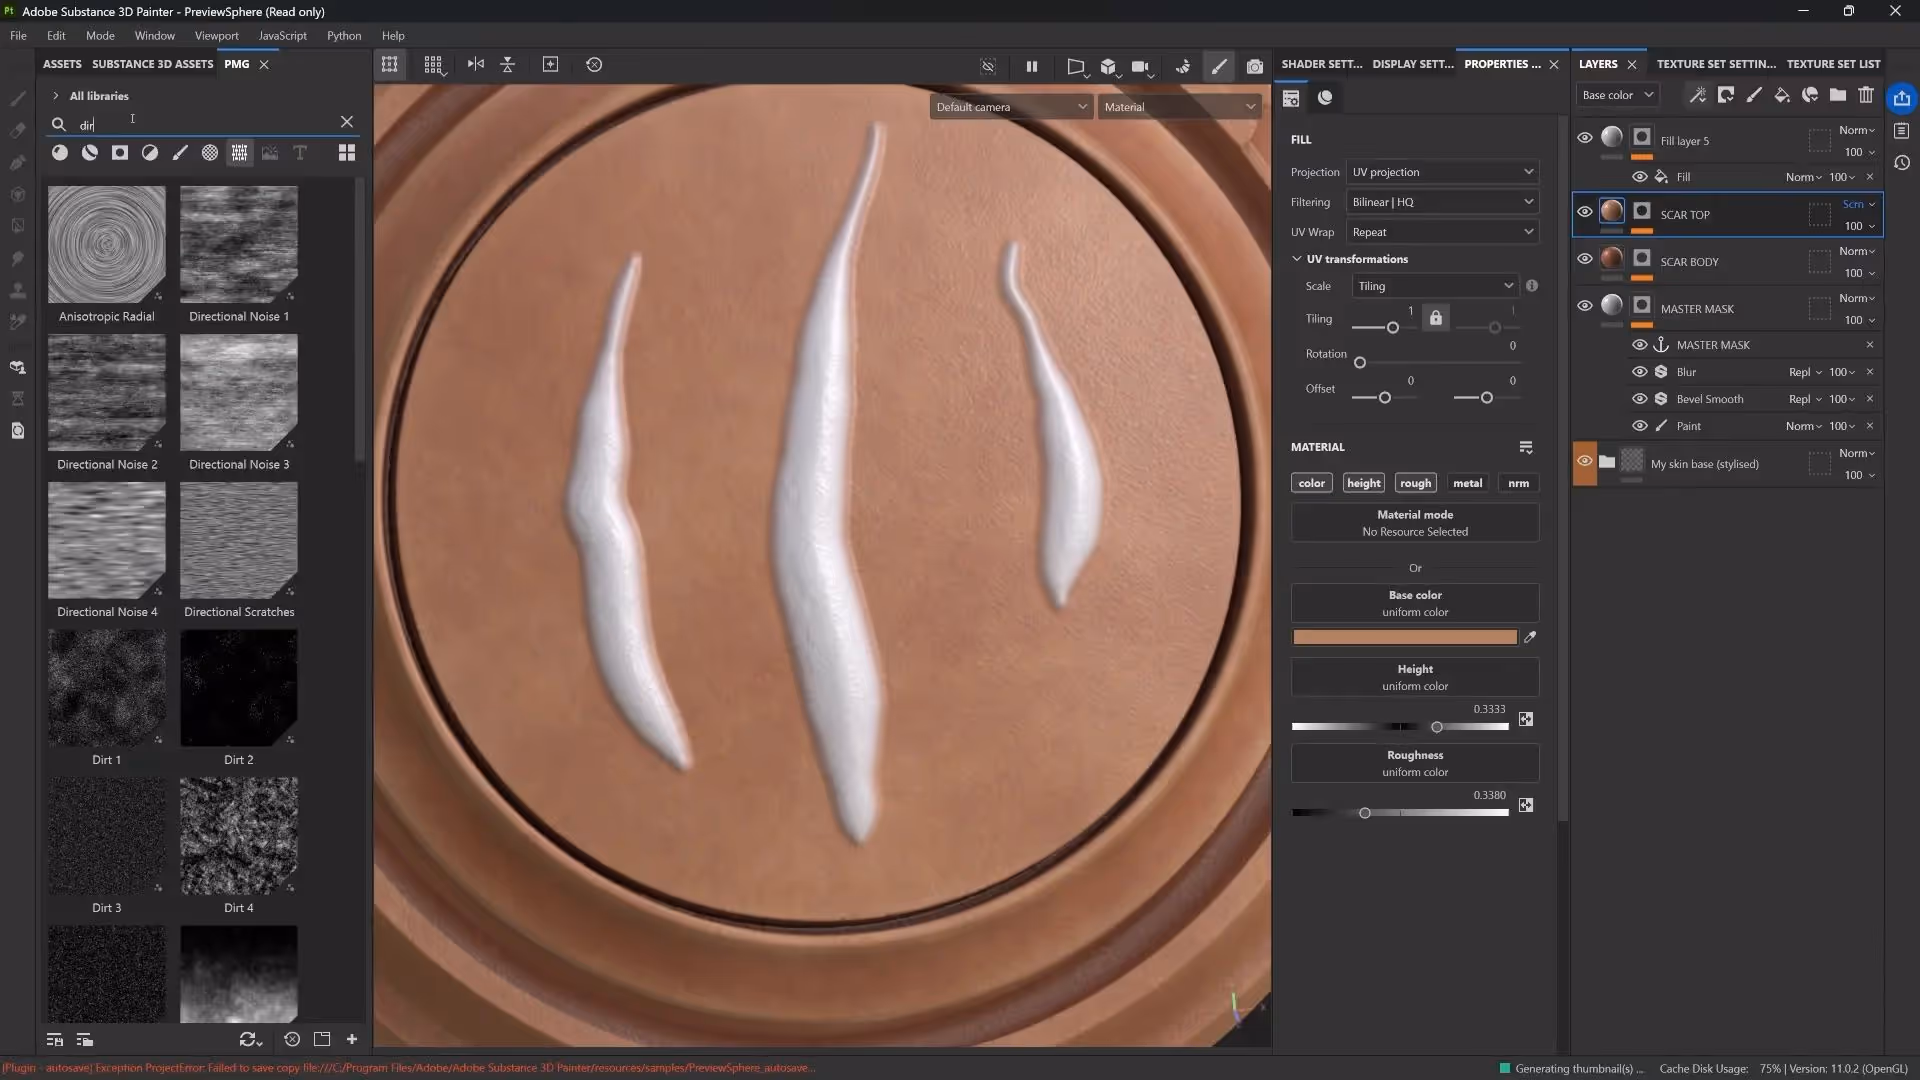
- Apply a directional noise texture to simulate hatched lines oriented along the scar.
- Use mask blending modes like Linear Burn to constrain the noise effect inside the scar shape.
- Adjust contrast, tiling, and rotation of the noise to match the scar’s direction and scale.
- Add a subtle blur filter to soften the noise edges for a more organic look.
Creating Damage Around the Scar
The scar itself isn’t enough; you often want damage or redness around it. Here’s how to add that:
- Create a new fill layer with a black mask and reference the master mask anchor point.
- Choose a reddish or orange tone to simulate inflammation around the scar.
- Add the Mask Outline effect to the mask to generate an outline around the scar shape.
- Adjust the outline’s threshold, width, blur, and curve shape to get a soft, natural edge.
- Introduce a grunge texture on top of the outline mask and set it to Multiply to break up the uniformity of the damage.
- Fine-tune the levels and color blending mode (such as Overlay) to get the right intensity and contrast.
This layered approach lets you create rich, believable skin damage effects that feel alive and organic.
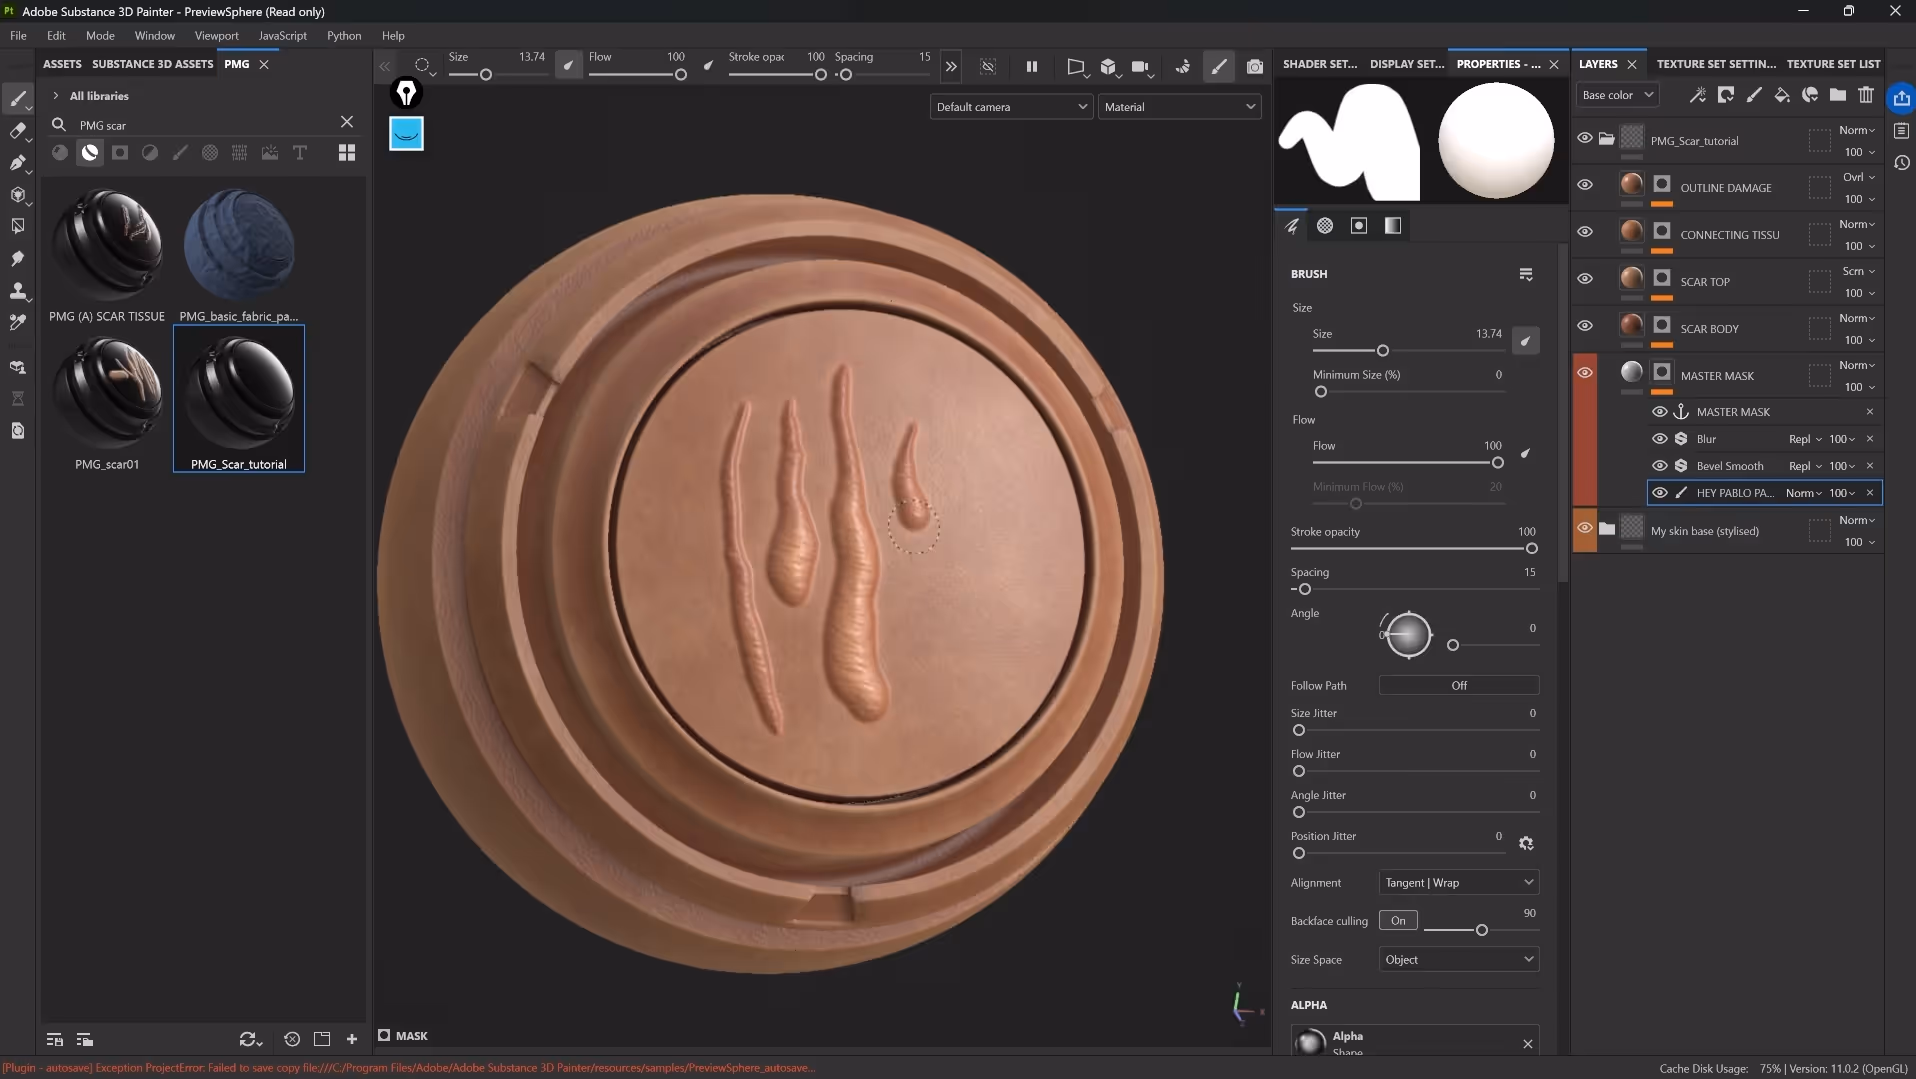
Saving and Reusing Your Anchor Point Setup
Once your anchor point system is set up, it’s important to organize it for future projects:
- Name your layers clearly, e.g., connecting tissue, outline damage, etc.
- Assign a color to your master mask layer to quickly identify where to paint your masks.
- Add a simple paint layer within the master mask with a note like, “Hey, Pablo, paint here,” as a reminder for yourself or collaborators.
- Group all layers and convert the group into a Smart Material for easy drag-and-drop use in new projects.

This makes your scar system portable and adaptable, allowing you to focus on creativity rather than rebuilding setups.
Conclusion: Unlocking the Power of Anchor Points
Anchor points might seem daunting at first, but as you’ve seen, they are a transformative tool in Substance 3D Painter. They let you:
- Reference a single painted mask across multiple layers.
- Apply different effects non-destructively on each layer.
- Build complex, layered materials that update in real time.
- Fine-tune masks and effects independently for ultimate control.
- Save and reuse your setups efficiently via smart materials.
By mastering anchor points, you’ll elevate your texturing workflow and create rich, believable materials with ease. Experiment with different brushes, filters, and blending modes to make the technique your own.
If you discover new and exciting ways to use anchor points, share your findings with fellow artists and keep pushing the boundaries of what’s possible in 3D texturing.
Happy painting!
ZBrush SKIN Brushes Pack
A collection of 69 ZBrush custom brushes to generate high-frequency details for the skin in your characters and creatures. The skin brushes in this pack also help you to produce custom and more complex alphas.
Get resource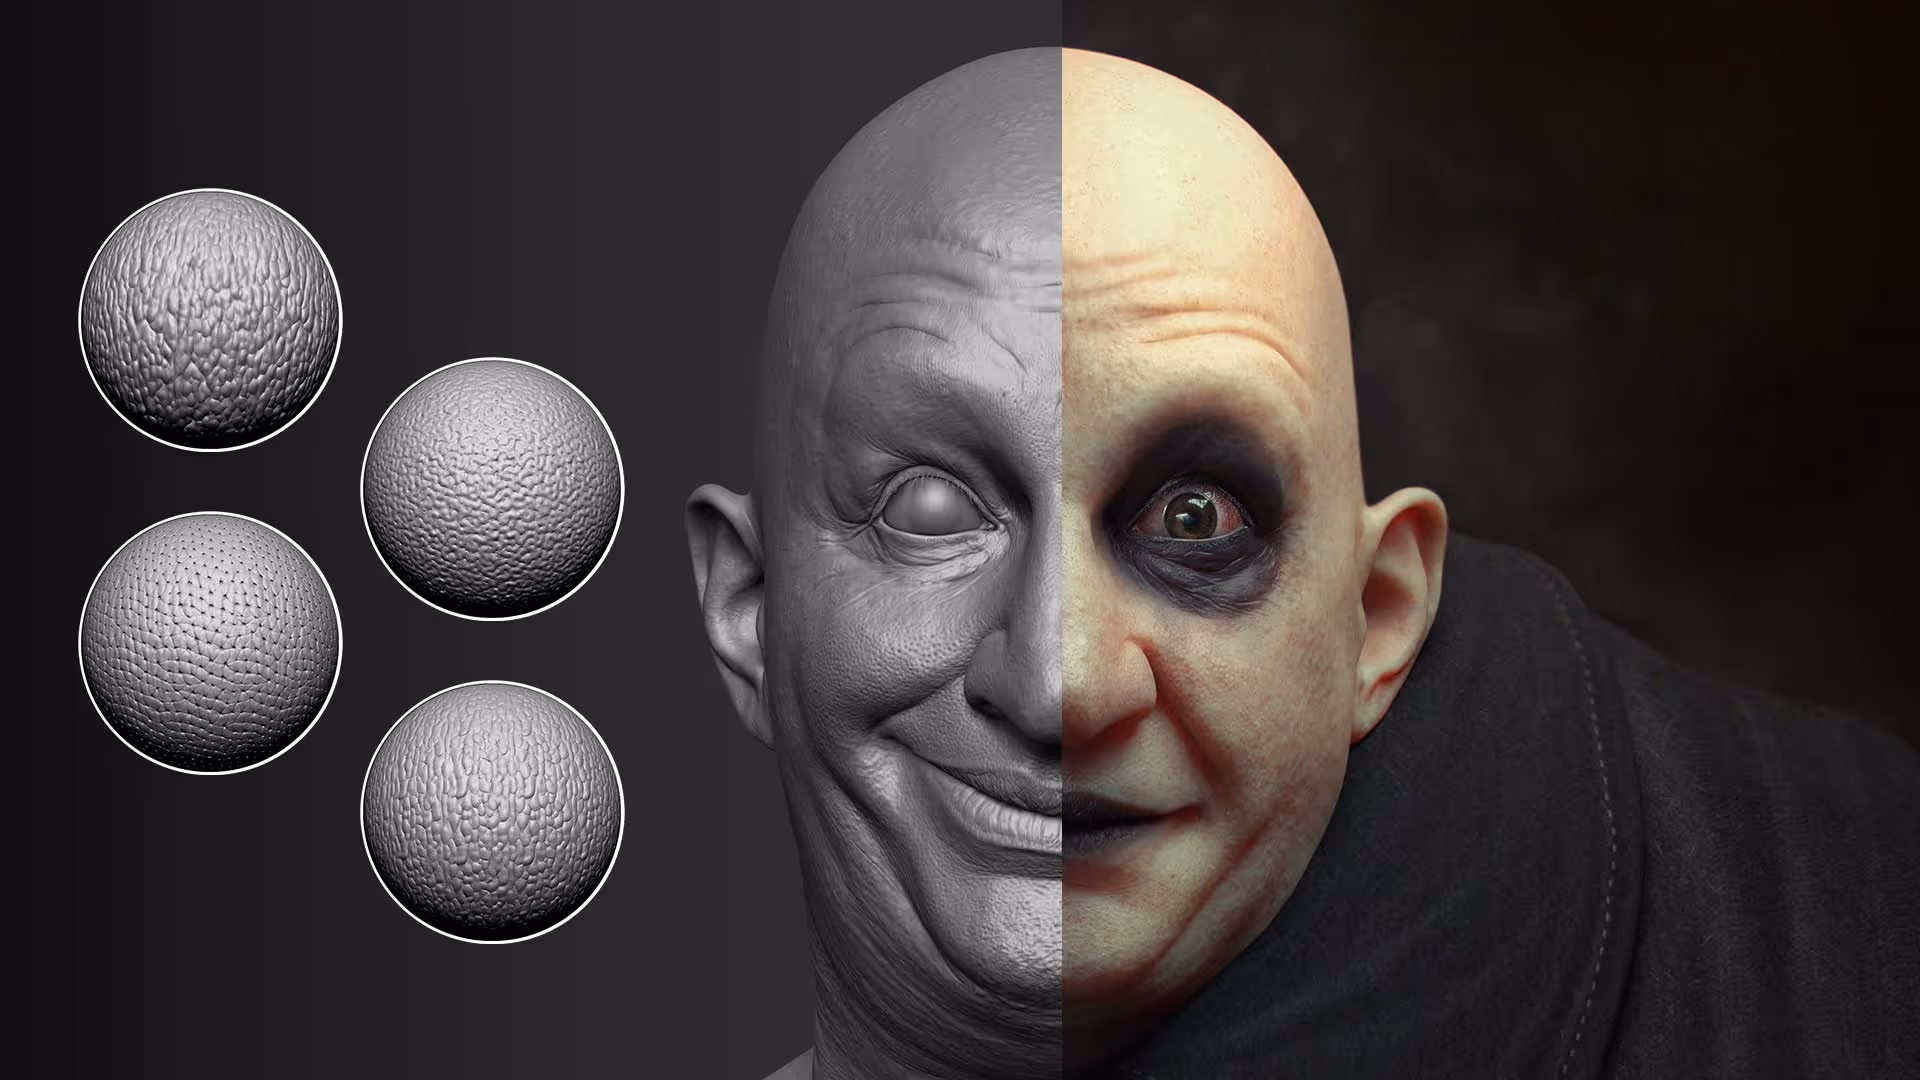
Detailing Brushes
A selection of free brushes that you can use to detail and sculpt skin for your characters and creatures
Check it out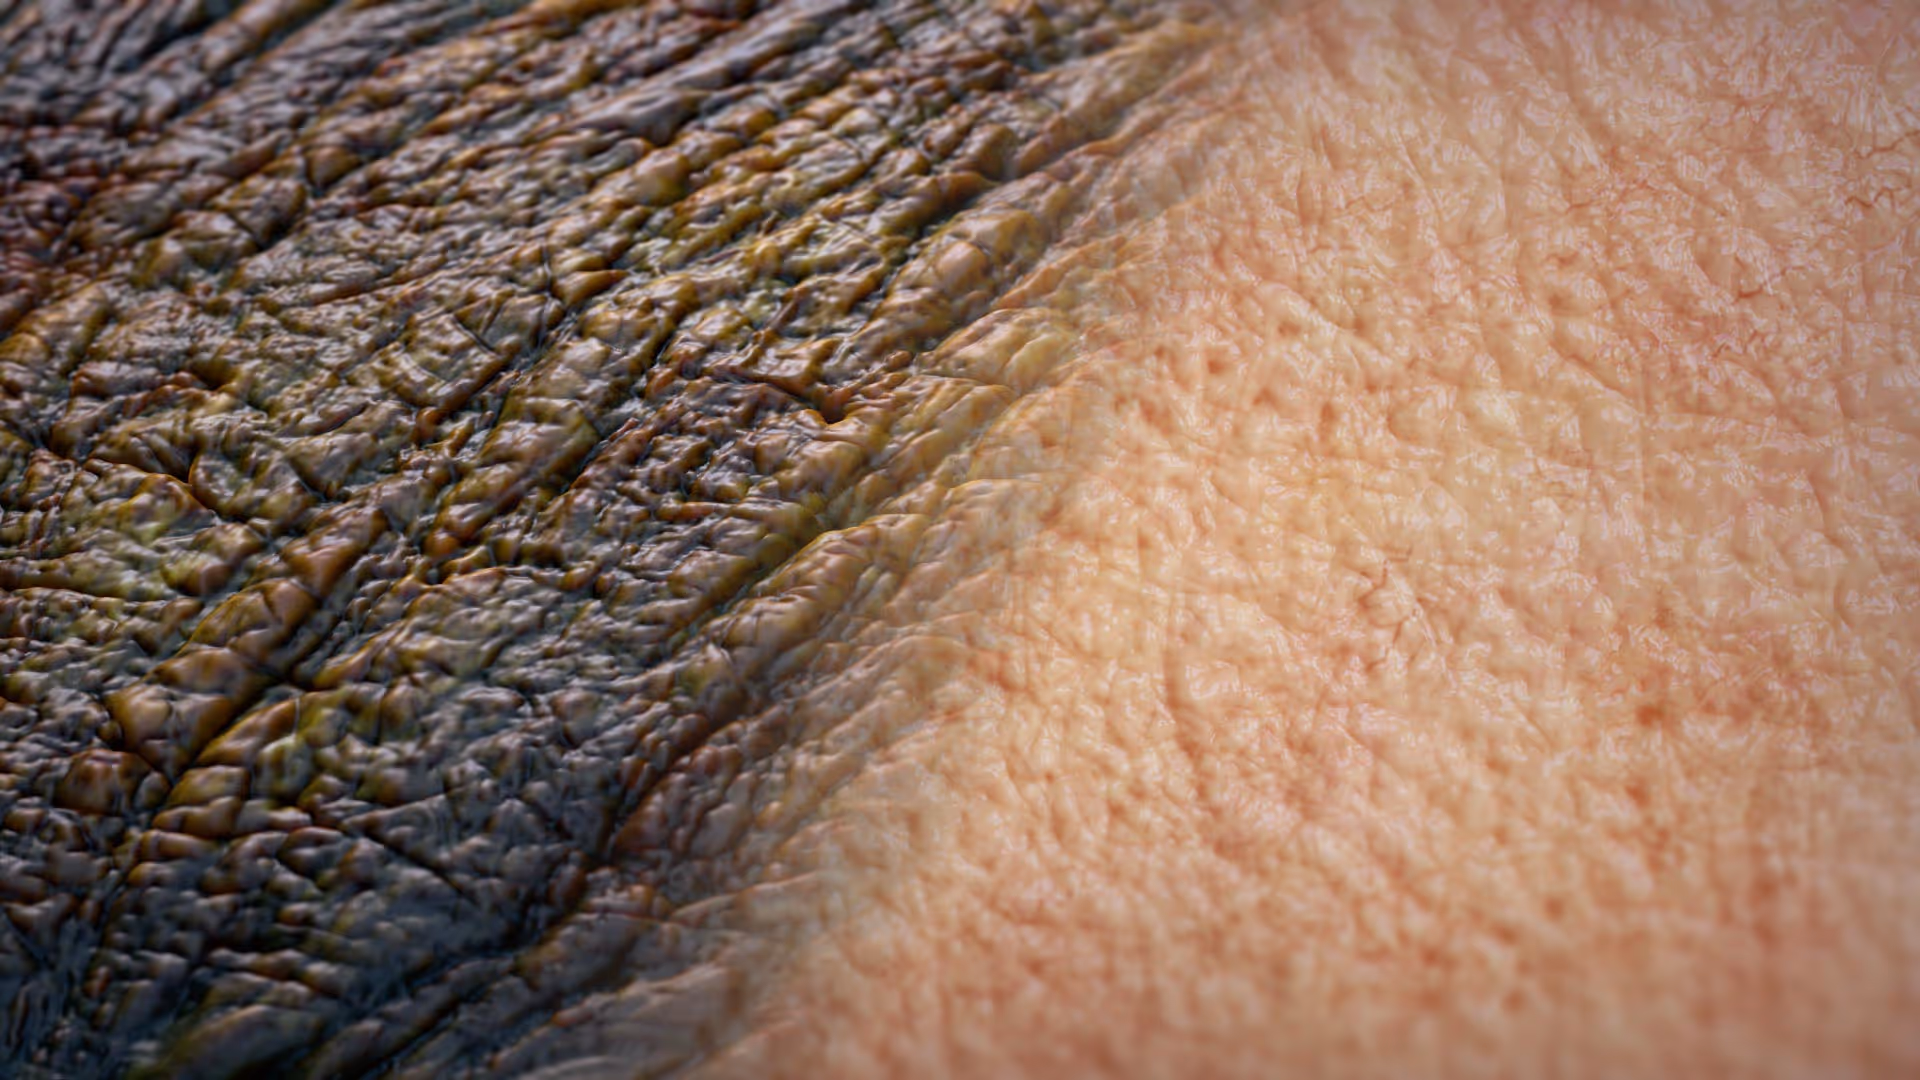


.webp)

