

Overview
This is a reference guide that covers all the process of trasnfroming a spare room in my house into a cozy studio office. The intention of sharing this project is because I purposely tried to create a nice space to work that looks cool and within a very limited budget.
You will learn how to:
- Plan your working space
- Save money without compromising the look and comfort of the space
- a couple of DIY hacks to enhance the look or functionality of objects
- Some of the materials and gadgets I use in my studio
Disclaimer:
Before we get started with the setup of this dream studio office space, it's important to acknowledge that not everyone has the luxury of a spare room for such a project. I’m very fortunate to have had an available space in my home, and I understand that space constraints can be a real challenge for many. However, even if you only have a portion of the room, or a little corner under some stairs that you can customise, this guide should give you plenty of ideas and practical tips to create something cool!
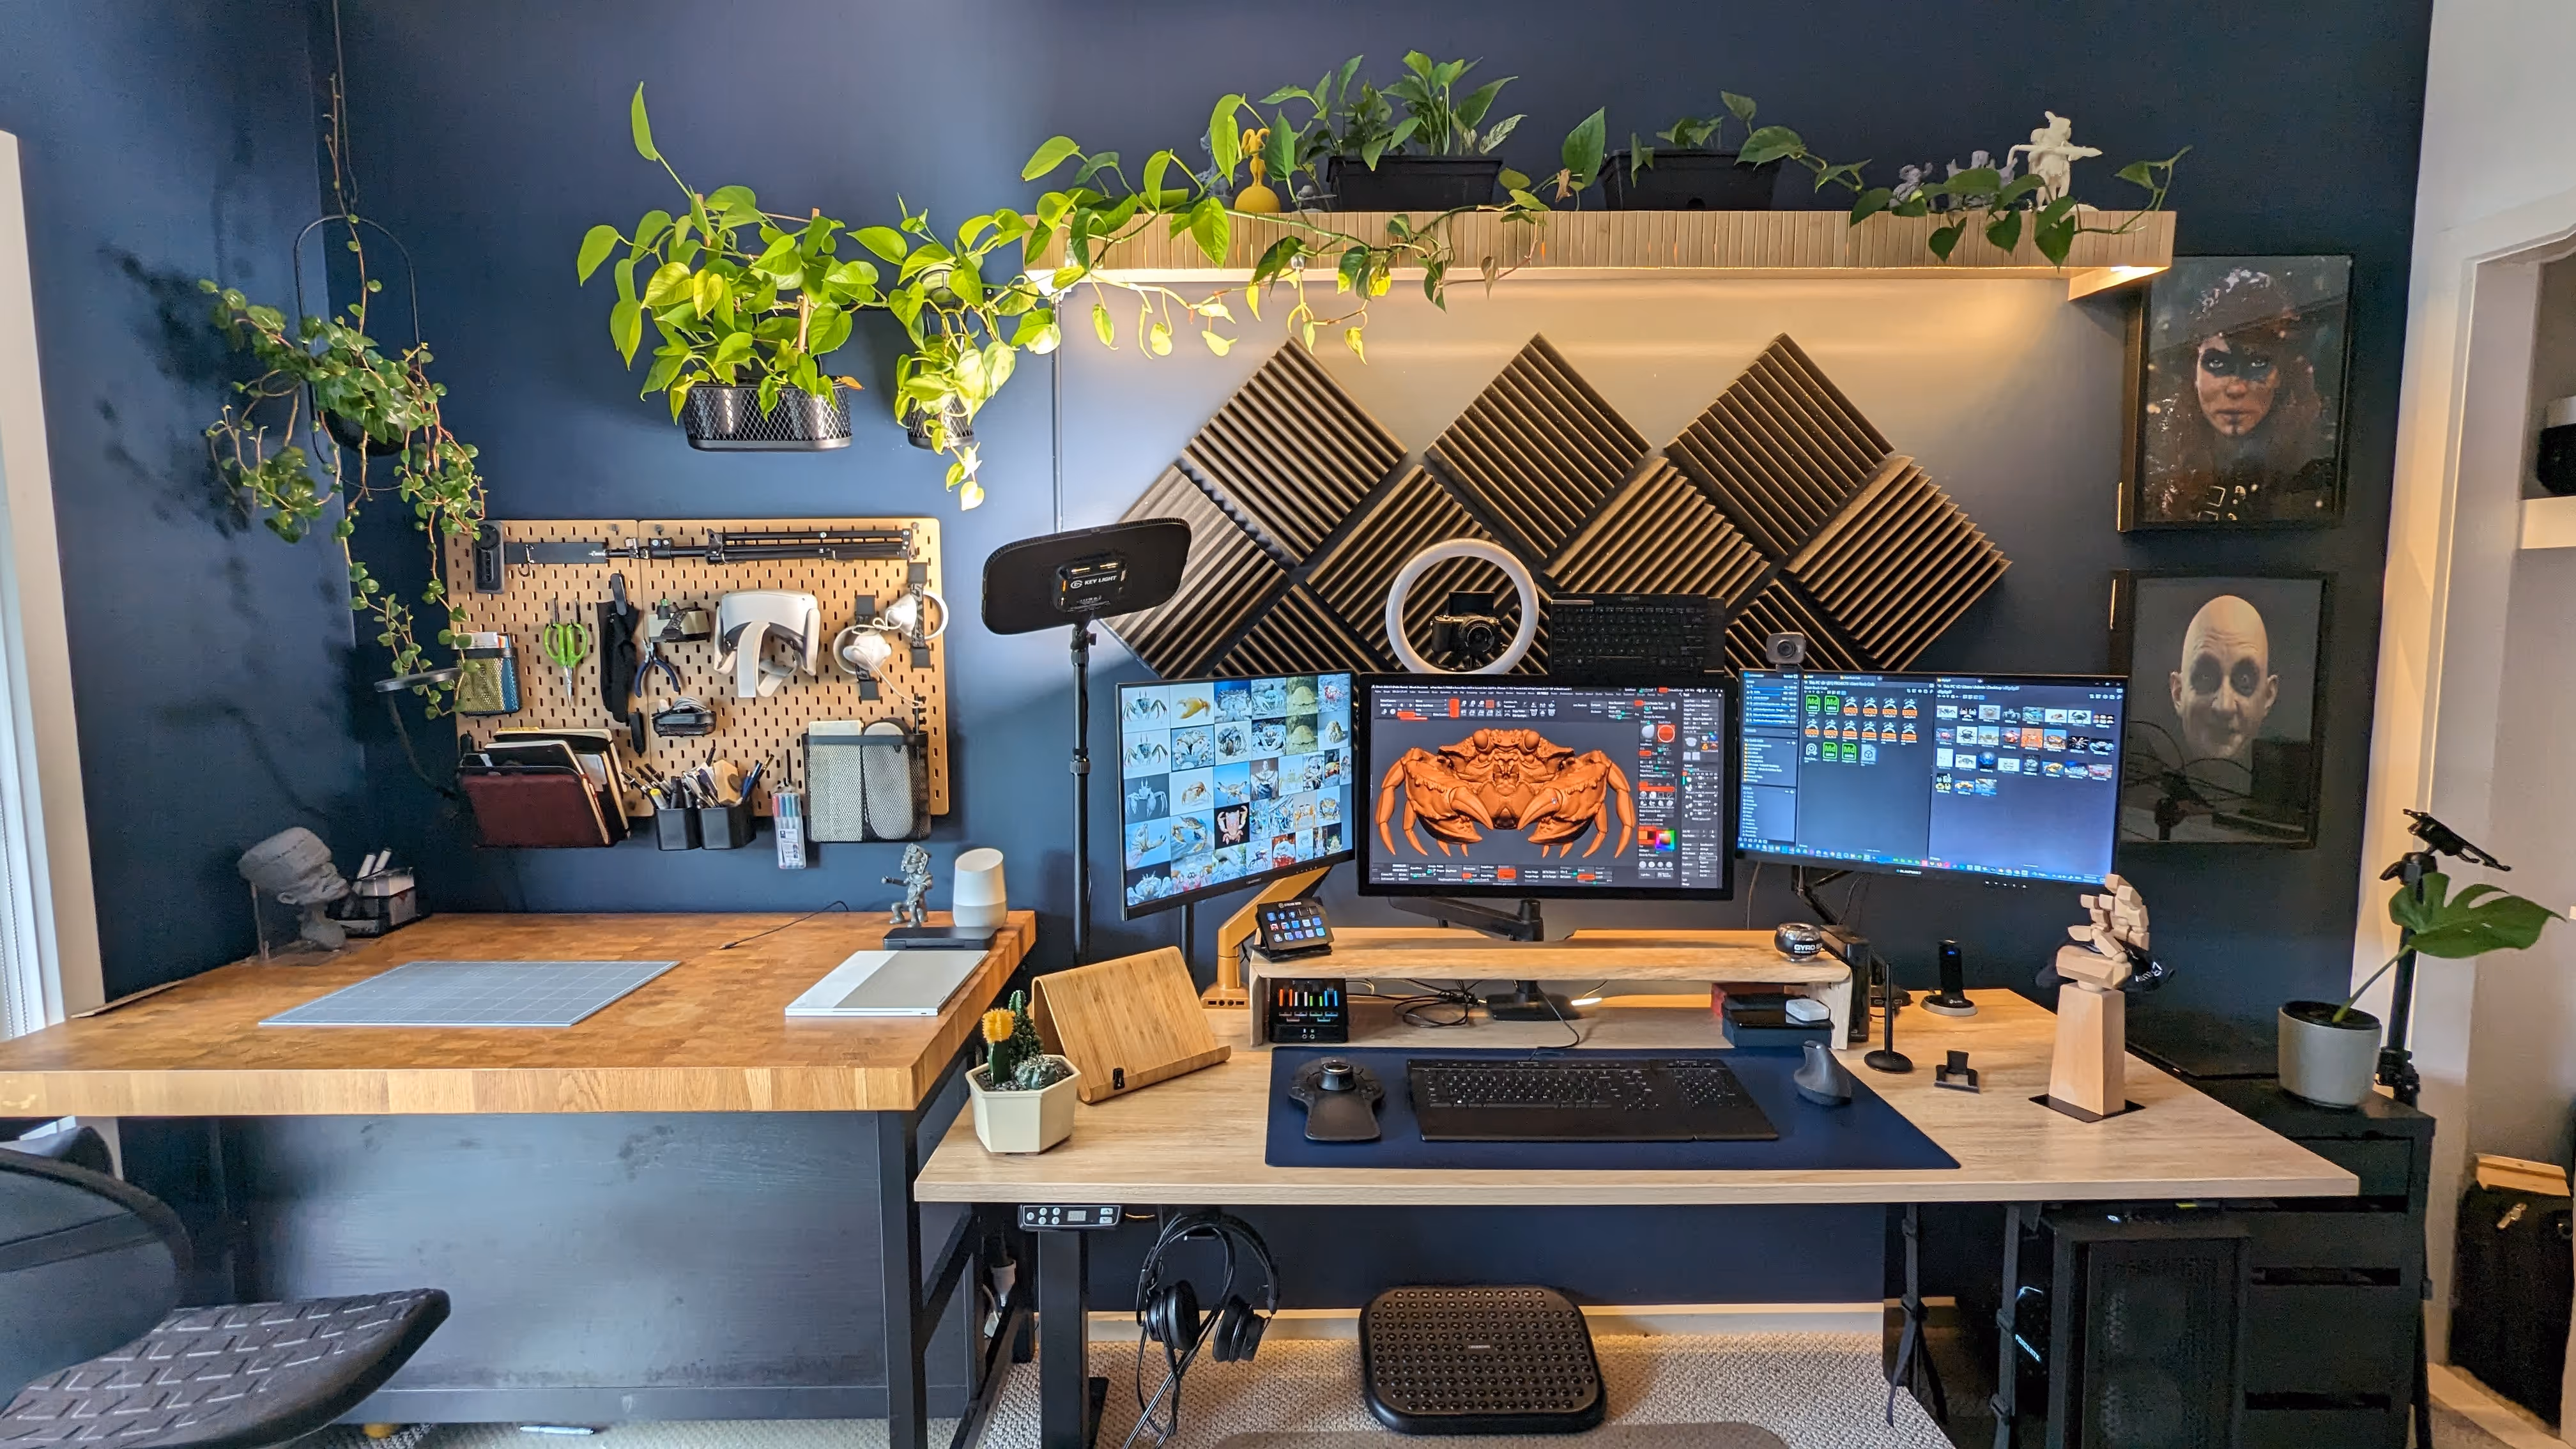
One thing I need to highlight is that my studio makeover wasn't a complete overhaul from scratch. I was able to repurpose and utilize some existing items, such as a standing electric desk, a spare tall table, and a couple of smart lights… so I set my budget for this project considering that I already had some stuff.
Throughout this guide, I'll share insights based on my experience, with the understanding that each individual's circumstances and resources may differ. Keep in mind that adaptability and creativity play a key role in crafting a workspace that suits your needs, regardless of the starting point.
I set a personal goal to build the room with a budget of AUD $1000. but I know that costs can vary depending on factors such as location, availability of materials, and personal preferences. Your budget may differ, and I encourage you to tailor the project to your financial capabilities… I established a straightforward yet arbitrary guideline for setting my budget: it should not surpass the cost of my computer tower.
As a note of transparency, there may be affiliate links included in this article. These links are provided for your convenience, and if you choose to make a purchase through them, I may earn a small commission at no extra cost to you ;)


Section 1: Planning and Inspiration
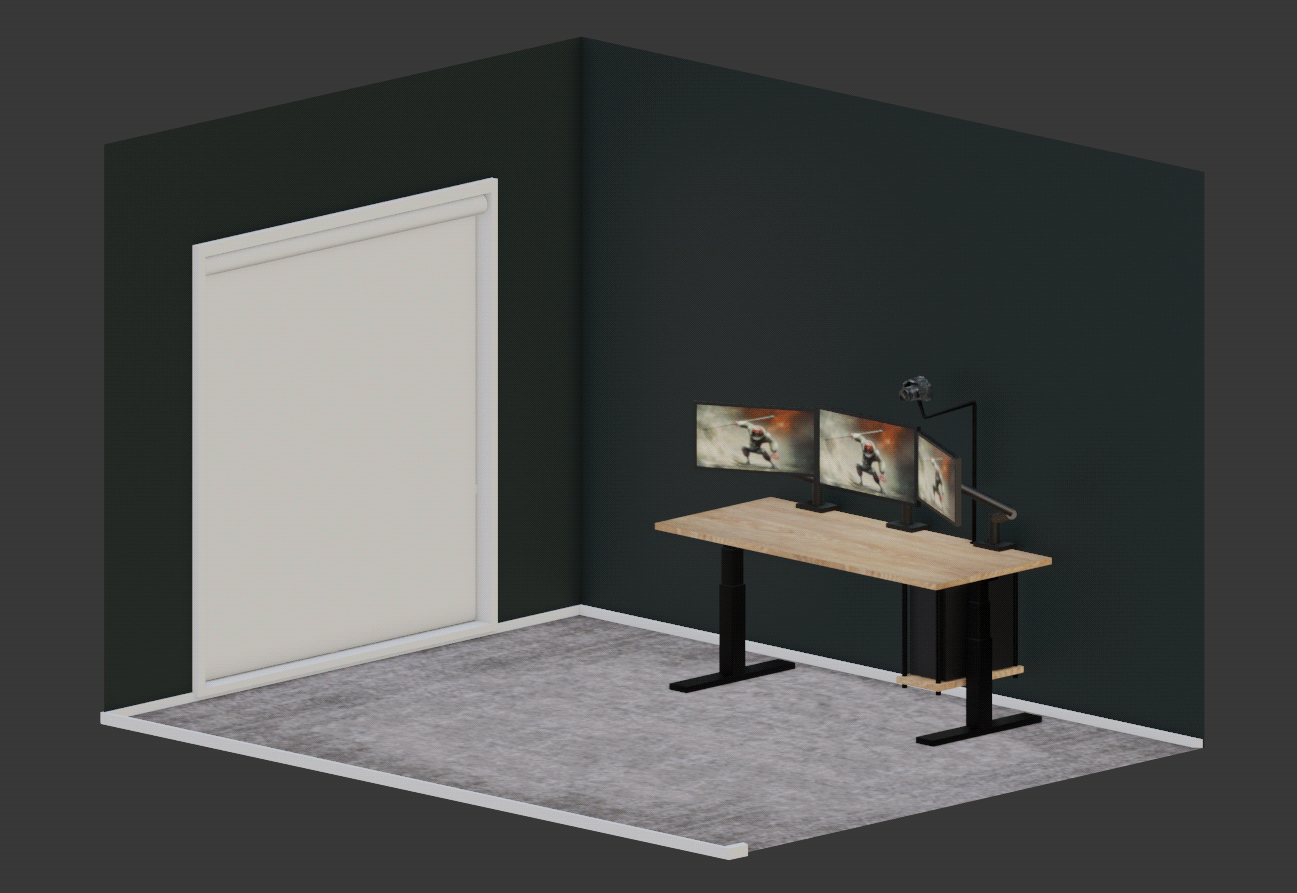
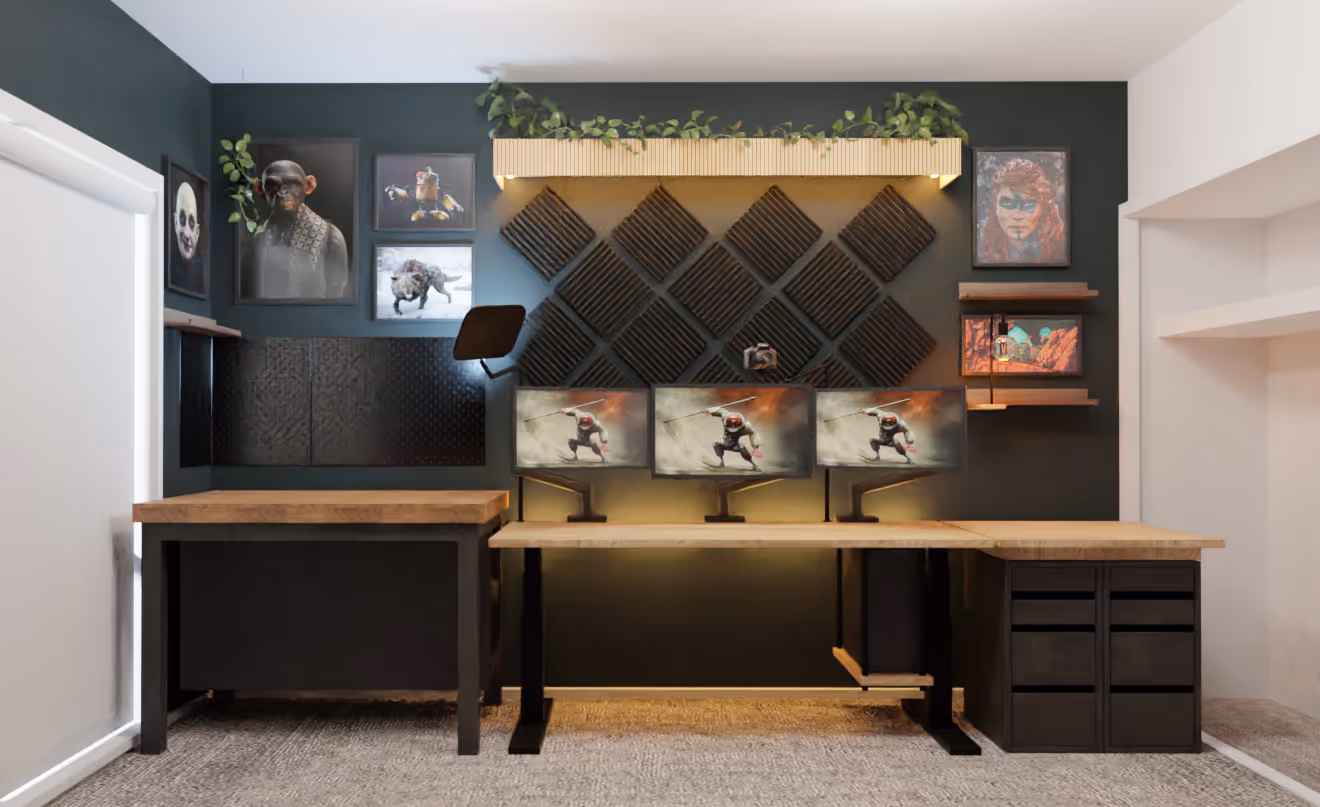
As always, the first thing I do for any project is to create a folder in my drive and collect references and inspiration to start the planning. Straightaway, I thought I could use my 3D skills to create a quick mockup of the space and visualise how things could look like before I bought anything… this was a massive time saver and a fun practical thing to do while planning. I’ll walk you through it, but here is the 3D mockup render
1.1 Assessing Your Needs:
Before you start collecting cool references and inspiration, I think is important that you do 2 things:
- Identify the primary activities you'll be engaging in (digital drawing, video editing, etc.).
- Consider storage requirements for art supplies, equipment, and gadgets… and think about how accessible the storage is (the boxes at the top of my wardrobe haven’t been opened in a year haha)
To help you define your needs here is a checklist with questions you can ask yourself to define the space. I know you might want to jump in to the DIY section, but believe me, this is the most important part if you are serious about replicating this process:
- [ ] Write down your primary task (Traditional drawing, Video editing, 3D modeling, etc)
- [ ] Write down your ideal primary task (maybe your primary task is not aligned with the one you would really like to be doing i.e. You do video editing but want to do 3D modeling).
- [ ] Write down you specific requirements (any type of equipment you need like a drawing tablet)
- [ ] Consider workflow needs: Do you switch between tasks often? do you need a second monitor or maybe an entire different space of the room to do something else?
- [ ] Account for storage (physical and digital) and keeping things organised: This will vary a lot between people, but think about what you have already to give you an idea of what you might need to keep it organised. (a lot of my storage hardrives and other bits are nicely tucked behind the tall table (dont' worry there is planty of ventilation there).

- [ ] IMPORTANT: identify power outlets and create good lighting conditions. In practical terms: if you have natural light make sure you account for that in the design of the room, then write down how many power points you have and the location of them in the room (drawing a tiny map helps).
- [ ] Think about ergonomics: Do you spend a lot of time sitting down? can you improve the chair or even better make a change to a standing desk (or hybrid)?
.gif)
- [ ] Plan for shared spaces: if you don’t have access to an entire room (maybe you share the space with your partner, or you are tucked away under the stairs of the living room), think about the area as a ‘shared space’. Write down the things you might need to improve your space for instance ‘noise canceling headphones’ or a simple physical divider, etc.
- [ ] Future-proof your space: write down activities and things that you might want to do eventually in your studio so you can do a bit of planning for it. For instance, if you want to get into podcasting, is there an area of the room you can plan for that (soundproofing, comfy chair, etc). I wanted to do more drawing and traditional stuff so I setup my spare table (it was my old ‘kitchen island’ in my previous tiny flat).
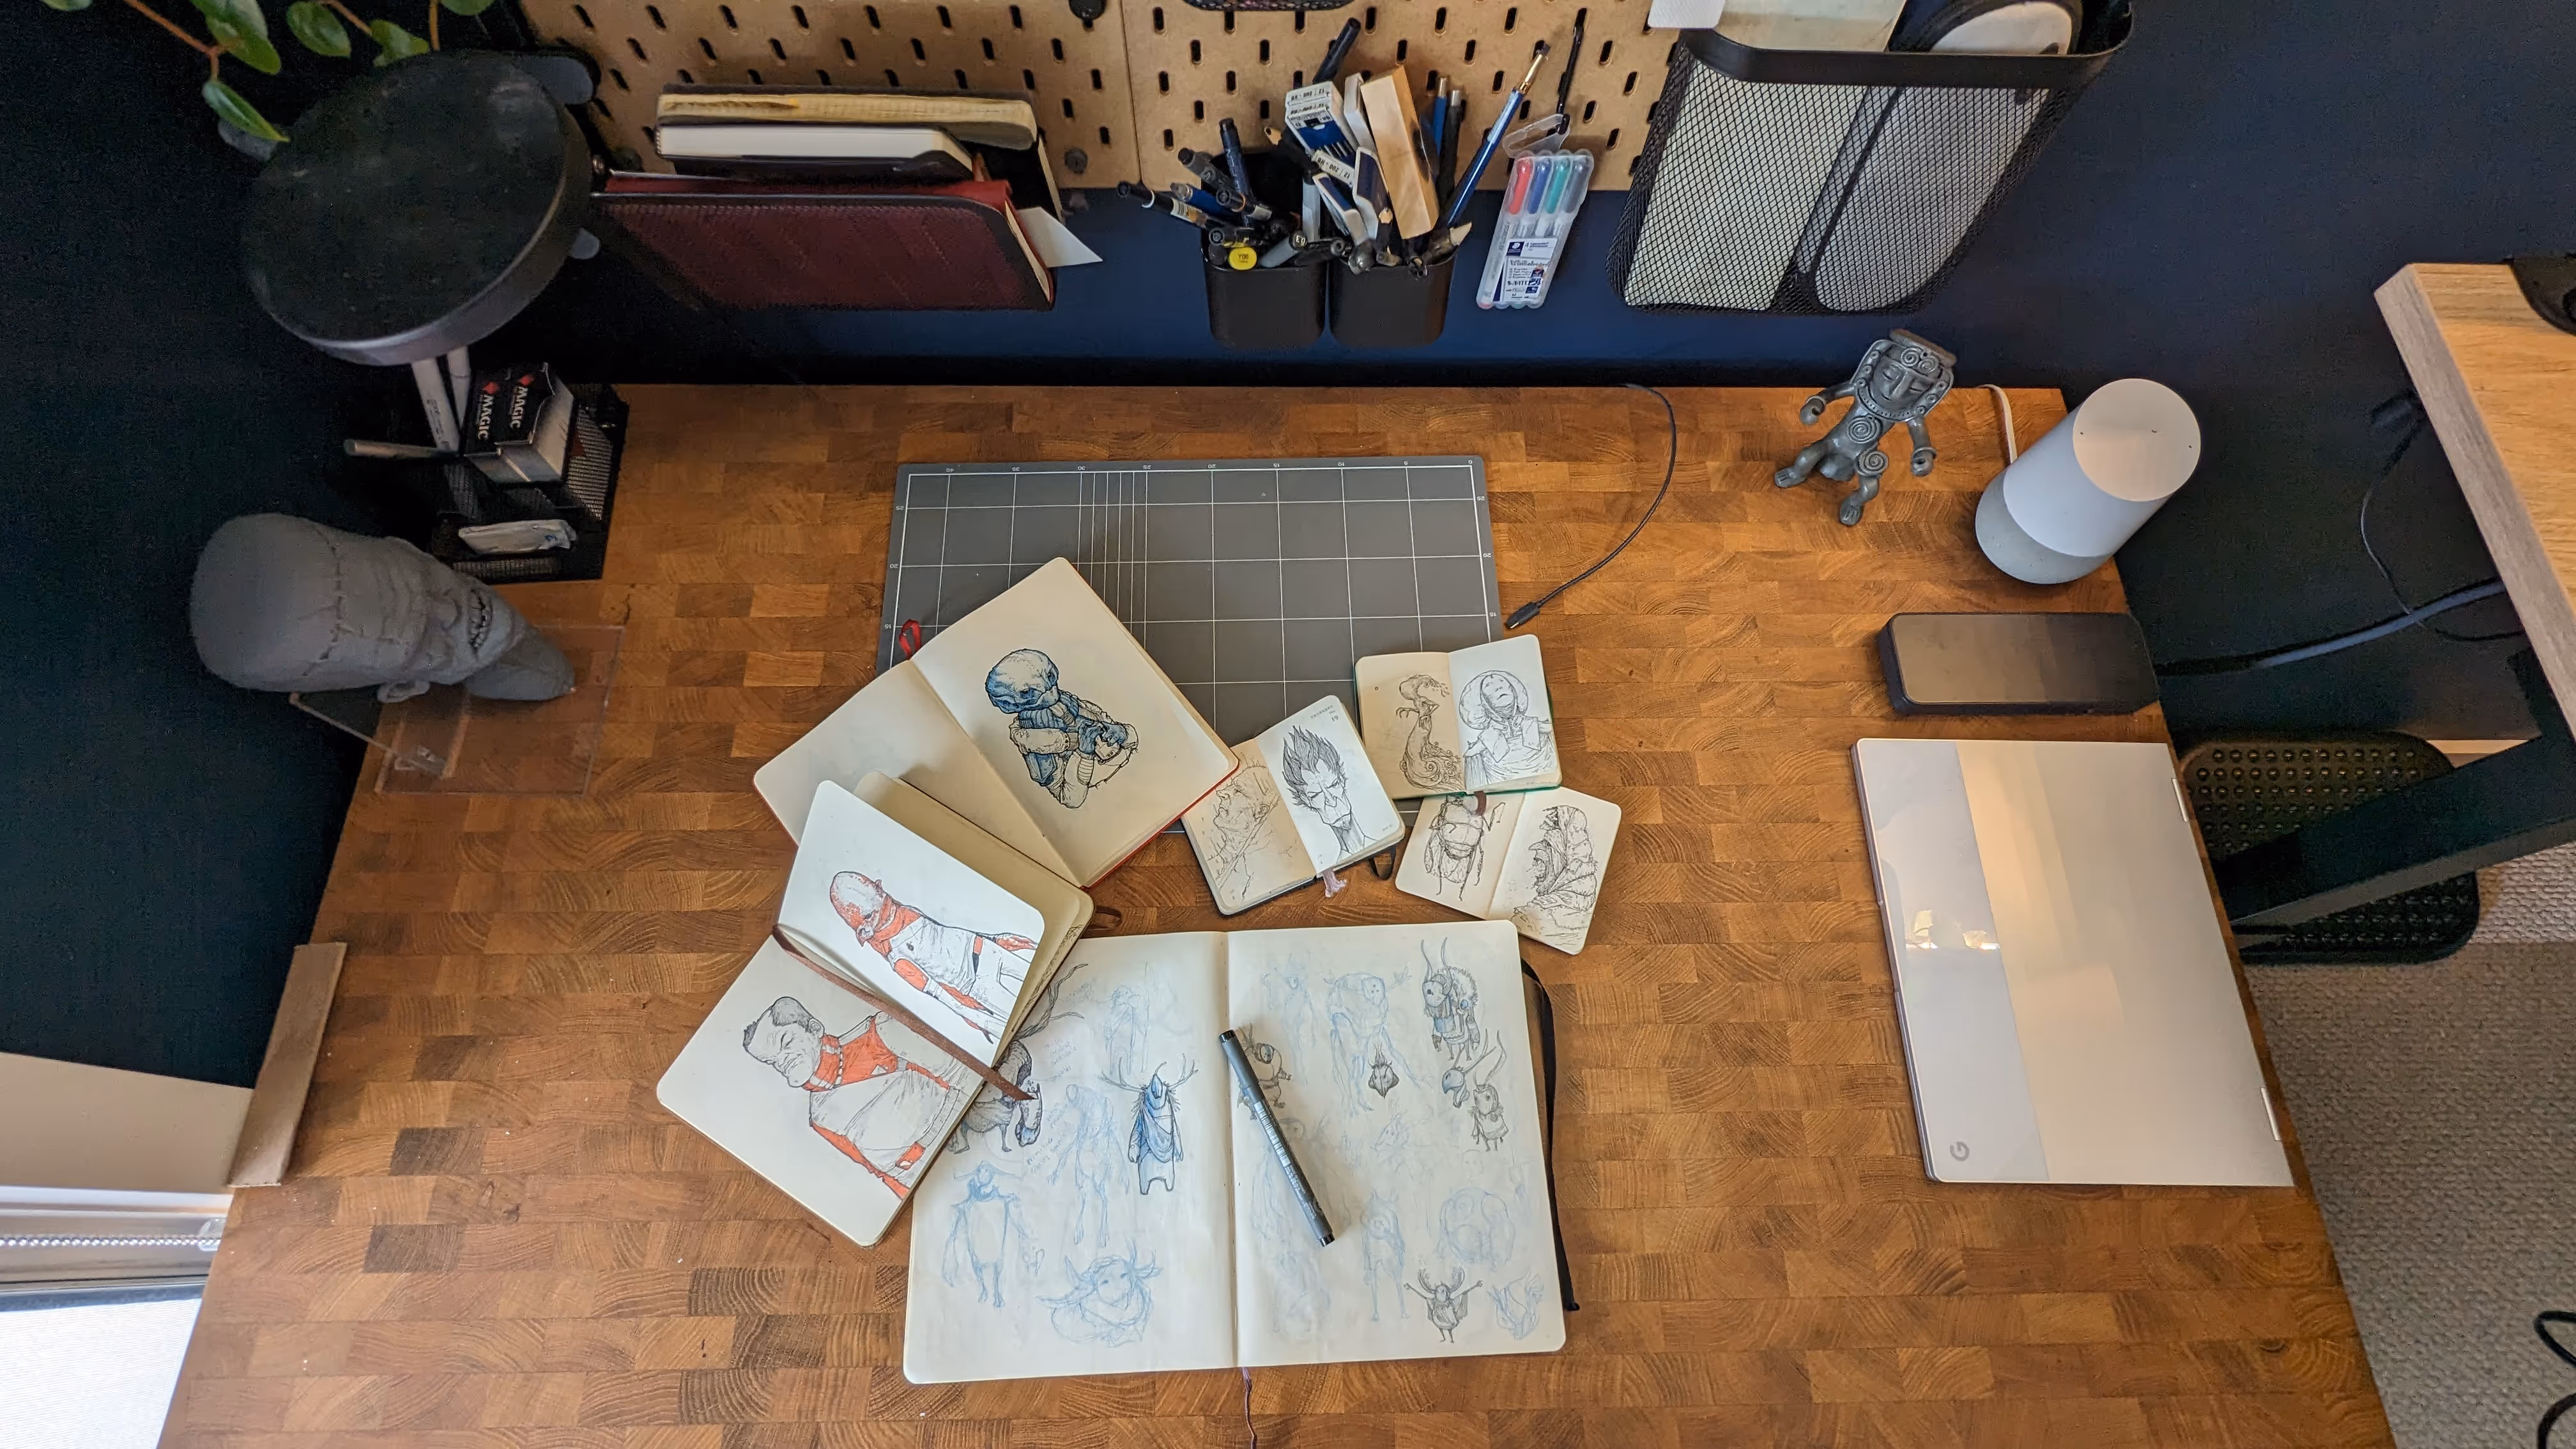
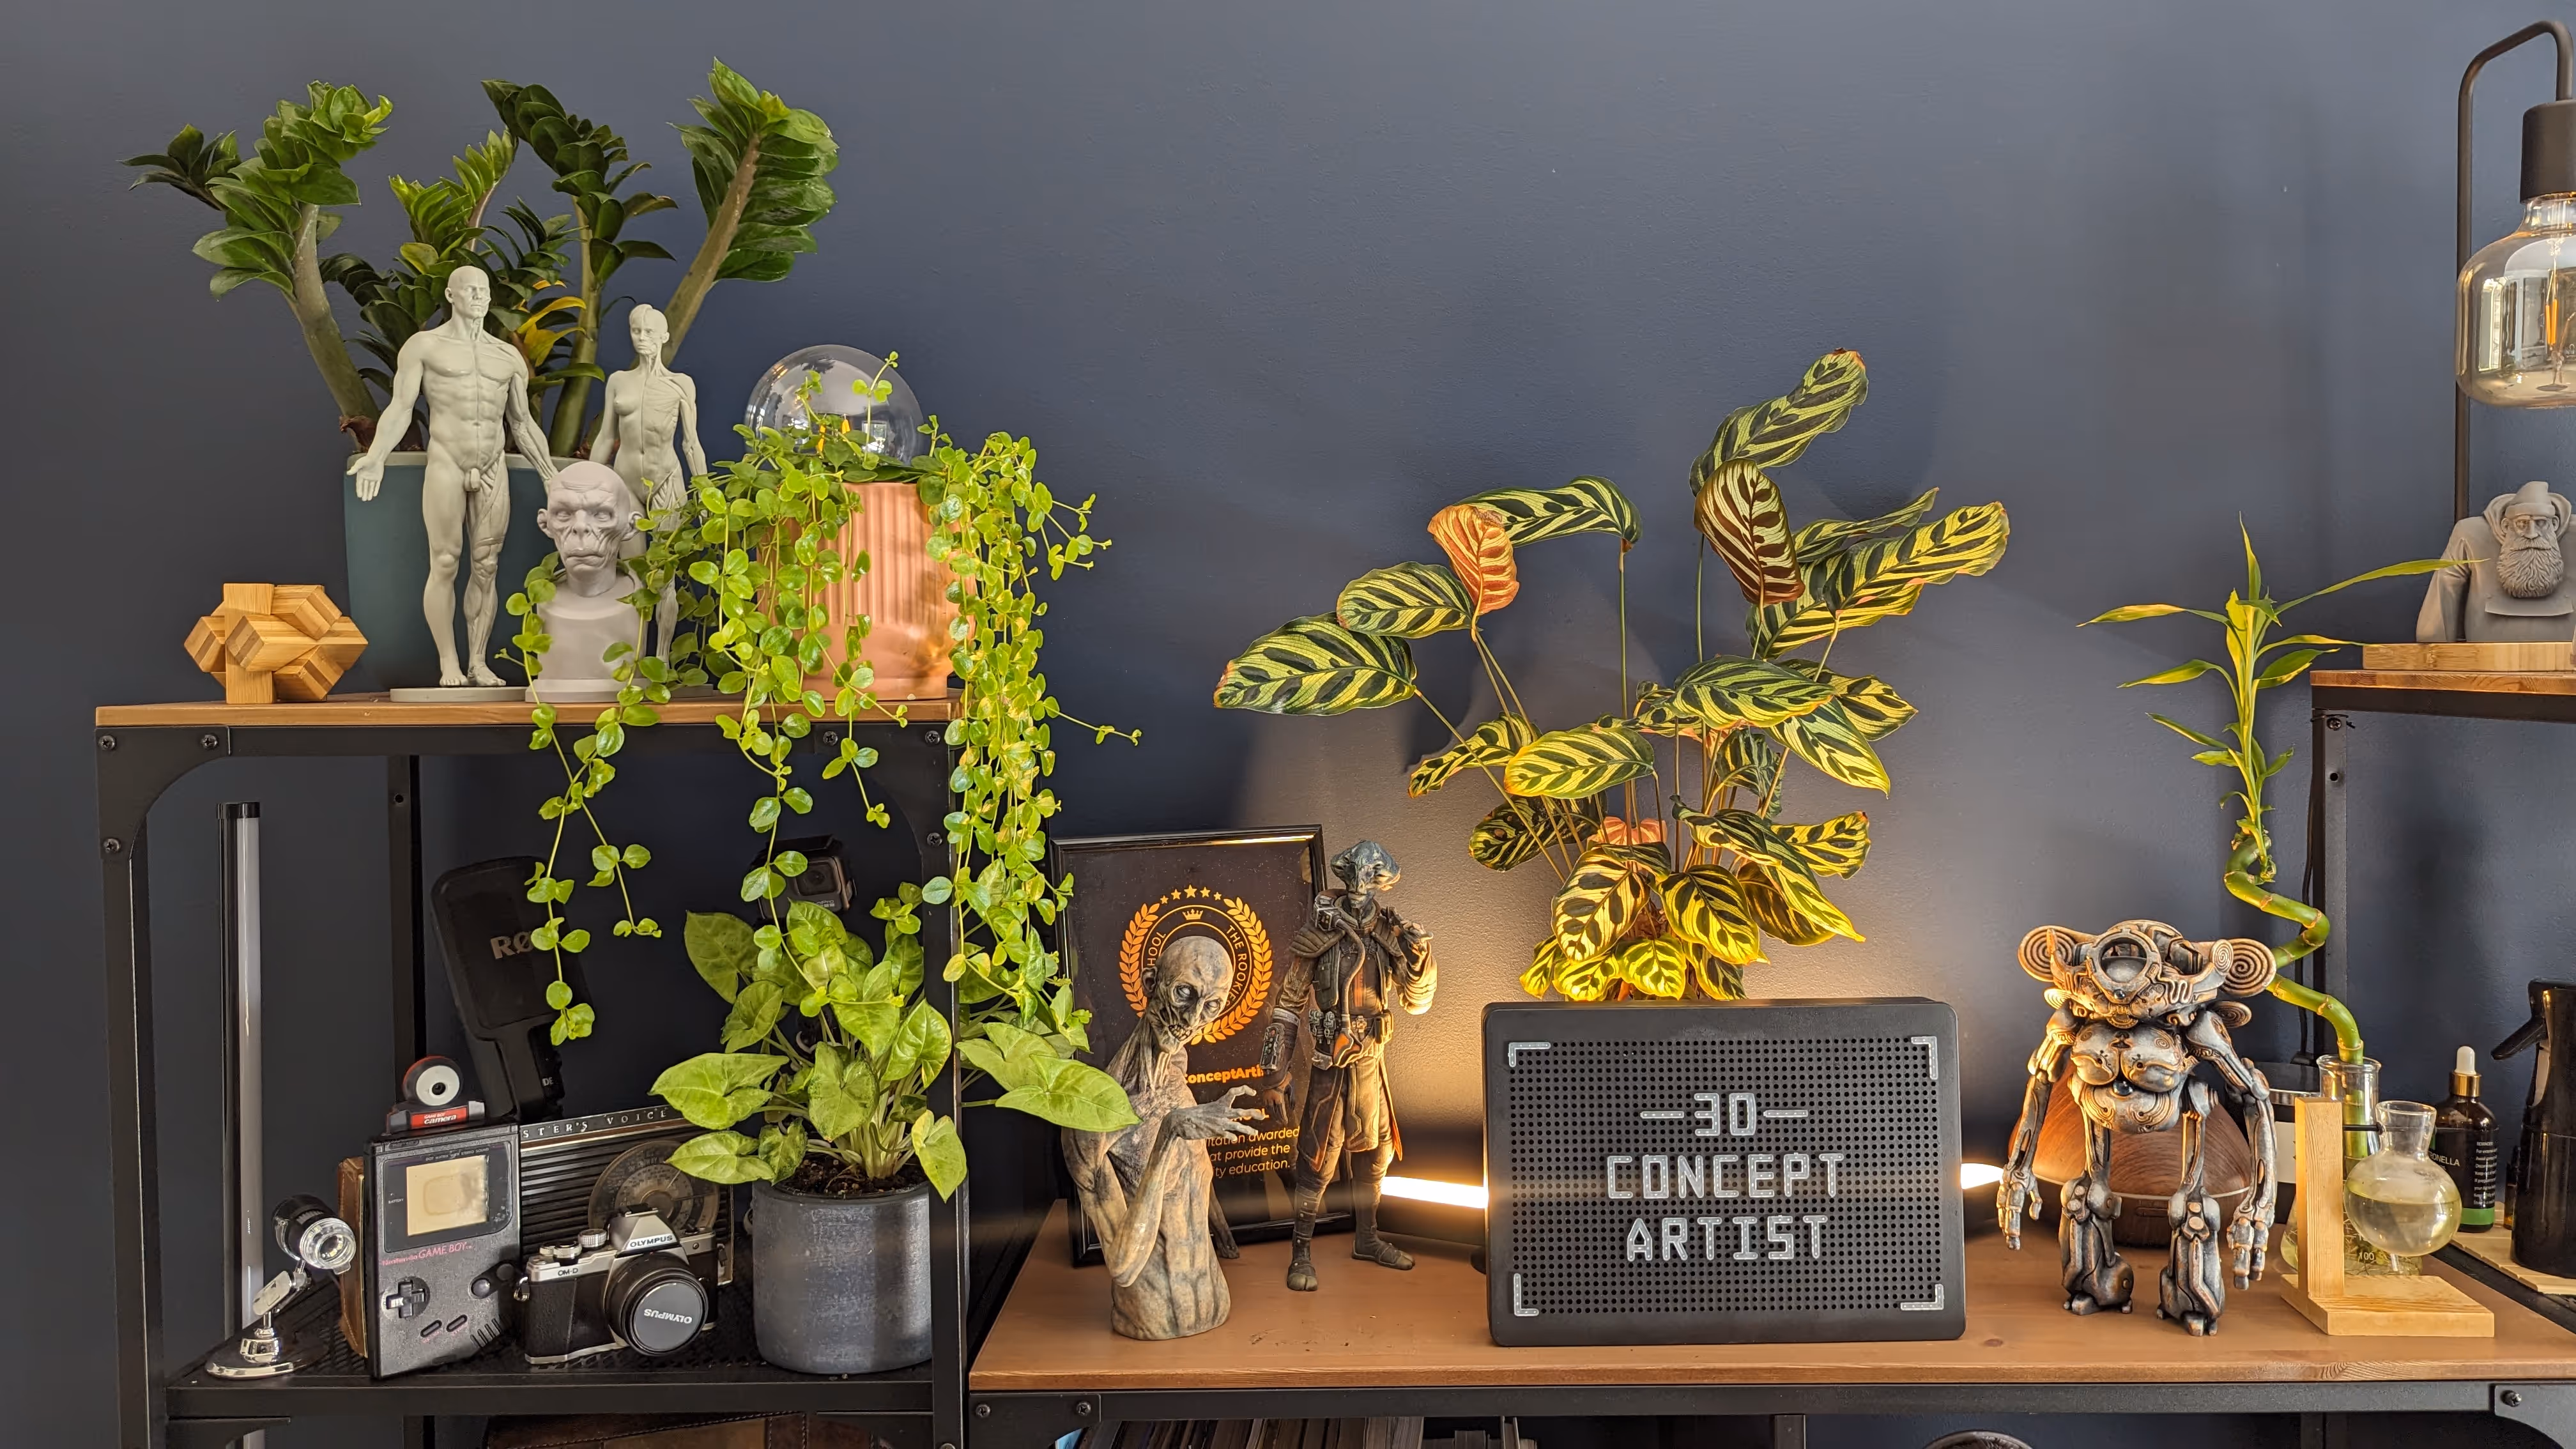
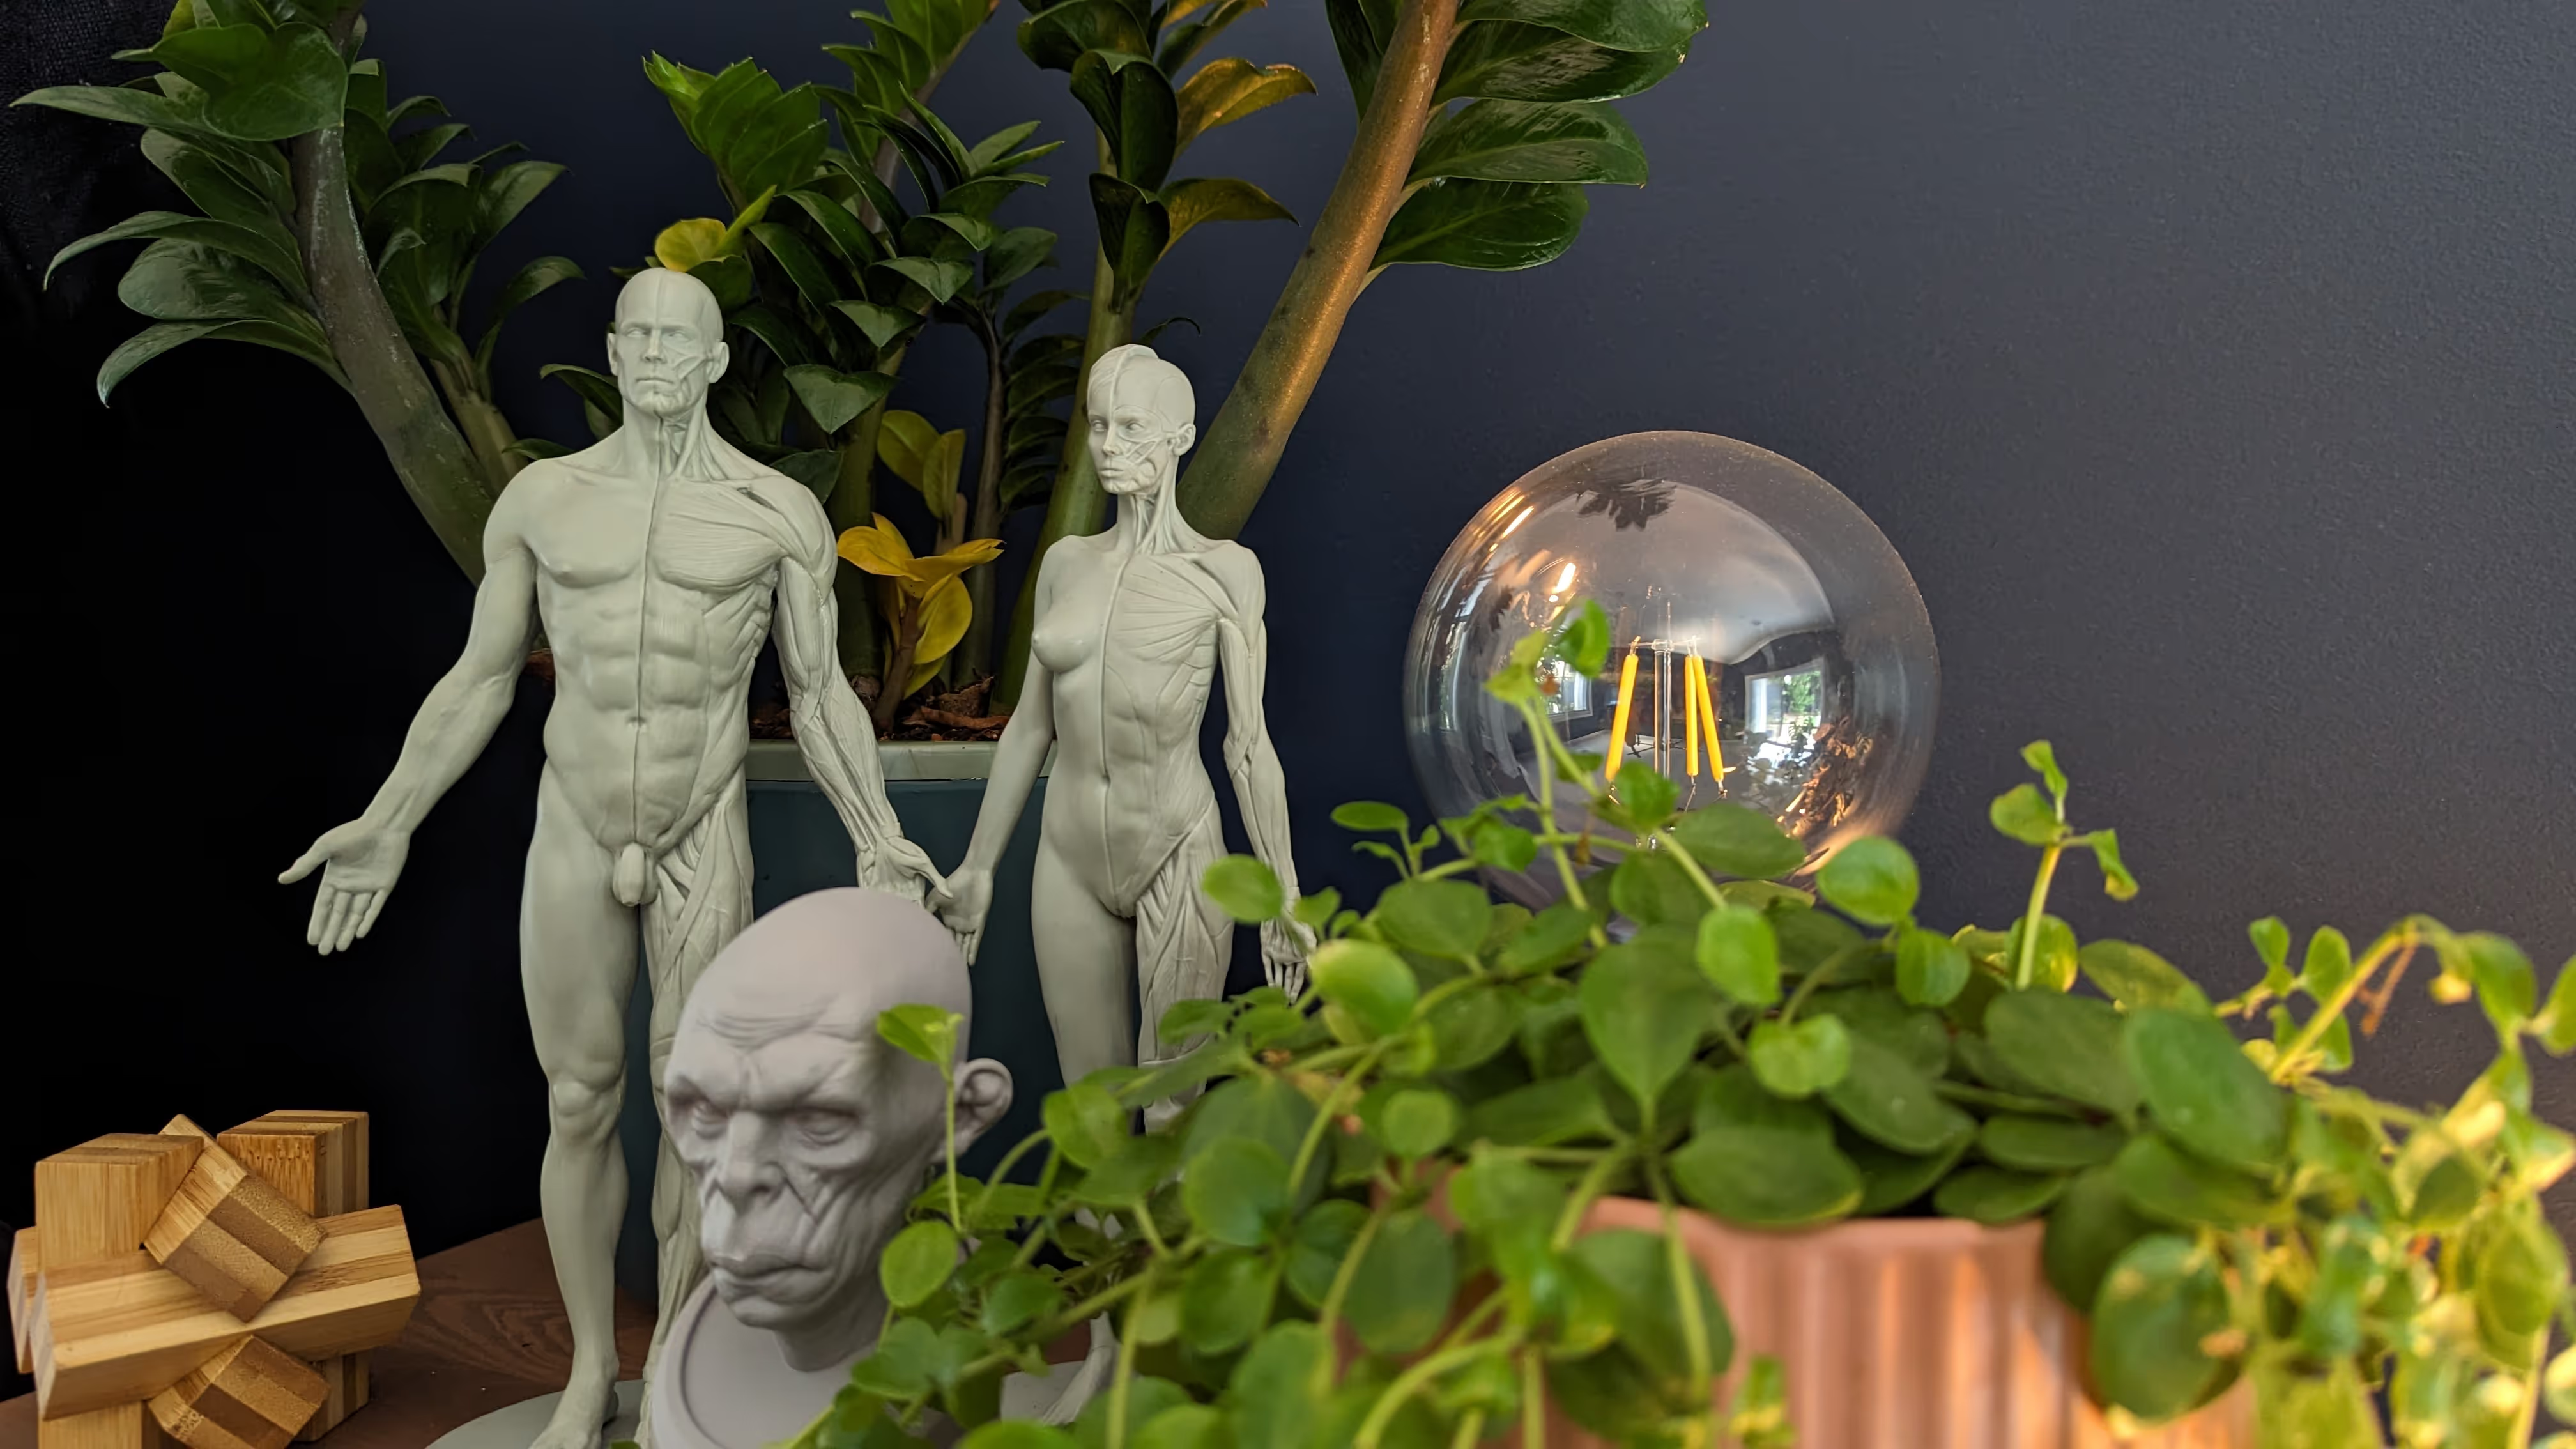
- [ ] Personalise your workspace: at the end of the day, this is YOUR space, so it is important to keep a personal touch. Write down the things you want to have that makes you feel that you are in your space. For instance, if you collect Marvel characters, you can have an area to display them. I love plants so I have a wide variety of indoor plants which I include in my plans.

1.2 Gathering Inspiration:
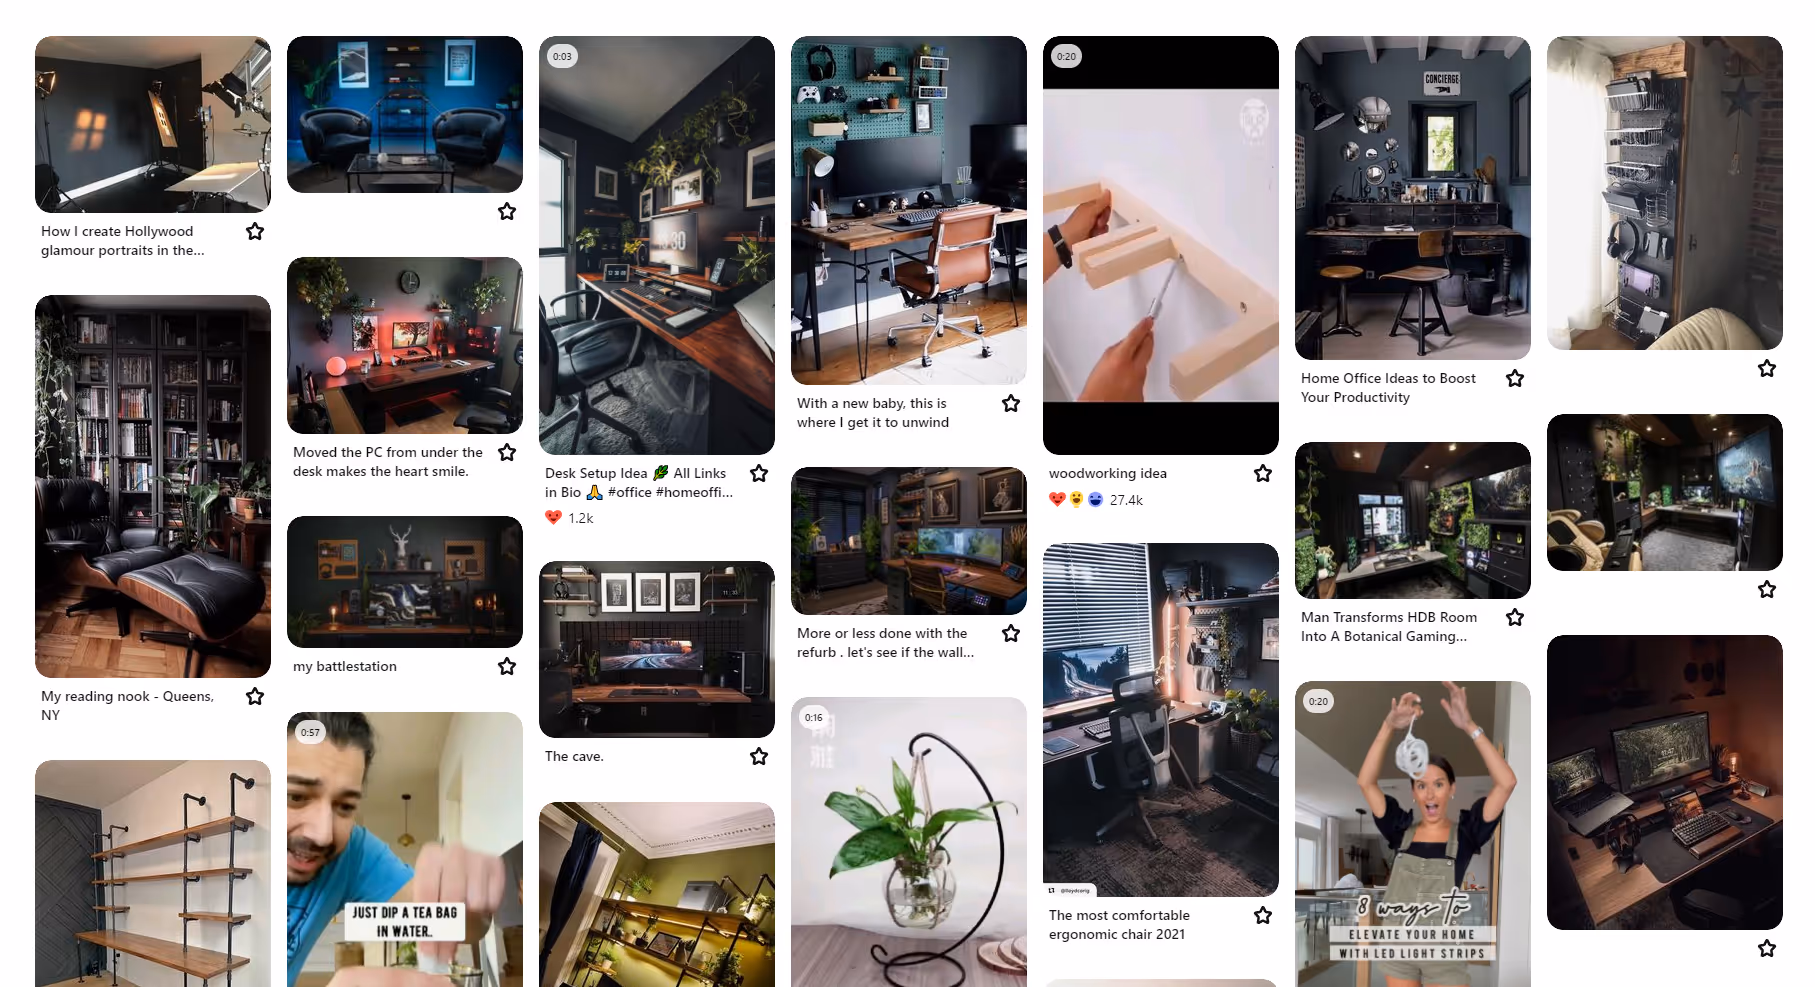
Once you have your checklist, you can start with the collection of references. I think is important to have a plan before you start digging into other designs because it will keep you focused on what you actually need/want and it will help you narrow down the search for the studio inspiration.
- Explore online platforms like Pinterest, Instagram, or interior design websites for inspiration.
- Create a mood board to visualize your ideal studio aesthetic.
1.3 Planning the space in 3D
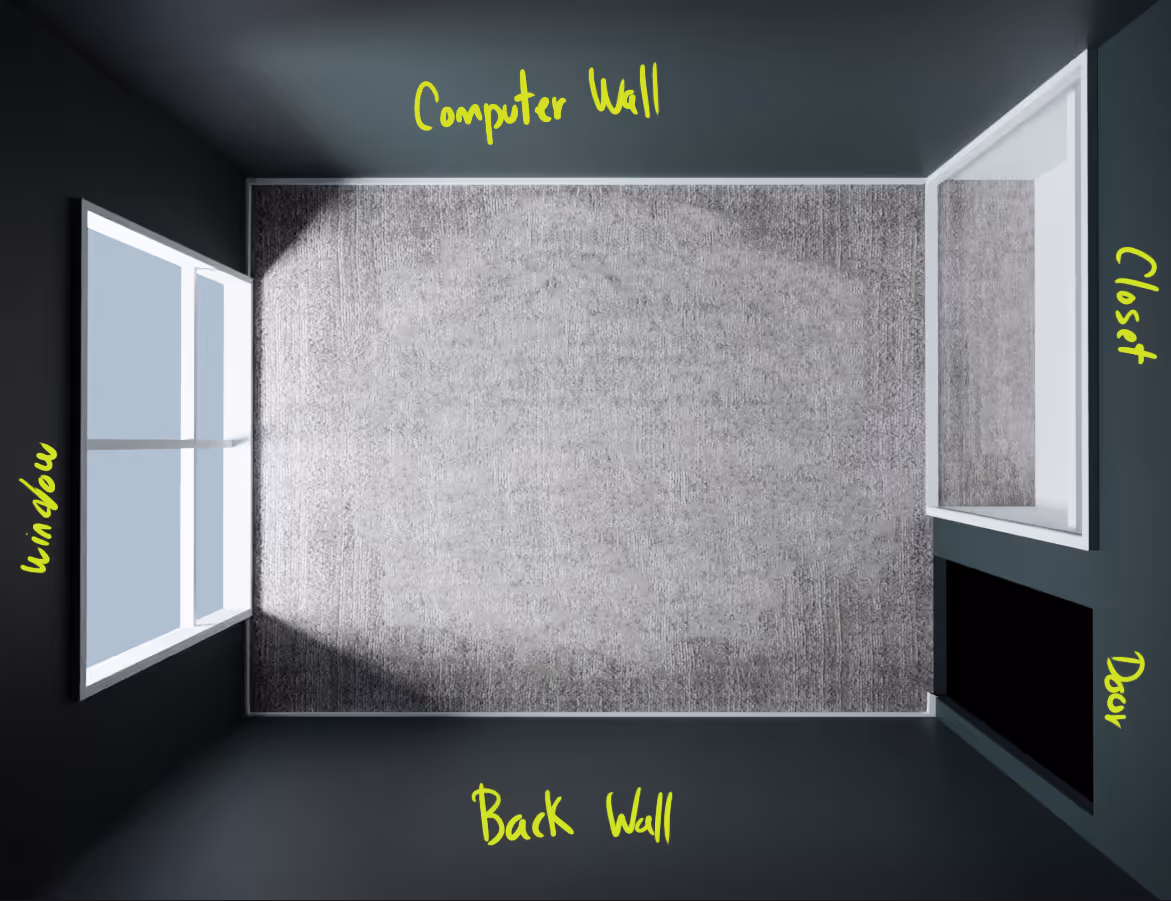
This might not be relevant for you if you don’t do any 3D work, but you can still plan your space using some tools I’m going to share. Let’s start with the measurement of the room:
Measure your space in all directions, any irregular area and the space to the door or windows and write them down on somewhere as reference. Then you can use an app on your phone to 3D scan your room to give you a starting point.
Polycam is a free app available in both android and iPhone/ipad and works great (very easy to use too) and you can export an GBL file with the scanned 3D Mesh.

With the right measurements and the scanned 3D object as reference I build a very simple room in Blender… a cube for the room and opened a couple of areas for the window, the wardrobe and the door:
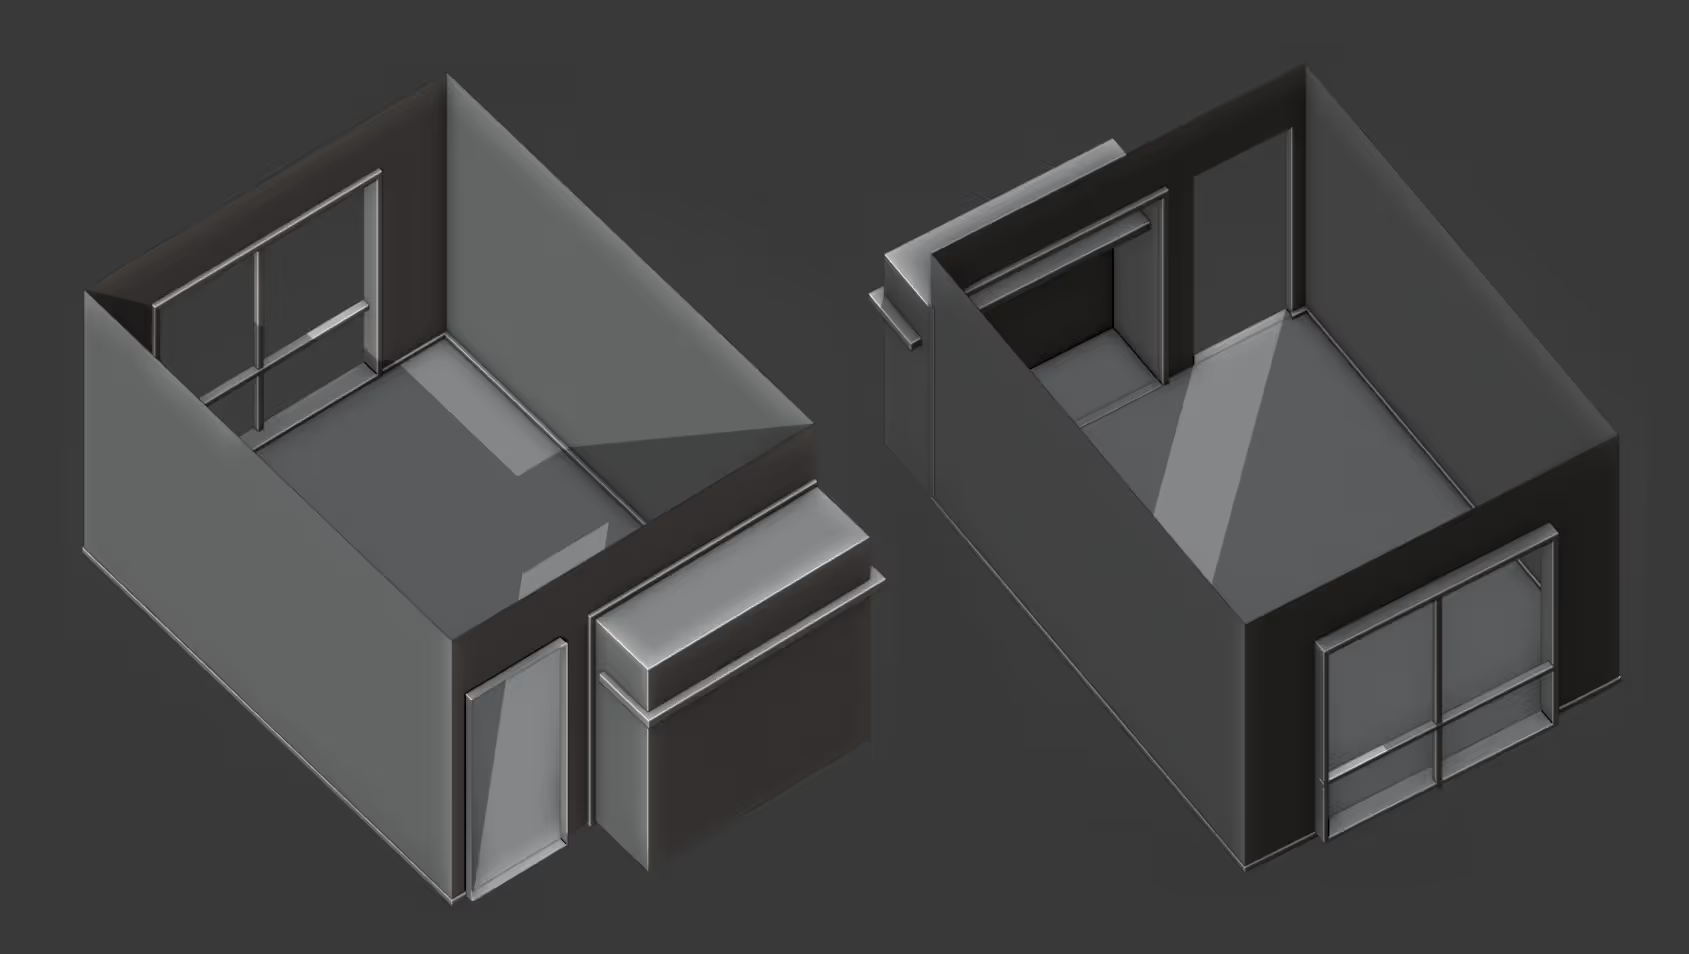
Then I did a very simple model with textures of the things I already had and placed them in the room.
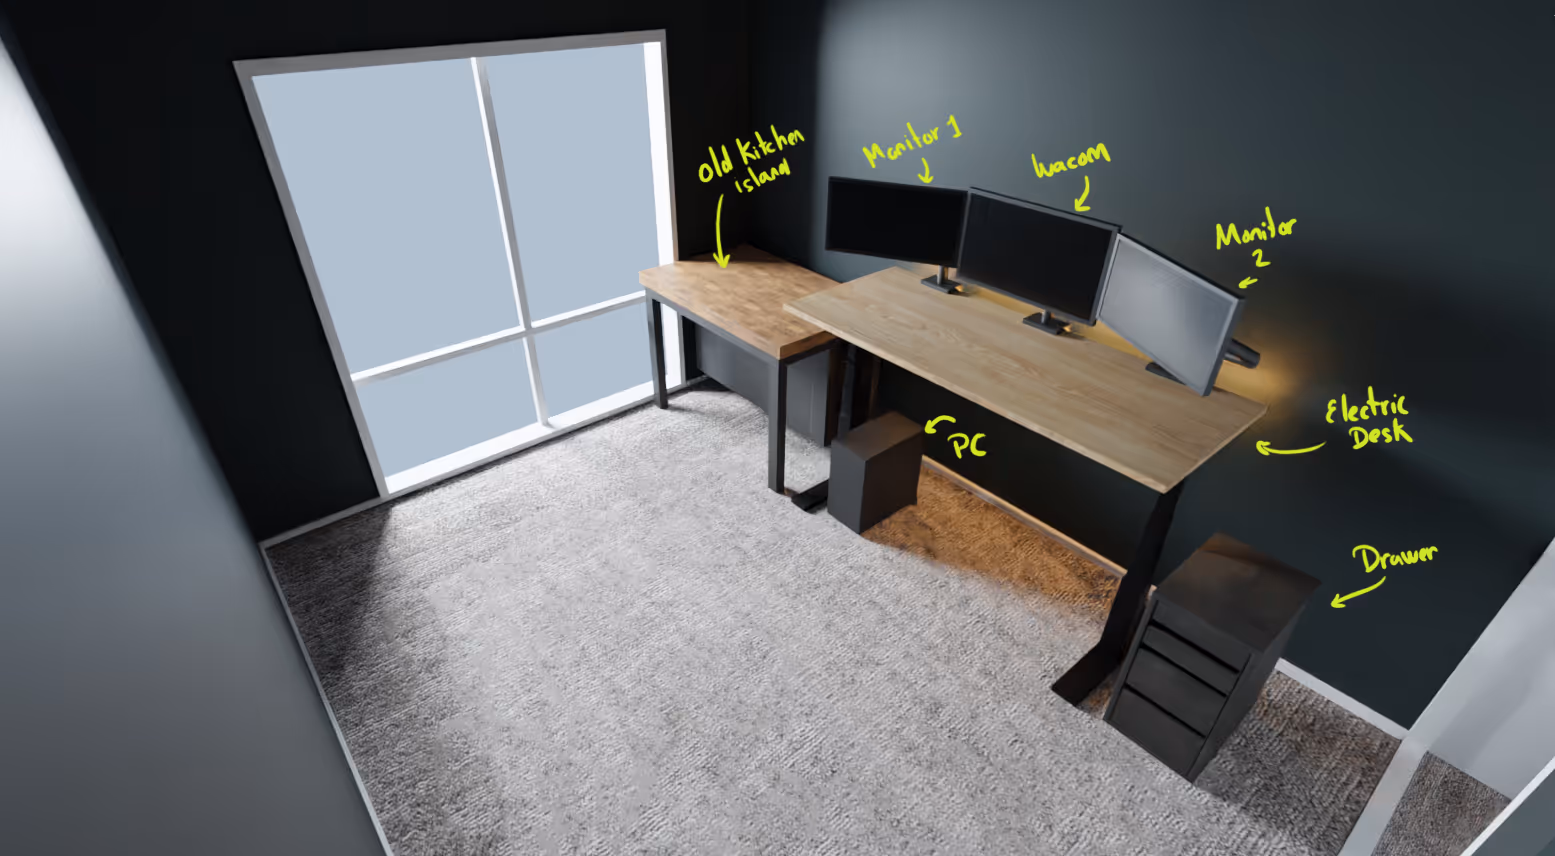
Then I went back to my checklist of the things I needed or wanted to include and made mockups of them in 3D. In my case I already had a good idea of the ‘style’ I wanted to go for and I had already checked some items online so it was easy to reproduce some things in 3D (for instance IKEA gives you the measurements and you might even be able to get the 3D model of the exact object too).
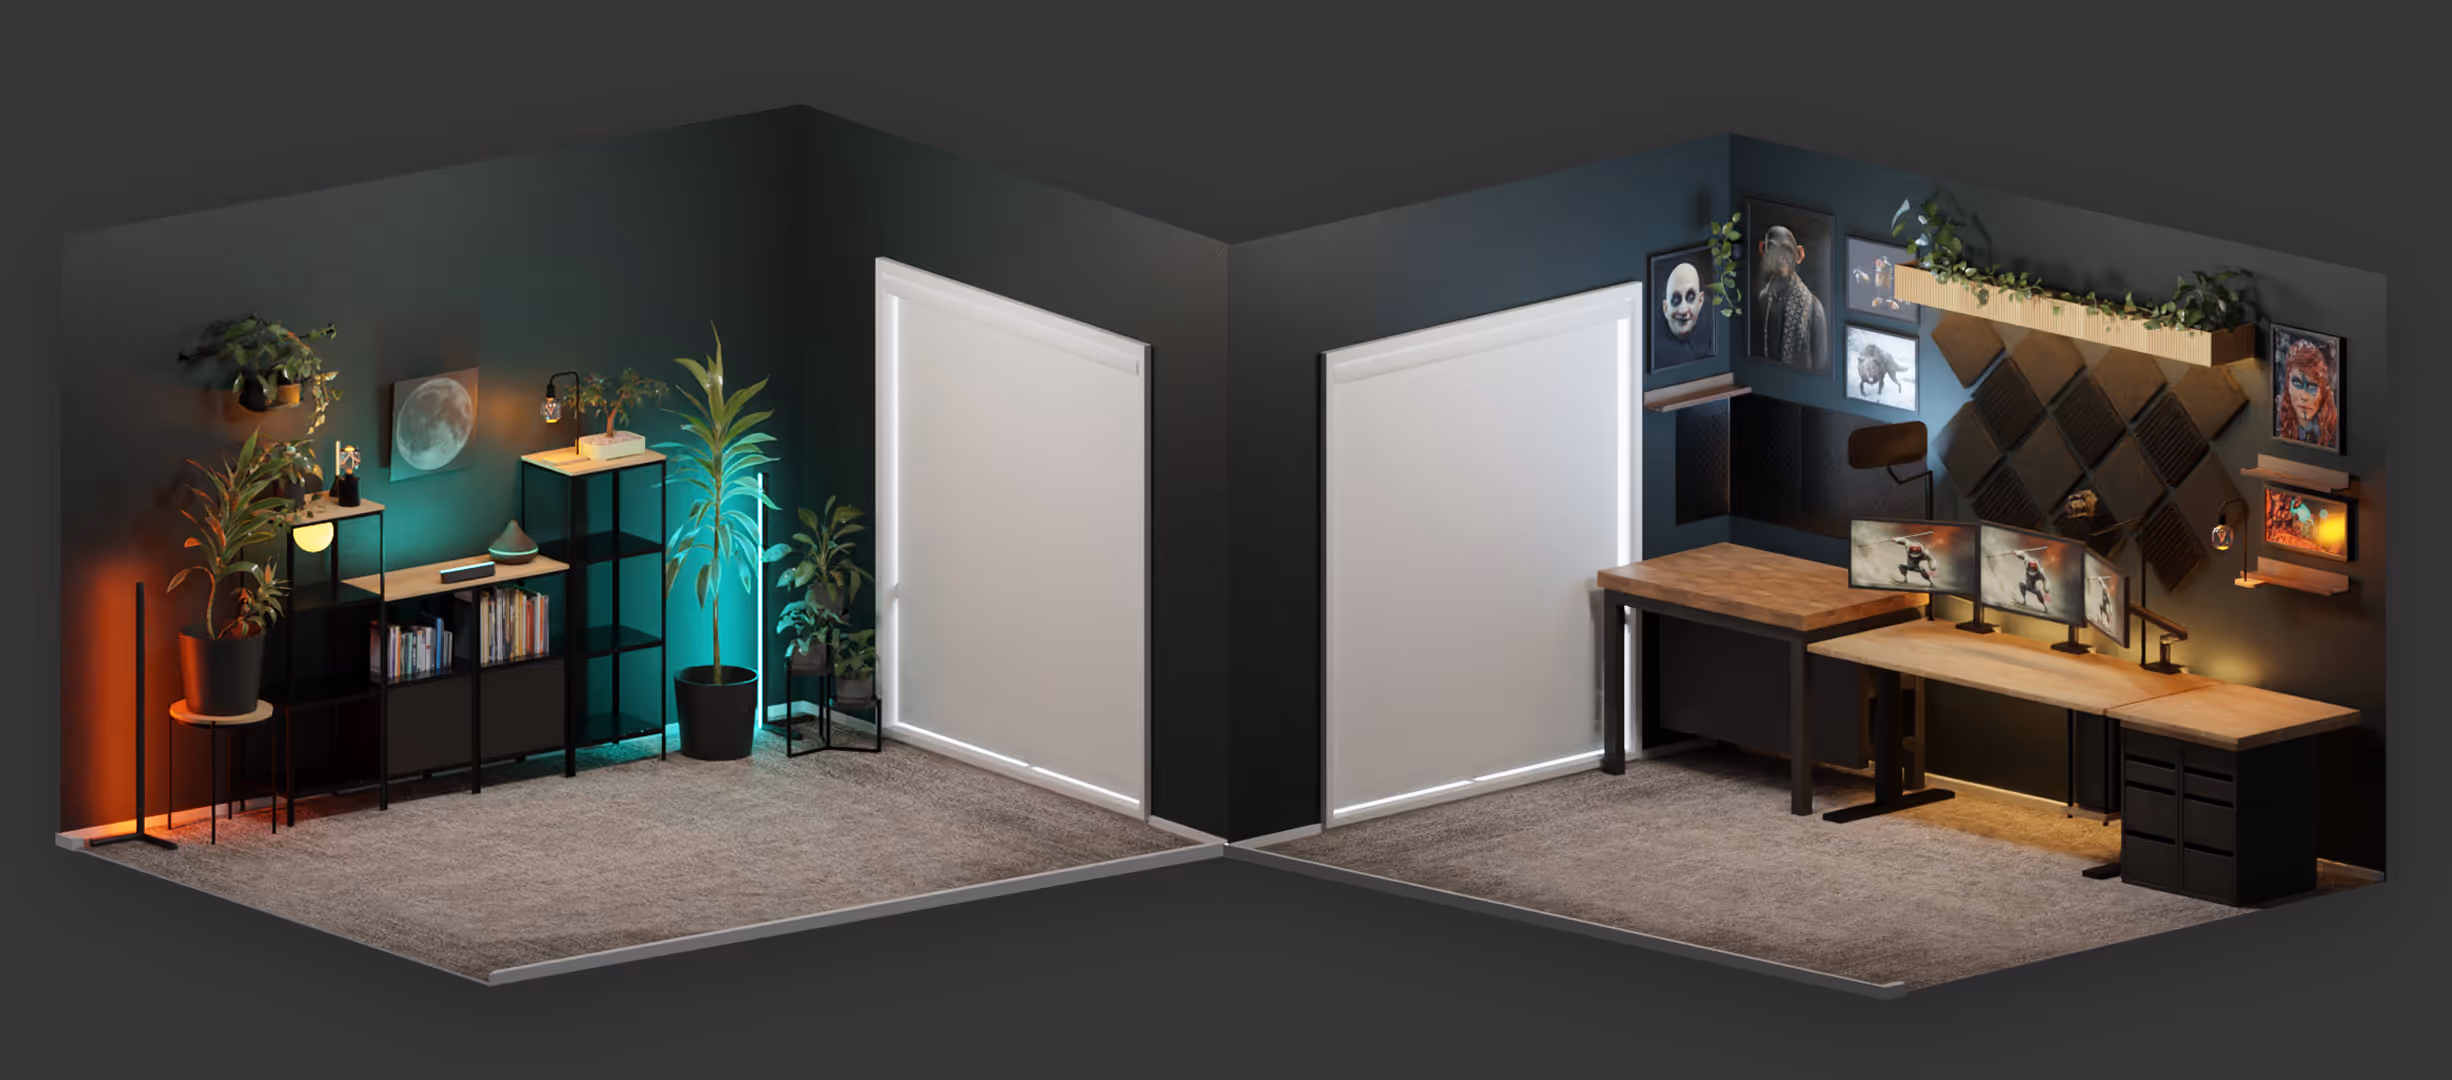
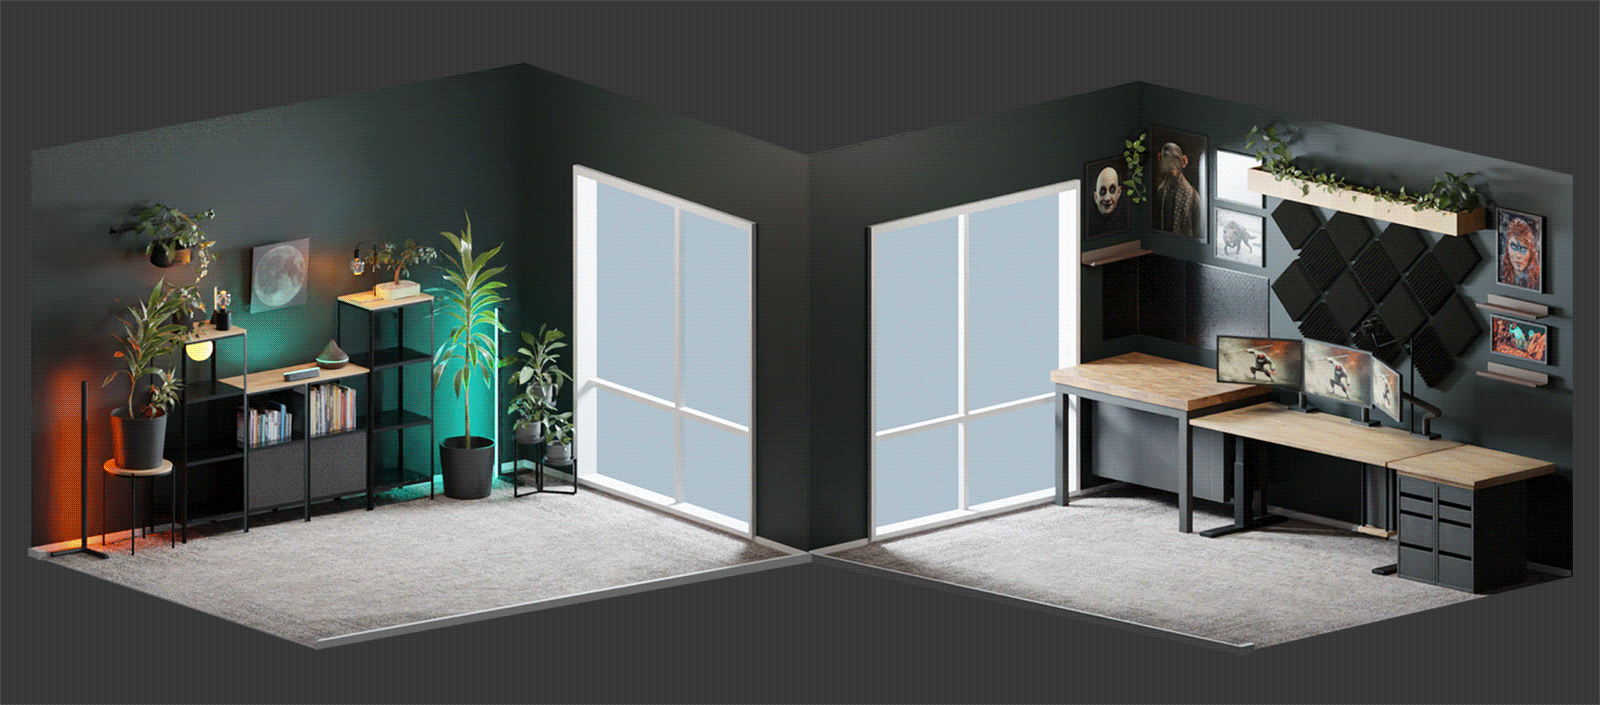
Another powerful advantage of this mockup is to test different moods and paint colours for the walls. I also decided to take advantage of the 3D mockup to test the setup of my lights and visualise how my environment would look like during the day and at night (since I tend to work late most days).
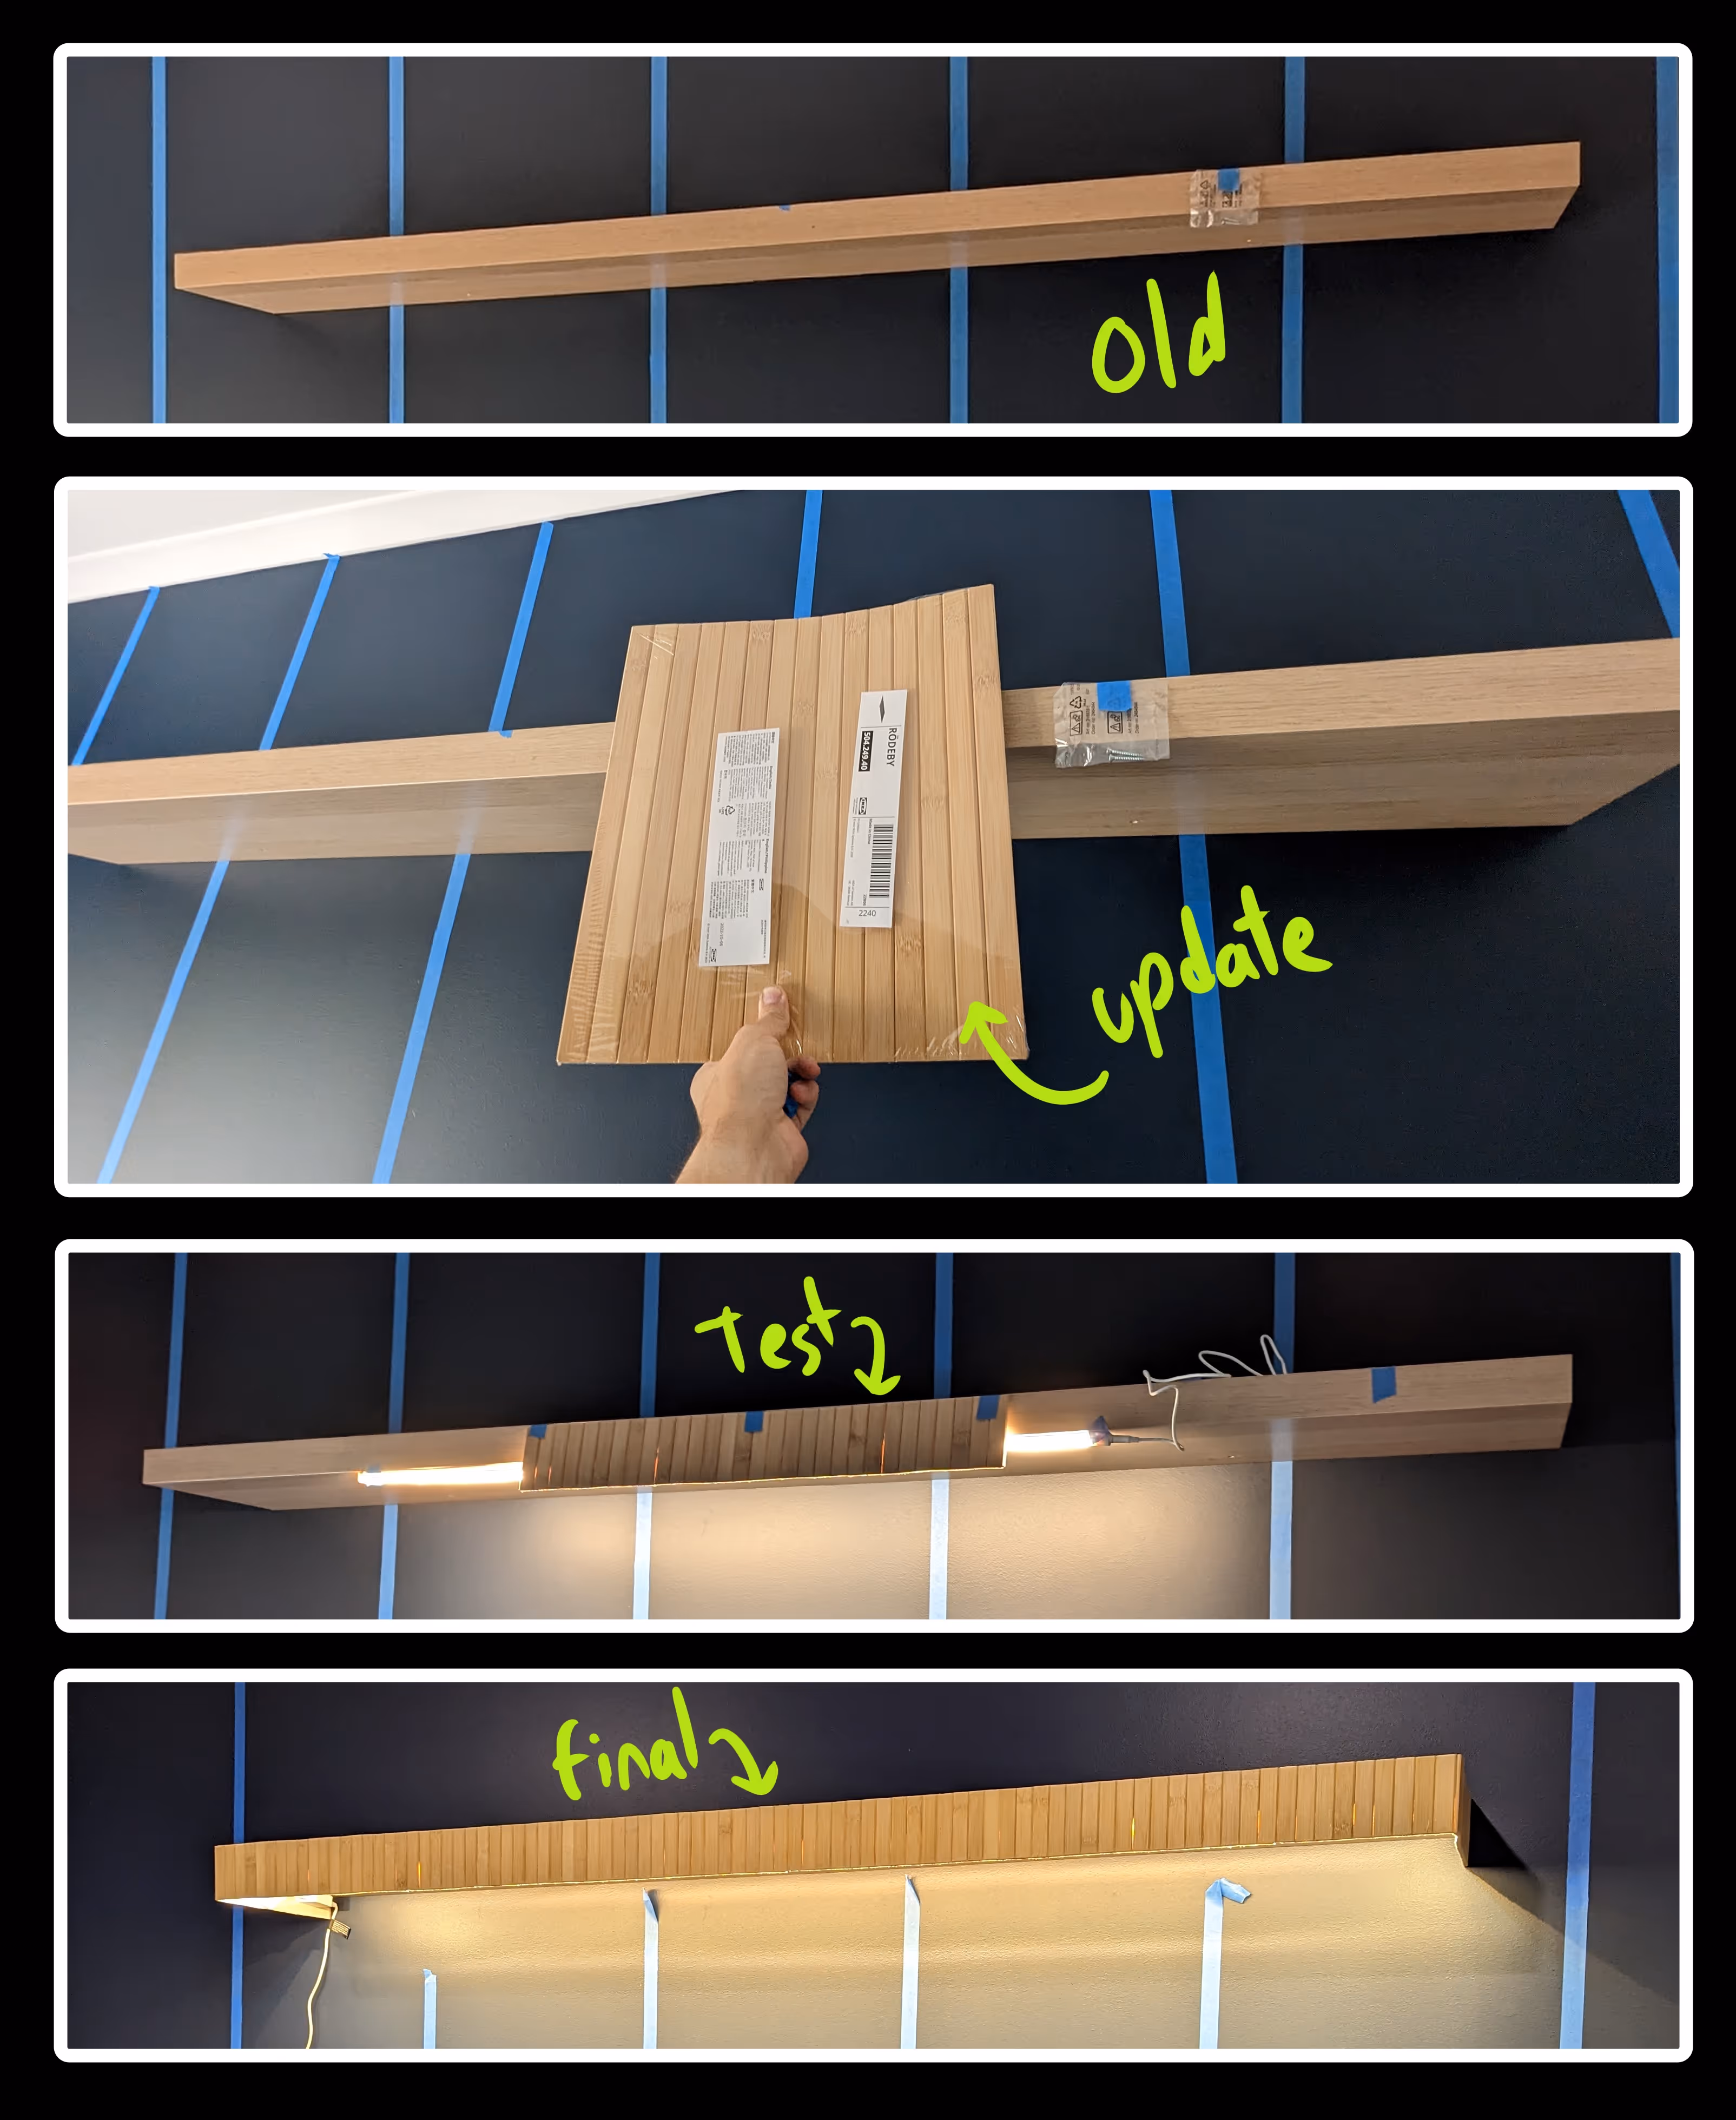
This process also gave me some ideas to solve problems that I didn’t account for. For example, I wanted to have a nice diffuse light on top of my computer monitors but I realised that when sitting down, the light will be quite visible and very distracting if I looked up slightly so I came up with a simple solution that actually looks better in terms of the design:
Once you are happy with your 3D Mockup even it is not 100% perfect with all your decoration, you can move to the actual setup of the room

Project Checklist
This is a very simple one-page PDF that you can download and print so you can keep track of your project. It has most of the items I used with the links and a checklist of things to keep in mind when planning 😉.
Check it out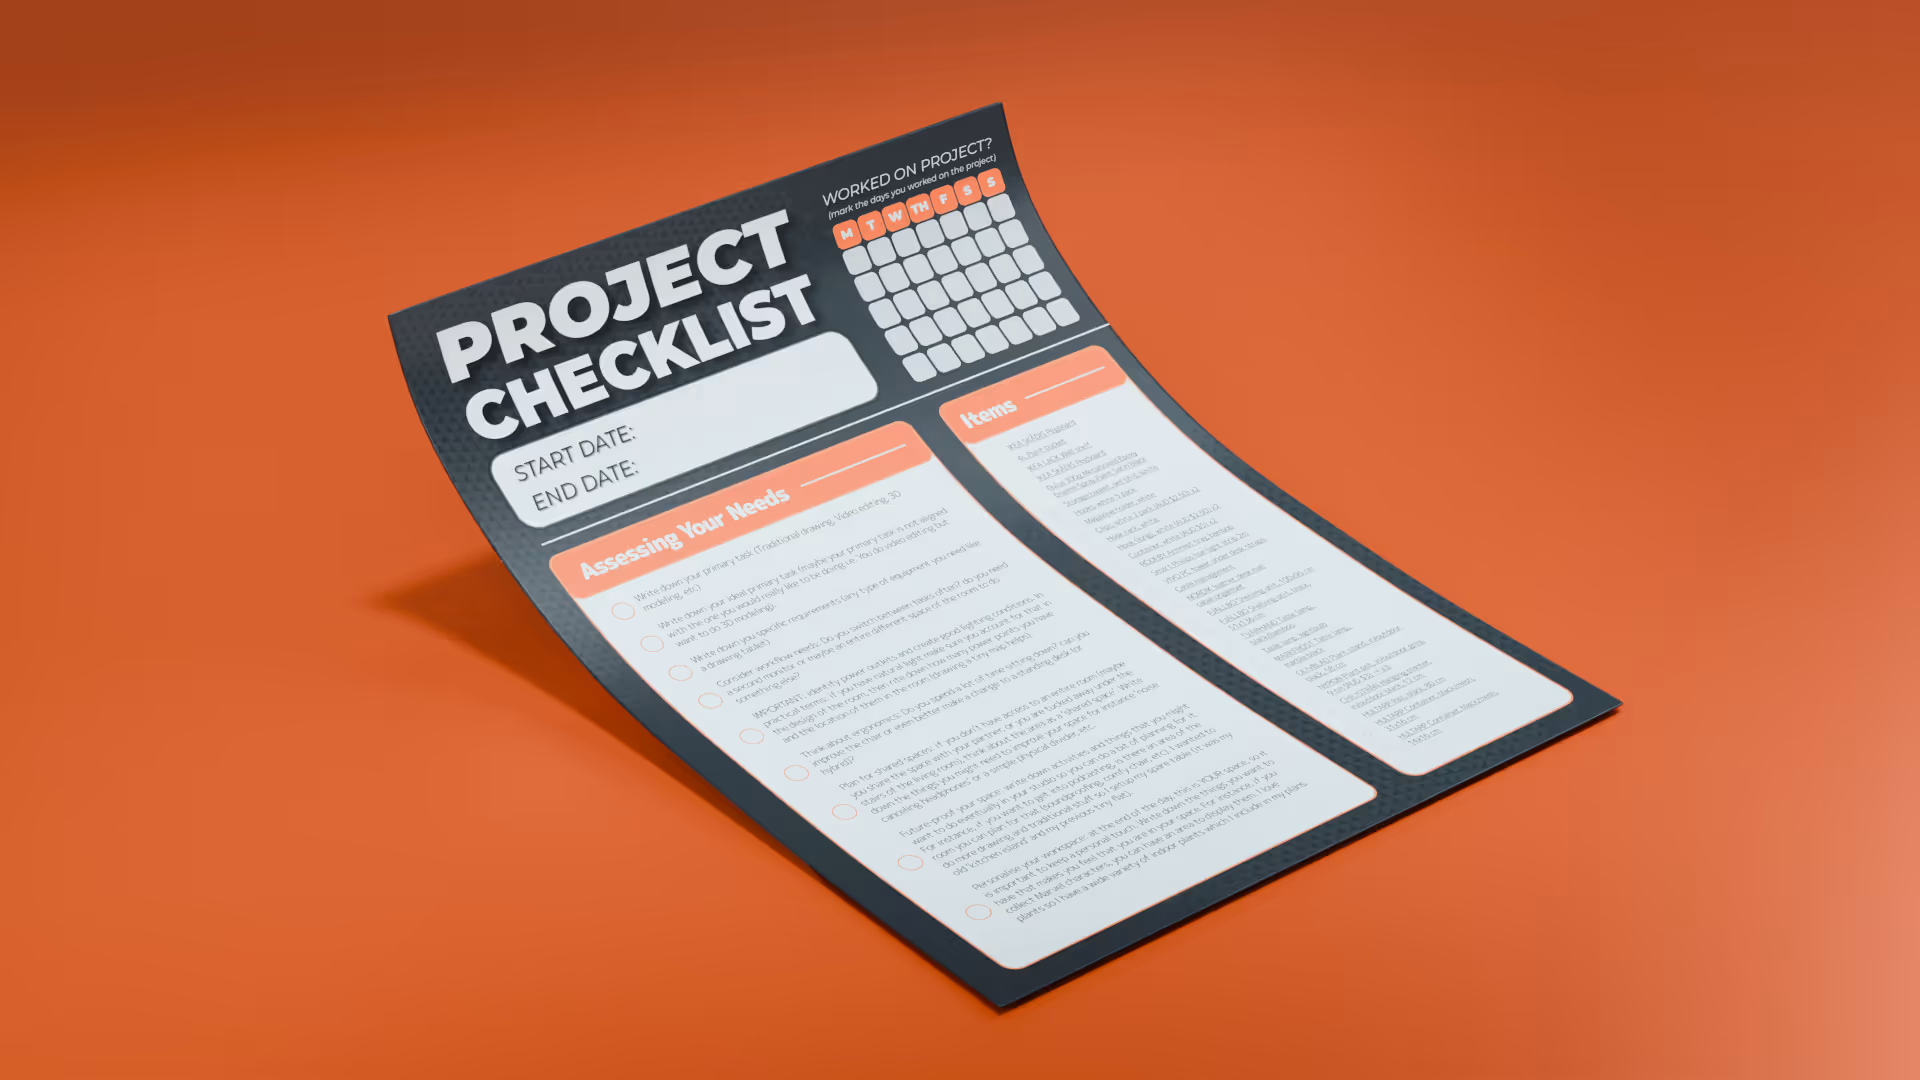


.webp)

