.jpg)
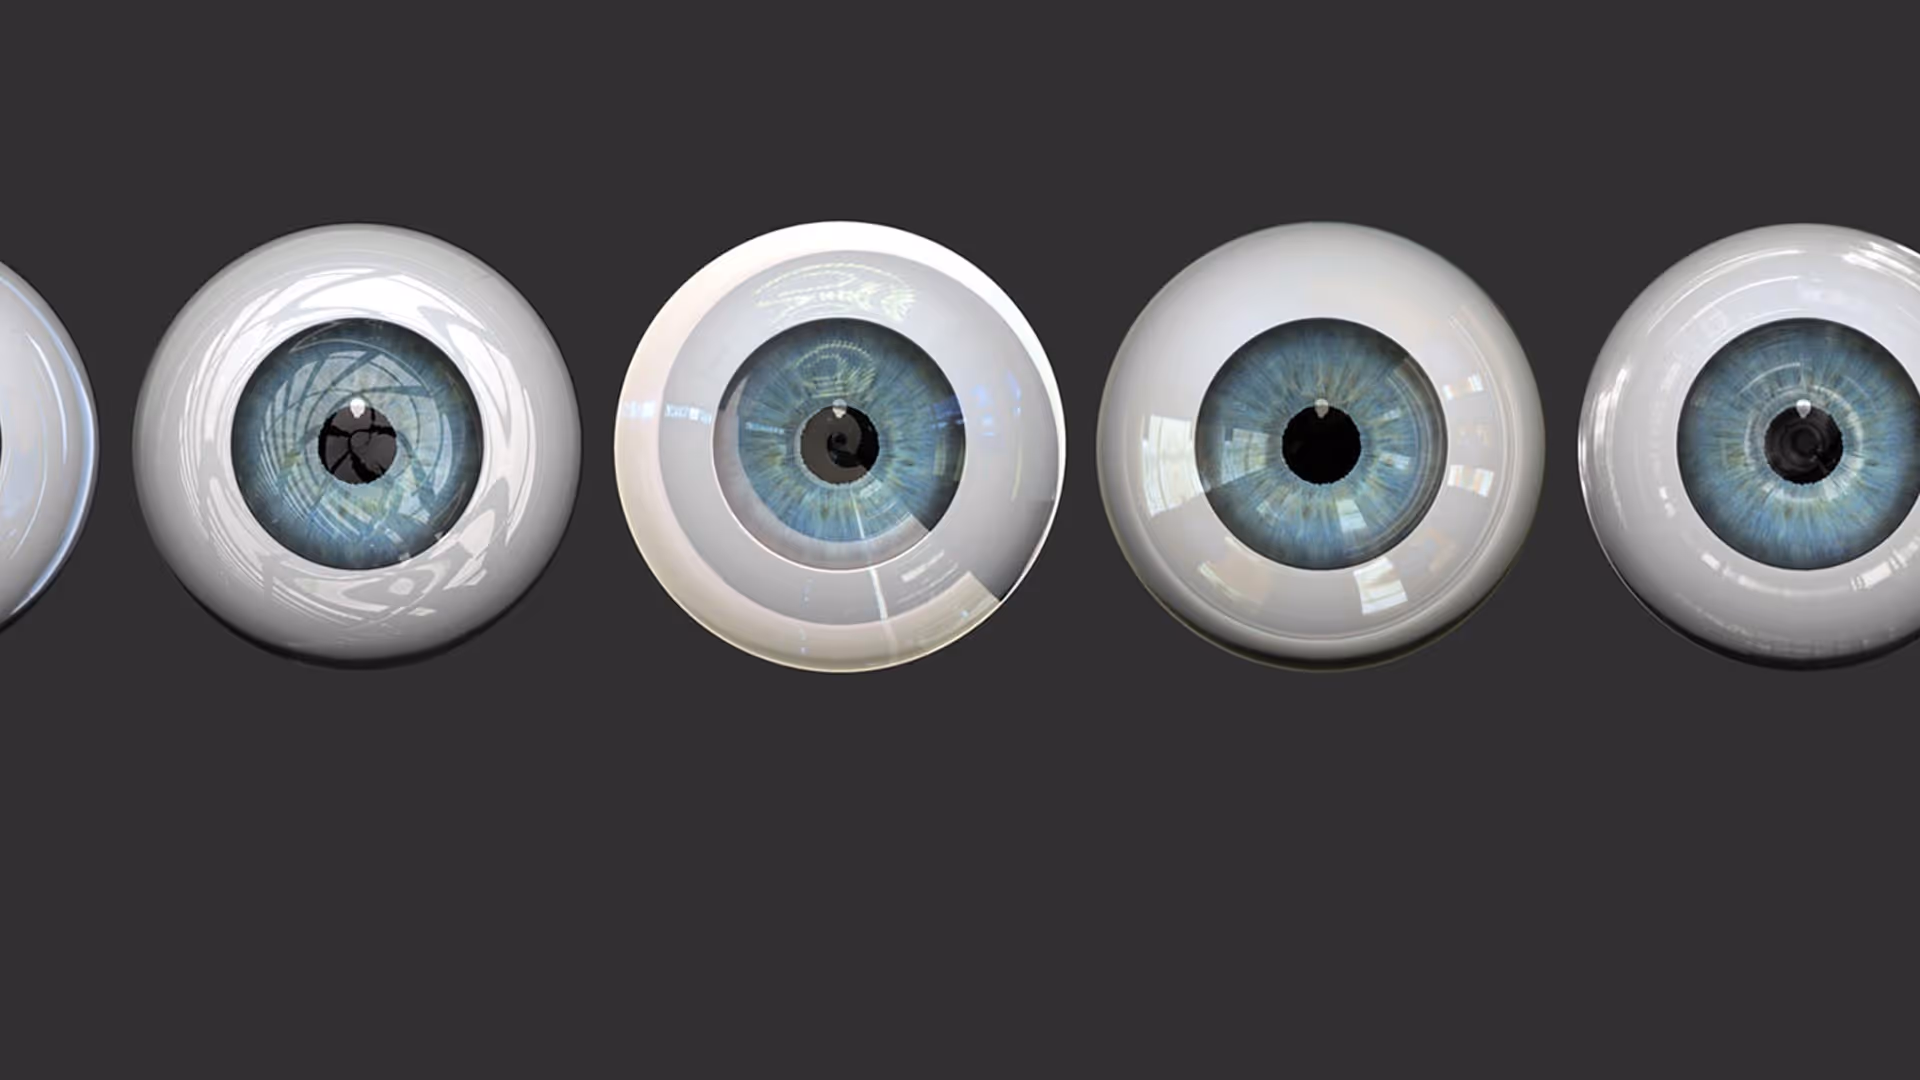
Check this alien head, I have some very simple eyes that are just two spheres with polypaint so nothing too crazy. but if you apply a tiny subtle reflection it will make the whole thing look more alive and is such a simple thing to do that I think makes a huge improvement.
So here is the basic concept, you can use a Material in ZBrush that has two imputs for materials and have one simple clean material for painting your eye and another one where you can control reflections separately. For instance you can:
- Take the SkinShade4 material (your polypaint base material), copy it and then paste it into the first S1 of a DoubleShader material (any material with 2 or more Slots will work).
- Then take something with a nice reflection and copy/paste it into the second slot S2 of the doubleShaded material.
TIP 1 → You can use any material you want for the reflection but MatCap works best
TIP 2 → for best results choose a reflection material that has dark grey values (I use silver foil to start)
.jpg)
Just in case you didn’t know how to mix materials and copy values between them, you can go to the Modifiers subpalette in the Materials palette, and use the buttons at the top of the UI there to CopySH and PasteSH (copy/paste shader). Also, when using materials with multiple slots, make sure you have the one you want to copy or replaces selected (black thin outline around it).
.jpg)
The cool thing about this tip is that for the second slot of the material S2, if you use a matcap, you can simply update the image that the MatCap uses with any image you want… obvioysly works best if it is a sphere witht he reflections on a square image, but literally ANY image will work.
.jpg)
Now, here is the trick… with the second slot of the material selecected (where you added your reflection matcap), scroll down to the Mixer subpalette, here is where you can determine how you want to mix the two material.
So just like in Photoshop, you can change the blending mode to ‘Screen’ and click on the ‘Black’ switch to turn it on. Enabling the ‘Black’ button will apply this shader as if was being applied to a black surface so that way you will get the nice reflections and highlights. This is why it works best with a matcap that is dark with reflections.
TIP → If you want things to long less dark you can leave the Black switch off. The best thing is to check this once you have the polypaint on to really compare the difference.
.jpg)
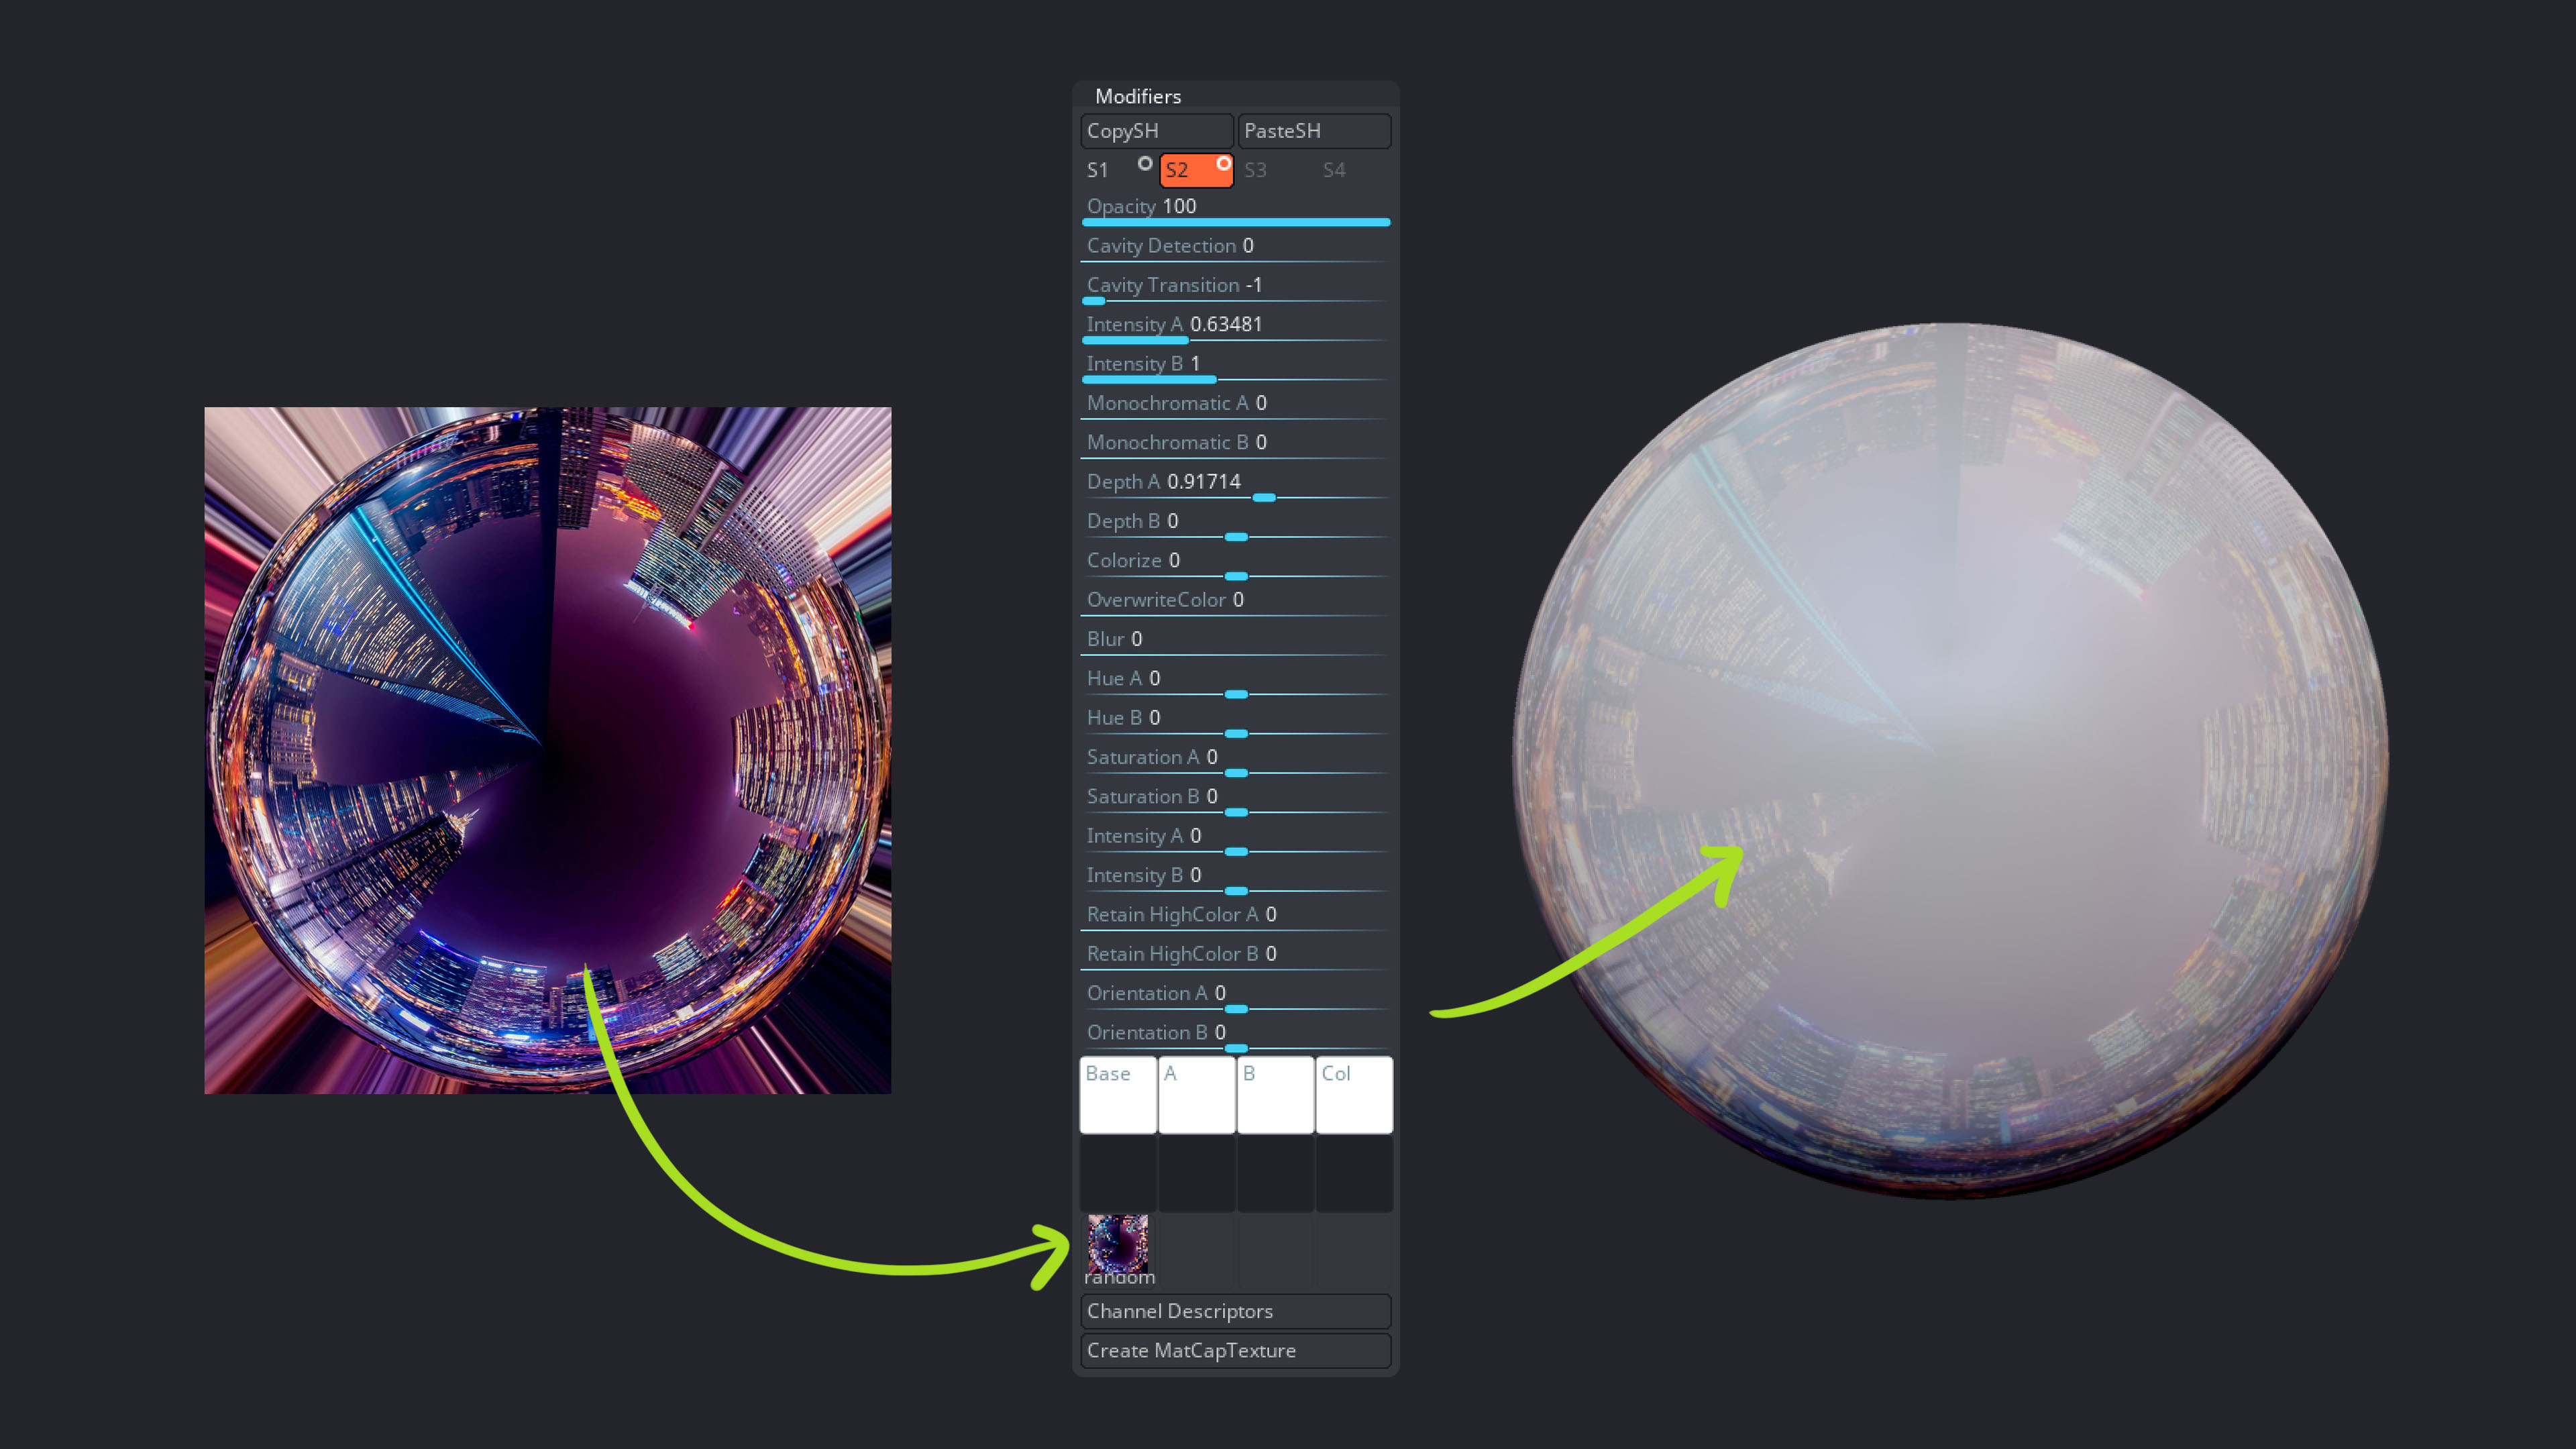
And as I just mentioned, this process works with absolutetly any image but ‘rounded’ or spherical imaged work best so a simple trick to use any image is to tweak them first in Photoshop:
- import any image you want into Photoshop (a 2:1 ration works best but you can keep it square). In my case I’m just testing things with a random photo of a city at night
- Go to filter > Distort > Polar coordinate and then select Rectangular to polar:
.jpg)
That’s it, save that as a square image and import ir them directly into the image slot of the MatCap material you are using for your reflections:
pretty cool right? Keep in mind that you can create a few of these materials with different ‘reflection types’ and intensities and save them in your library… so next time you are working on a character with eyes, you can just choose one of your own materials and you don’t need to do any more setups!


.webp)

.webp)