
When recreating a person digitally, the key is to have solid reference images from different angles... ideally with similar expressions to what you want to sculpt. The challenge is that these references are usually taken with different lenses, making perspective matching tricky.
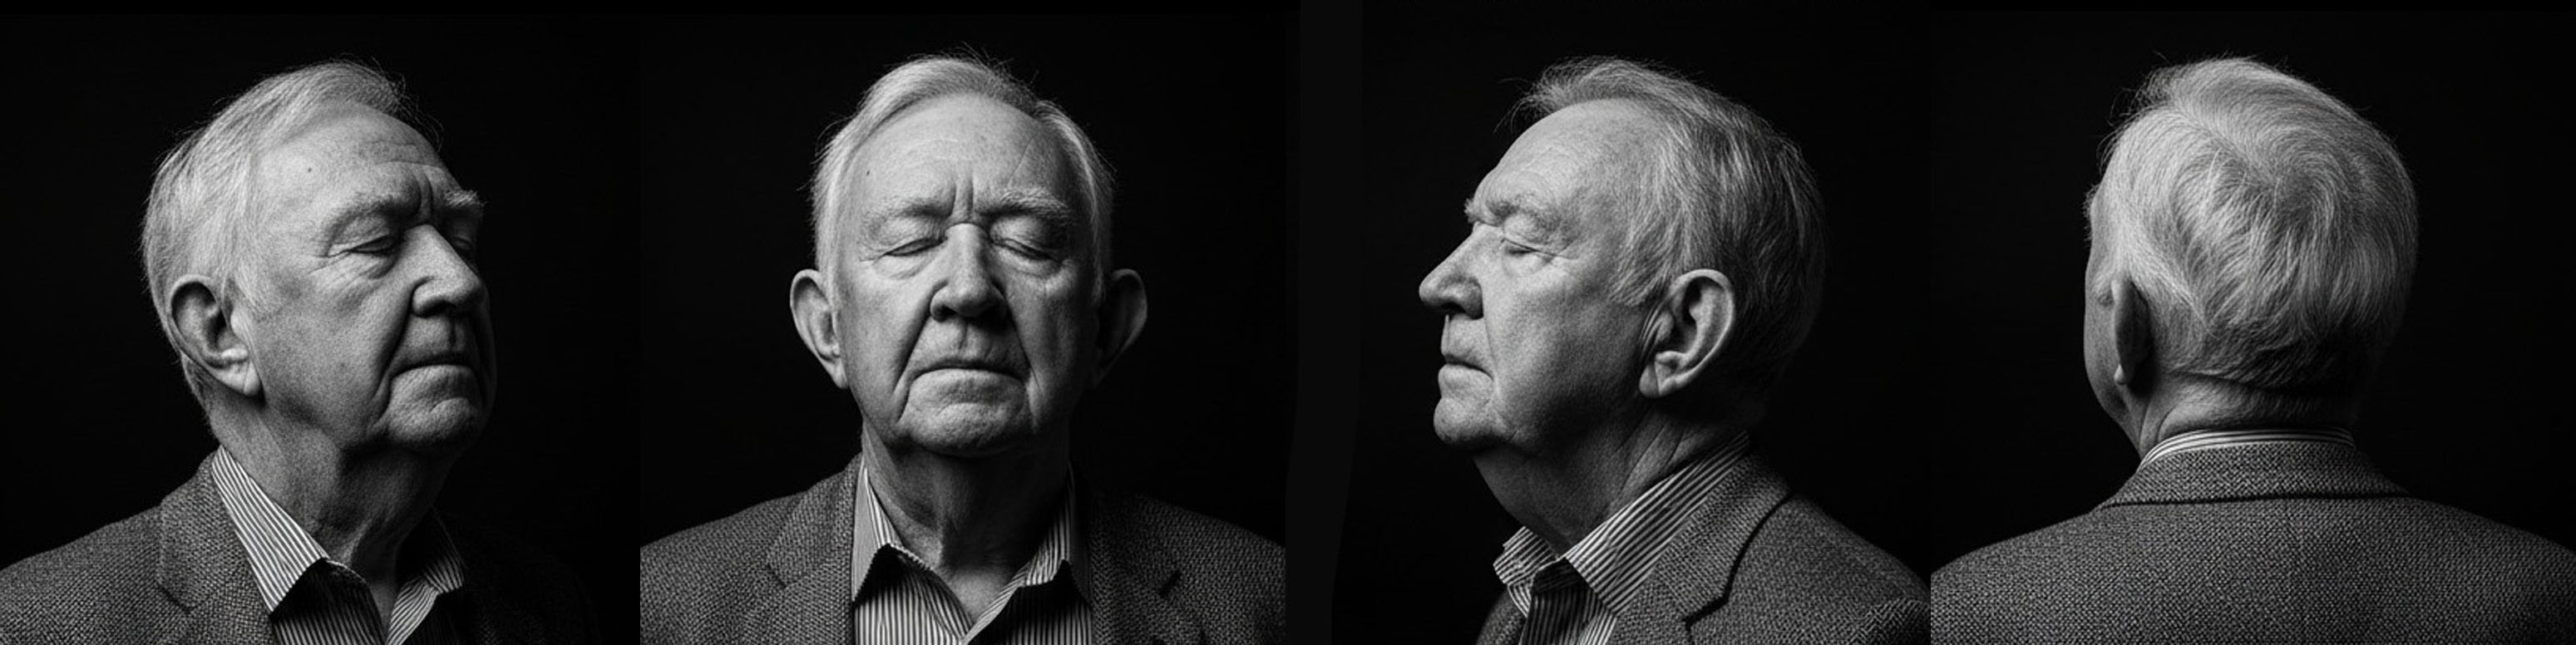
For fun, I tested the new Google Nano Banana image generator (yep, the AI tool) with a single portrait, asking it to “create a character sheet with the same style and mood as the reference, keeping consistency across side, back, and front views.” Here’s the result:
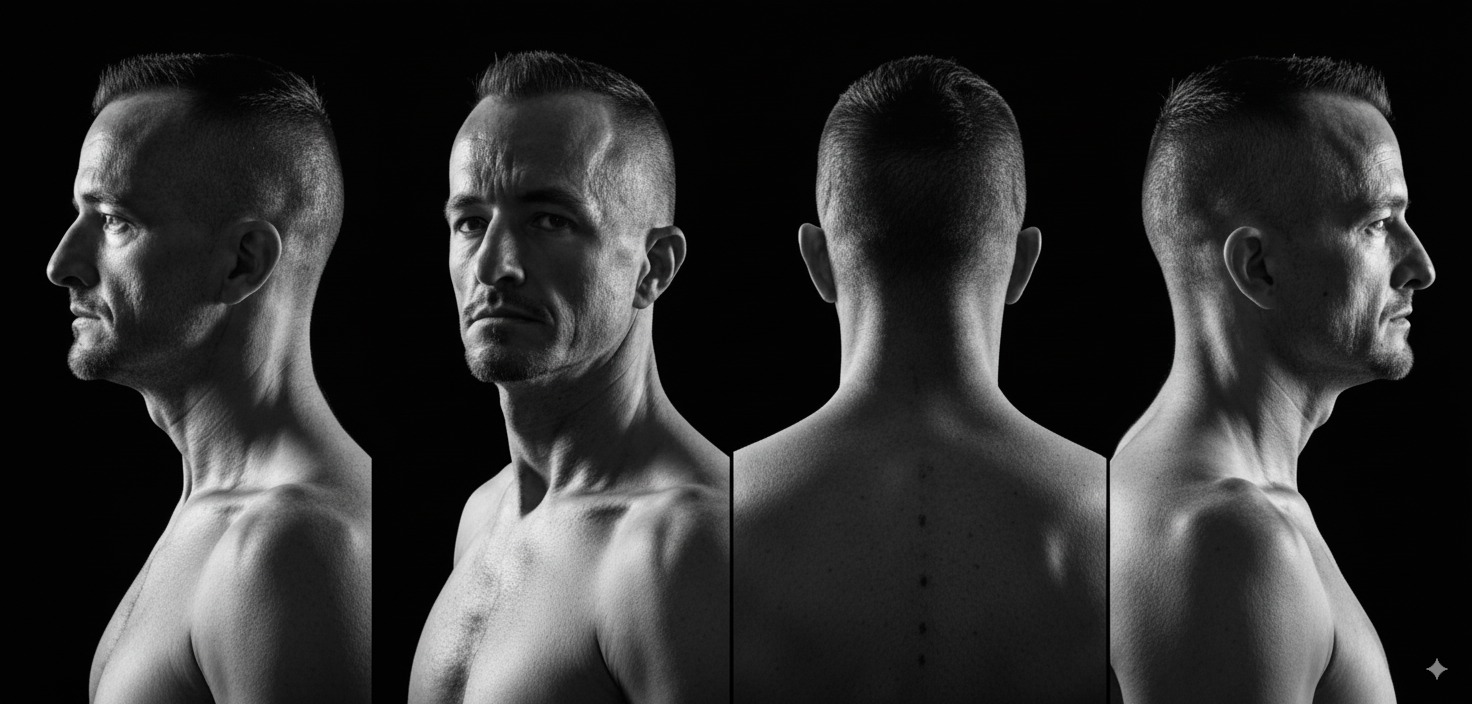
Not too bad! Some photos work better than others, but overall it produces a decent rough reference to practice with... giving you consistent shapes of the same head across different views.
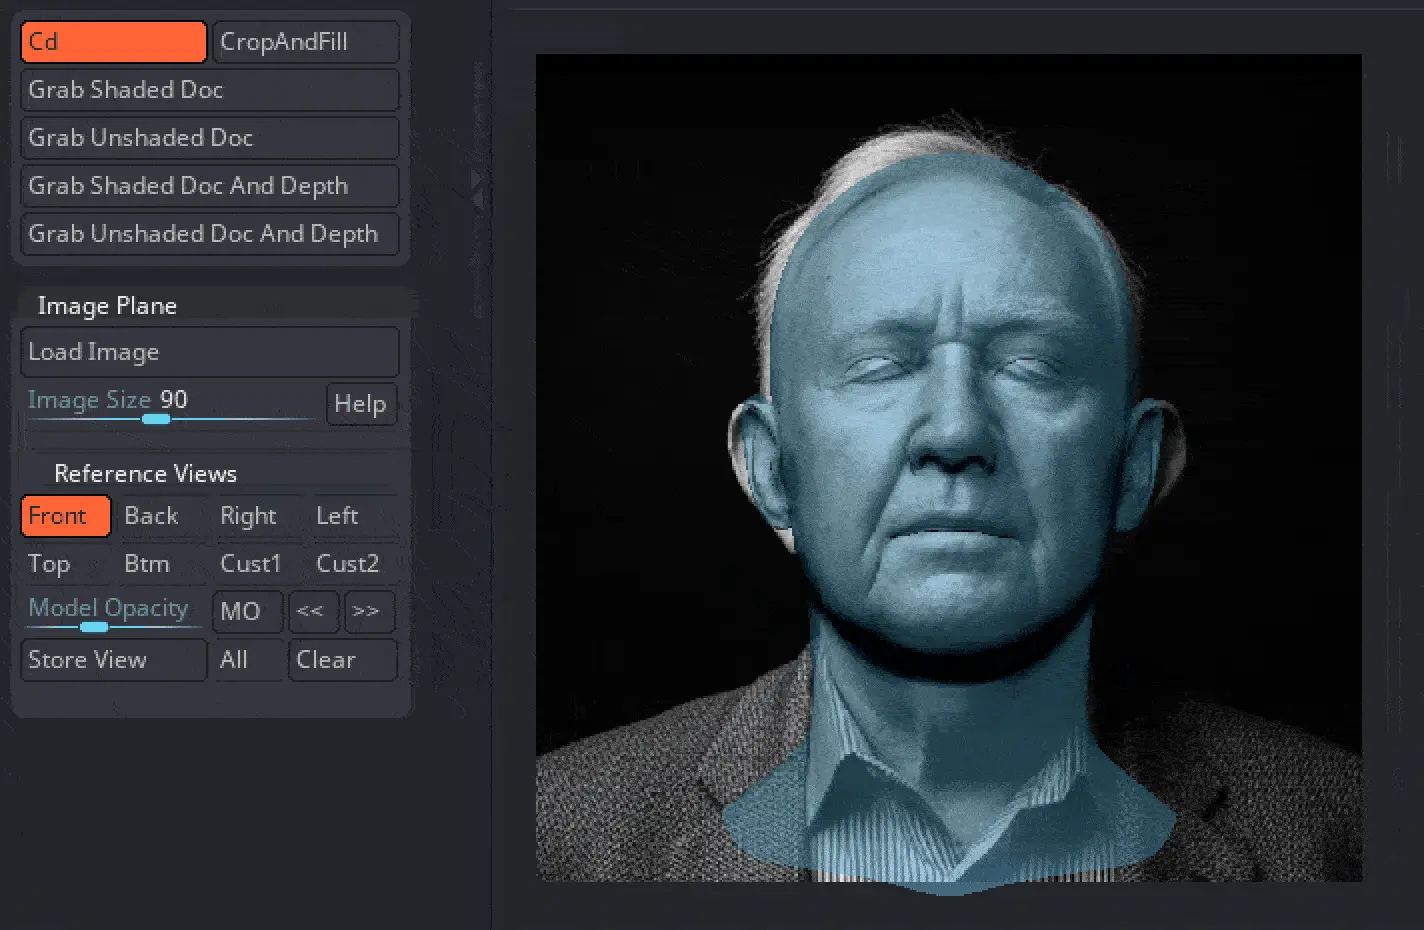
In Photoshop, I split the images into squares (aspect ratio doesn’t really matter), then loaded them into ZBrush via the texture palette. From there:
- Make sure you select the view you want first from the texture palette
- Click on ‘load plane’. this will load the image you’ve selected in the texture palette (front view in my case). If no image is selected first, the ‘load image’ button will open up your file browser
- Make sure you are in the ‘switch’ that corresponds to your reference view (front for me)
- Finally, move, zoom and rotate your based mesh or wherever you are starting with, and try to match the angle of your reference (you might also need to play with the field of view). But once you get a rough match, click on the ‘store view’ to save your ‘front view’ or any other view
.jpg)
Once you are done with the first image plane, you can repeat the process with the rest of the views. The cool thing about doing it this way is that you can adjust the rotation of the model slightly between stored views
Repeat for other angles, and you’ll be able to switch between reference views with ease. You can even map arrow keys to the << and >> buttons in the Image Plane subpalette for faster toggling.
Finally another very useful tool in the image plane subpalette is the ‘model opacity’ slider and the button MO to toggle the visibility of the model so you can adjust the mesh more precisely with the reference photos.
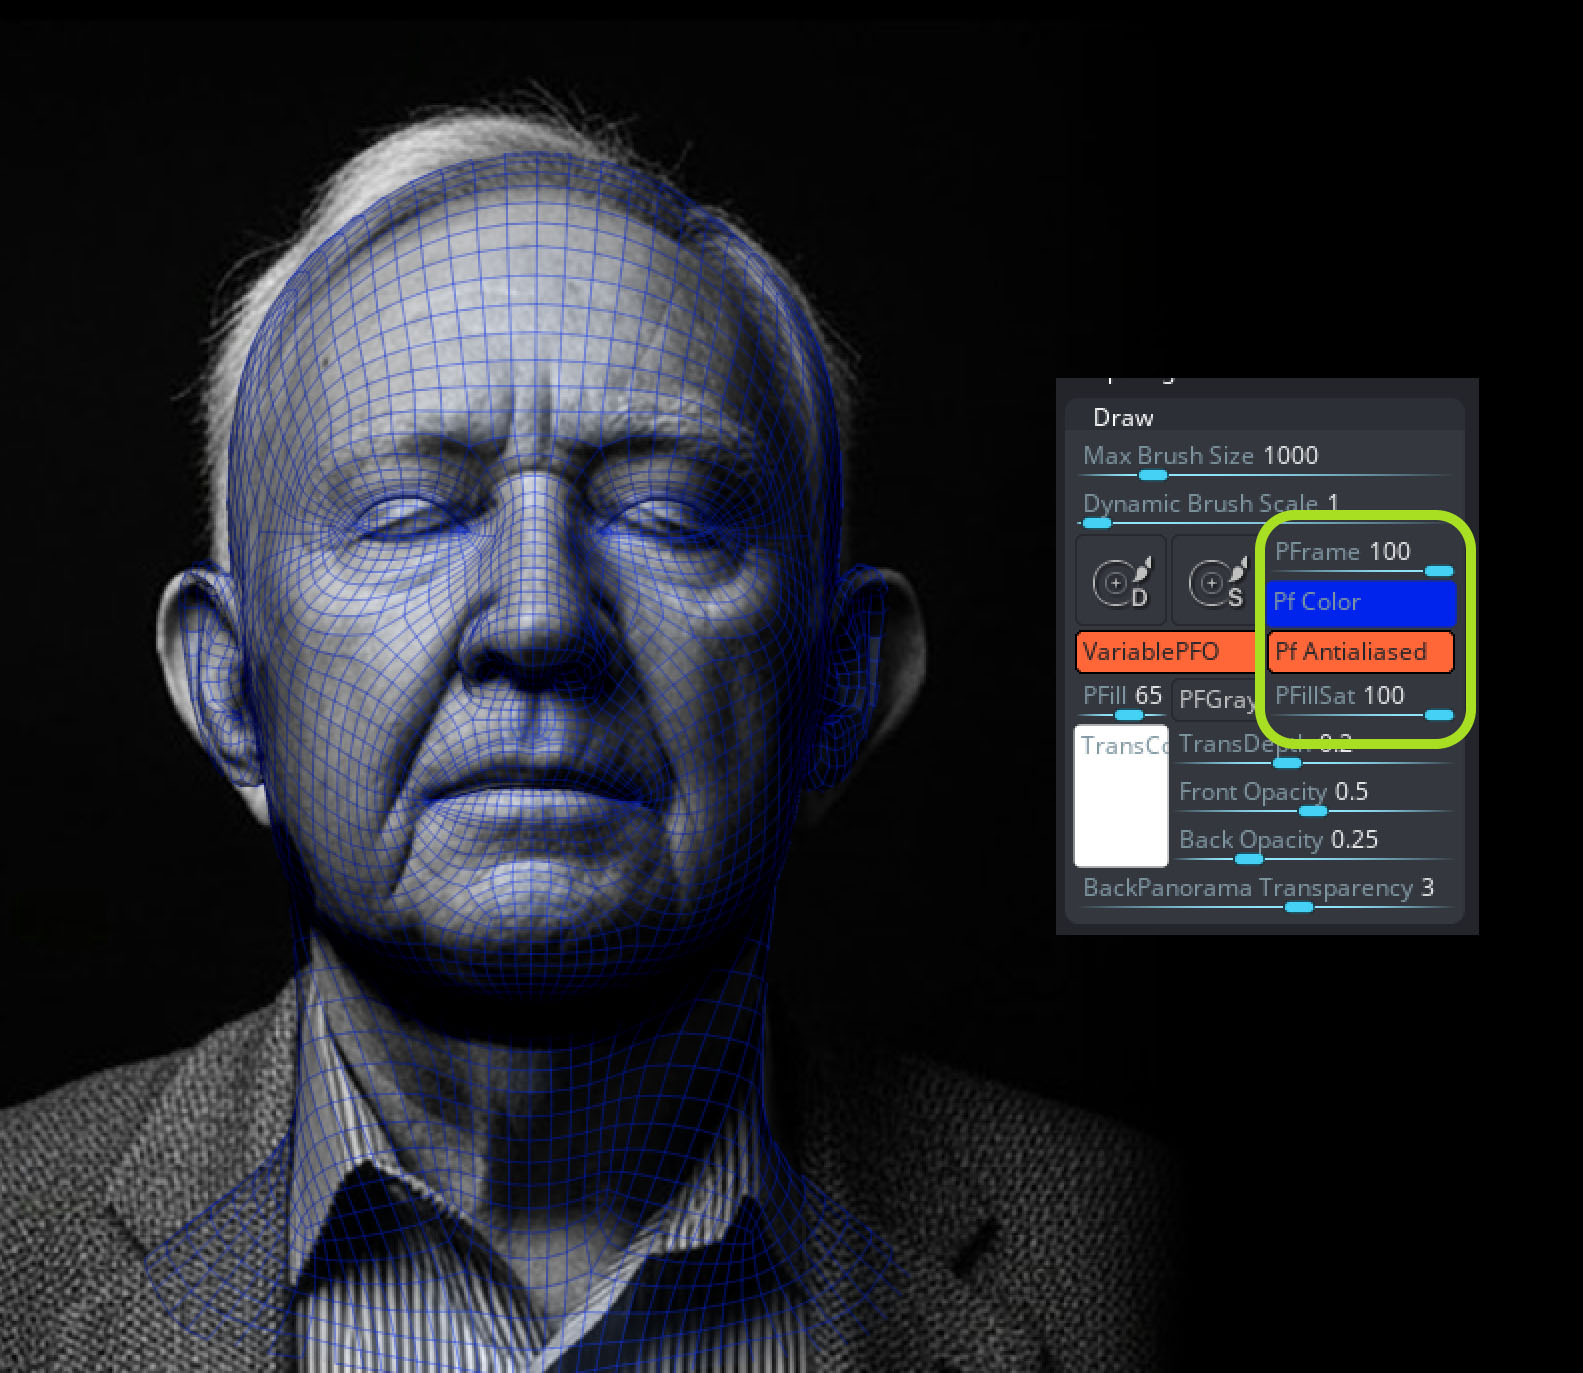
One extra tip for you is that if you start with a clean topology…. what you can do is to click on the MO button to toggle off the visibility of the mesh completely and then turn the polyframe on. You’ll be able to see a nice wireframe that will potentially help you adjust it more accurately. in fact… you can actually change the colour of your polyframe and the intensity of the ‘polyframe’ so you can setup something a lot more accessible and easy to spot:
The main process of adjusting the mesh deserves its own walkthrough, but the short version is: take your time, observe carefully, and keep refining volumes to match the references.


.webp)

.webp)