You’ve probably heard about the golden ratio (≈1:1.618) being everywhere in nature and classical art… but is it actually useful for us in 3D sculpting? Short answer: yes! not as a strict formula (or at least not how I use it), but as a way to bring a natural rhythm into your proportions, hierarchy and the way you distribute details. Let me show you with a few examples.
1. Balancing complexity vs. simplicity
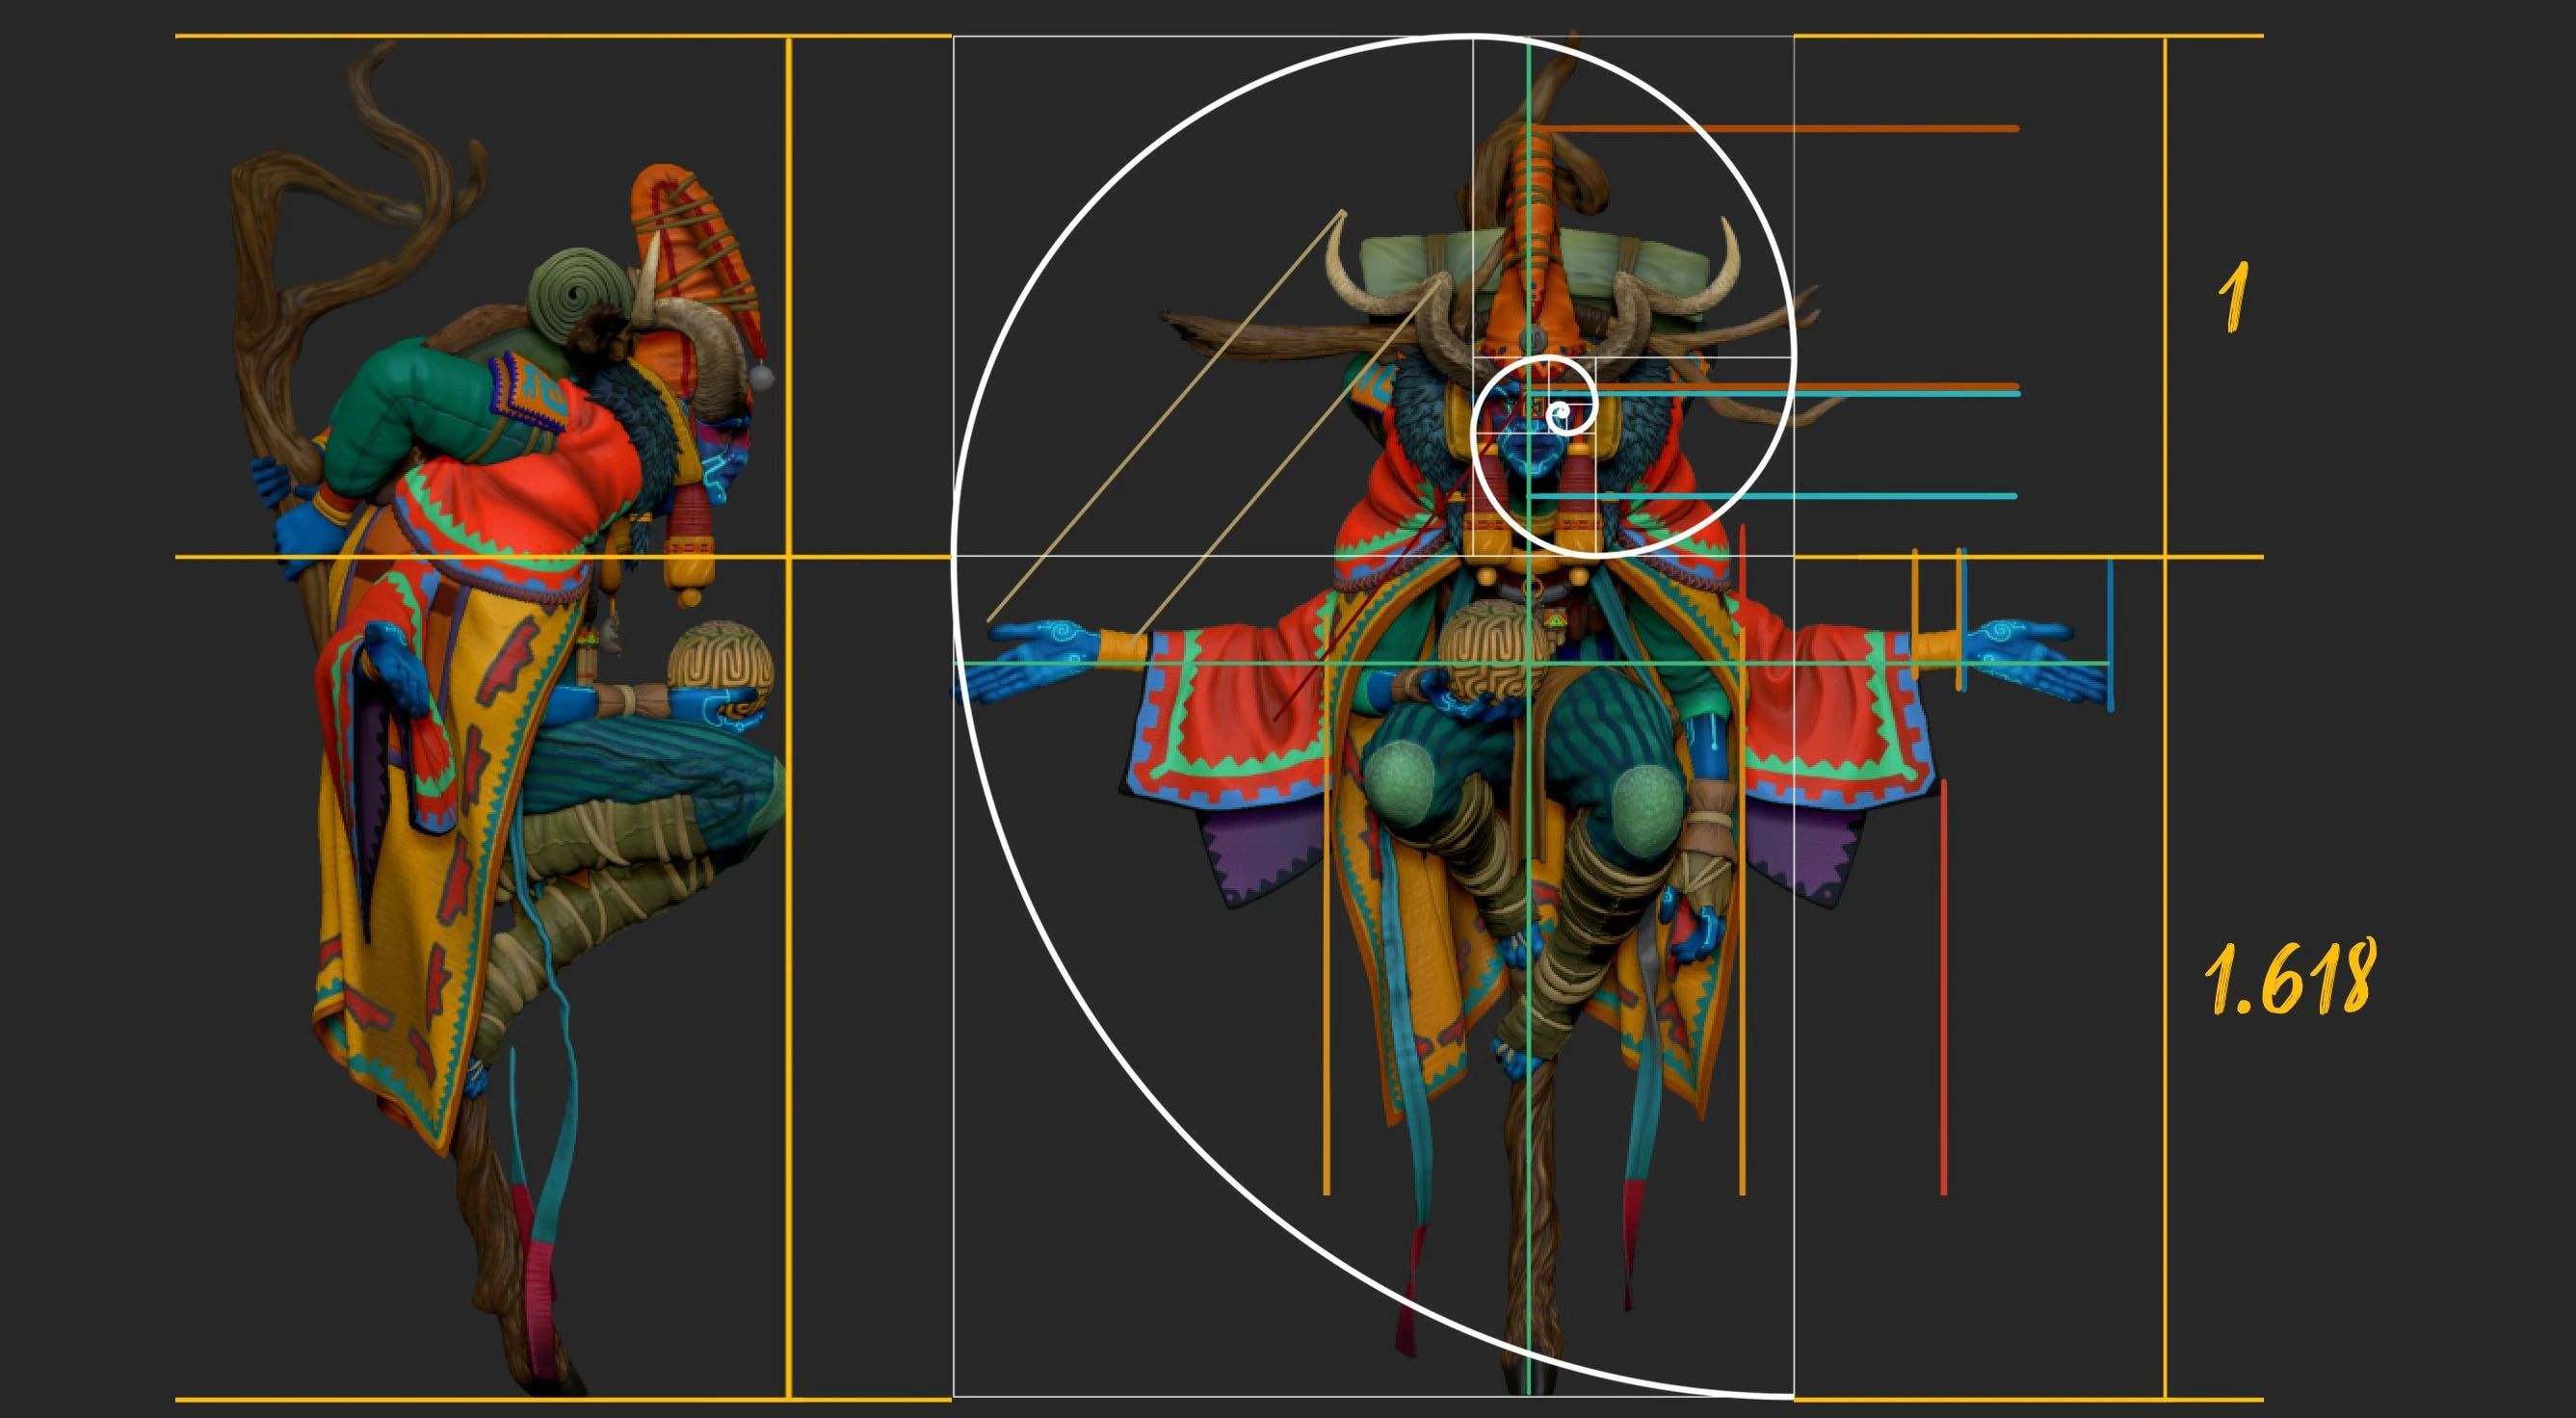
Check out the first image: on the left, you’ve got an area that’s absolutely packed with folds, straps, patterns, and surface detail. On the right, the fabric is much calmer and simpler.
That’s not an accident, these areas are split using the golden ratio. By keeping the dense detail in the smaller section and letting the bigger one breathe, the whole thing feels more intentional. I like to treat the whole character as a composition, and in this case the body and arms almost form a symmetrical “cross.” I used that central line of symmetry as an anchor, loading the middle with all the busy details so it naturally becomes the focal point.

👉 Next time you’re tempted to scatter detail everywhere, try clustering it and leaving some space clean. The contrast makes the detail pop even more and make the whole sculpt feel more intentional.
2. Natural finger proportions
Here’s a fun one: fingers actually follow the golden ratio pretty closely (almost). If you treat the first bone of the finger (proximal) as “1,” the next one (intermediate) is about 0.618, and the tip (Distal) is around 0.382. That’s why the taper feels so natural… it’s literally built into our anatomy.
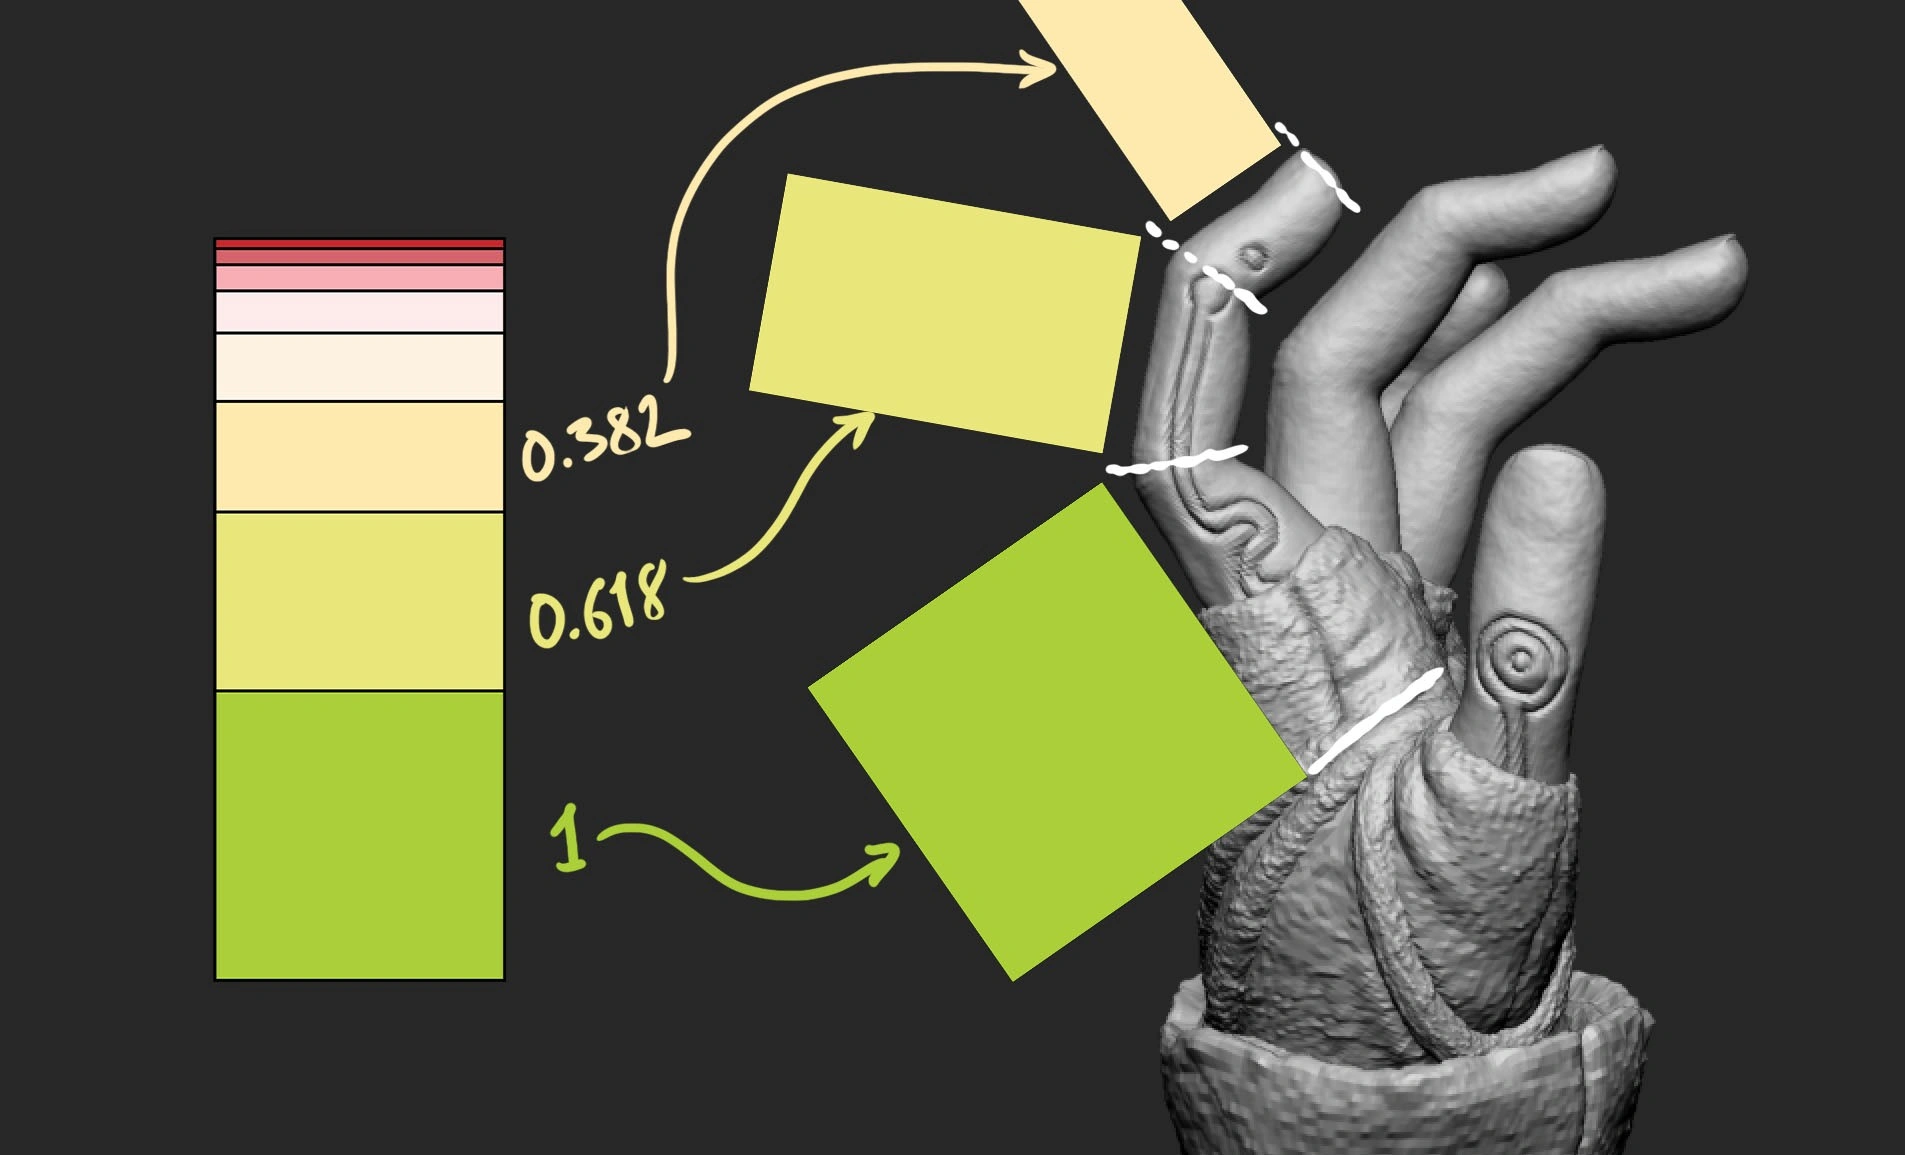
👉 When you sculpt hands, think in terms of big → medium → small. You don’t need to measure decimals, just keep that ‘cascade’ in mind and your fingers will instantly feel more believable.
3. Flow in horns and appendages
Horns, spikes, and similar forms are a great place to use the golden ratio in two different ways. On the left side of the image below you can see how the horn is broken down into uneven sections that taper as they go up. This “big → medium → small” rhythm follows the golden ratio and gives the horn a natural flow instead of looking like it’s divided into even chunks.
On the right side, I’ve mapped out how the detail patterns are distributed. Notice how the heavier wrinkles and surface noise are concentrated in the smaller sections near the base, while the tip area stay much cleaner. This uneven split of detail keeps the eye moving upward and makes the form feel more organic.

👉 When you’re sculpting horns, tails, or any tapering appendage, think about the golden ratio not just for size but also for where to cluster detail vs. where to let forms breathe. That combination is often what sells the realism.
4. Props and headgear design
the final image is all about how you can use the golden ratio to divide up big shapes into smaller, more interesting ones. On the right, notice the relationship between the head and the tall hat. Instead of making the hat the same size as the head (which would feel stiff and blocky), it’s narrower and taller, roughly following the 1:0.618 proportion. That uneven split keeps the silhouette dynamic and avoids symmetry.
On the left, the same logic is applied to a prop. The main divider line doesn’t sit right in the middle… it falls at the golden ratio mark. The top section is filled with a repeating horizontal pattern, while the bottom switches to a different design with fewer, more vertical wave-like lines. This contrast not only breaks up the shape but also gives each section its own rhythm while still feeling connected.
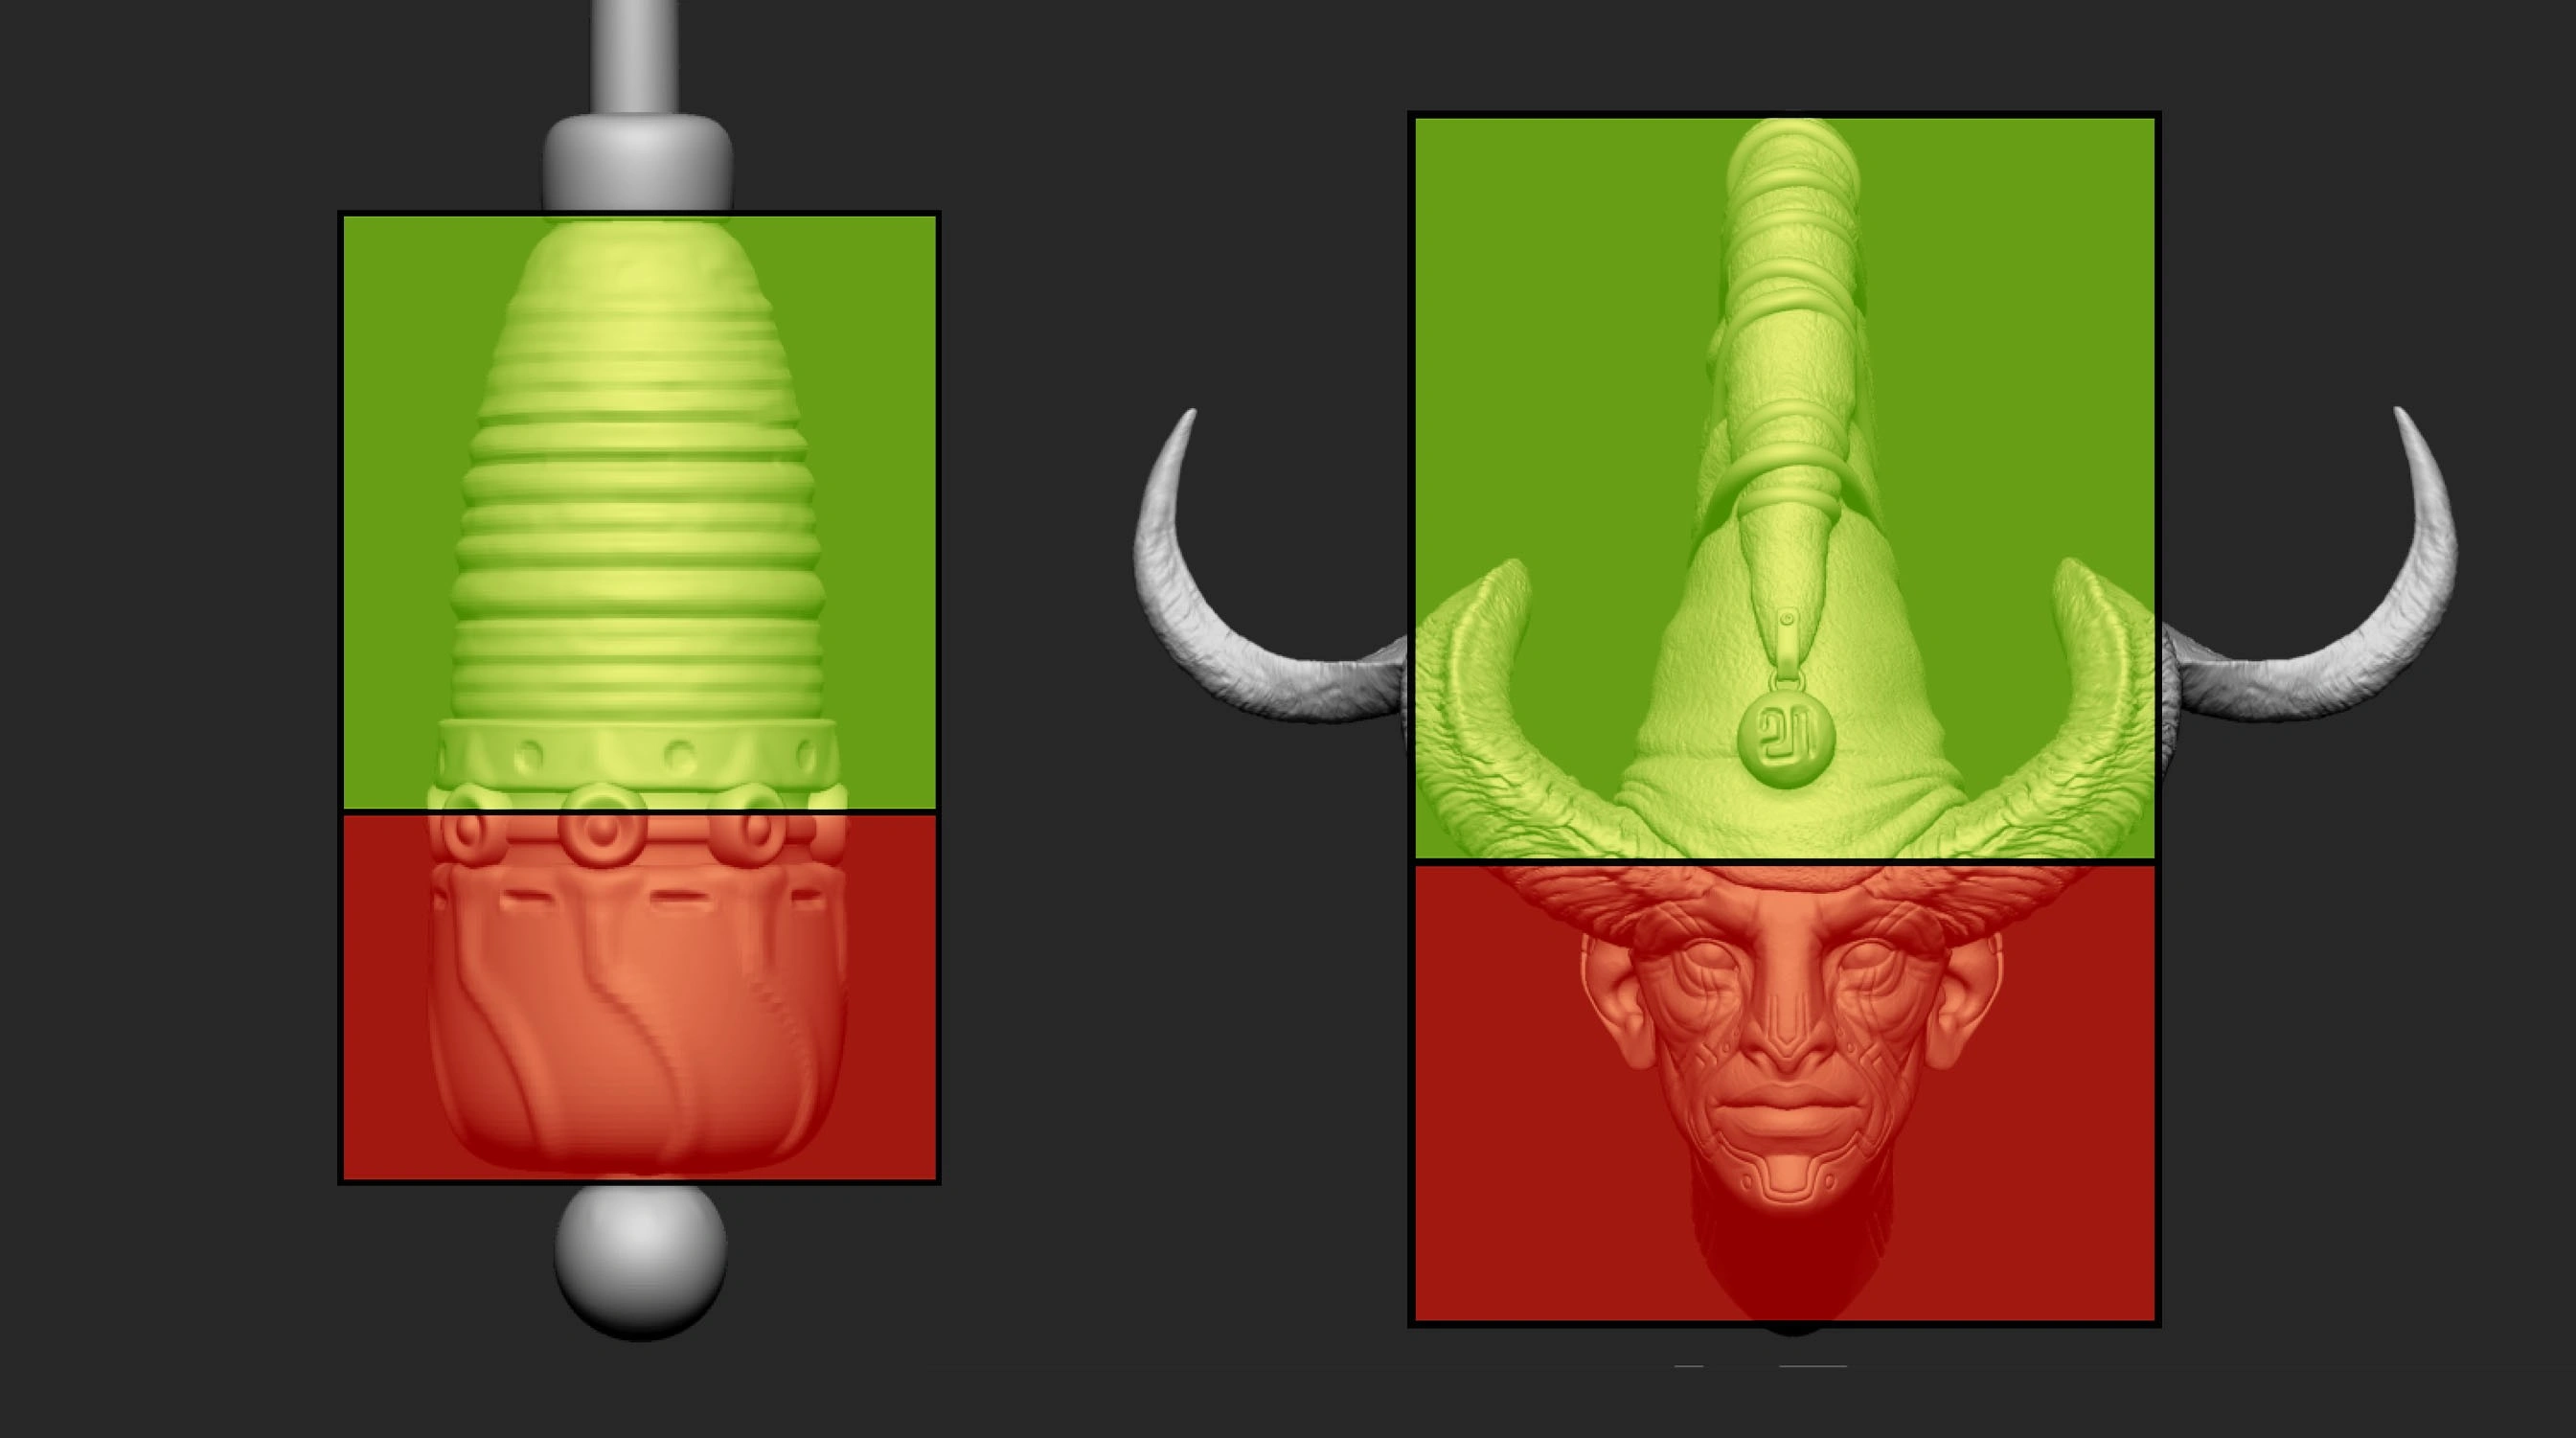
👉 When designing props or ornamental gear, try using the golden ratio to decide where major dividers fall and how patterns change across sections. It makes the design more engaging than if you just split it evenly down the middle.
Wrapping it up
The golden ratio isn’t about being a math nerd with calipers… it’s about finding a rhythm. in fact the simplest thing you can do is find ‘the middle point’ of anything you are doing, and then offset that line a bit… that’s it and you can:
- Use it to balance busy and calm areas. (areas of rest vs. areas of details)
- Let it guide proportion cascades (like fingers and horns).
- Apply it to design divisions in props and clothing and even in texture patterns
If something feels a bit “off” in your sculpt, try overlaying a golden ratio grid or just think in terms of big → medium → small. Nine times out of ten, it’ll help your forms click into place ;)


.webp)

.webp)