
For this tip to work better you’ll need to have a based mesh with a descent UV layout for the head/face and a unwrapped face texture. You can find plenty online so the focus is on the texturing technique but wanted to give you some context… So I have this head in ZBrush and it has descent UVs (some areas like the nose and ears can be improved):
.jpg)
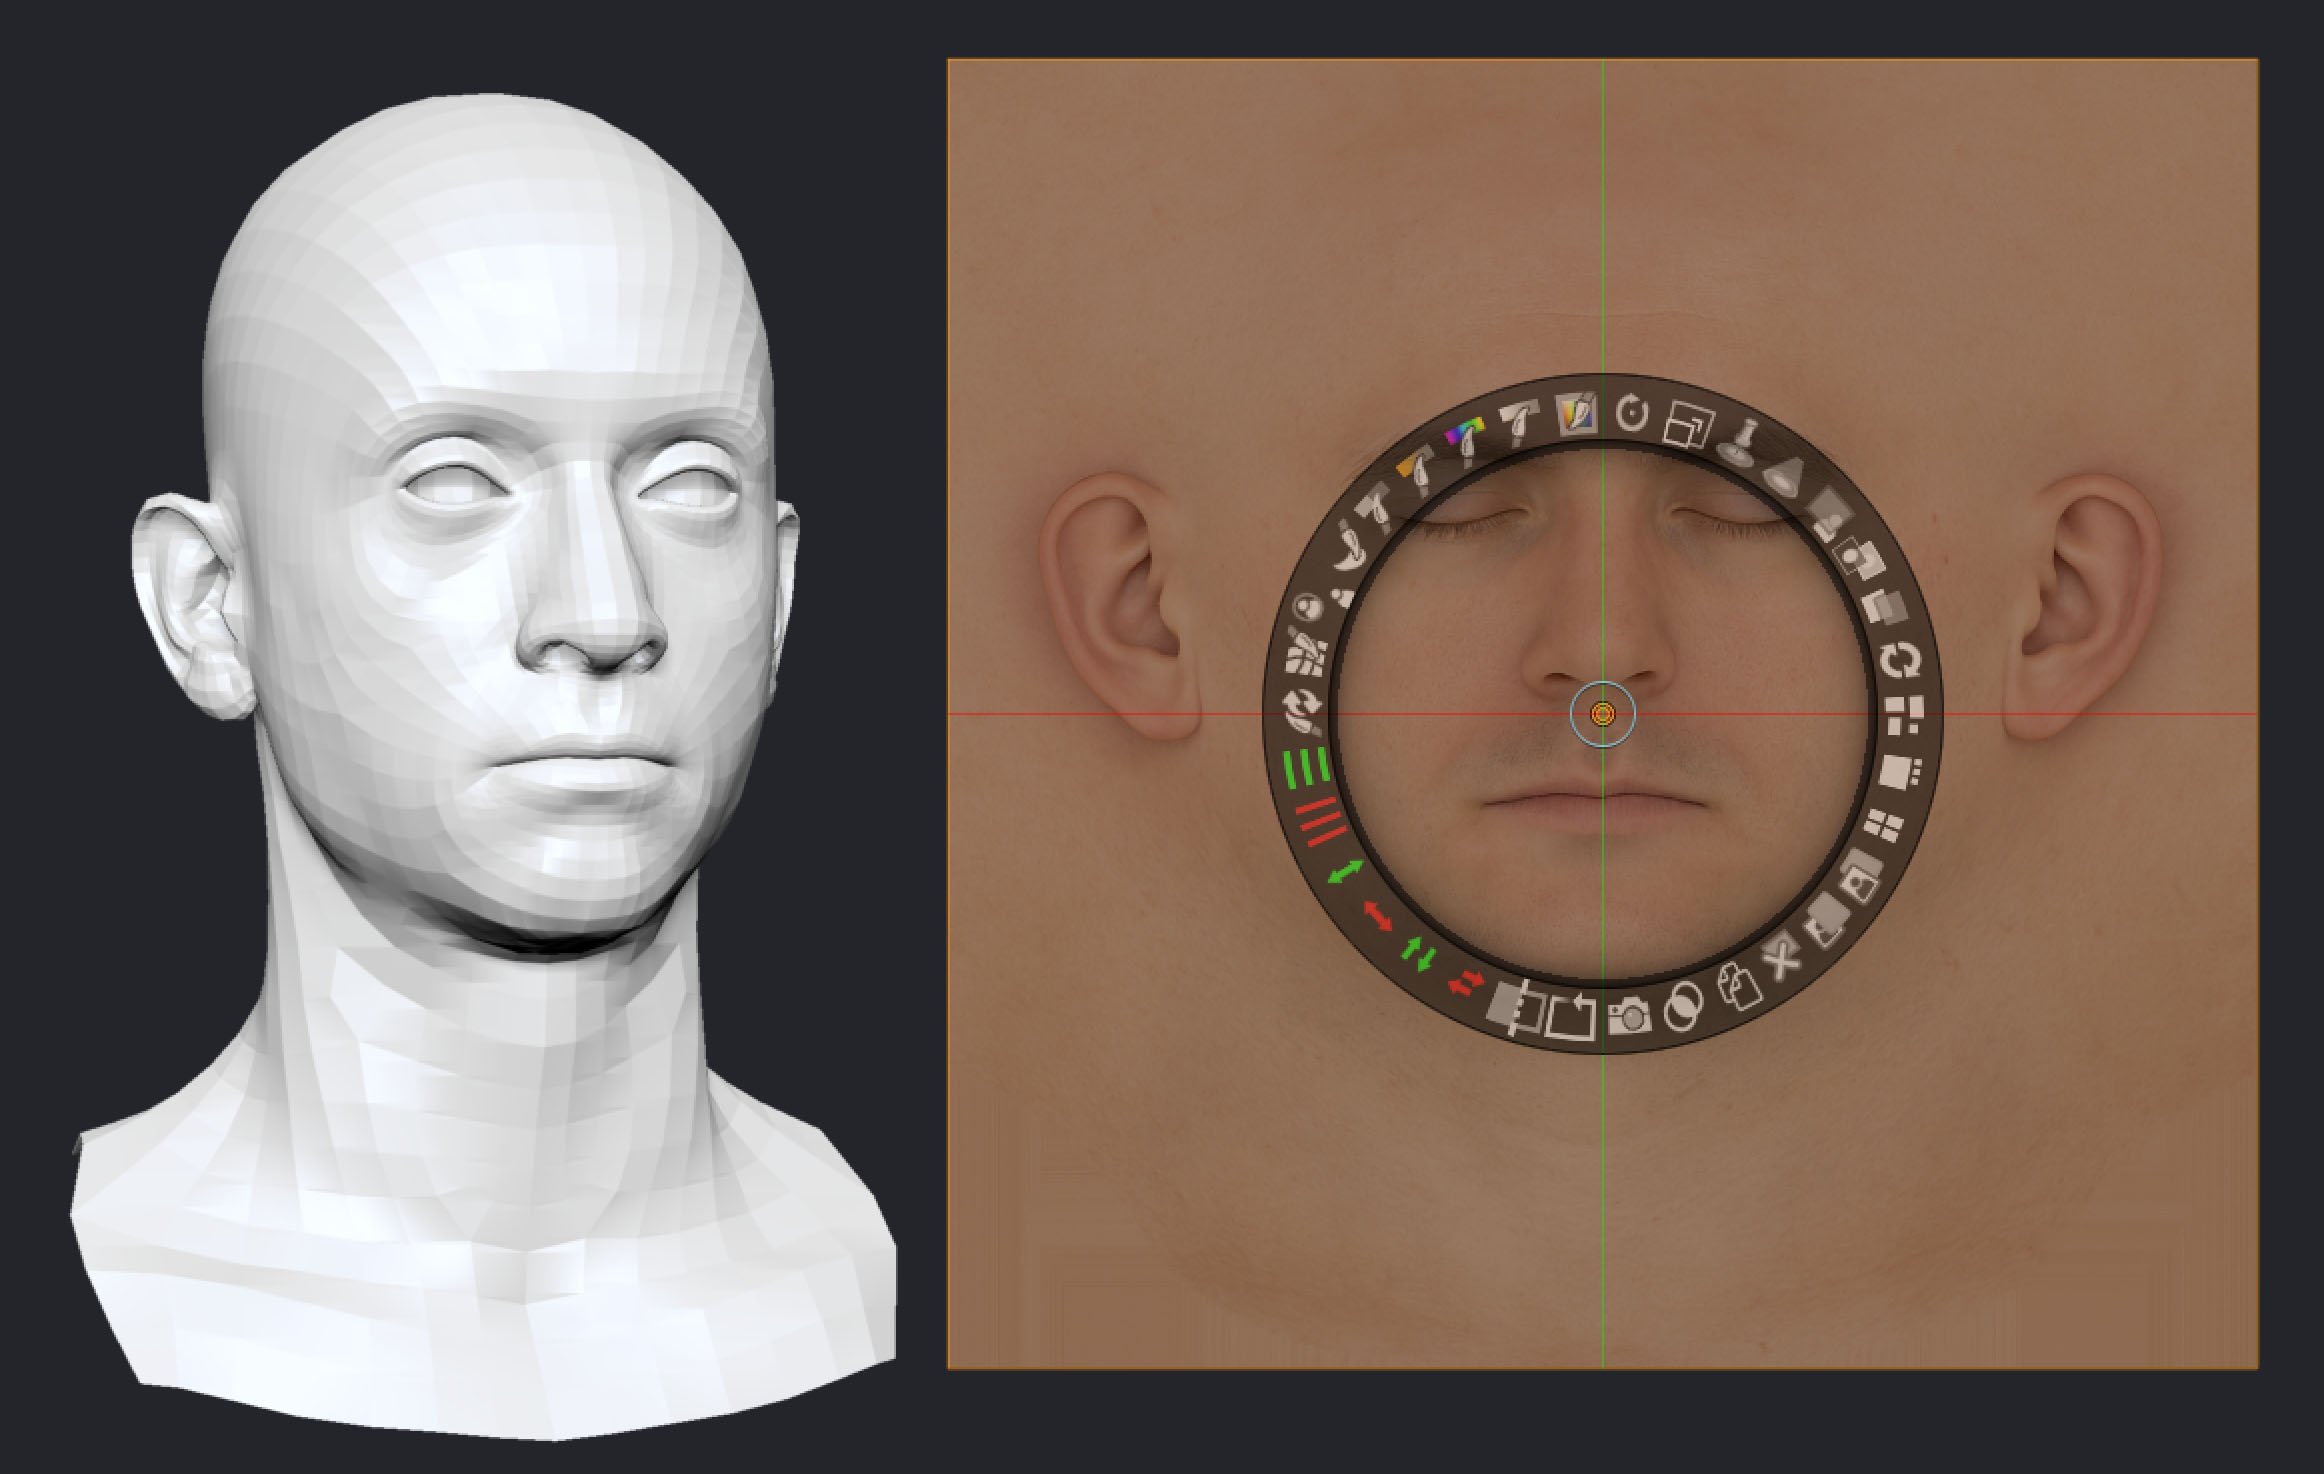
The first thing you want to do is to load your texture into ZBrush from the texture palette, and then add it to your spot light. This is your ‘texture editor’ tool in ZBrush:
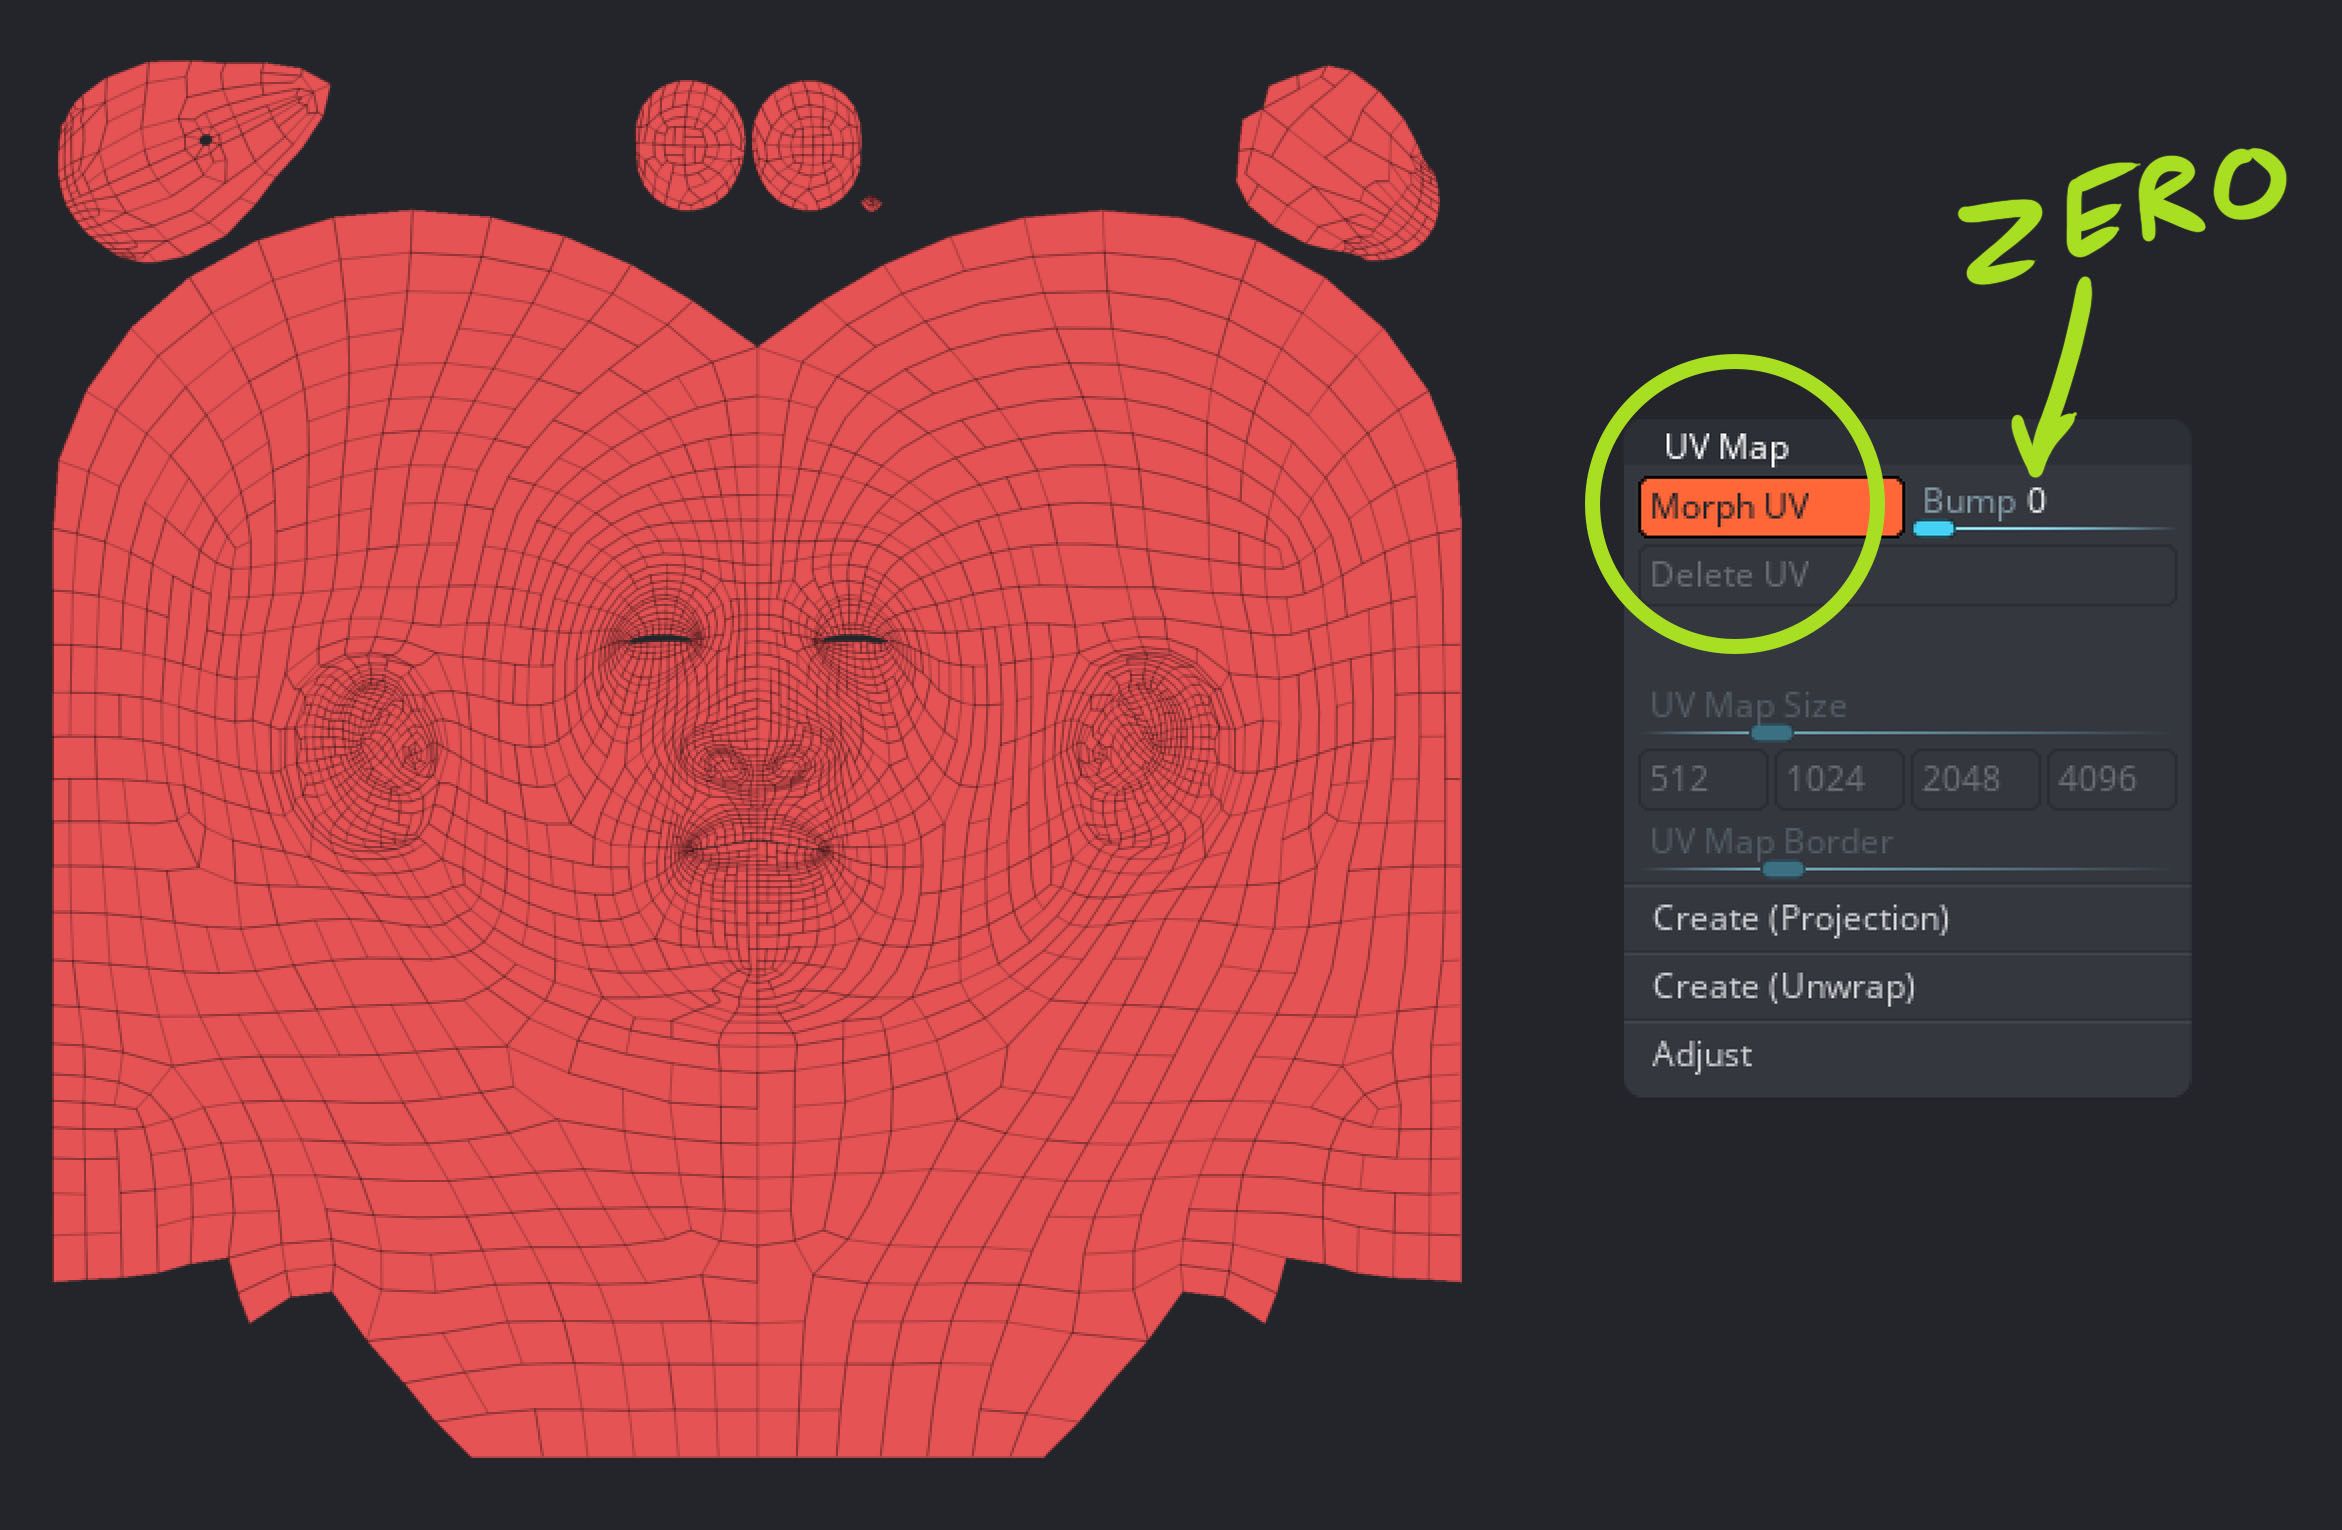
Then here is the first trick… you need to go to your UV Map palette and set the ‘bump’ value to zero and then click on Morph UV. ZBrush will transition from the 3D view of the model to a 2D view with the UV Layout. The zero bump means that there won’t be any deformation… just a flat ‘texture’ ;)
I assume you already guessed where I’m going with this right? but hang on! there is another cool trick here that you might not be aware of from the powerful spotlight in ZBrush…
You can bring in you texture and scale it, move it and rotate it to find a close match to your UV layout, but in most cases it won’t be a perfect match (otherwise is easier to just load it as a texture).
So you can use the NUDGE tool in the spotlight. This is such a cool and overlooked feature… it basically works like the nudge tool in photoshop (or liquify to an extend) and allows you to push the pixels of the image around.
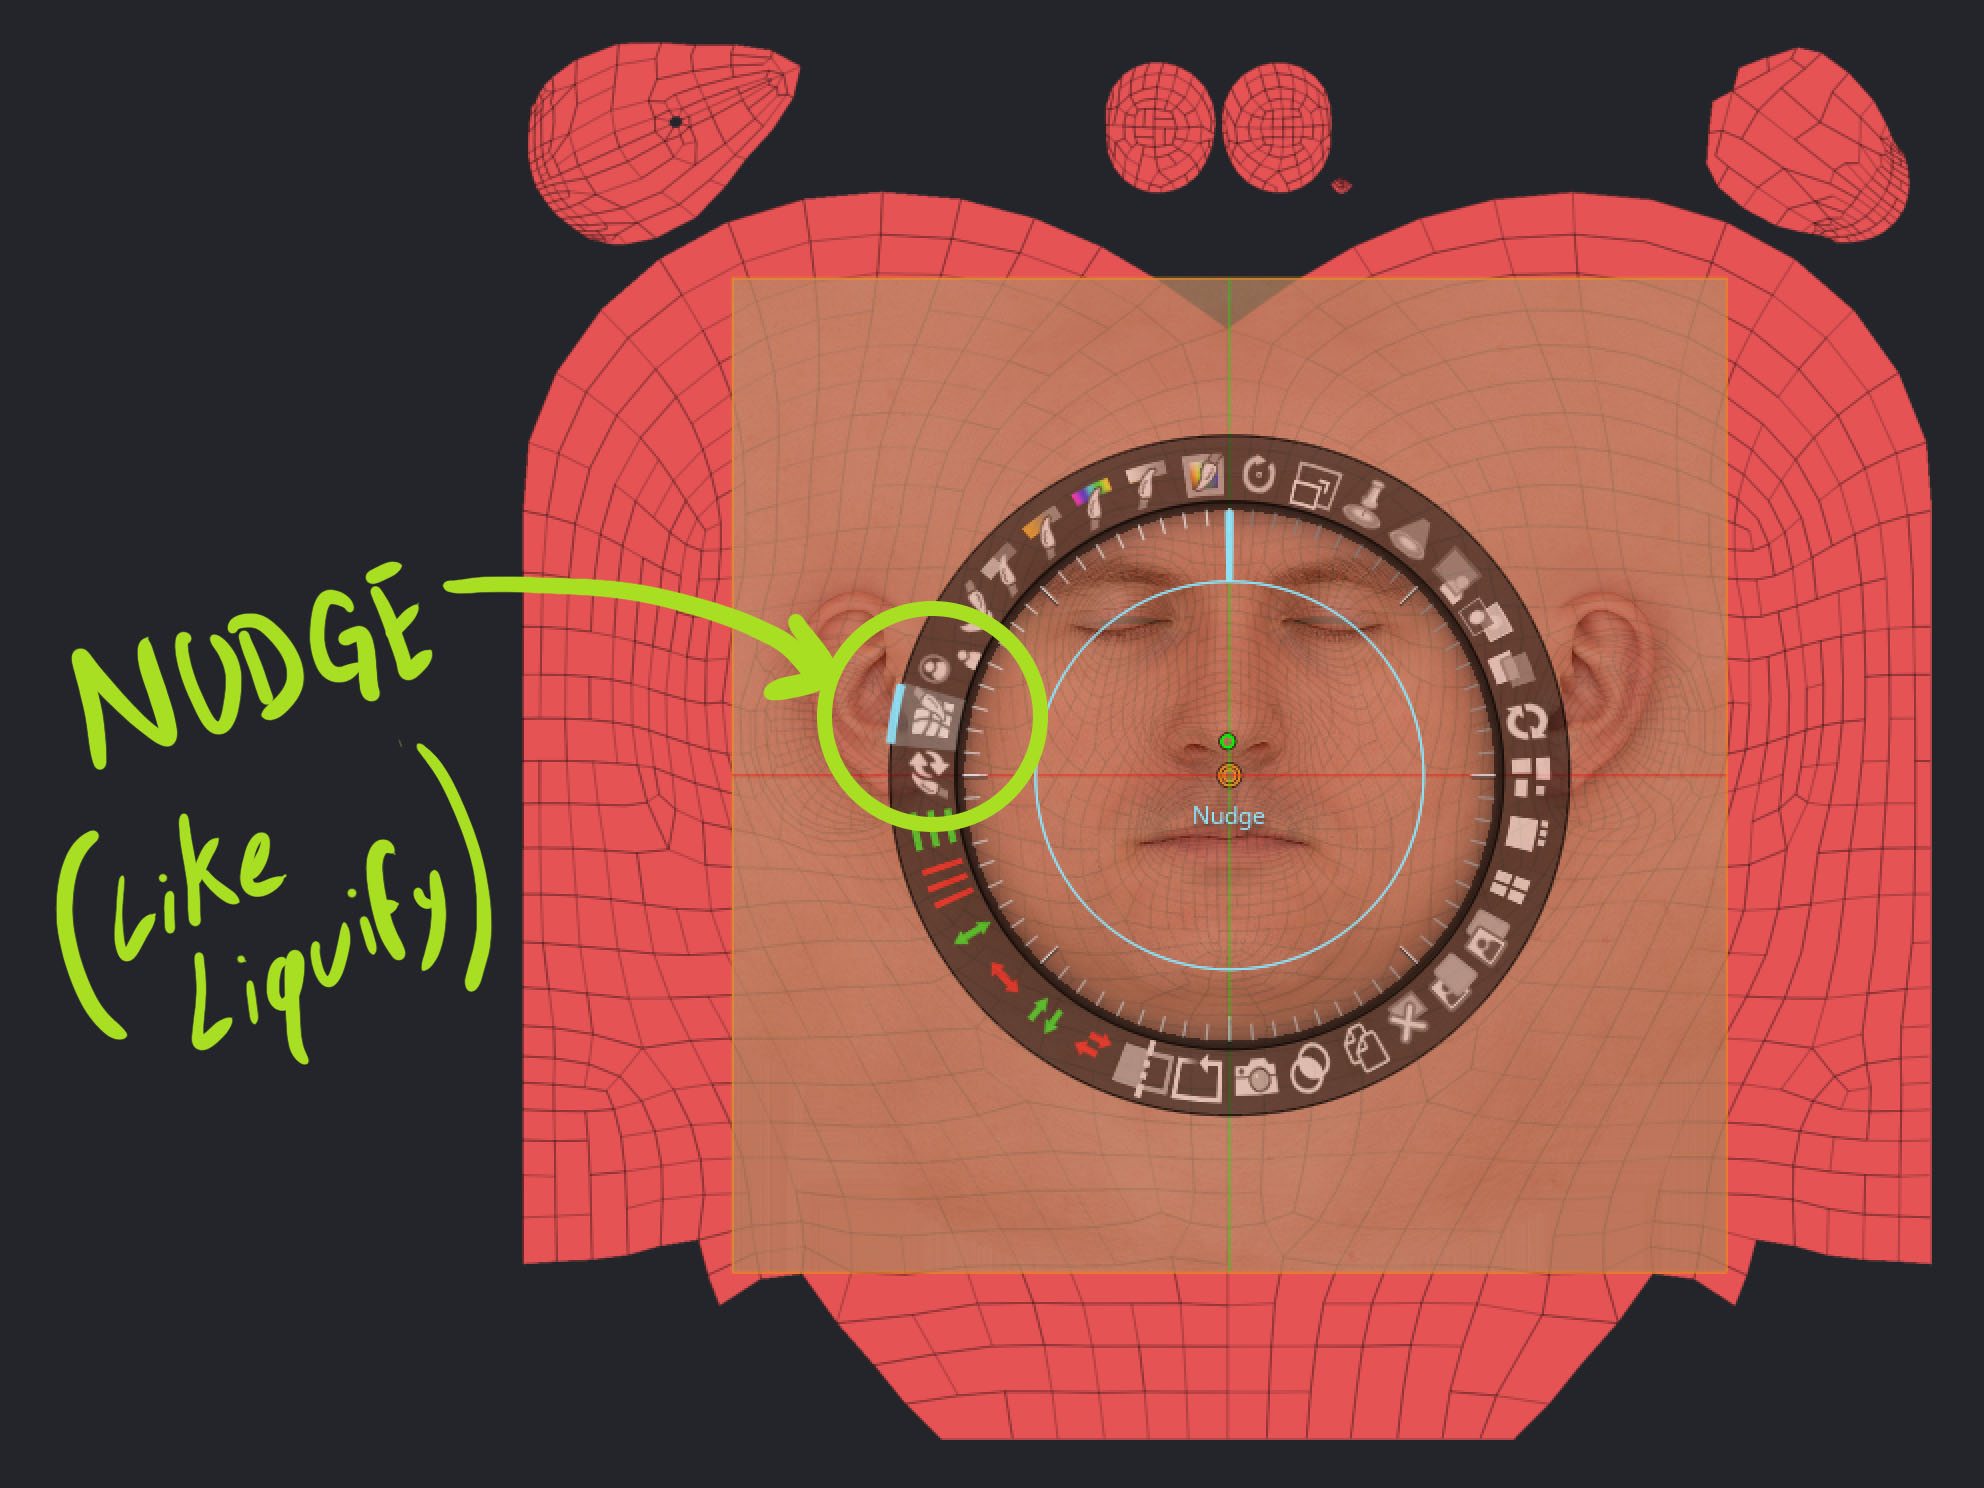
Make sure you select the nudge option and move the radial controller away from the texture frame, this allows you to click and drag on the textures to nudge the texture in place to match the UVS!

After a couple minutes you can have something that is very close to the UV layout. Then you can switch to the paint tool in spotlight, press Z to go into the projection and choose a painting brush to fill in the UVs.
NOTE: is worth mentioning that this is obviously projecting polypaint so you need to have enough resolution. If you don’t… turn off the Morph UV, subdivide your head and then Morph UV again. Also try not to move the camera or lock it so it will match what you have ‘nudged’.
That’s it, once you have finished projecting your textures you can click on the Morph UV again and do any manual adjustments to the textures direcly on the model but you should already have a pretty descent base!


.webp)

.webp)