Just keep in mind that this is a very useful technique for the effect… not just for creating these type of jackets haha
STEP 1: Duplicate whatever base mesh you want, delete the parts you don’t need and Dynamesh it. I also add a tiny bit of inflate to help with the effect:
.jpg)
STEP 2: with the SliceCurve brush, cut up the jacket (or anything else) into various polygroups. The idea here is to cut wherever you want to have a tension point like the seams in the jacket:
.jpg)
STEP 3: Here is the real trick that you might not be aware of… from the Masking palette, you can actually mask a mesh ‘by feature’ and because with have those polygorups, if you click the MaskByFeature big button, ZBrush will create a mask along all the cuts we did:
.jpg)
STEP 4: Here is the second cool trick… from the Dynamics palette, set the gravity to 0 (or very low). Then make sure the Inflate and Expand switches are on and simulate until you are happy with the result.
These settings will tell ZBrush to push the mesh outwardly allowing for a bit of expansion while keeping all the seams intact since they have a tiny mask!
.jpg)
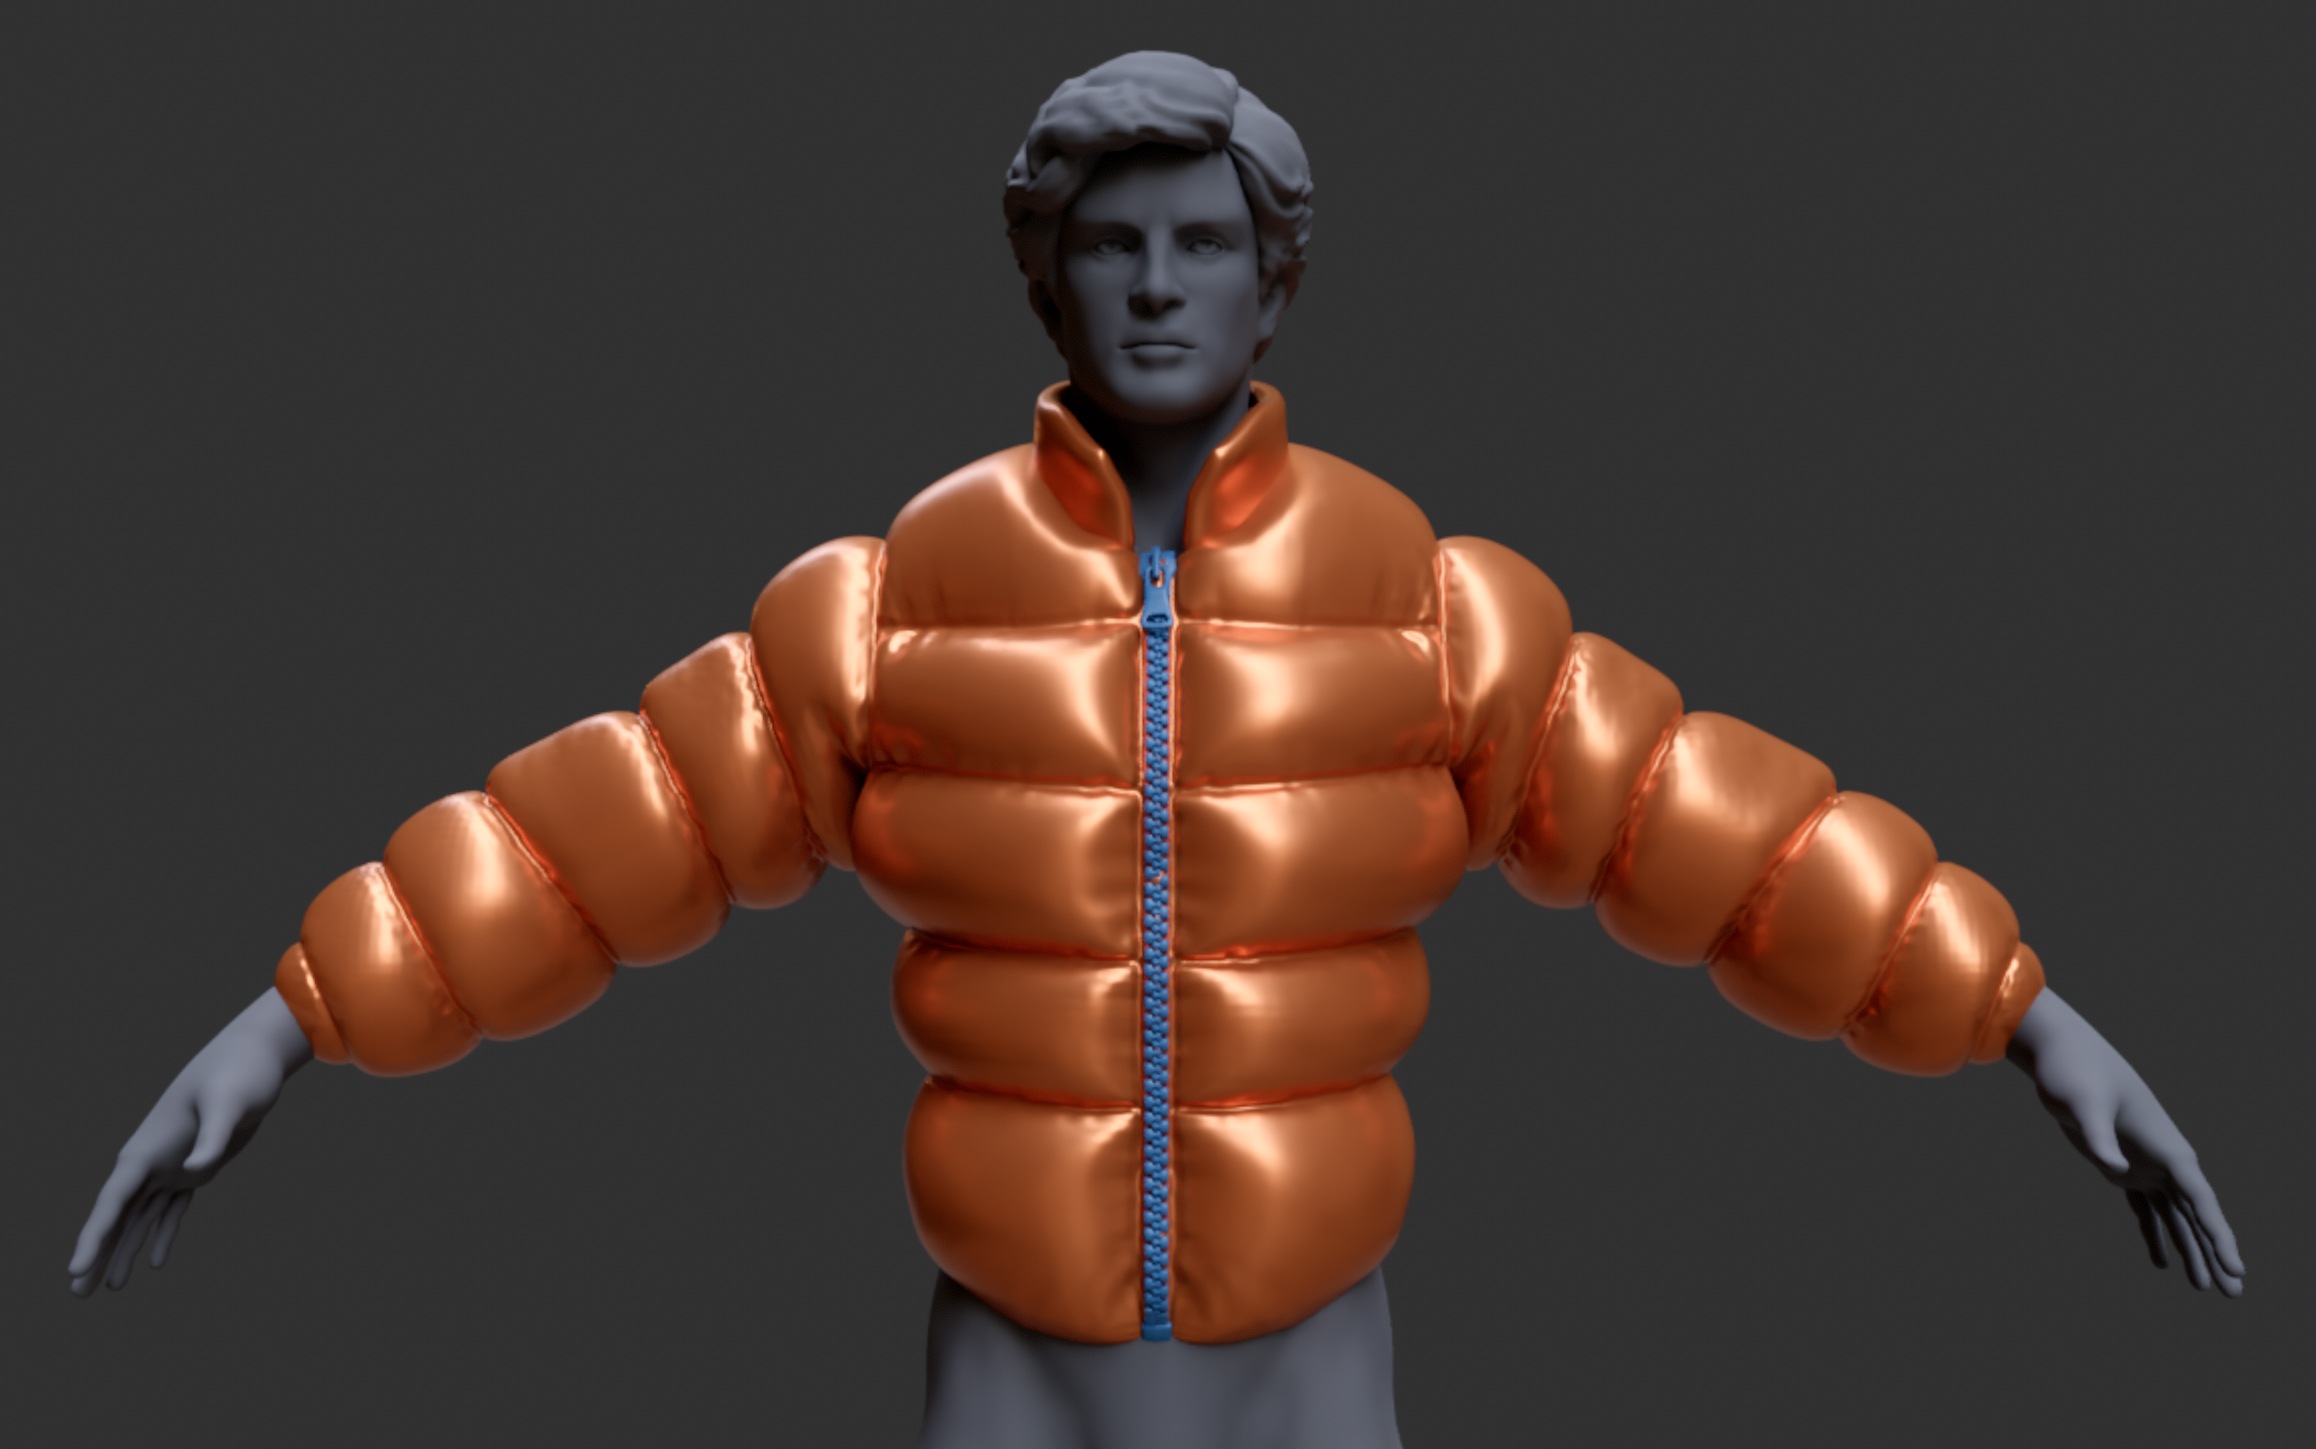
STEP 5: Run a ZRemesher, subdivide and project details! that’s it… you are good to go!
.jpg)
I also added a Zipper with the IMM brush that comes with ZBrush just for fun.
Hopefully this helps!


.webp)

.webp)