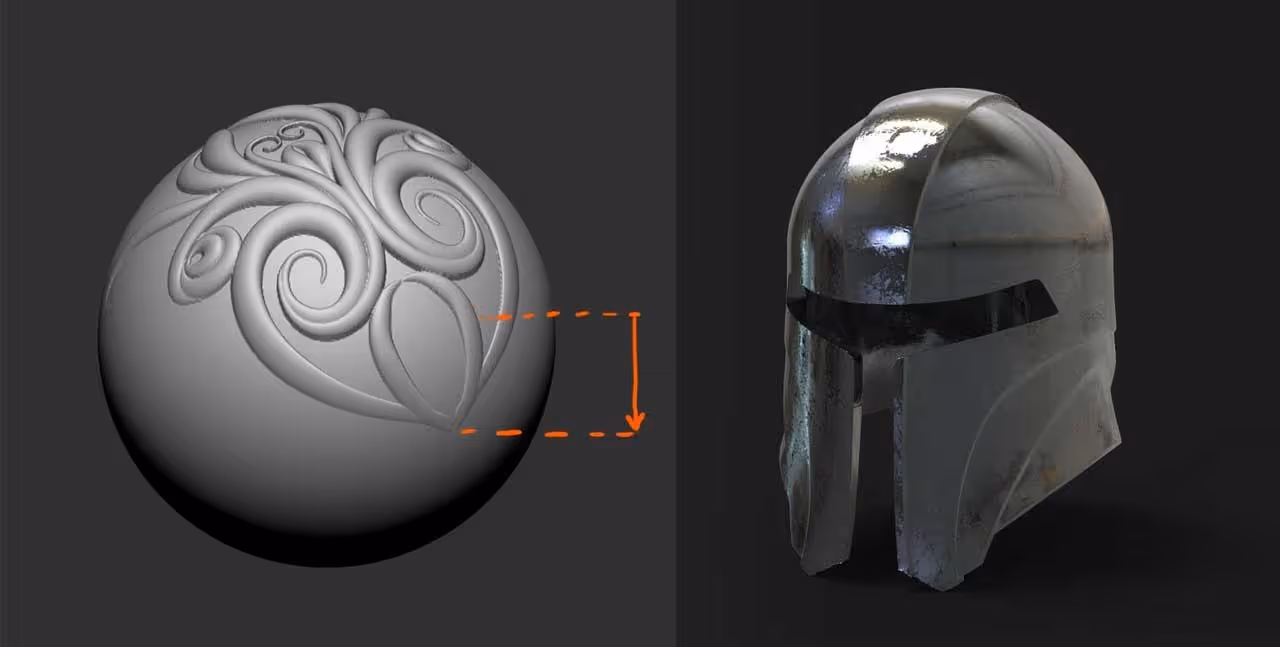
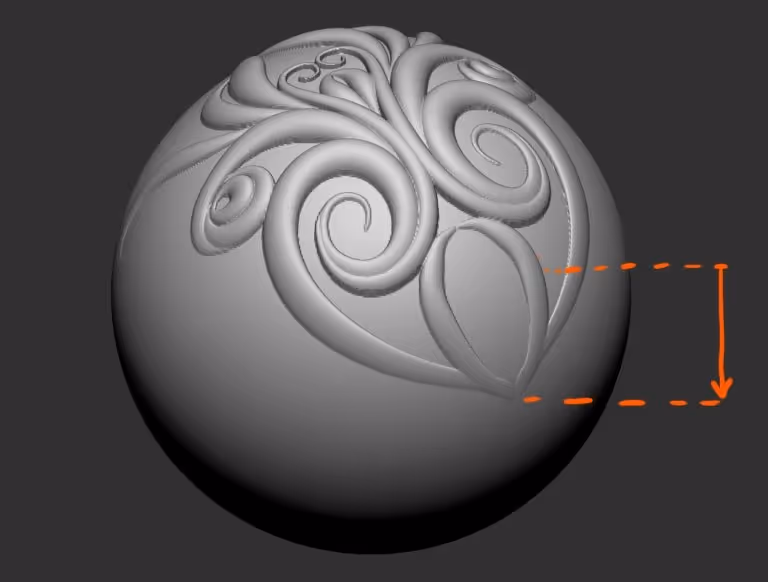
You might have run into a 'stretching' issue when you want to create details with an alpha over a convex to concave surface in ZBrush... and that's to be expected since you are projecting the 2D image (alpha) over a 3D object:
This is where one of the best tricks using the Clip Brushes comes in handy. Obviously, Clip Brushes are a fantastic tool to clip and trim meshes (especially for Hard Surface modelling), but they also can be used in a different way with the workflow I'm about to show you (only a couple of steps).
If you want to have a cleaner projection of a 2D image (alpha) into the 3D object, you can clip an area, project and then 'unclip' without loosing the projected details.... so basically:
- Clip an area (enough to cover the detail that you want to project).
- Click and drag your alpha to project the detail
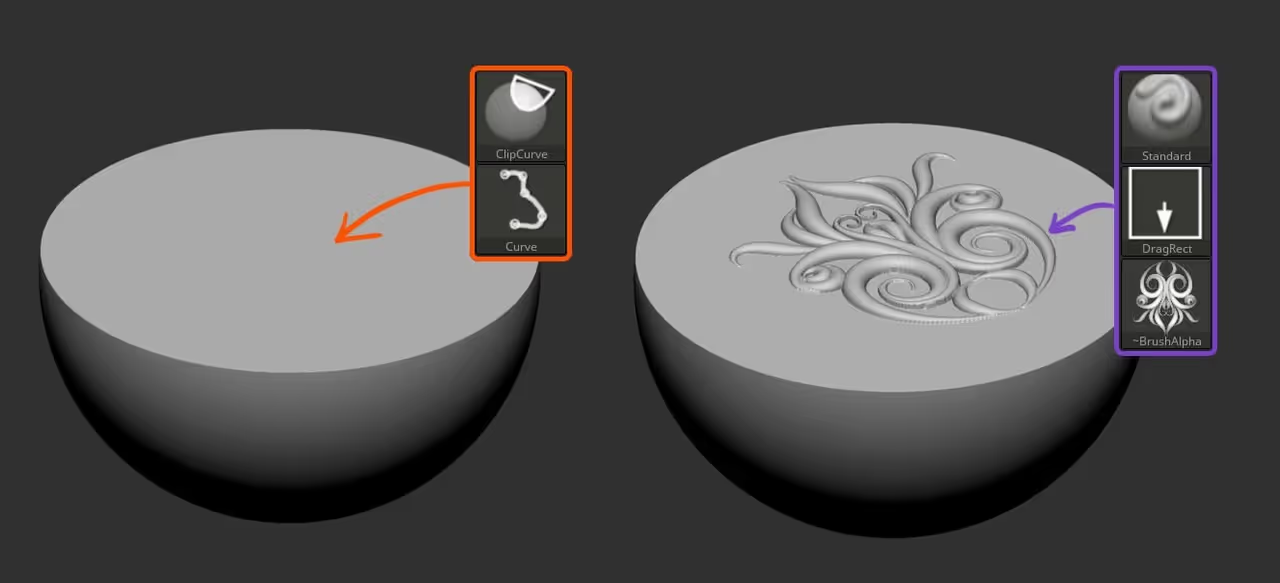
Then, you can just go to the Brush palette > Clip Brush Modifiers, and click on the 'Unclip' button! PURE MAGIC!

Below is the process again in action:
- Clip area
- project / sculpt details
- Unclip area
Extra tip: You can press Ctrl + Spacebar to bring up the pup-up menu of the Clip Brushes Modifiers ;)
The other thing that is an absolute 'must' for you to try is the 'BRadius' switch on the Clip Brush Modifiers.
BRadius essentially gives you the ability to determine a 'clipping radius' base on your brush size, so not all the 'clipped' surface will be flat. This is a fantastic way to generate some panels or quick indentations on a hard surface model.

And obviously, if you also have the 'Polygroup' switch on (from the same Clip brush modifiers), you will get different polygroups with every clipping action which is great for ZRemesher or to split parts later on.
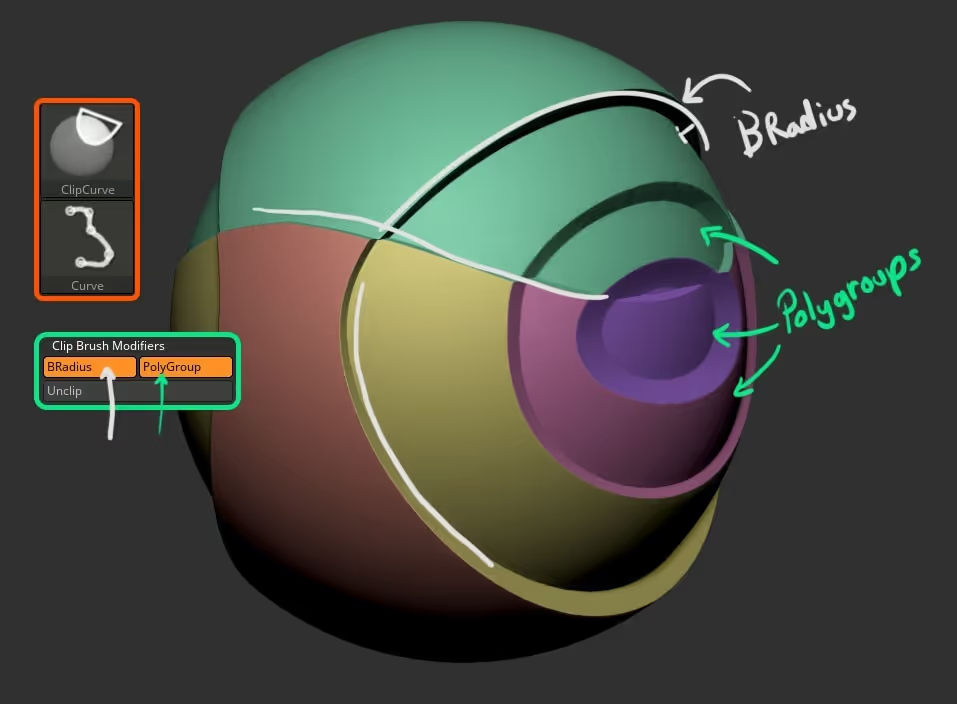
And remember that changing the 'depth' of the clipping action is just a matter of changing your brush size. It is a very simple process and the results can be really cool when combined with other features in ZBrush.
For instance, in the example below, I used clipping brushes to quickly set up some design lines and panels for the helmet (less than 2 min), and then use the Boolean feature to cut in the centre part for the eyes.
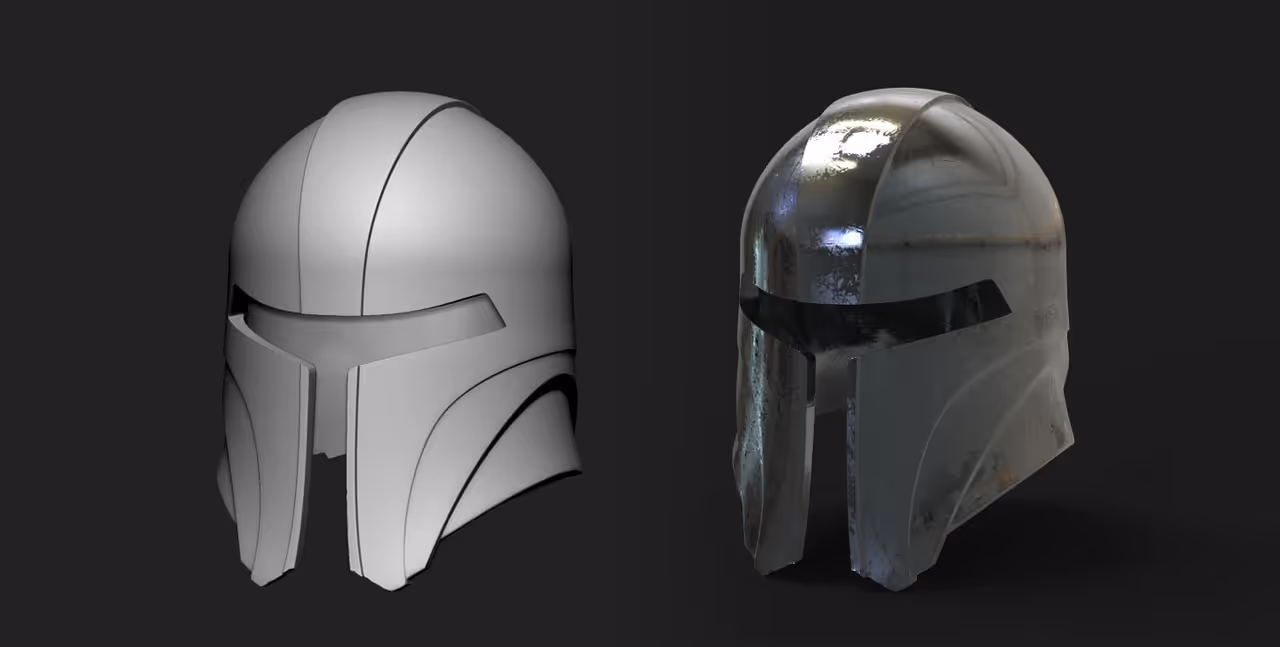
Here is a quick recap of the process I followed to set up the helmet using the techniques I described in this quick tip (the 'distortion' at the end was using deformers from the gizmo 3d).
That's it for his tip.


.webp)

.webp)