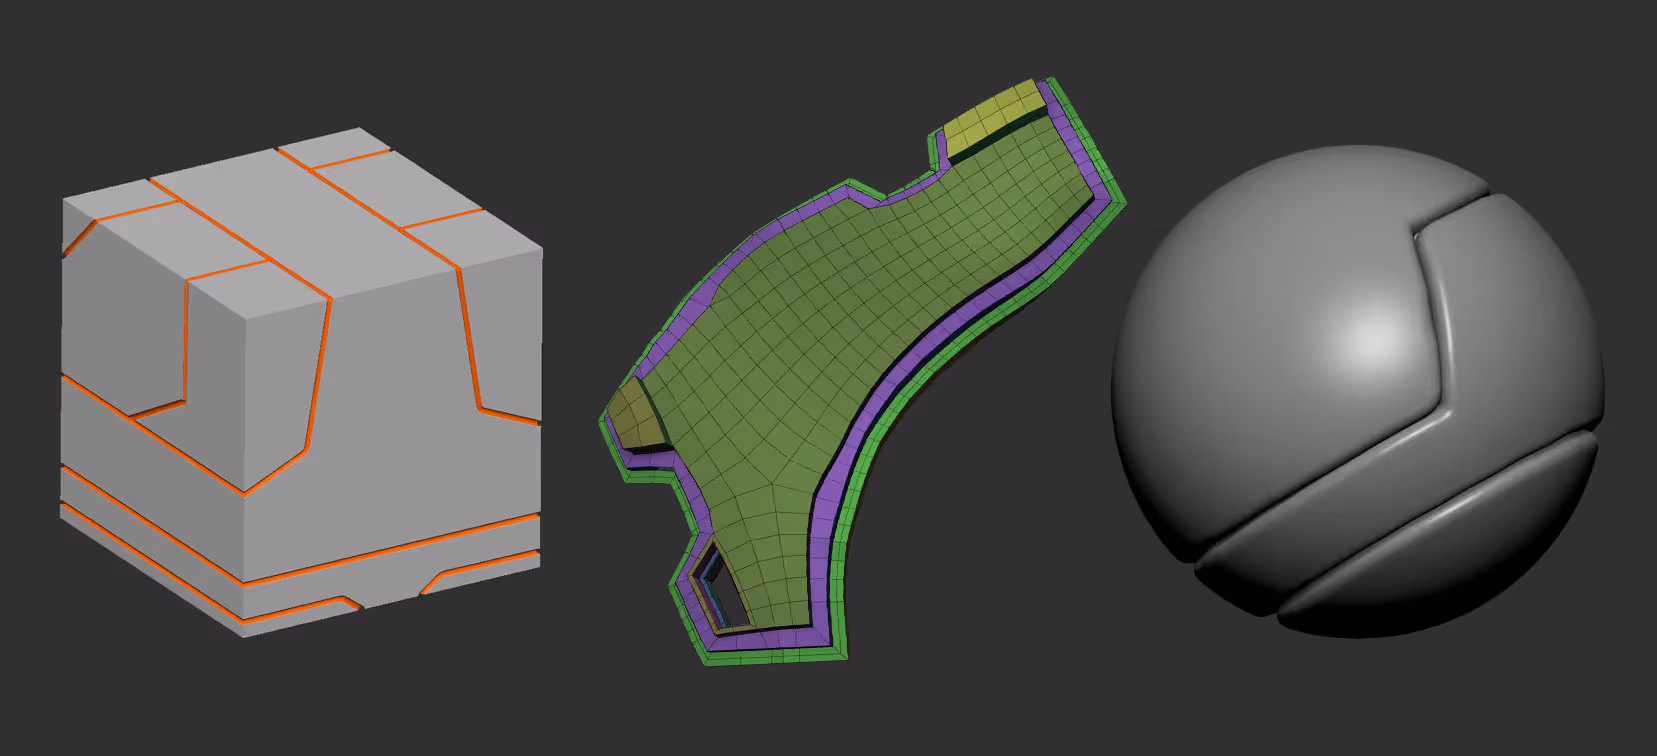
Since I started working on a robot with the 3DSnippets this month, I thought I share some of my favourite simple tricks for Hard Surface, specially using the slice curve.
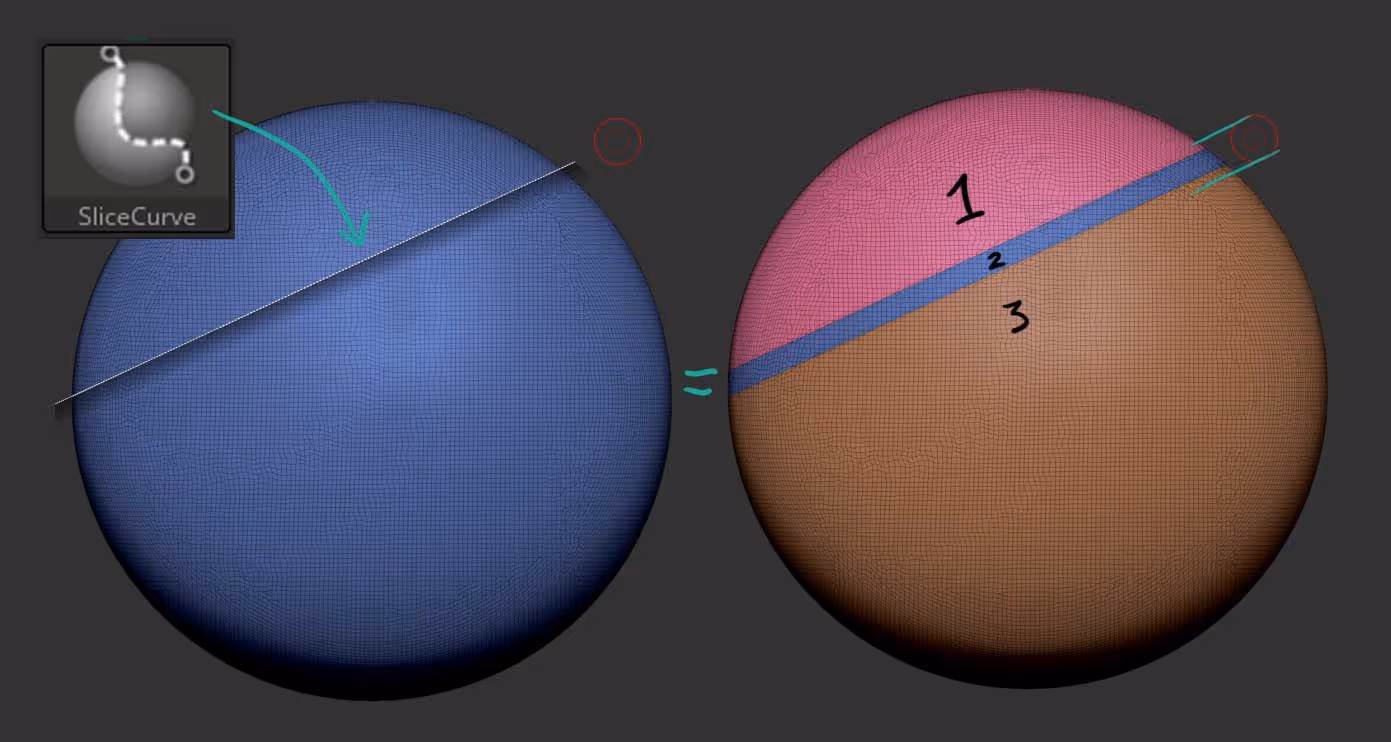
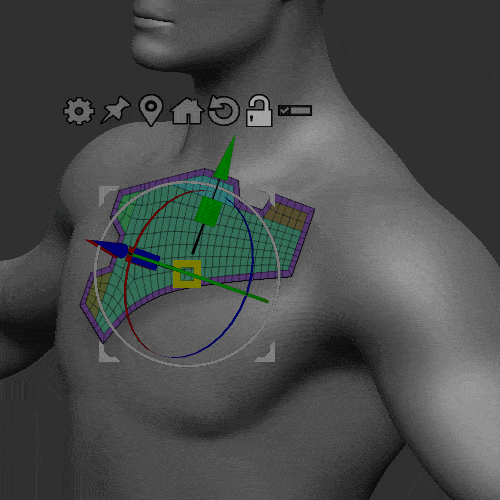
The first tip is to use the ‘BRadius’ to create slices with thickness and polygroups. With the Slice curve selected, hold Ctrl + Shift + Spacebar and enable BRadius from the mini pop-up palette

I’m using a Dynamesh sphere but you can use anything you want… Slice the object and the result will be a clean cut with thickness so you end up with 3 polygroups. The thickness of the slice is determined by the size of your brush (BRadius = Brush Radius).
What’s really cool about this tip is that this feature will give you consistend thickness (as long as you keep the brush the same size), so you can slice the mesh a few more times and then clean up the resulting polugroups to leave only the ones you like for something like a panel or cut.
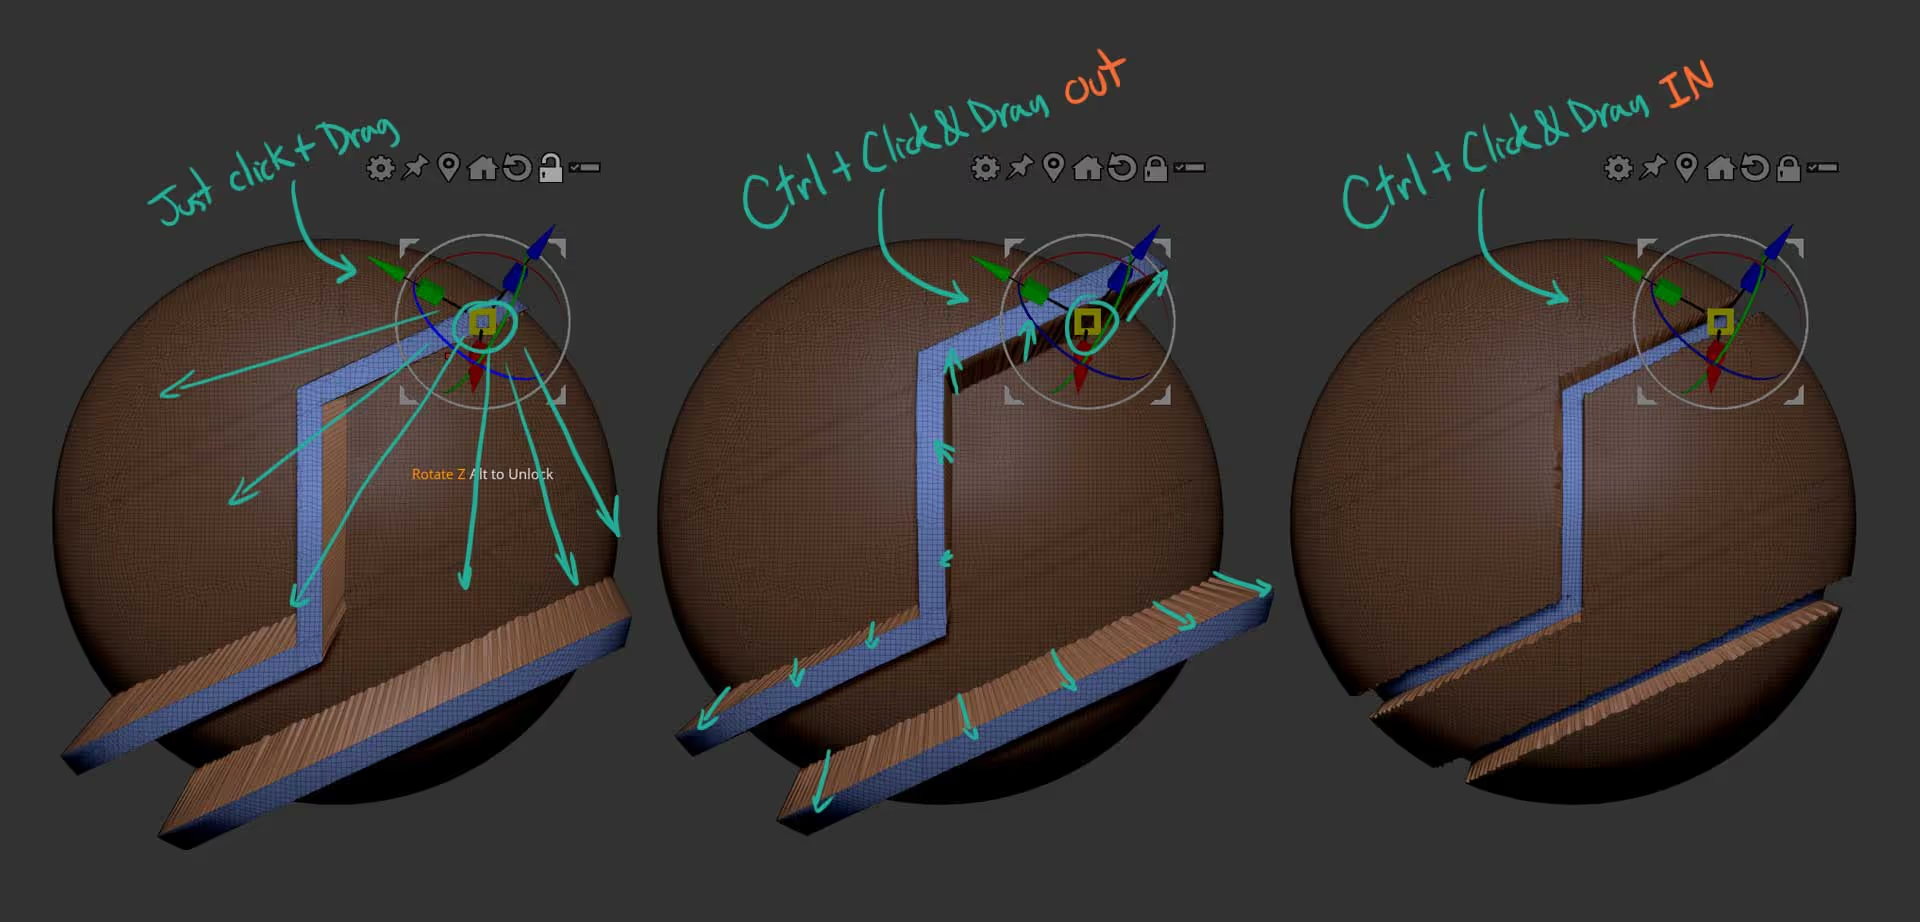
Also you can select the Gizmo 3D and hold Ctrl + Left click on a polygroup to automatically mask it:

Here is a second tip that can be used at any point but I found it really helpful as a second pass on the previous tip… if you just click and drag from the centre yellow square of the Gizmo, ZBrush will scale the unmasked areas from the pivot point (position of the Gizmo). However, if you hold Ctrl while you click and drag in or out, the scaling happens based on the normals of the unmasked areas… if you didn’t know this trick, this can be a game changer ;)
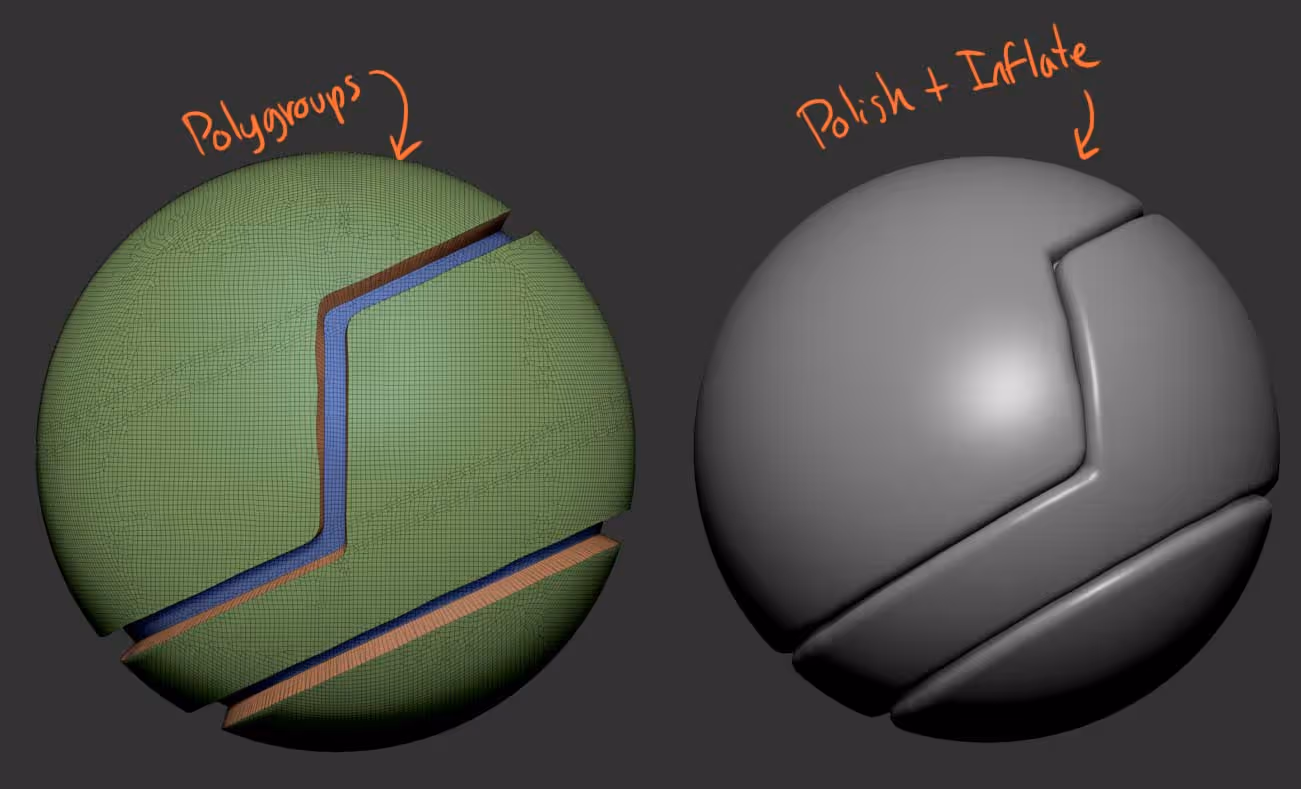
Another cool follow up tip is that after you create your cuts or panels with the workflow I mentioned above, you can hold Ctrl + W while you still have the masked area and assign a different polygroup… that way you end up with 3 polygroups that are very easy to clean.
You can polish by groups and inflate things a bit for example:
Another quick tip using the Slice curve, is to slice up a piece to generate a bunch of polygroups, then use the Frame Mesh from the stroke palette to so create curves along the difference of the polygroups and then use any curve brush (like CurveTube) to add geometry along the curves:

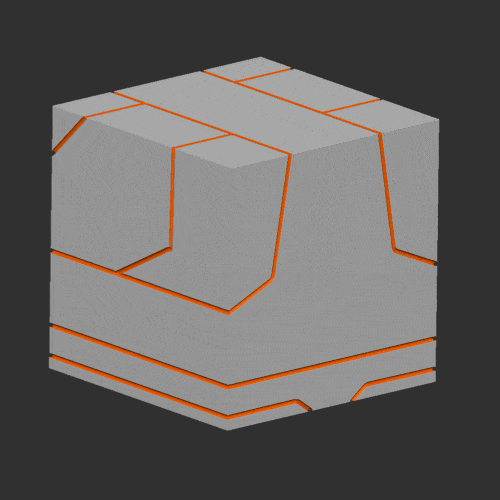
you can split the unmasked points to separate the tubes from the objects and then use Live booleans to subtract those tubes from the mesh and generate some quick and clean cuts:
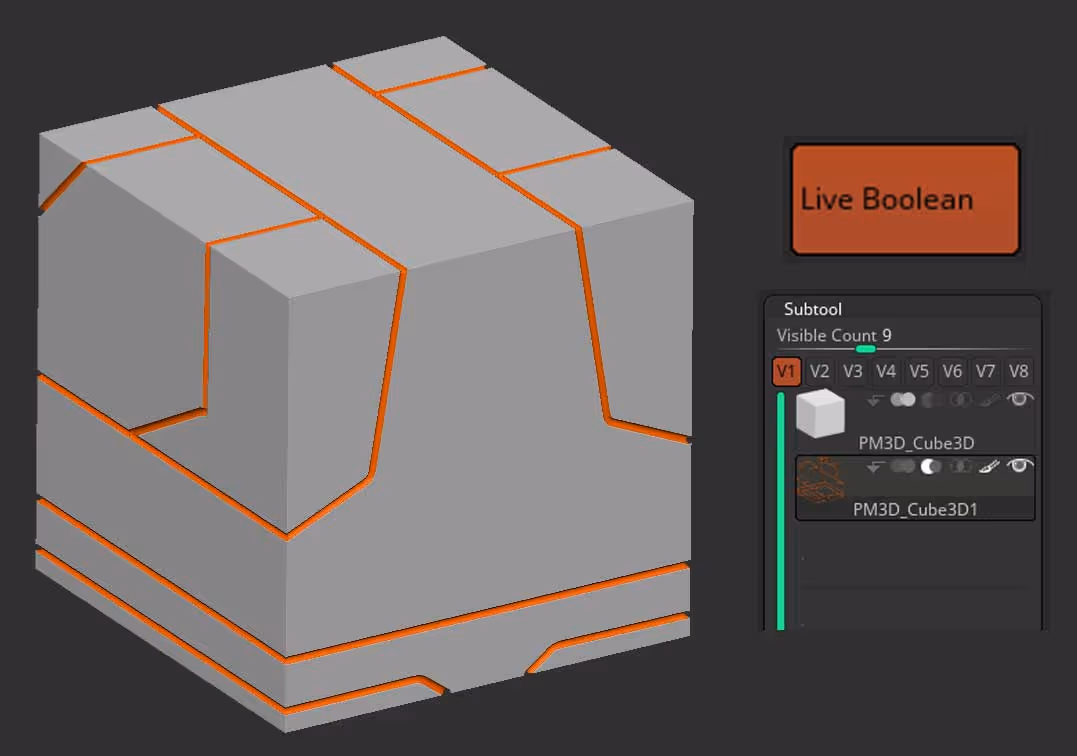
What’s cool about this tip is that you can use the inflate slider on the boolean subtool to increase or decrease the thickness of the panels in two seconds:
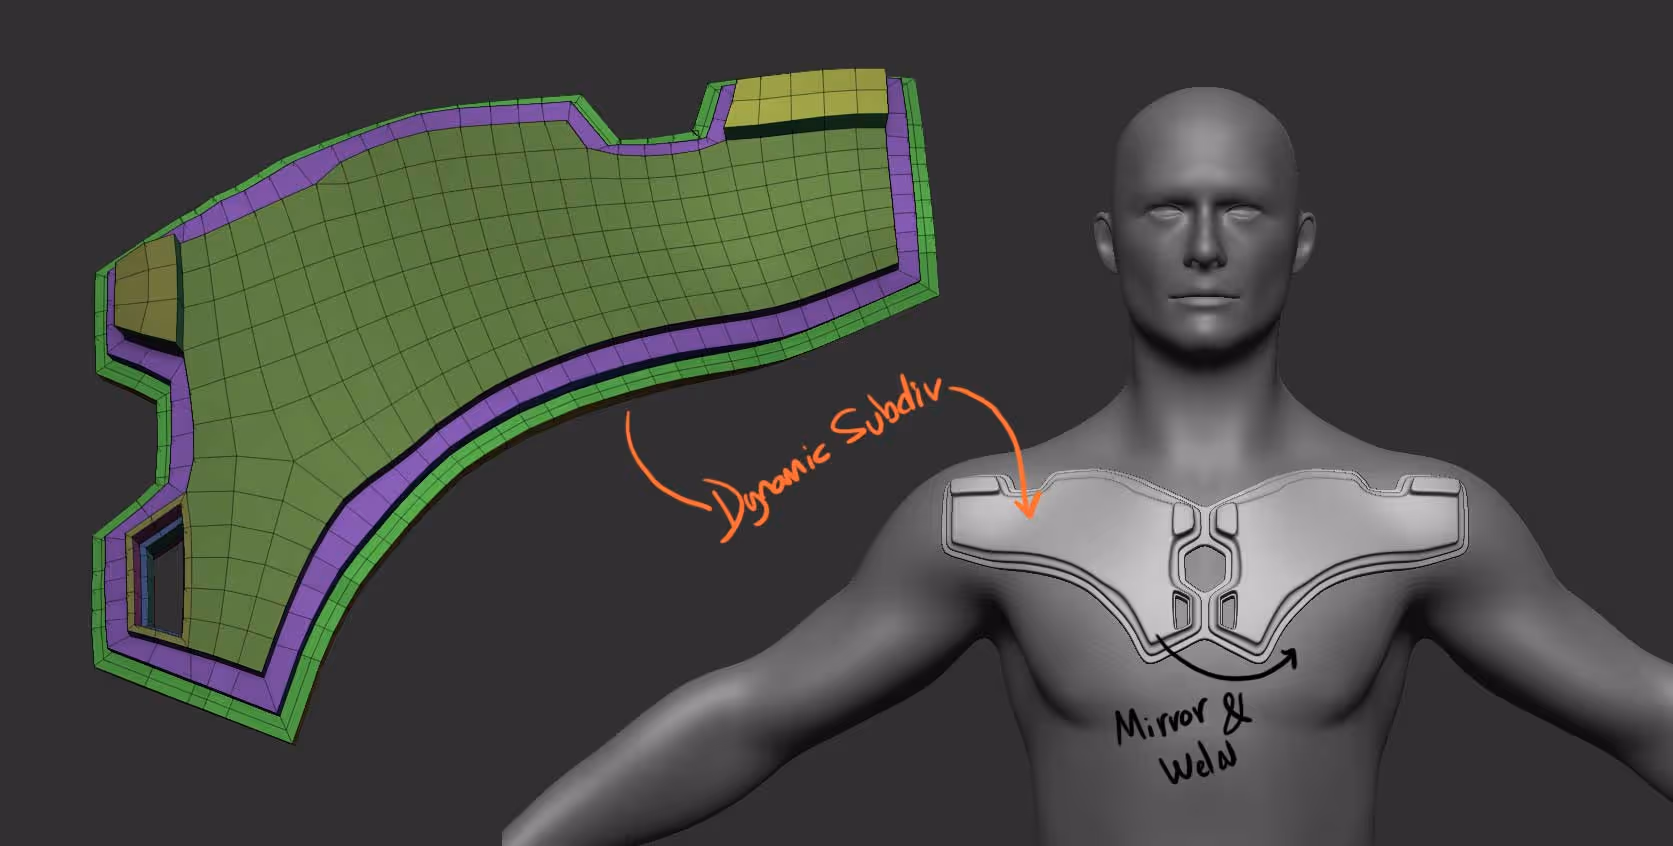
One final trick that might also be of help is so create a Hard Surface shape over a plane by slicing it up and removing the areas that you don’t want:
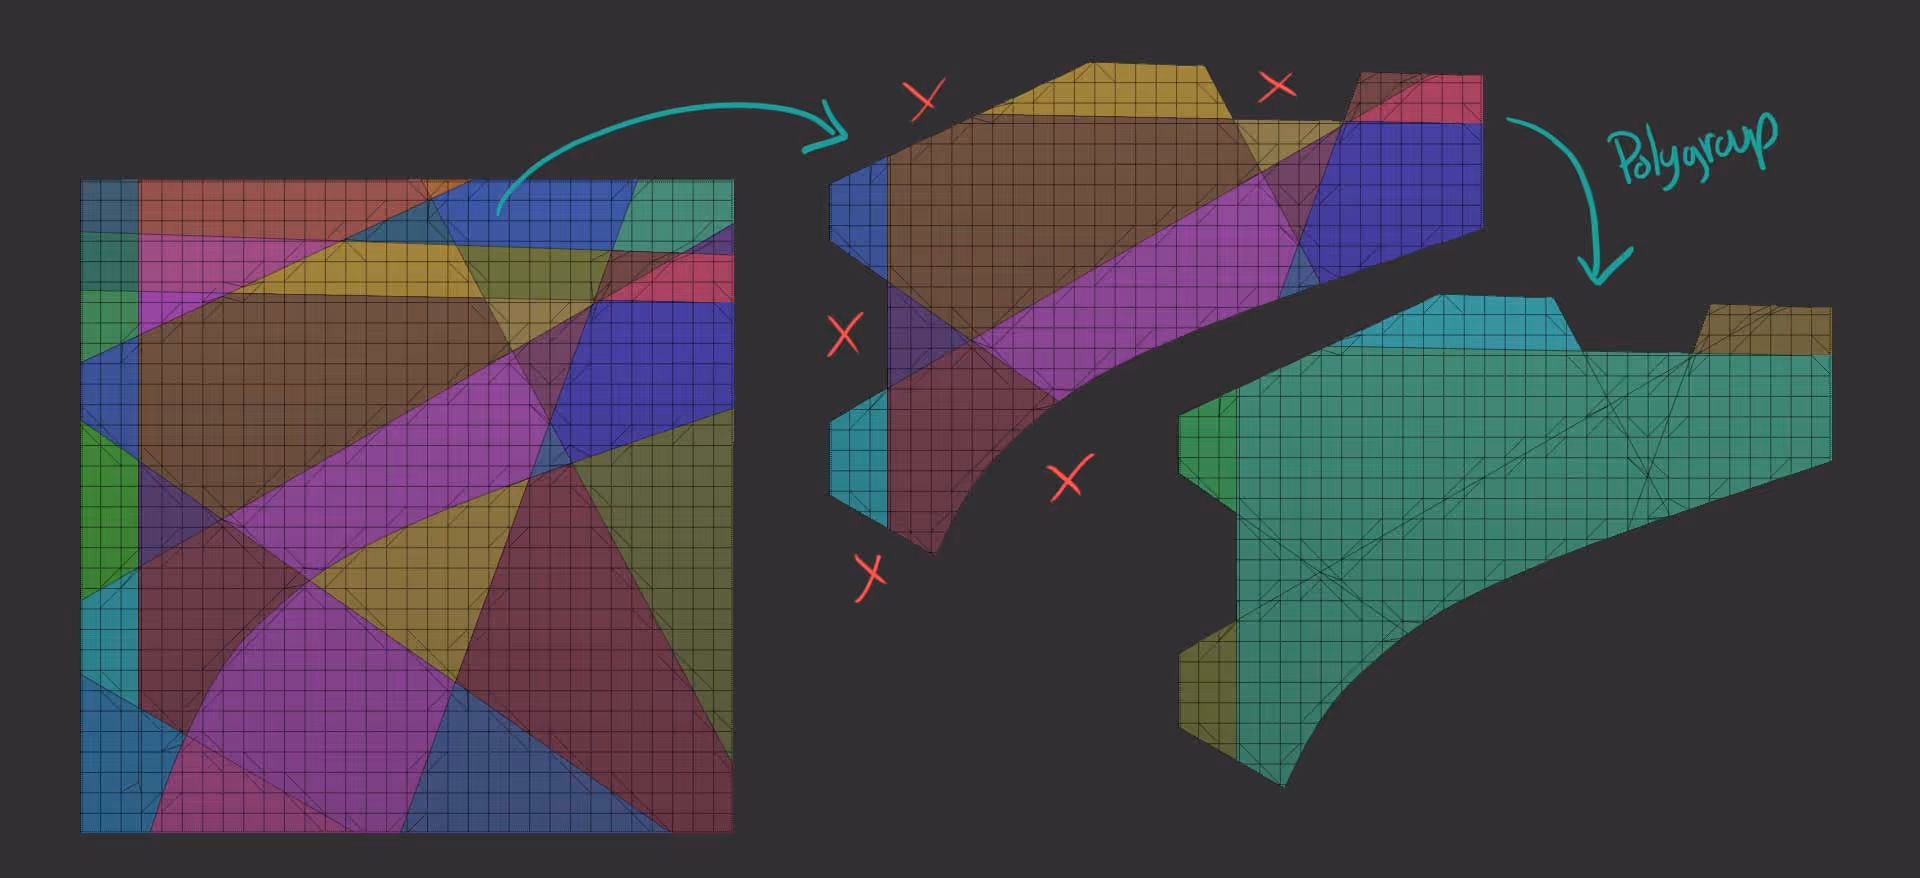
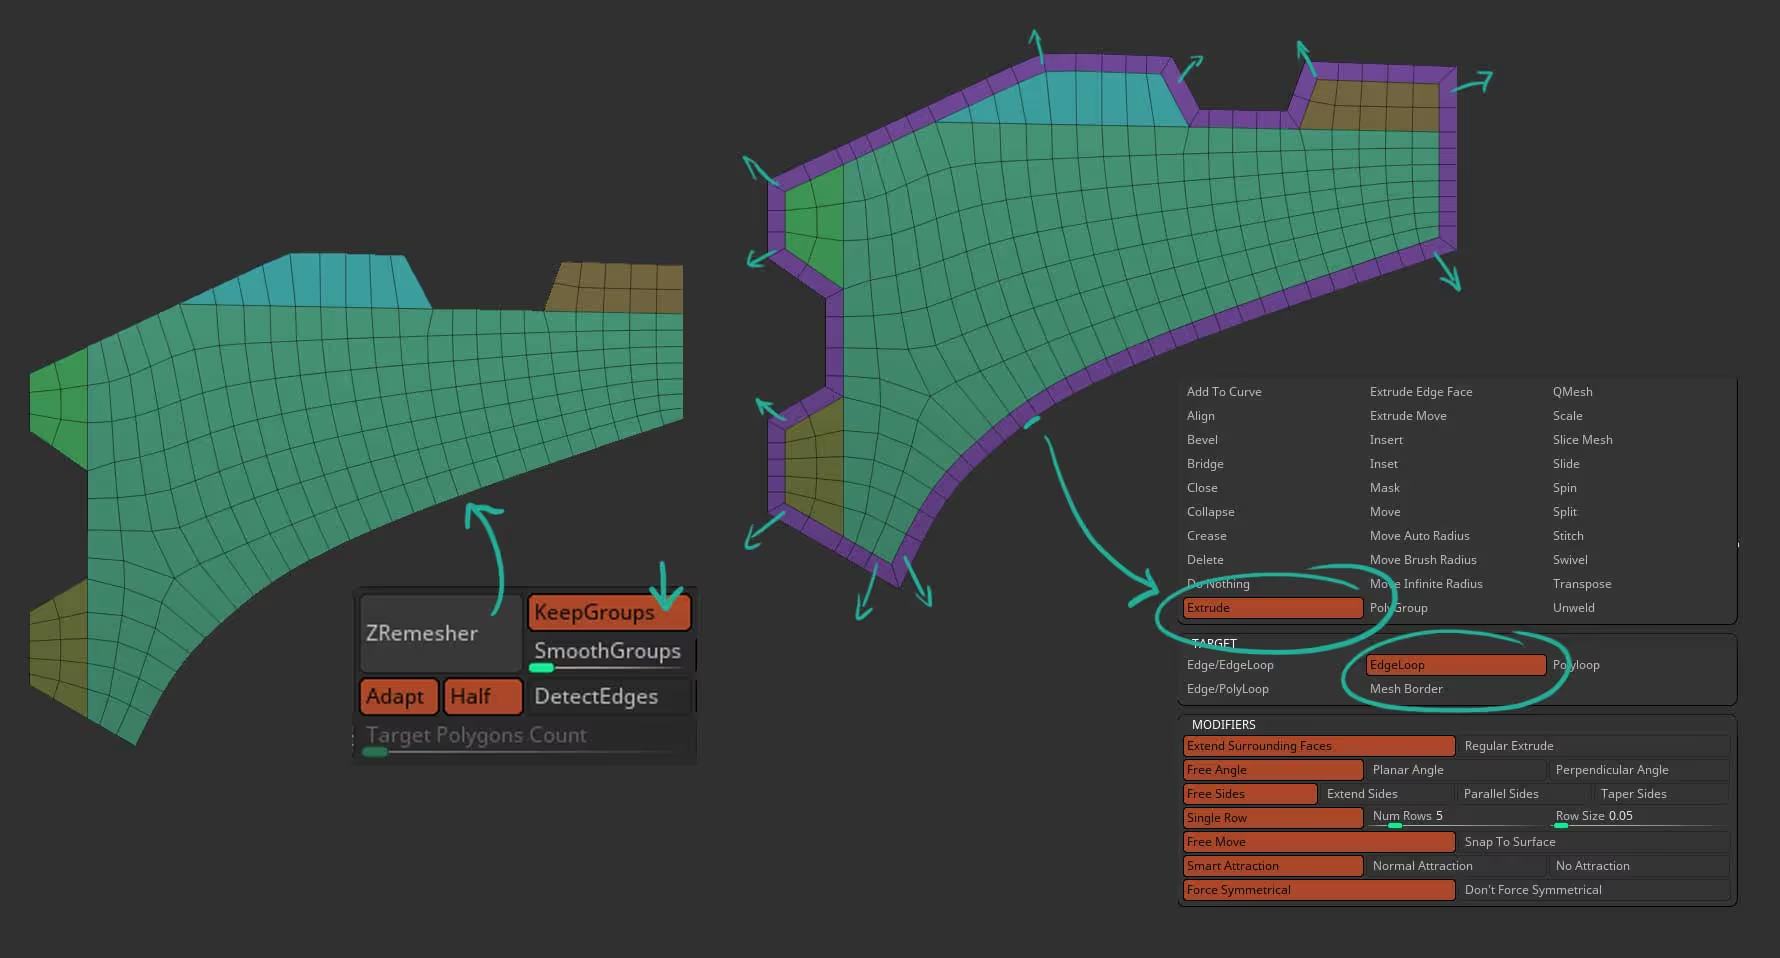
You can leave the polygroups you want to keep and run a ZRemesher on the very simple plane using the KeepGroups option. Also after a process like this, I like to extrude an edge (with ZModeler) all around the object to keep the smoothing clean:
An here is the trick, you can take the custom shape of the plane and select the Transpose Cloth tool. Go to the Dynamics palette and calculate the volumes and then you can just push the flat plane with your custom shape towards any other mesh to deform it!
once deformed you can add thickness and anything else you want to make it more intersting:


.webp)

.webp)