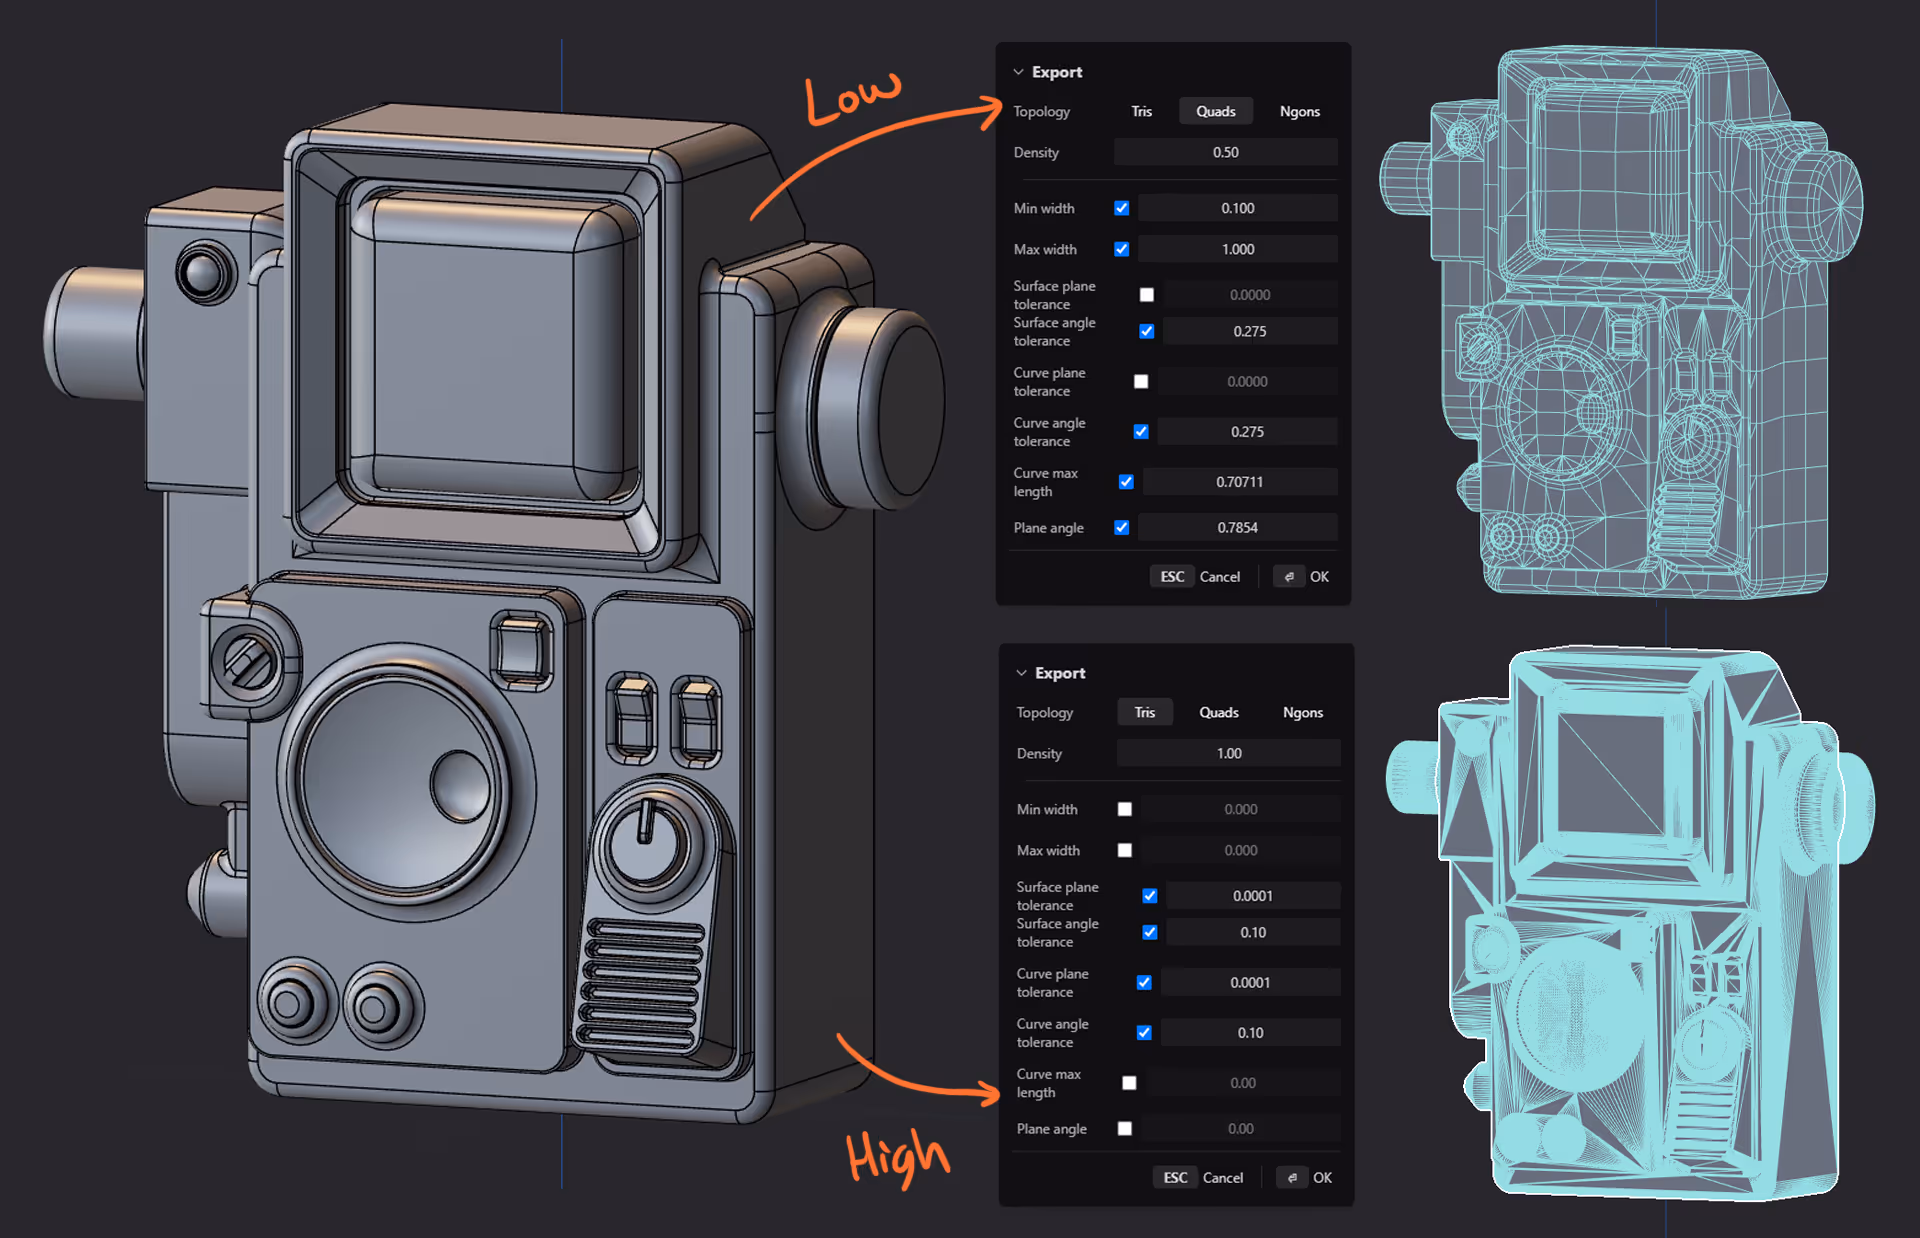
Once you have your asset ready in Plasticity, you can go to the ‘Save as / Export’ and tweak the settings to export your mesh. The trick is to export a low-res mesh with ‘Quads’ and another high-res mesh.
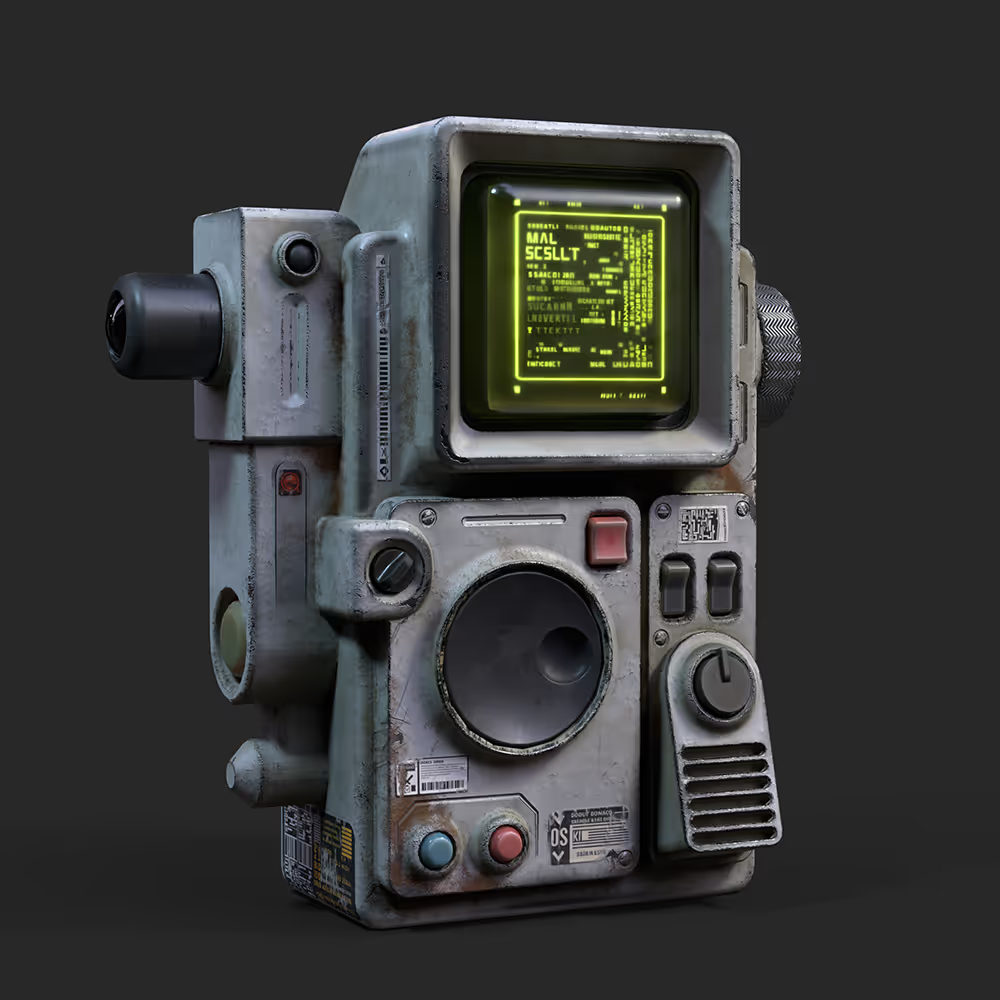
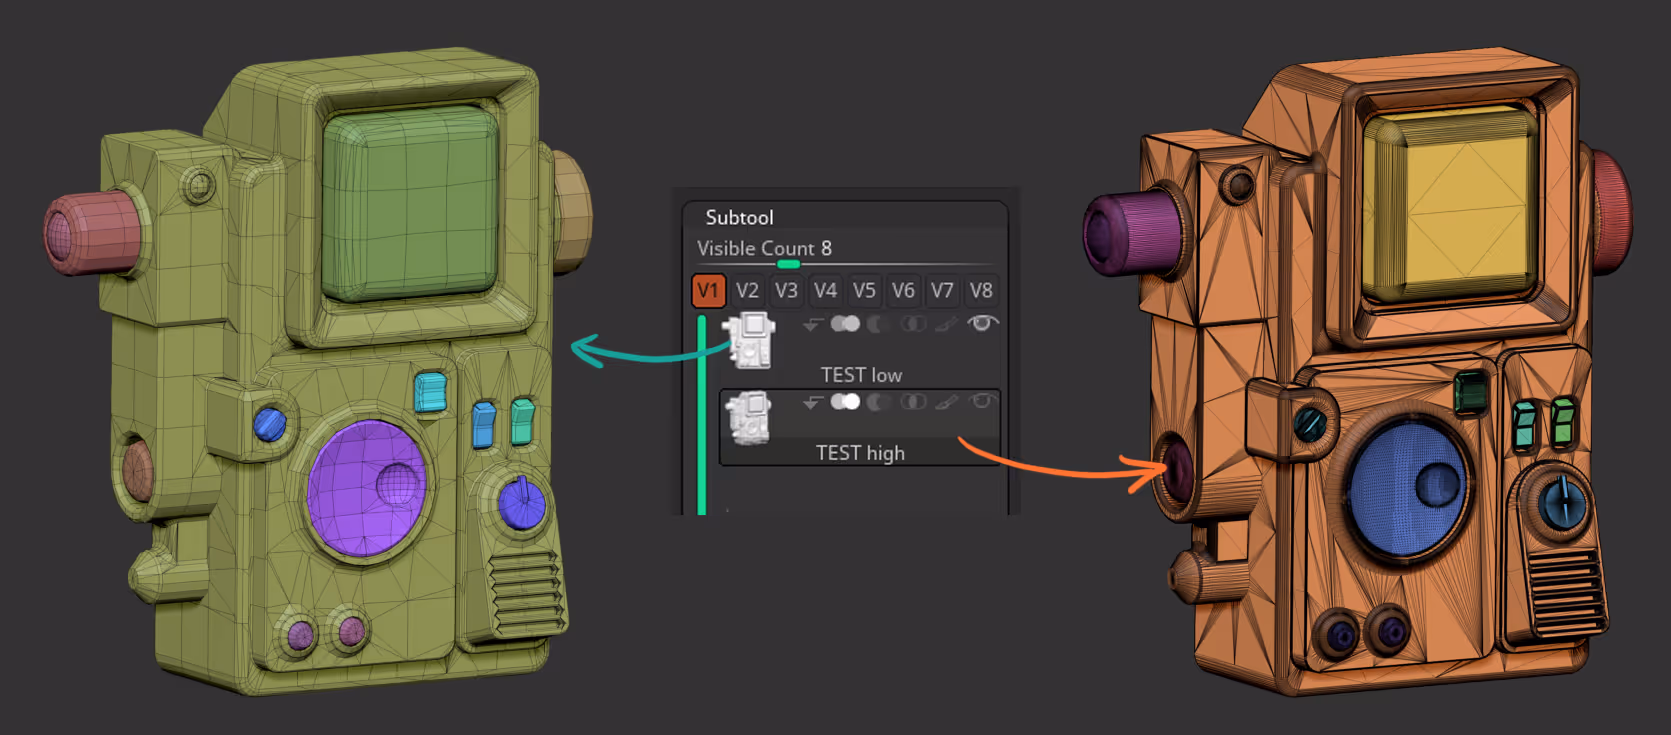
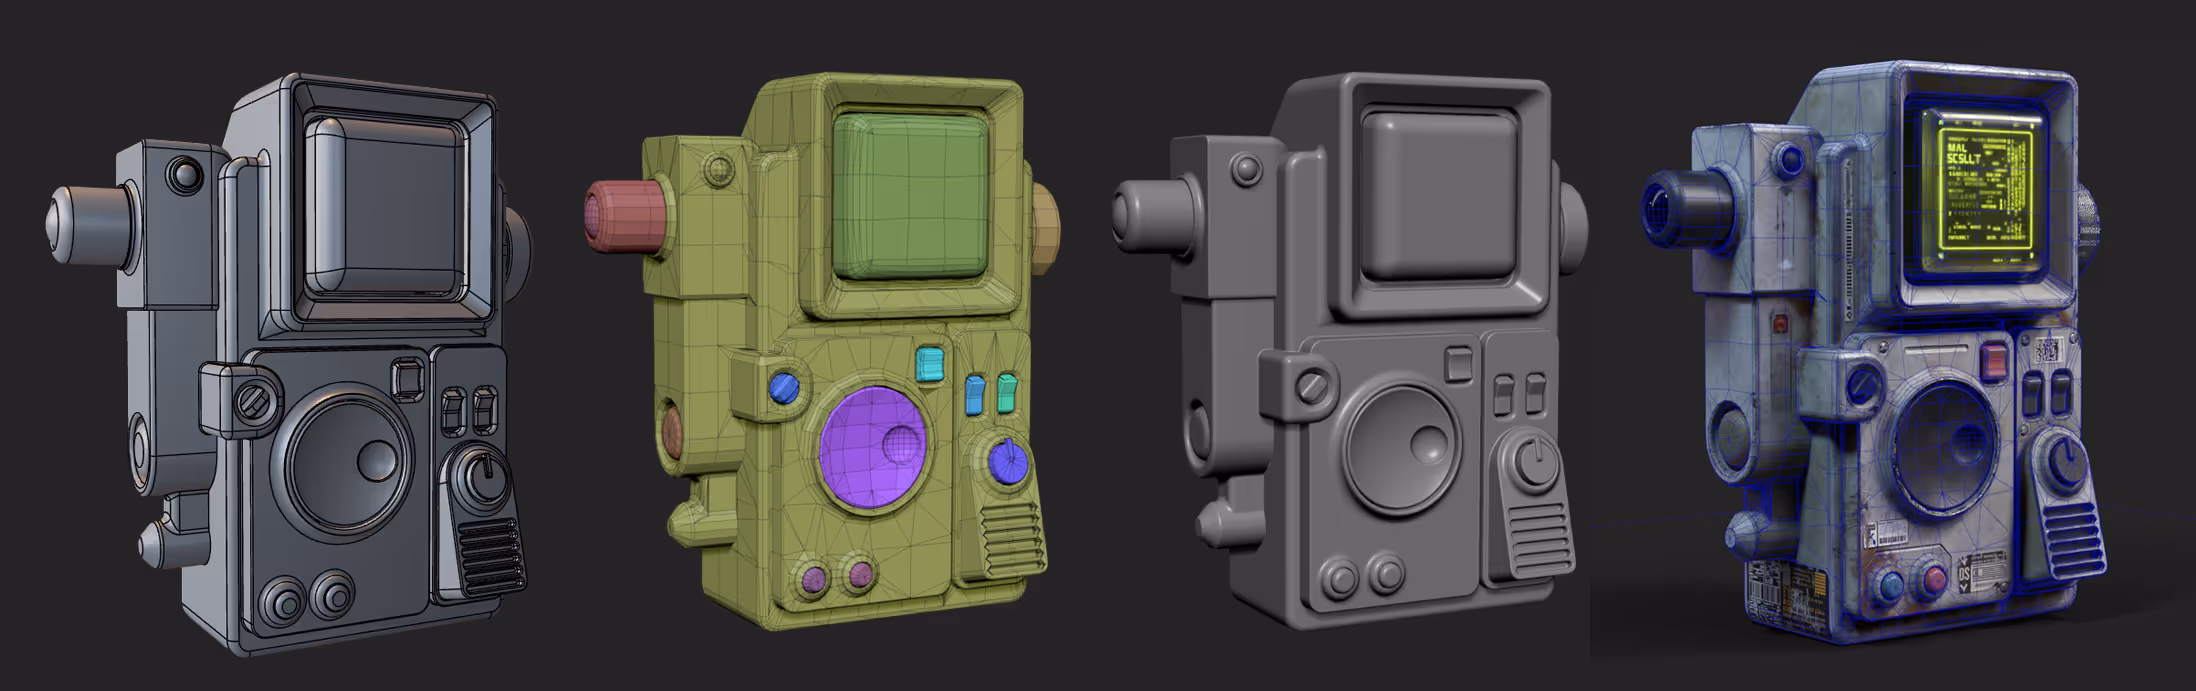
Then in ZBrush you can import both meshes into the same tool. Usually, a CAD model requires quite a bit of cleanup to generate a nice topology or to make it usable as a low-poly asset, but with the following ‘hack’ you can just get it to work for a concept:
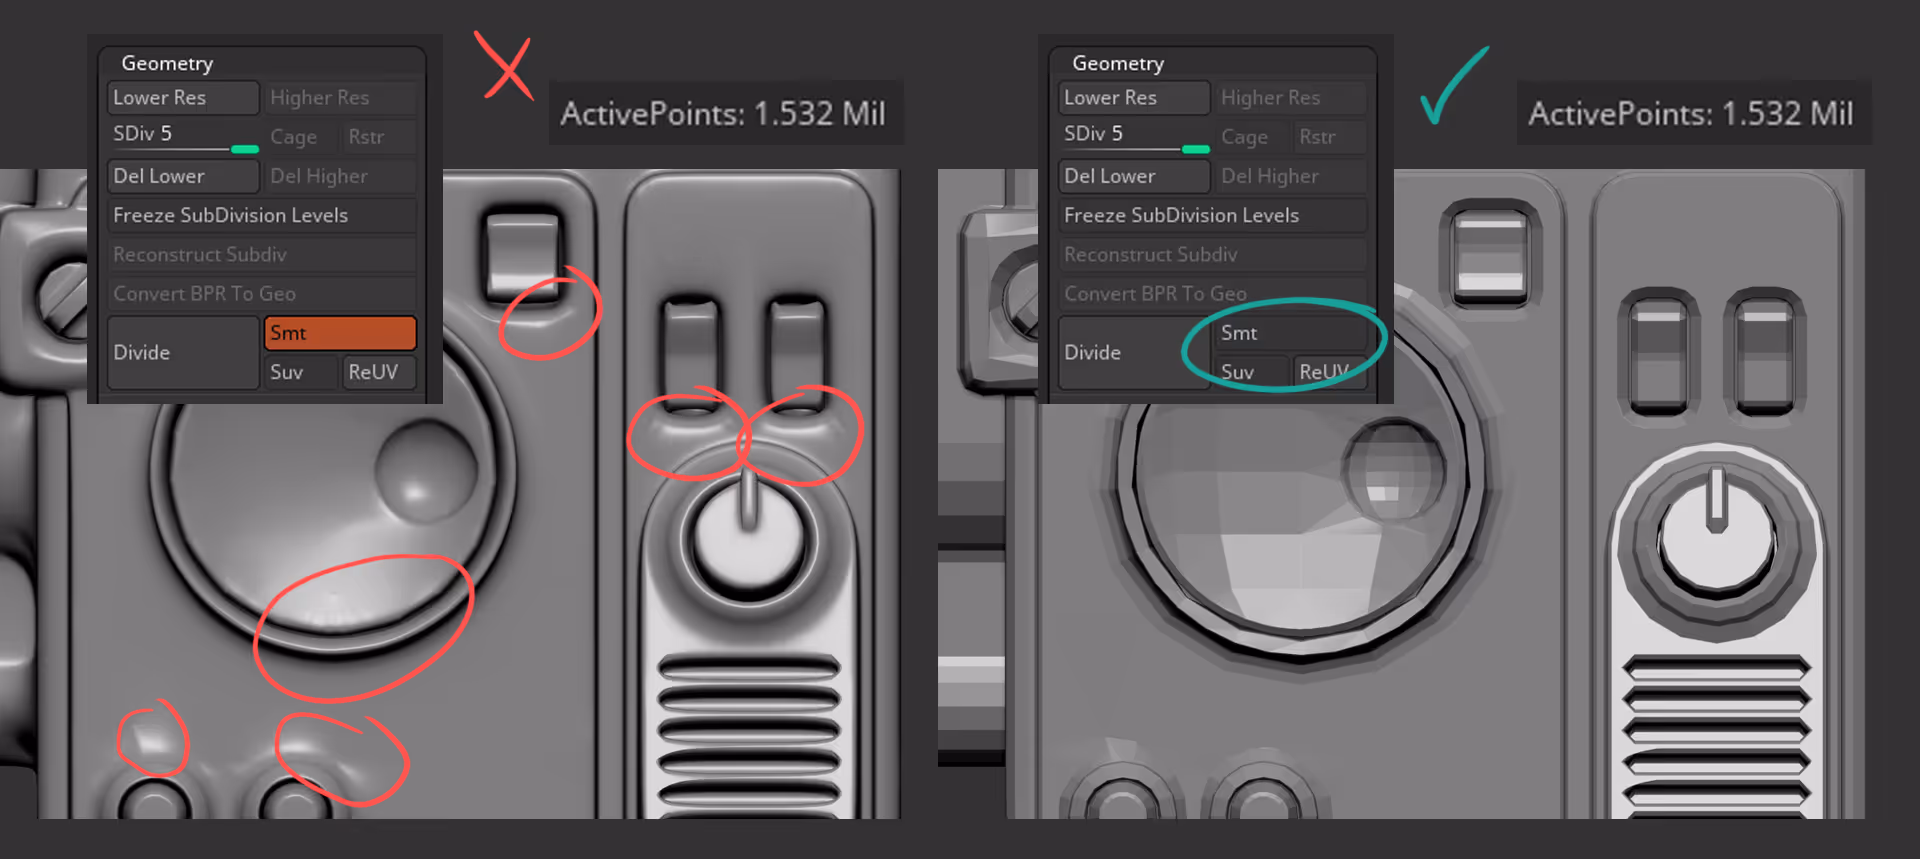
Since the exported low-res mesh won’t have an ideal topology, subdividing might result in artifacts so the trick is to subdivide the mesh a few times but with the Smt (Subdivide Smooth modifier) switch disabled so that ZBrush doesn't smooth the model as it subdivides it.
Once you have enoght polygons (even if it look very faceted), you can recover the ‘smoothness’ of the original mesh by projecting the high-res mesh!
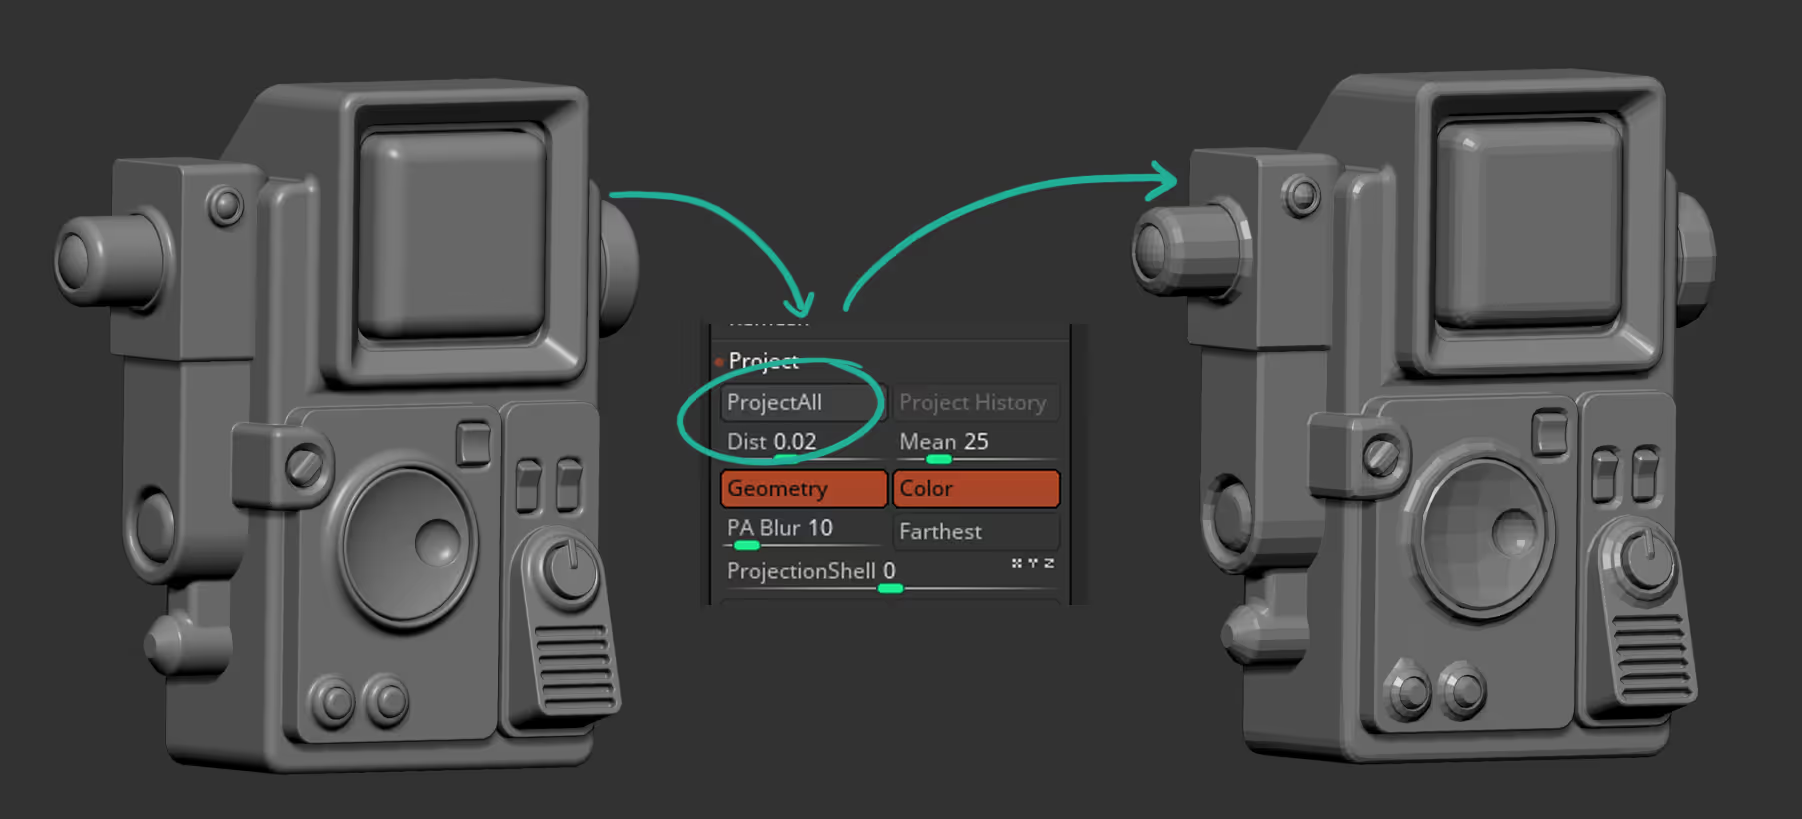
that's pretty much it, You’ll end up with a nice-looking asset with subdivision levels even if the topology is not the best one. Keep in mind that if there are things that look weird in certain areas of the low-res mesh, you can always re-export from plasticity by tweaking the settings a bit more ;)


.webp)

.webp)