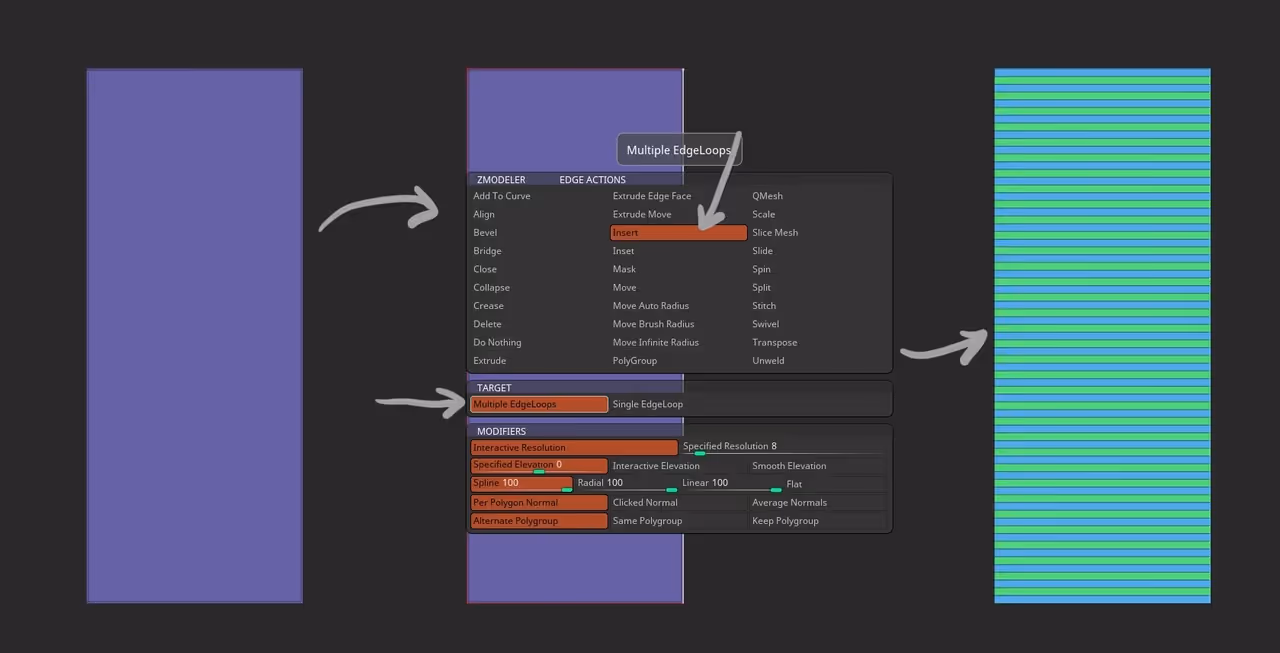
Take a simple plane with no subdivision at all and scale it to make a rectangular piece. Use the ZModeler to insert multiple loops... each edge loop will become a 'bone' of the wing.
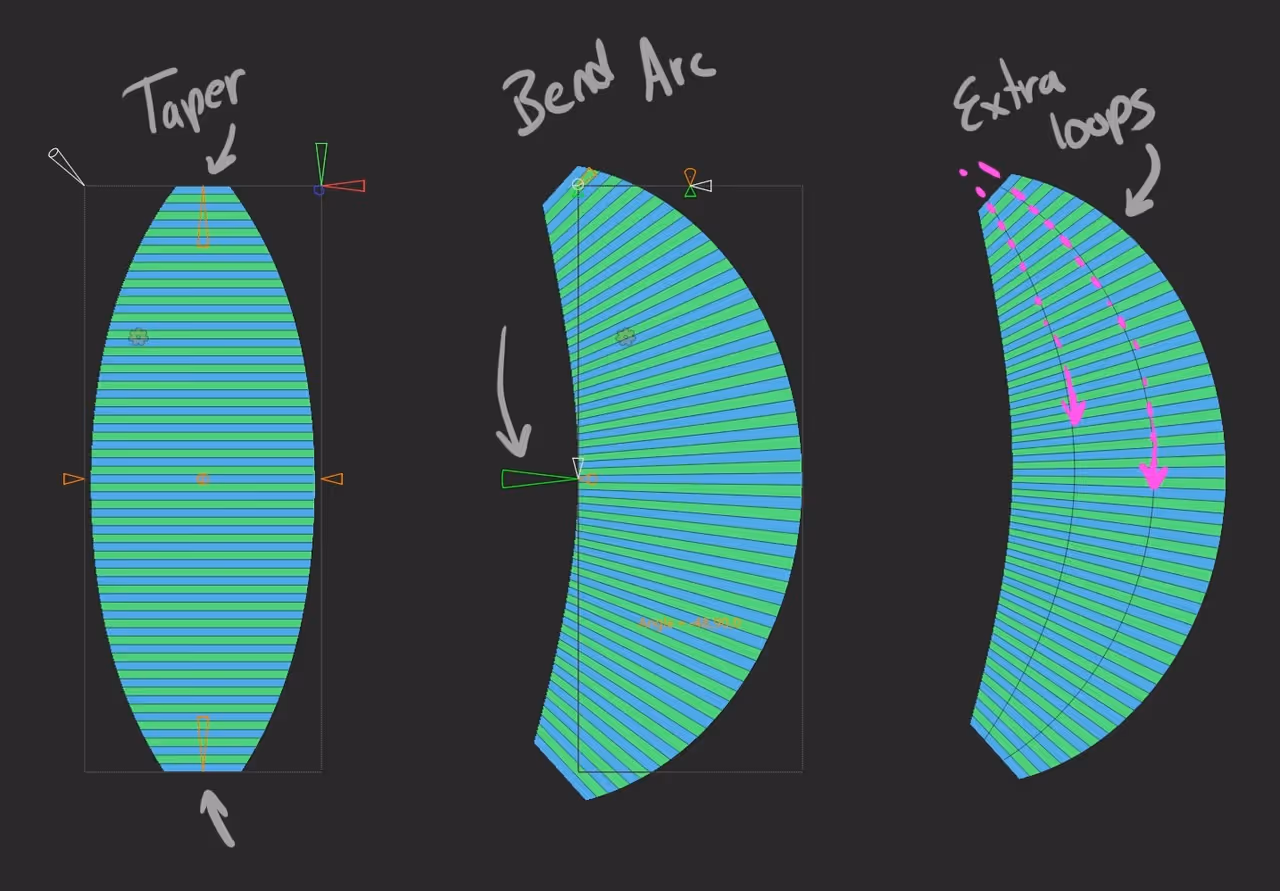
Now, bring in the 3D gizmo and from the gear icon choose the taper deformer to make the top and bottom a bit narrower and then use the bend arc deformed to give the mesh the overall curvature... you can also add a couple of extra edge loops for this next step to work better.
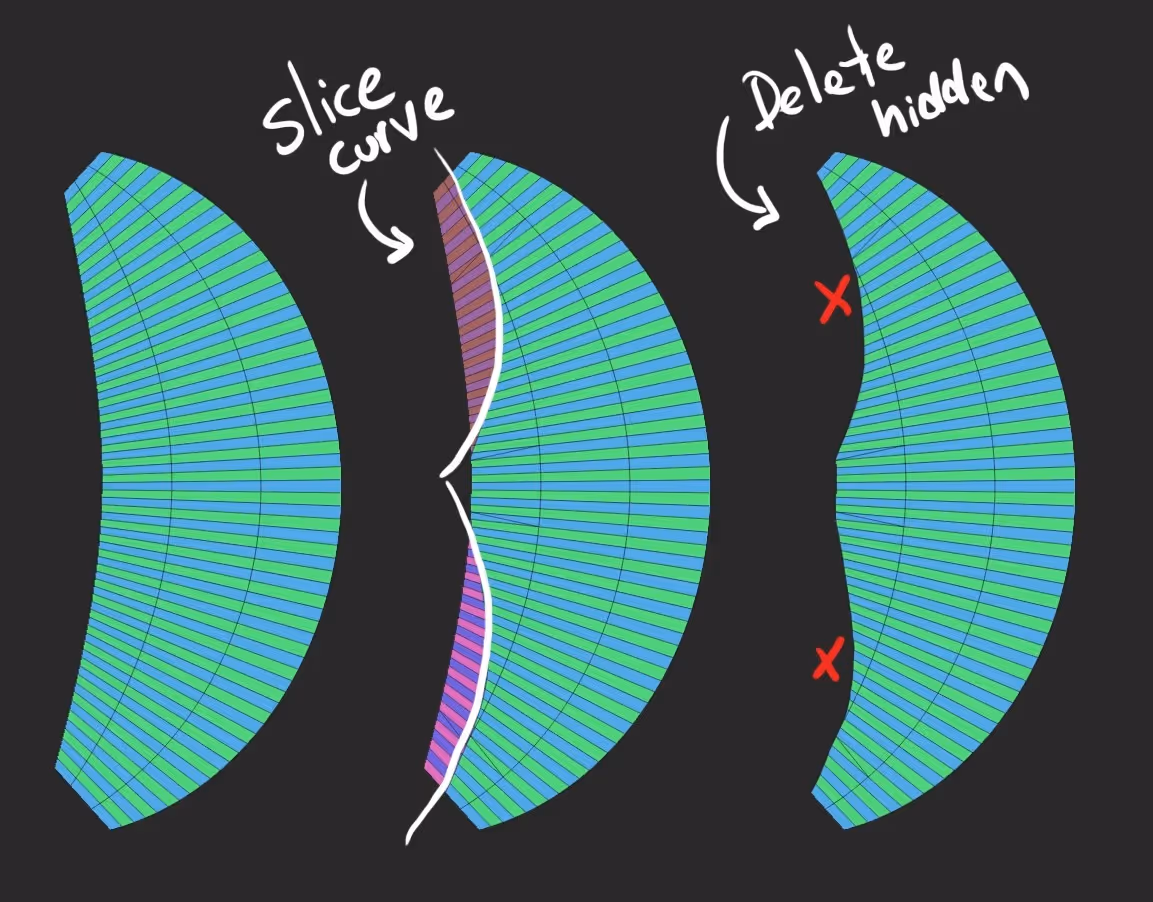
Now that you have the basic shape, you can use the slice brushes to slice additional portions to shape the 'wing' further.... and simply hide and delete those portions:
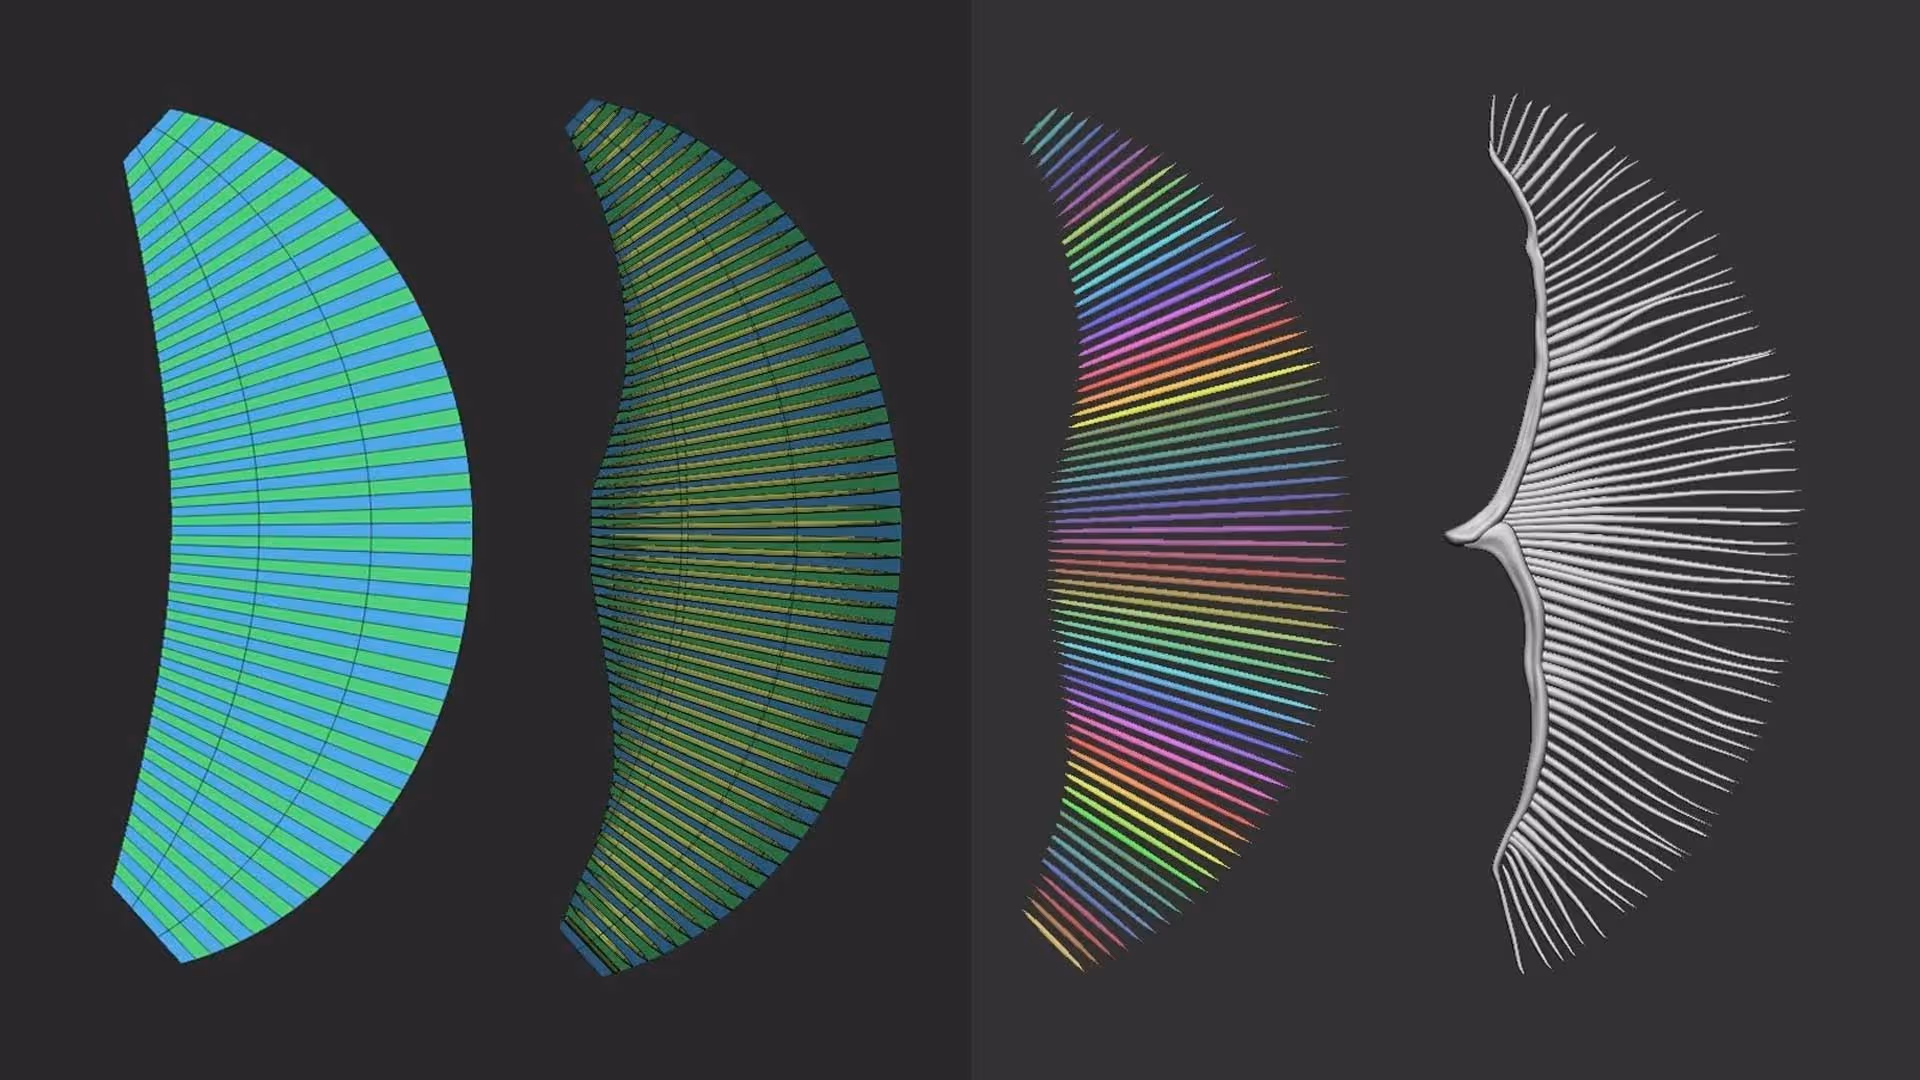
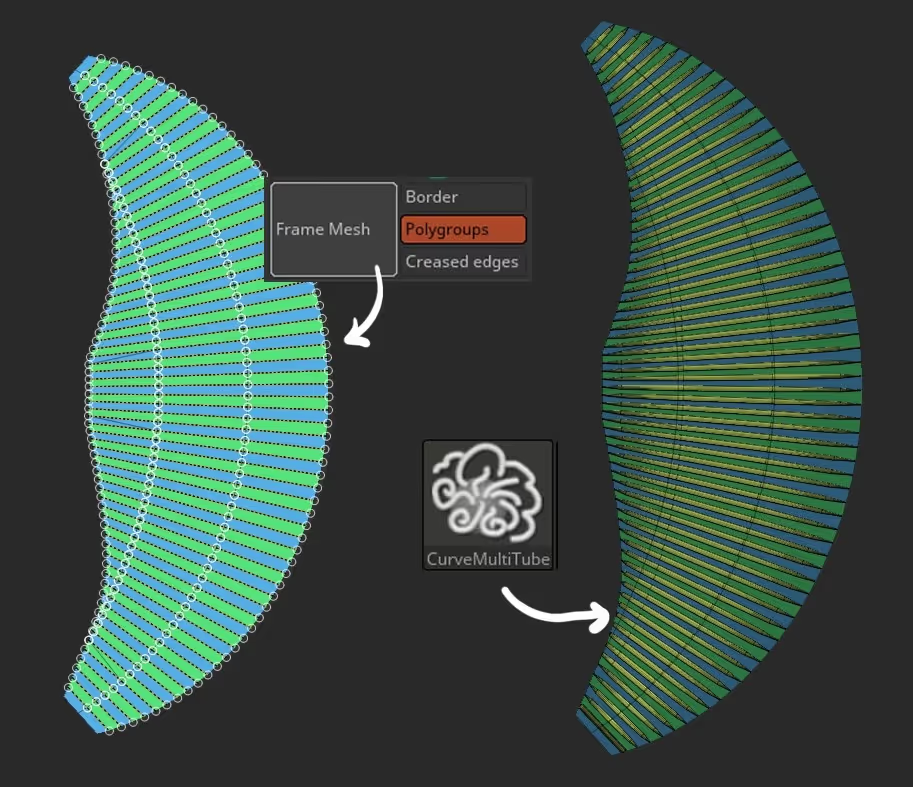
Finally, because we have the polygroups generated by the insert multi loops tool, we can go to the stroke palette, click on the Frame button with the polygroup switch enable and ZBrush will place a curve on the differences of the polygroups... at this point you can use any curve brush you want. I'll keep it simple and use the Curve Multi Tubes to click on any curve:
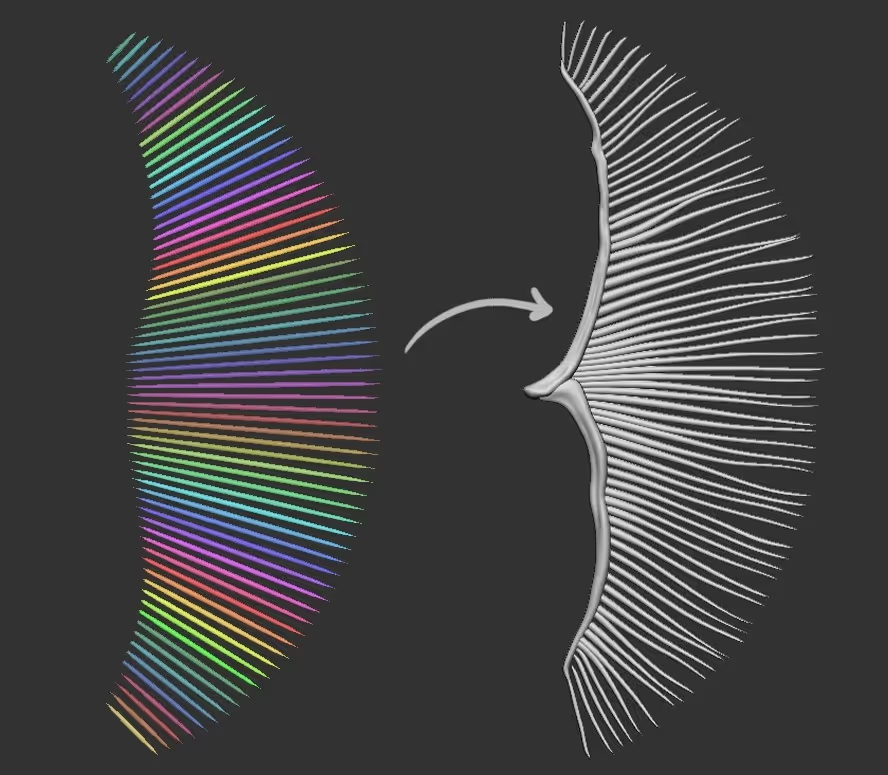
Now that you get what you needed from the guide mesh, you can split it and hide it. Maybe run an auto group process to assign different polygroups to each piece and then use other brushes to further refine the tubes into whatever you want ;)
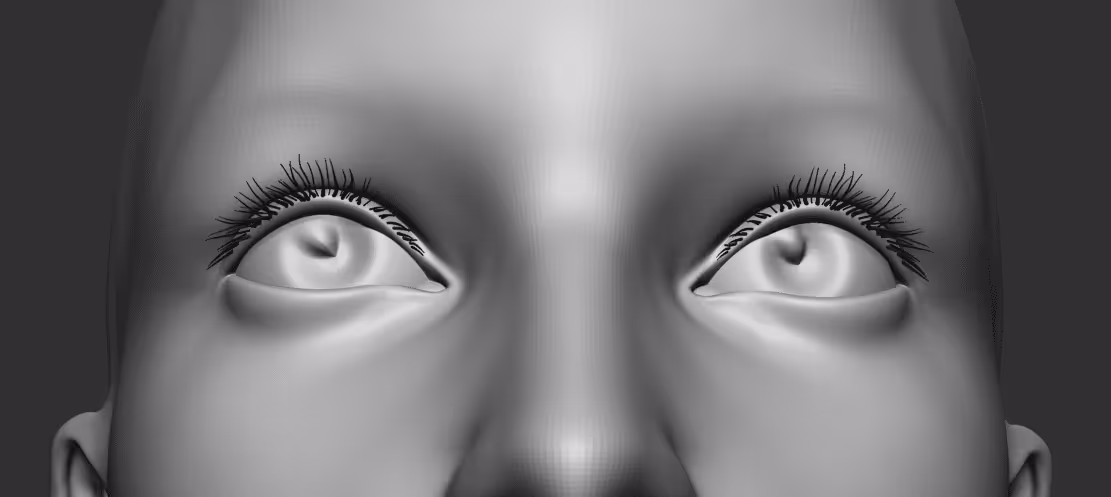
that's it for this tip! hope you find it useful.... and you might be getting ideas already, so I'll just say it... YES, this is a great method to do other things like eyelashes for example ;)


.webp)

.webp)