A new cool addition is that you can now 'grow visibility' based on the Polygroup so if you have part of a polygroup visible you can press Ctrl+Shift+Q and select every polygon with the same ID
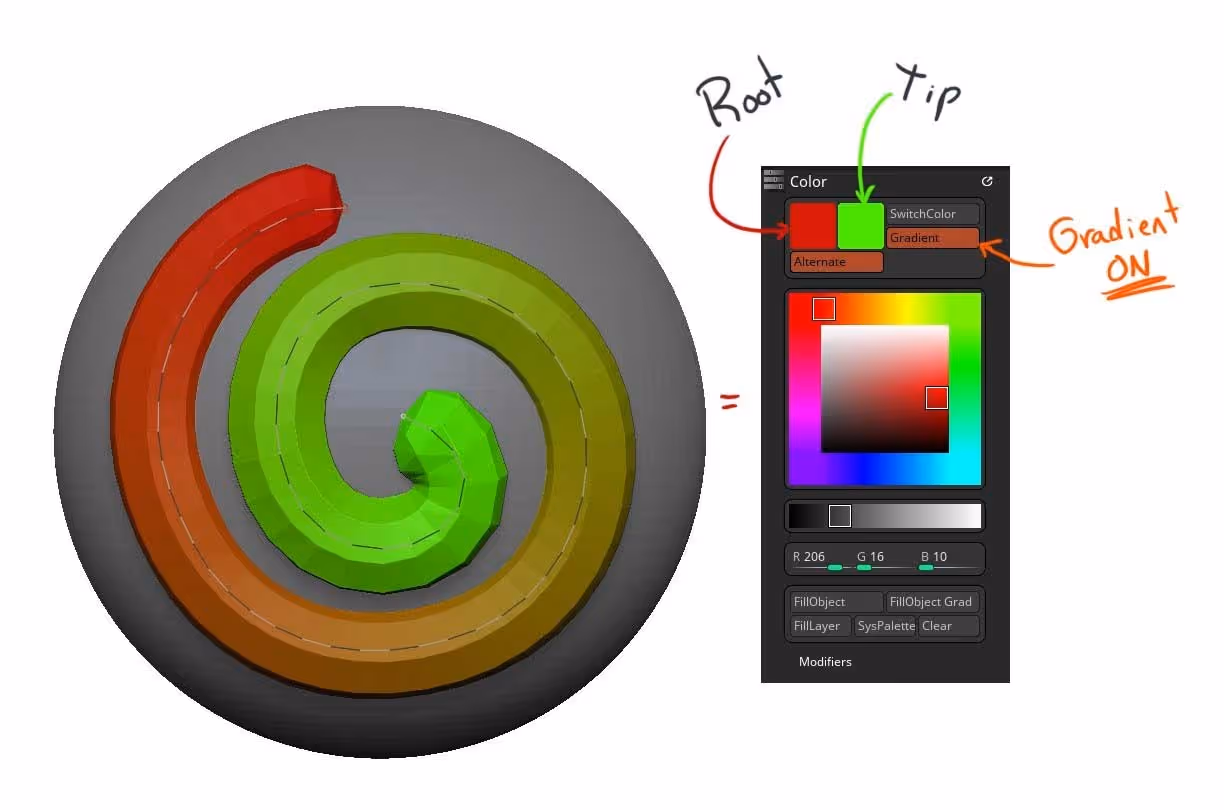
Another pretty neat update is that the Curve tubes and Curve snap brushes now support gradient with polypaint. So basically if you enable the 'Gradient' switch from the Color palette, and choose a couple of colours for the 'Root' and 'tip', you can draw the tubes with a gradient!
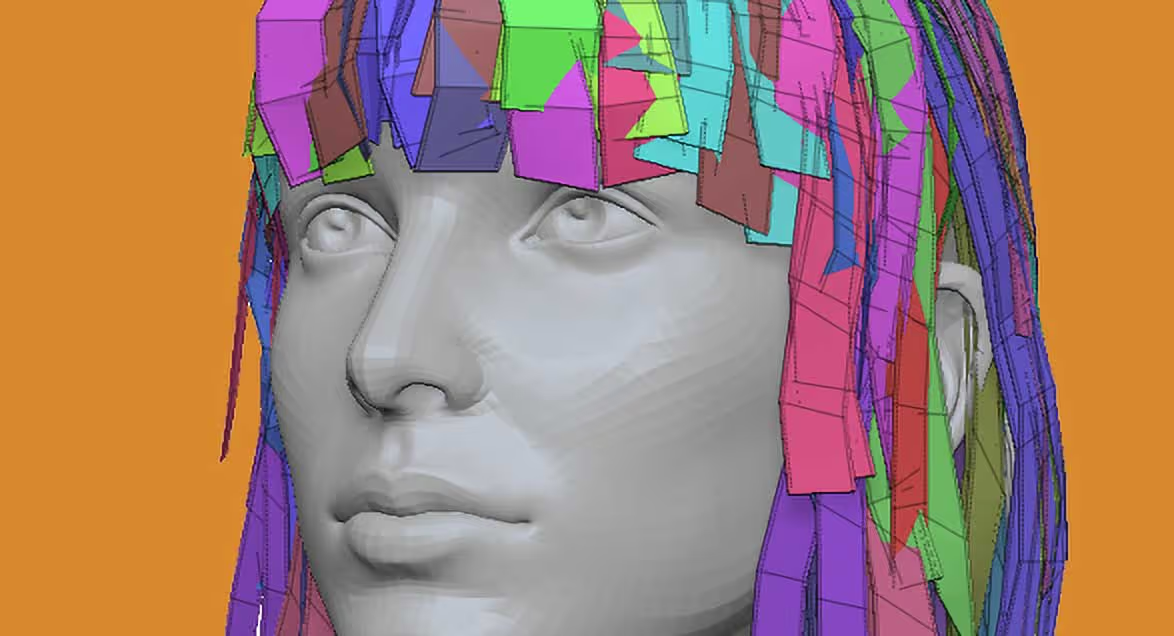
You can read everything related to the update here, but what I really wanted to show you is the new brushes: The curve flat and the curve flat snap!
These two new brushes are really useful to create hair cards in ZBrush. They both do the same thing but one will snap to the surface (CurveFlatSnap), and the other one will let place the hair card away from the surface:
So with these two brushes, you can set up rather complex low-poly hairstyles very quickly. In terms of the workflow, here are some steps for your reference that might help:
- Start with the CurveFlatSnap and make sure you use a large brush size to cover the scalp
- Do another pass with the CurveFlatSnap brush to add a bit of volume and cover more gaps
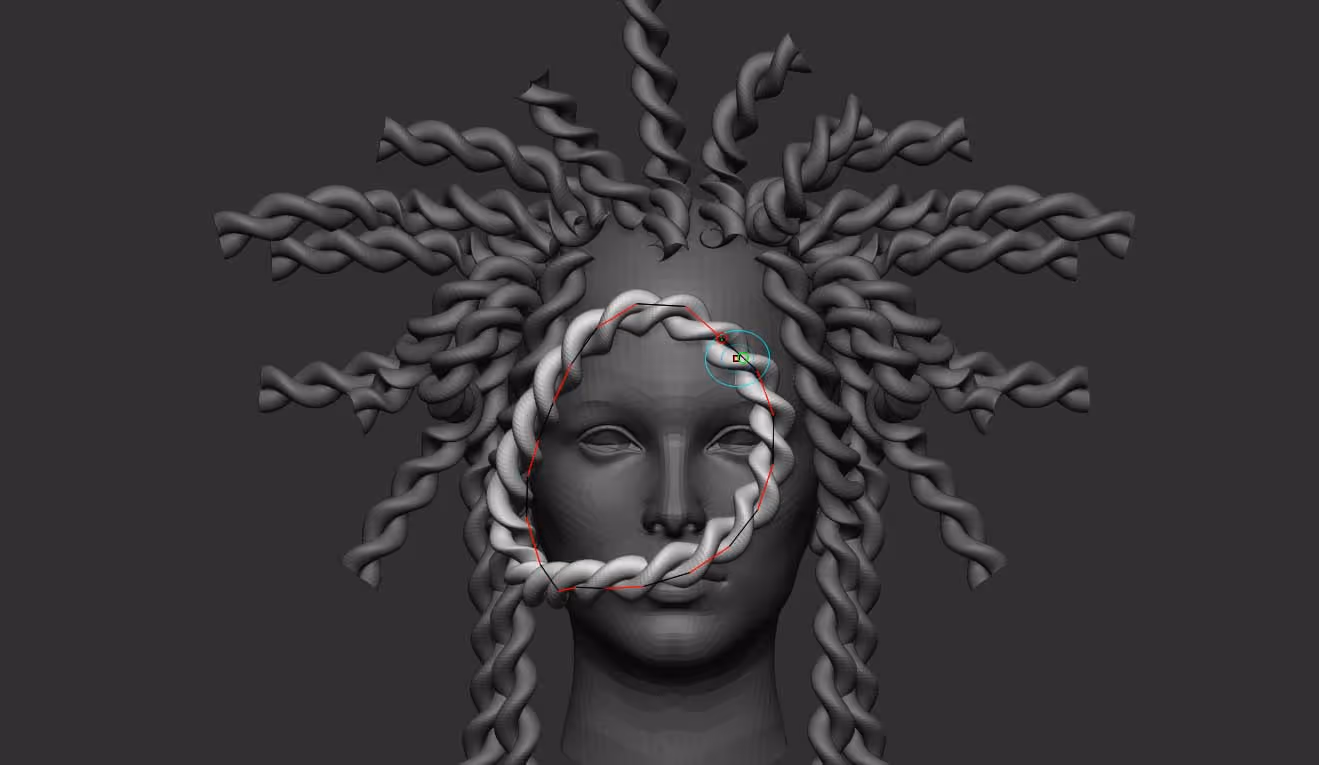
- Take the CurveFlat brush and start adding volume and determining the length of the hair. I'd also 'lock' the start of the brush to keep the 'root' in place.
- After placing all the strands, use the Move Topological to adjust the placement of the strands

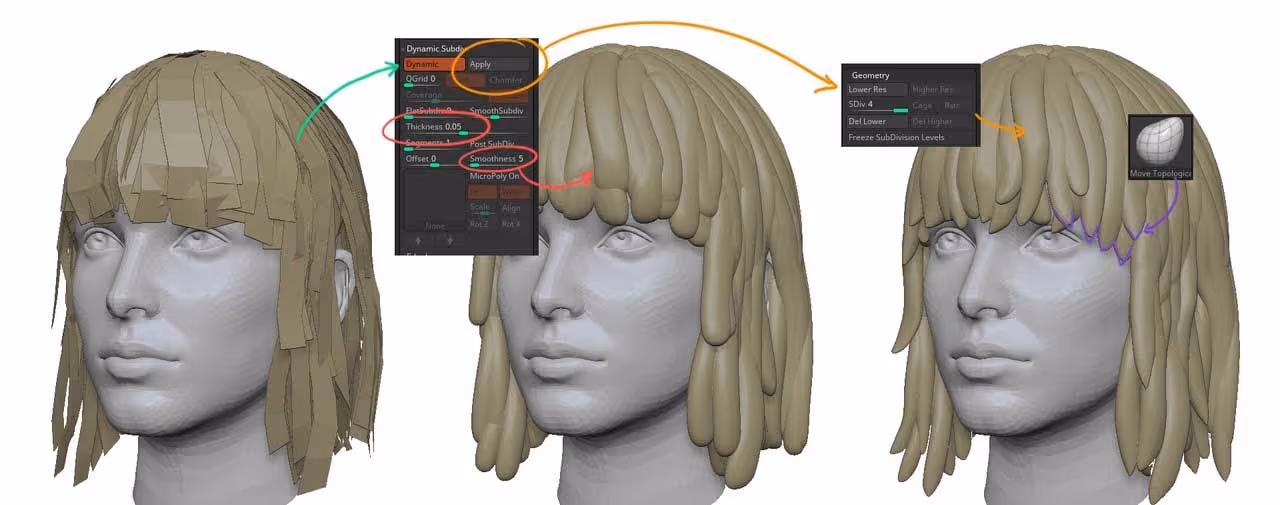
Another very cool tip is that if you want to create a more stylised hair for your character, using the CurveFlat and CurveFlat snap will still give you a more controlled way to place the geometry compared to other brushes. Once you have placed all the hair strands, you can use the Dynamic Subdivision to add thickness and smooth them out to make it a solid mesh that you can edit afterwards!


.webp)

.webp)