For instance, let's say that you want to work on a stylised 'curly' or braided hairstyle. You can place each strand or 'tube' of hair individually with curves, or automate the process a bit more using FiberMesh. To start with this workflow, all you need is a mesh that can be tiled (like it would be with any curve brush).
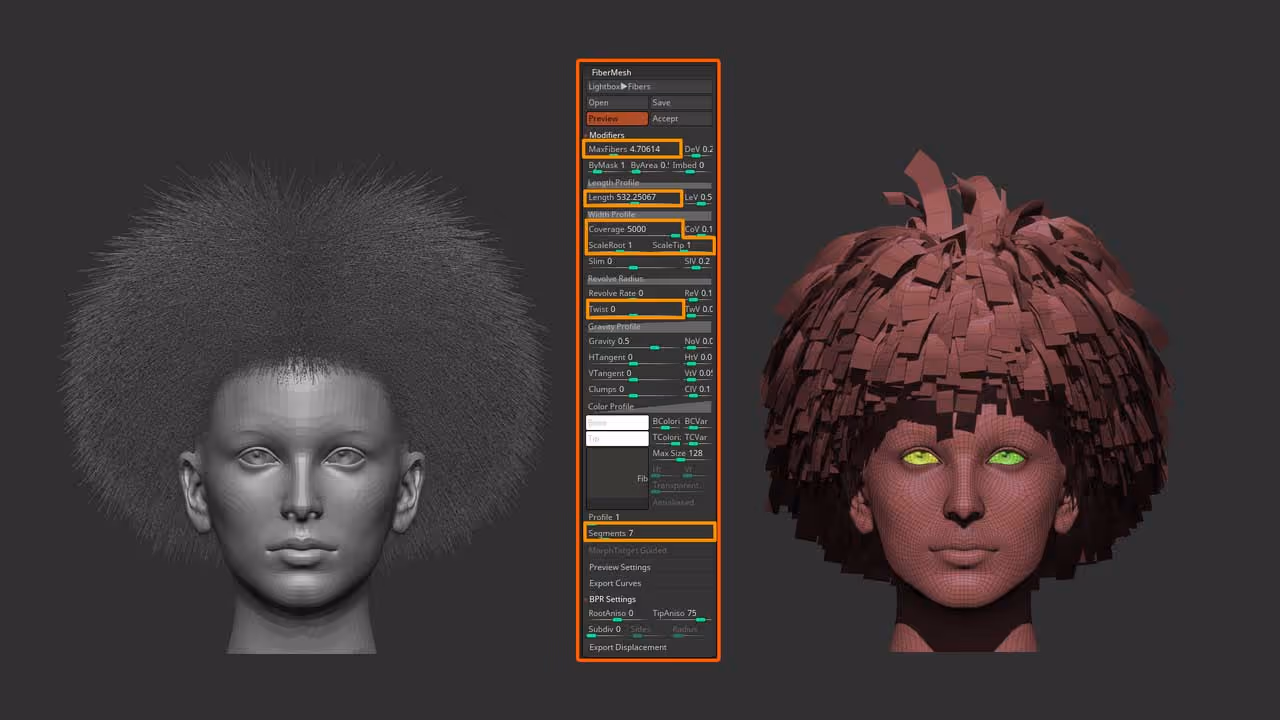
Once you have a mesh ready, the first step is to use FiberMesh to create our 'guides' for the hairstyle. Enable FiberMesh, and tweak the settings so that you get a series of 'hair cards' with relatively even square polygons (changing the Segments will help you with this).
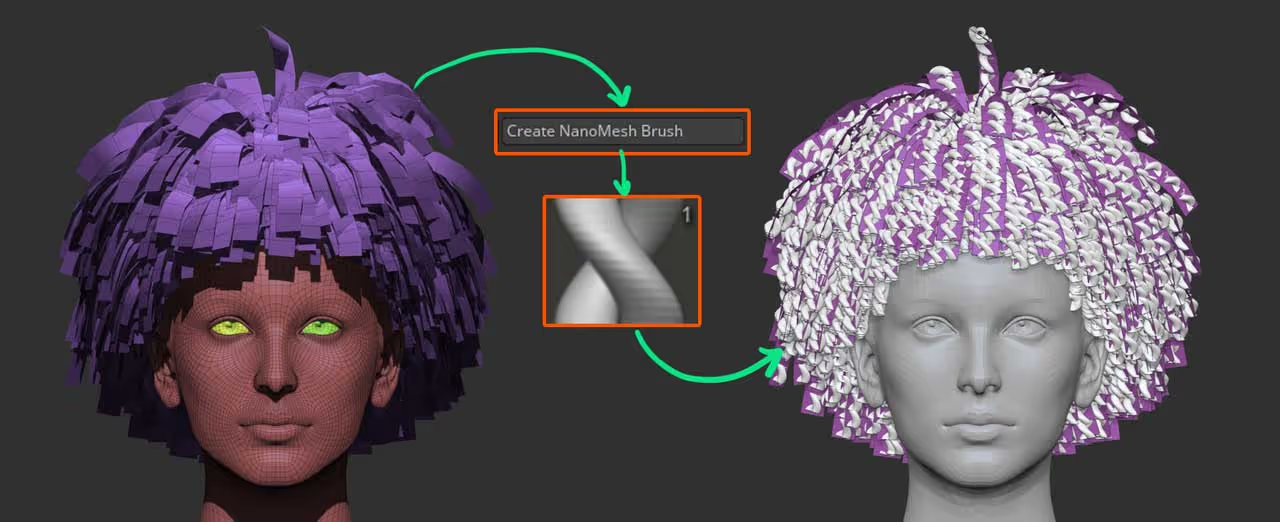
For the next step, make sure you 'accept' to create the FiberMesh. Then, take the mesh you want to tile, and turn it into a NanoMesh brush.... the idea is that you will be able to insert any mesh into every single 'square' polygon from the FiberMesh (Polygroup all):
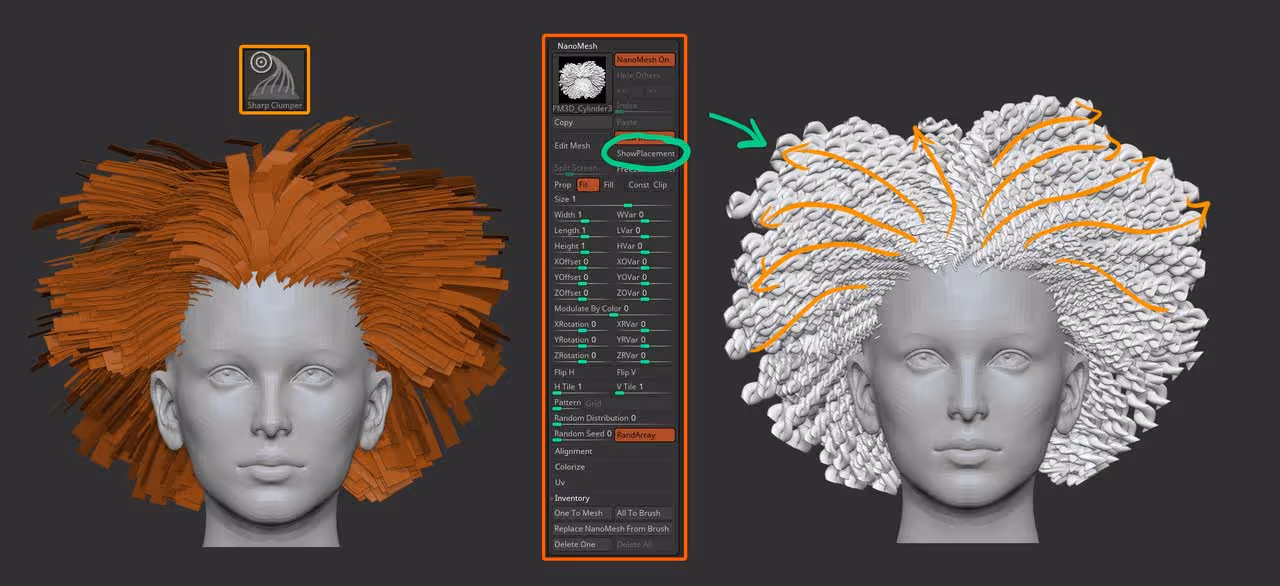
The third step to finalize this quick setup is to adjust your NanoMesh settings so that the inserted NanoMesh fits nicely within each polygon square of the FiberMesh and point in the right direction.
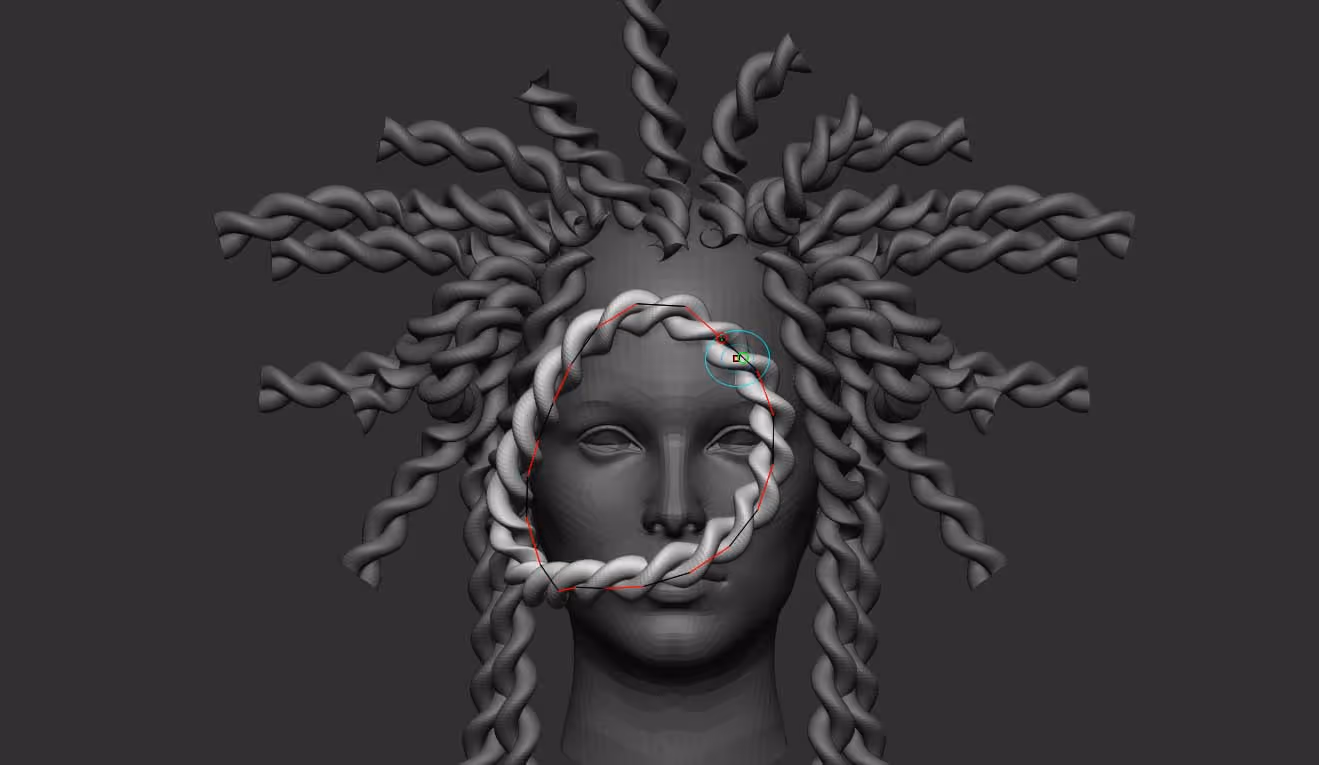
Don't worry about the 'gap' between the meshes, we'll fix that in the next step.... but now that everything is set up, you can 'hide placement' in the NanoMesh settings (this will hide the FiberMesh we used as a placement), and now you can use any Grooming brush to adjust your hairstyle.
If you are interested in my custom FiberMesh brushes you can get them here.
Pretty awesome right? you are ultimately grooming the FiberMesh, but what's displayed is the NanoMesh we added, so we are not altering the inserted mesh at all ;)
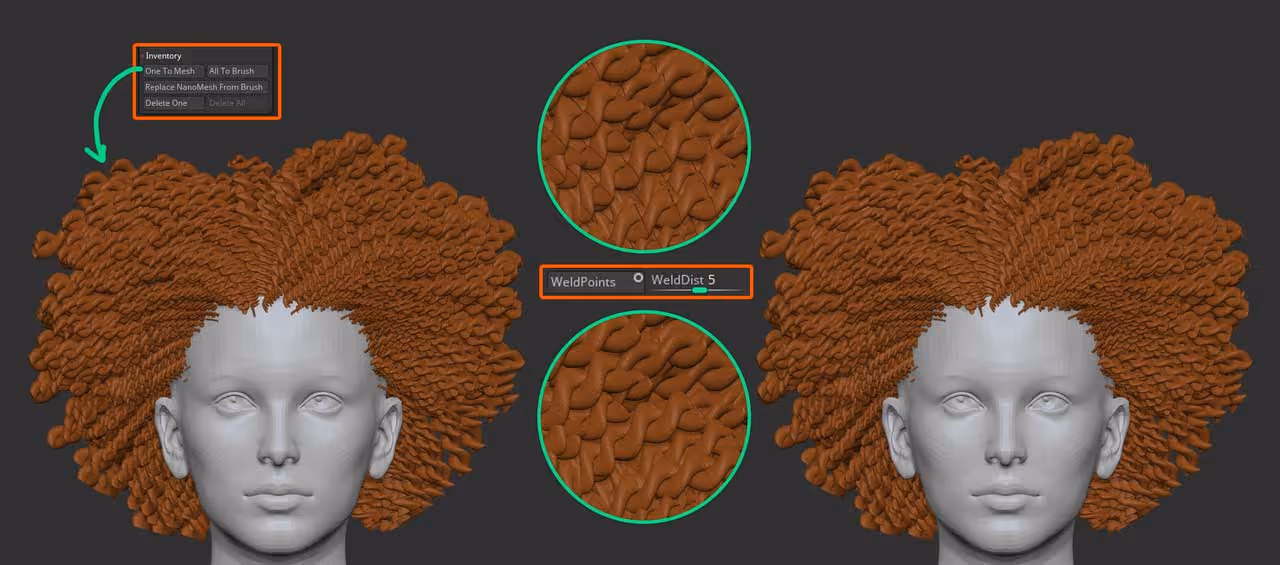
At the end, you can go ahead and convert the NanoMesh into a normal mesh from the 'One to mesh' button under the Inventory section of NanoMesh and use the 'Weld Points' from the Modify Topology to close the gaps between the meshes of the hair. If the default settings for the WeldPoints don't close all the gaps, you can play around with the 'WeldDist' slider to adjust the distance of points that should be merged.
Done! hope you like this technique... there are tones of different uses for this type of stuff, have fun!


.webp)

.webp)