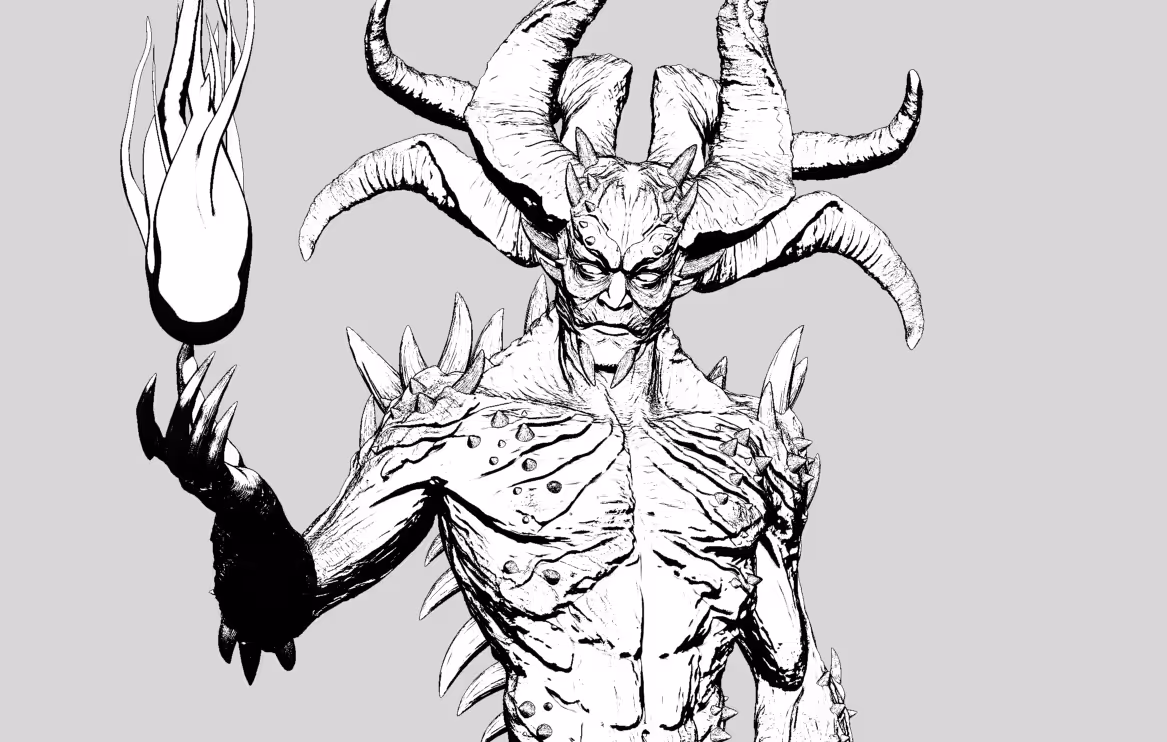
To start with, select the ‘FlatSketch01’ material that comes with ZBrush. This material should give you a good starting point to create the ‘comic look’:
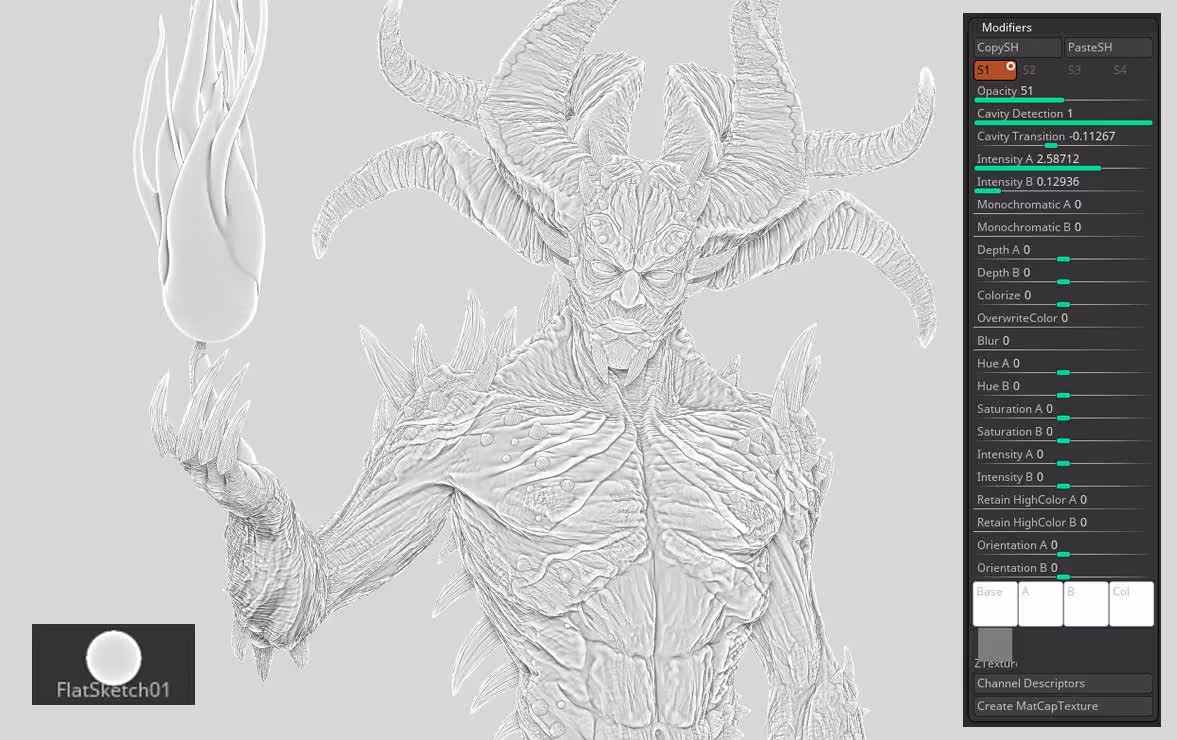
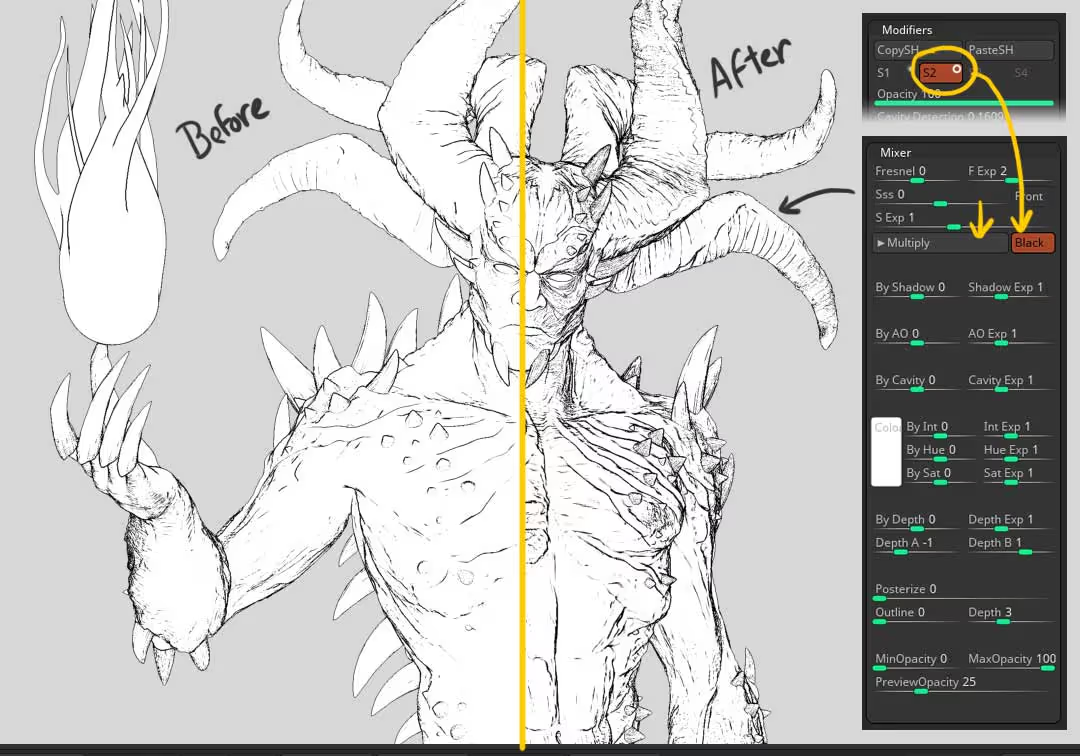
To have more control over the look of your material, you can copy the FlatSketch01 material and past it into the S1 and S2 of a ‘DoubleShader1’ (from the standard materials section):
You can use the ‘CopySH’ and ‘PasteSH’ buttons at the top of the Modifiers subpalette from the Material palette. The idea is to have the same FlatSketch01 material in the S1 and the S2 of the double shader material but with different settings.
For the first one (S1), Set A colour to black and leave B white (from the bottom of the modifiers), then set the opacity to 100 as well as the Intensity A and B. Then you can play with the Cavity transition and Direction to get the look you want… the aim is to get a nice ‘outline’ around the silhouette and volumes of your models.
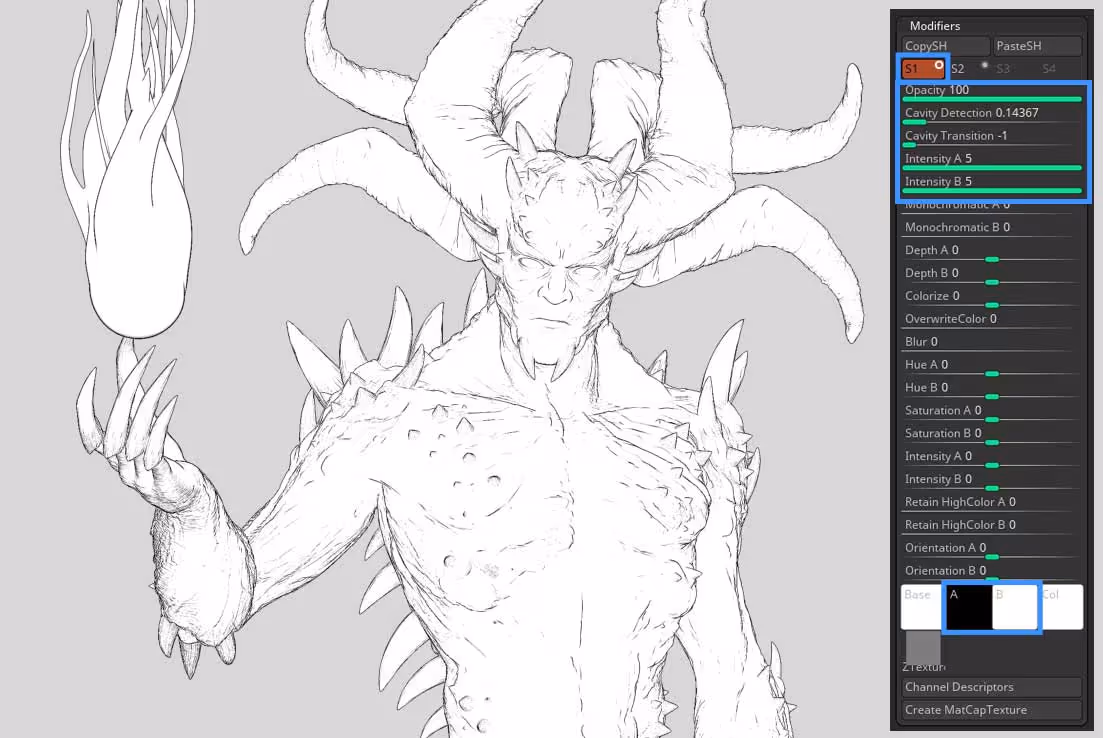
For the second one (S2) repeat the same process, but this time set the A colour to white and the B colour to black. Play with the Cavity transition and Direction again to get most of the dark lines to define the crevices on the inside of the volumes.

Once you have the settings you like (mostly cavity direction and transition), is time to combine the two shaders properly… with the S2 selected, scroll down to the Mixer subpalette, and se the blending mode dropdown to Multiply and enable the switch called ‘Black’. This will basically multiply S2 over S2 just like multiplying to linework layers in photoshop.
That’s about it. You can go back to the cavity settings and continue the refinement of your material.
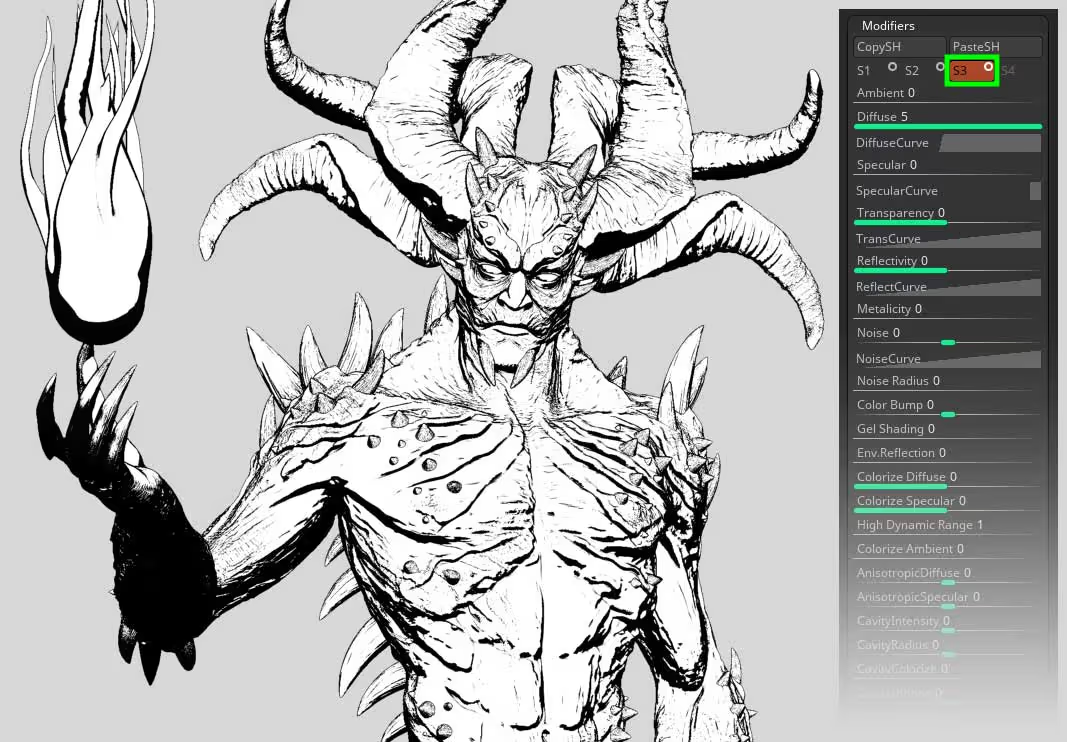
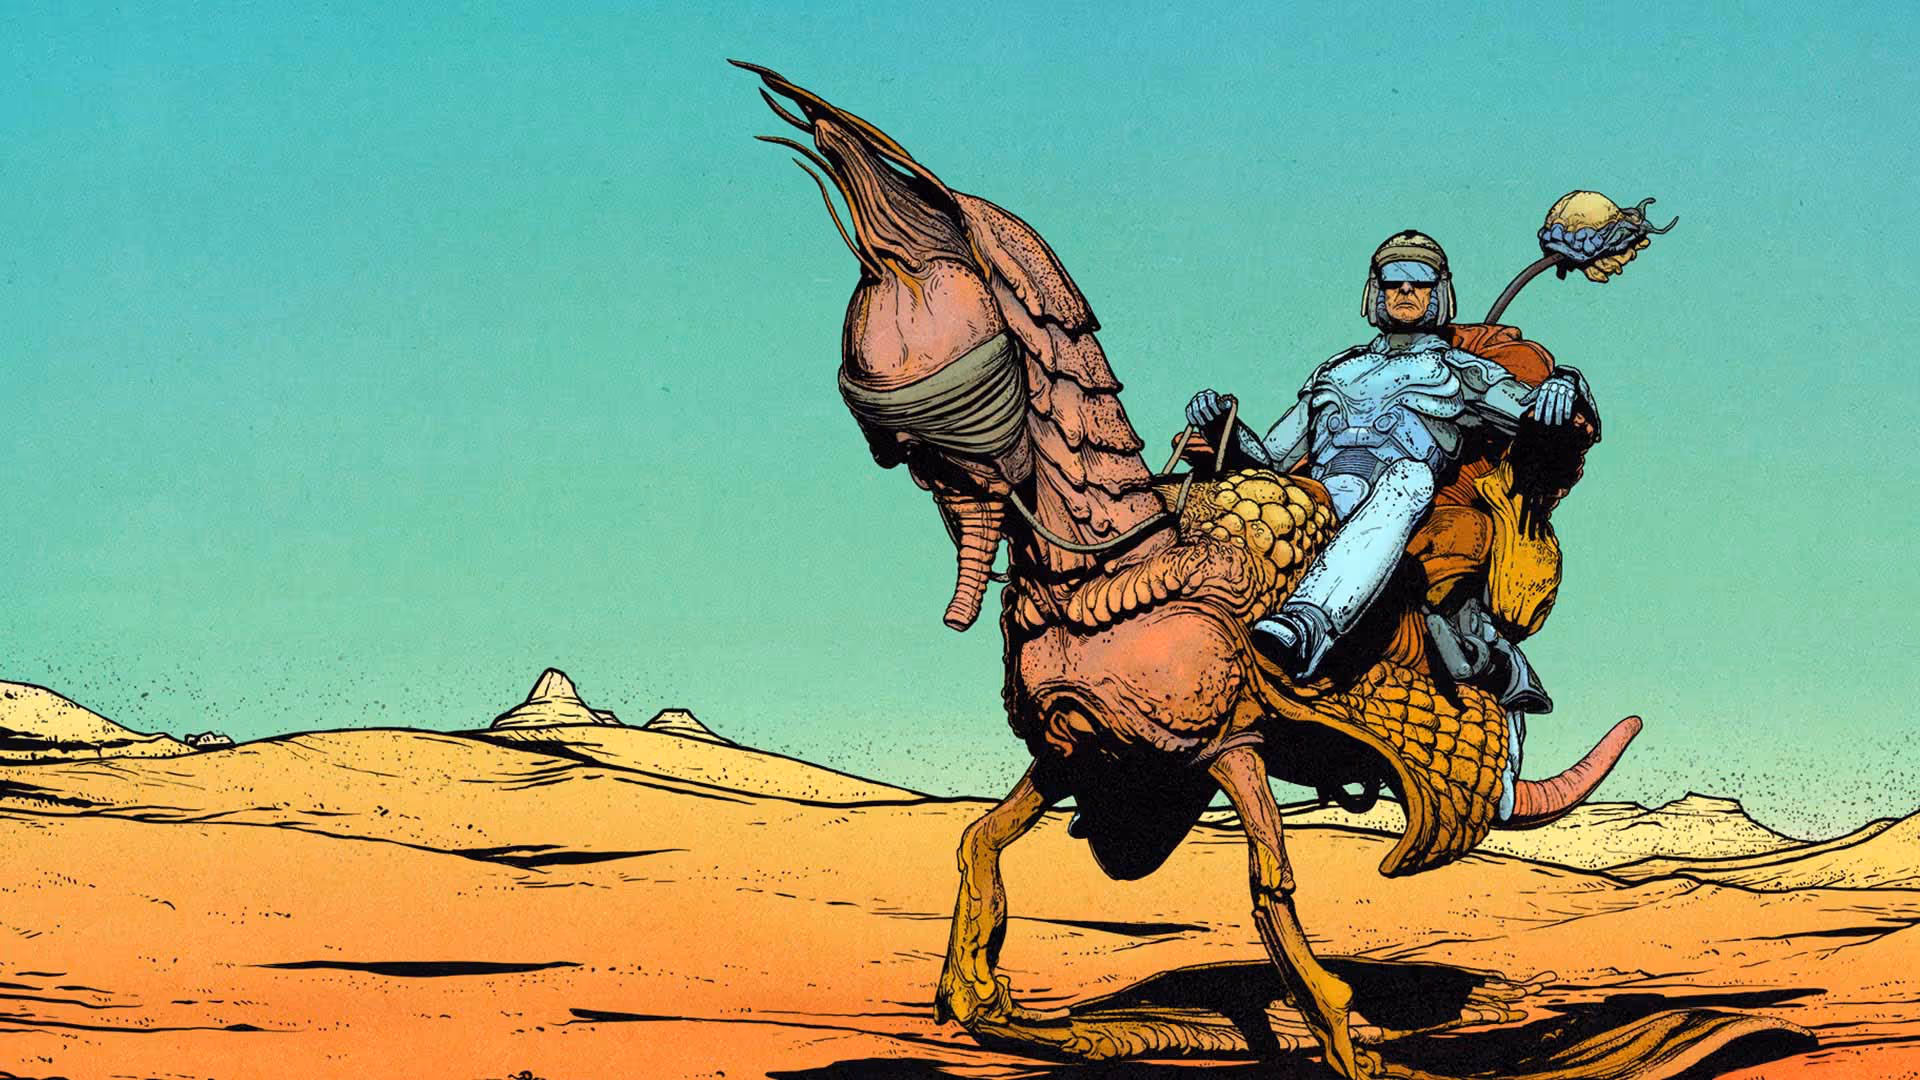
If you want to take things further, you can follow the same setup but in a TriShaders material and use the additional slot S3 to add a simple diffuse material (like BasicMaterial). You can take the Ambient to 0, the Diffuse to 5 and play with the Diffuse Curve profile to contrast the transition of highlights and shadows… Set the blending mode in the mixer to Multiply as well and you got yourself some nice strong shadows:
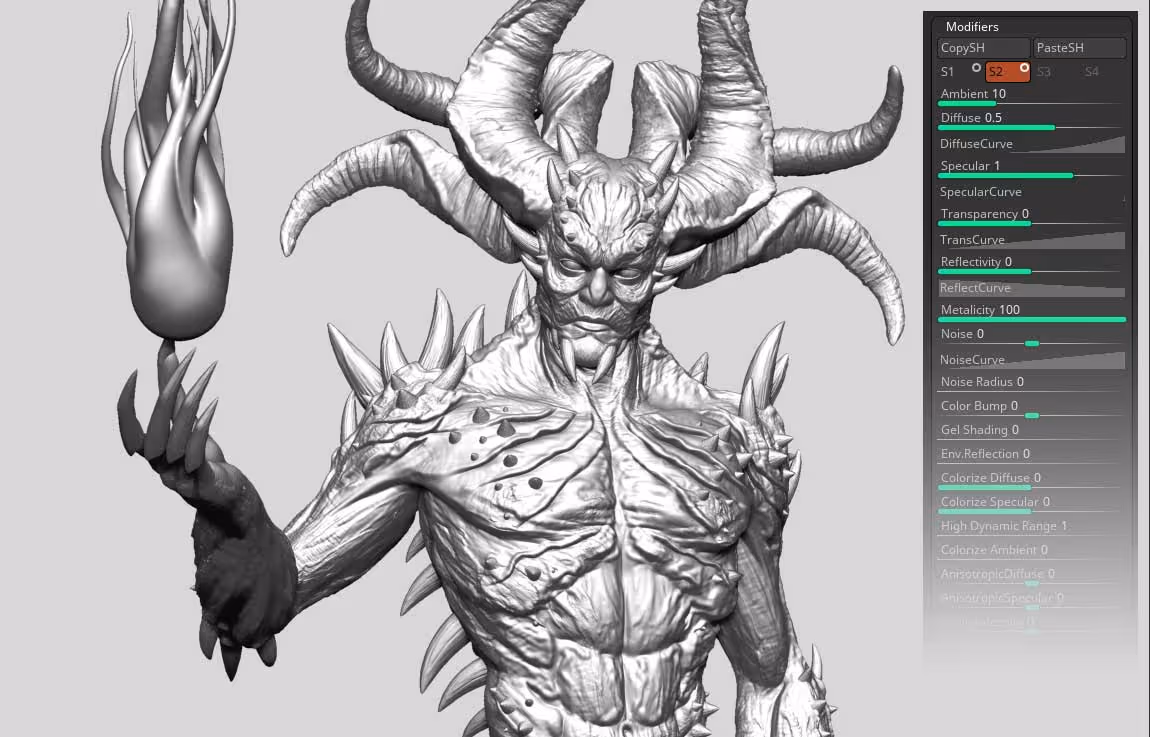
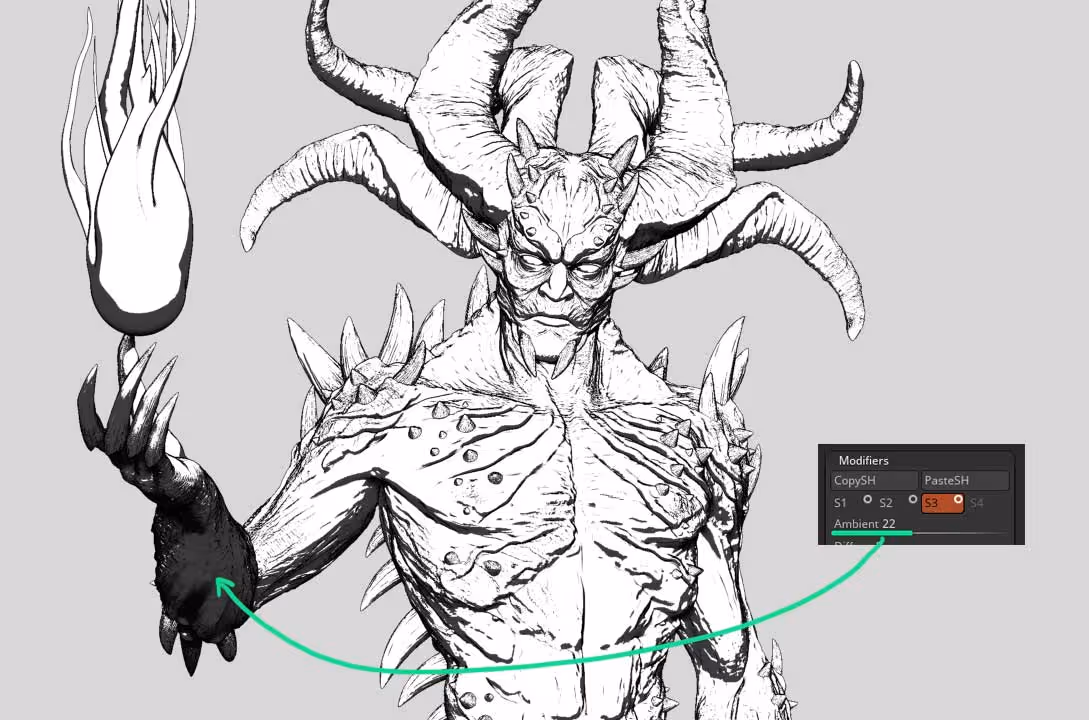
If you want to have more variation in your values, you can add a bit of ambient light so that the shadows are not 100 black:
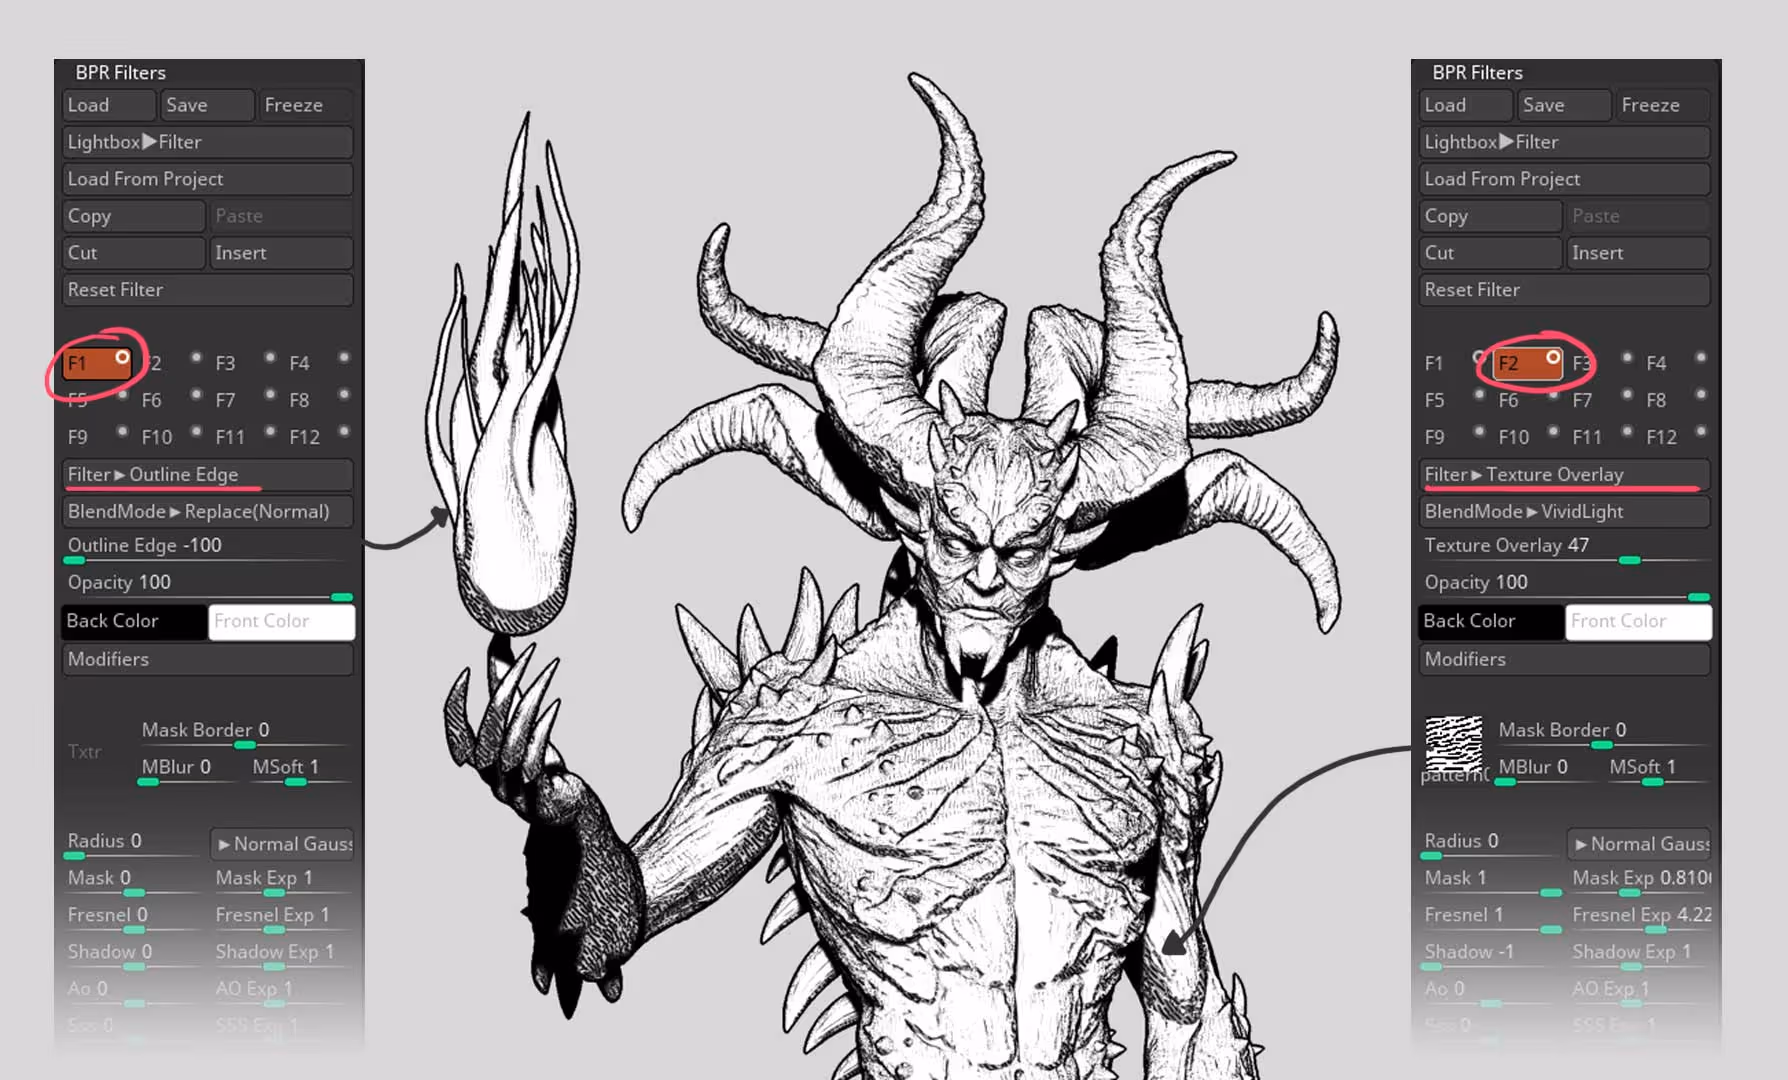
And to wrap it up, you can even include a couple of filters from the BPR filters to polish the comic-look of your image. For instance in F1 I added an ‘outline edge’ to add a thicker line all around the model and in F2 I used a texture overlay to add some texture around the glancing angles of the volumes (masked with Fresnel).


.webp)

.webp)