
First, you can take any ‘avatar’ or creature base mesh and duplicate it. The duplicate will be the clothes so I like to inflate it a bit to separate them from the base.
The next step is simply to create polygroups for the different pieces of clothing you want and delete the rest (in the image below I just want to keep the pants and the shirt).

Once you remove the polygroups you don’t need (hiding them and the ‘delete hidden), you can create additional polygroups where you want the seams of the clothes to be. This part is important and probably the only one that will take more than 2 min.
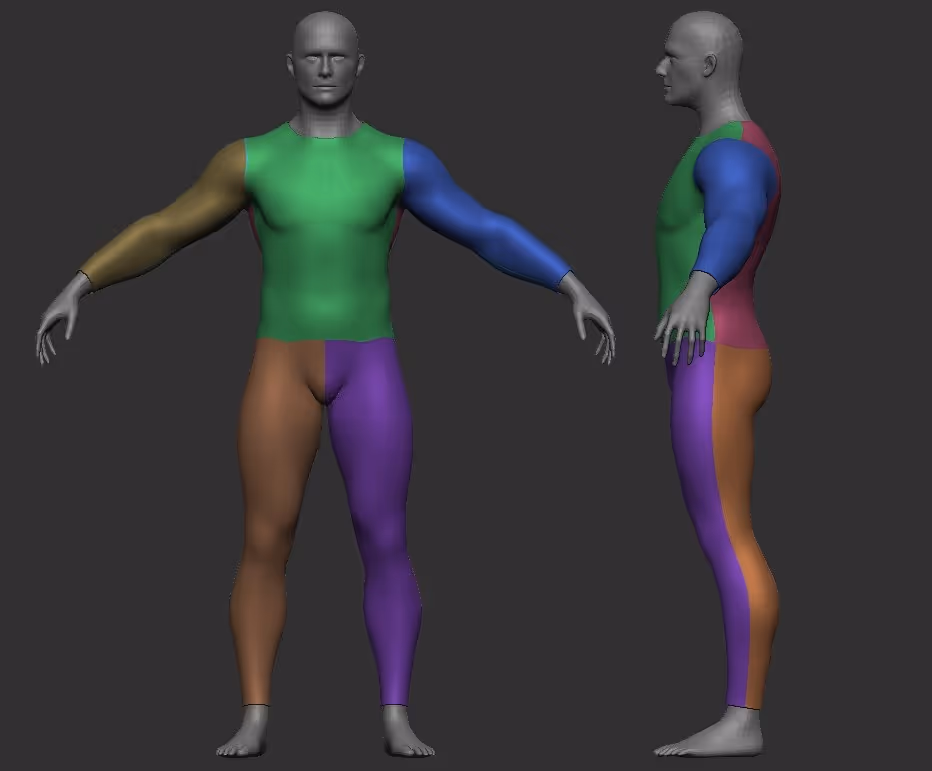
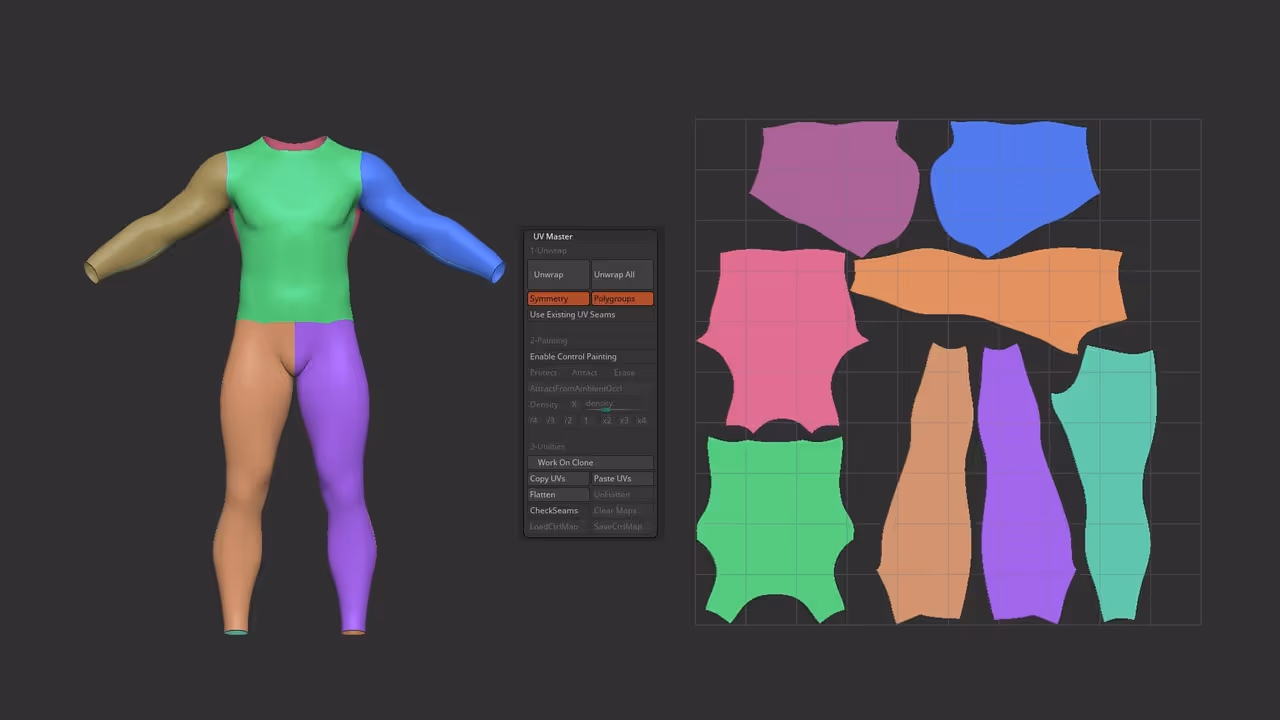
Once you have your polygroups ready, all you need to do is create a set of UVs. Since I duplicated the original mesh, I have a decent topology as the base with quads so the UV process is pretty easy. From the ZPlugin palette, use the UV Master to unwrap the mesh with the Polygroups switch enable so that each piece of the clothing gets its own UV island.
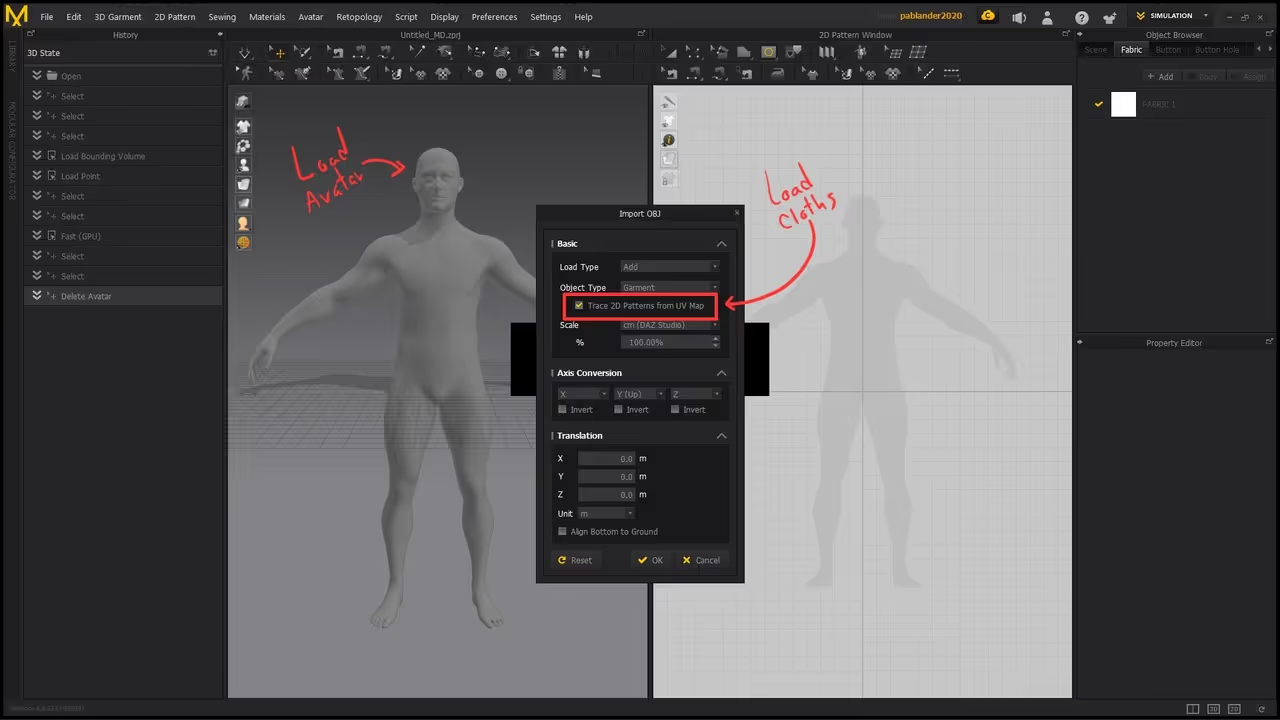
That’s pretty much it... at this point you can export the avatar as an FBX or OBJ from ZBrush and do the same for the clothes. You’ll want to export two different files so you can import one as an avatar and one as a garment in MD.
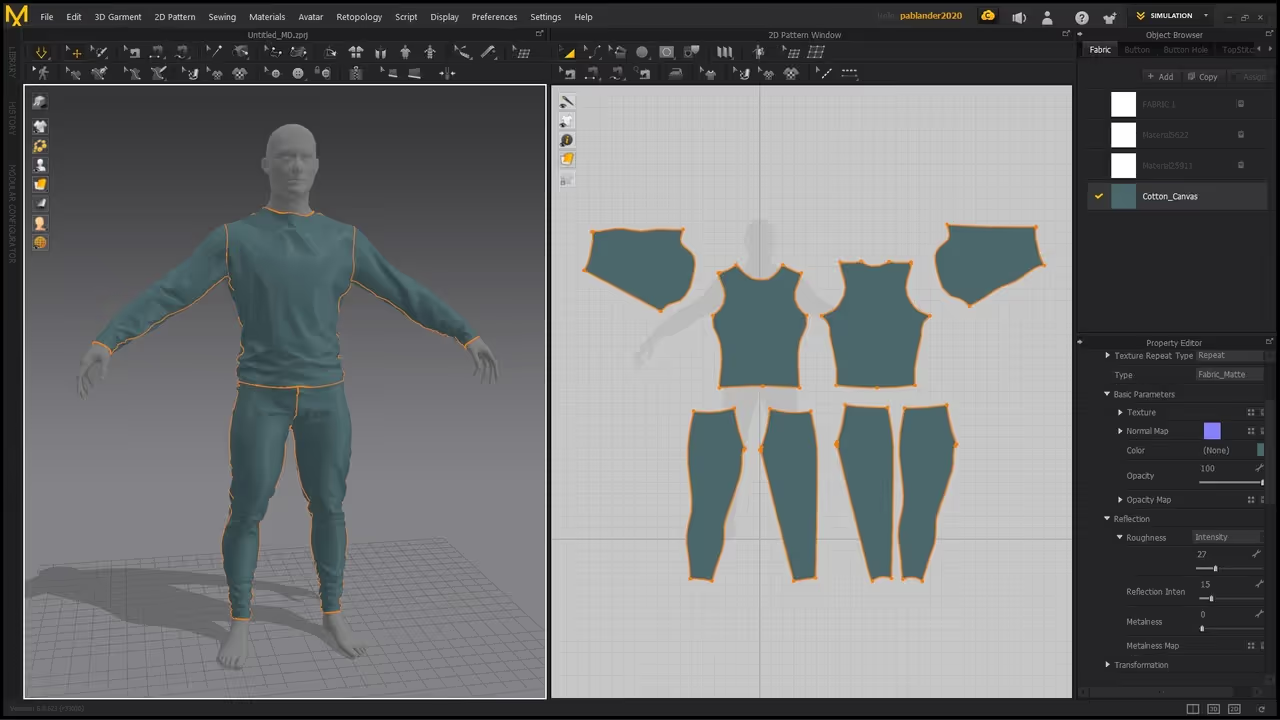
Now, here is the trick... When you import the mesh of the clothes that have UVS, MD is going to give you the option to Trace 2D Patterns from the UV map, so make sure you tick that box:
Done! all the pieces you split in ZBrush using polygroups, come into MD as separate 2D Patterns and they even come saw together based on the difference of the polygroups we had in ZBrush.
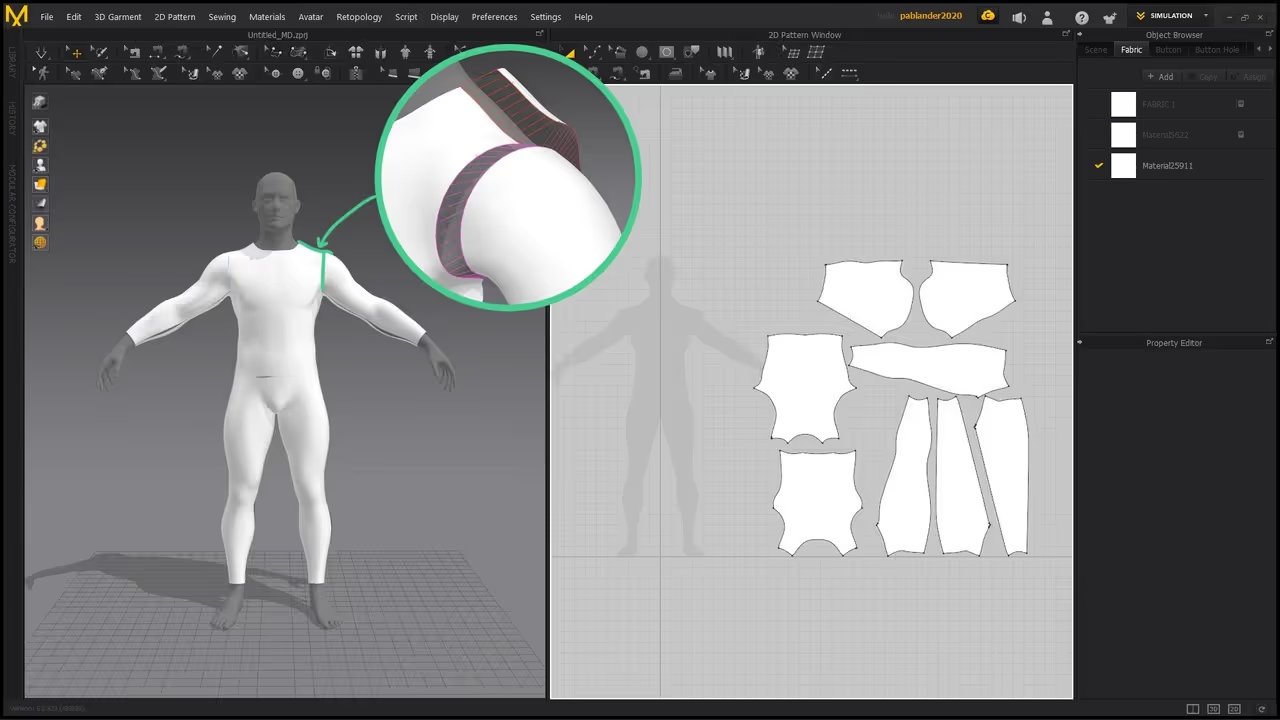
At this point, you can just play with the type of fabric and simulate the clothes on the avatar (I also re-arrange the pieces in the 2D viewport so it is easy to see where things are in the space).
This is a fantastic way to get some quick patterns done, especially if you are working on an unconventional piece... What’s great about this workflow, is that whatever you did in ZBrush it should pretty much suit the base mesh nicely since it is ultimately the same (inflated) mesh.
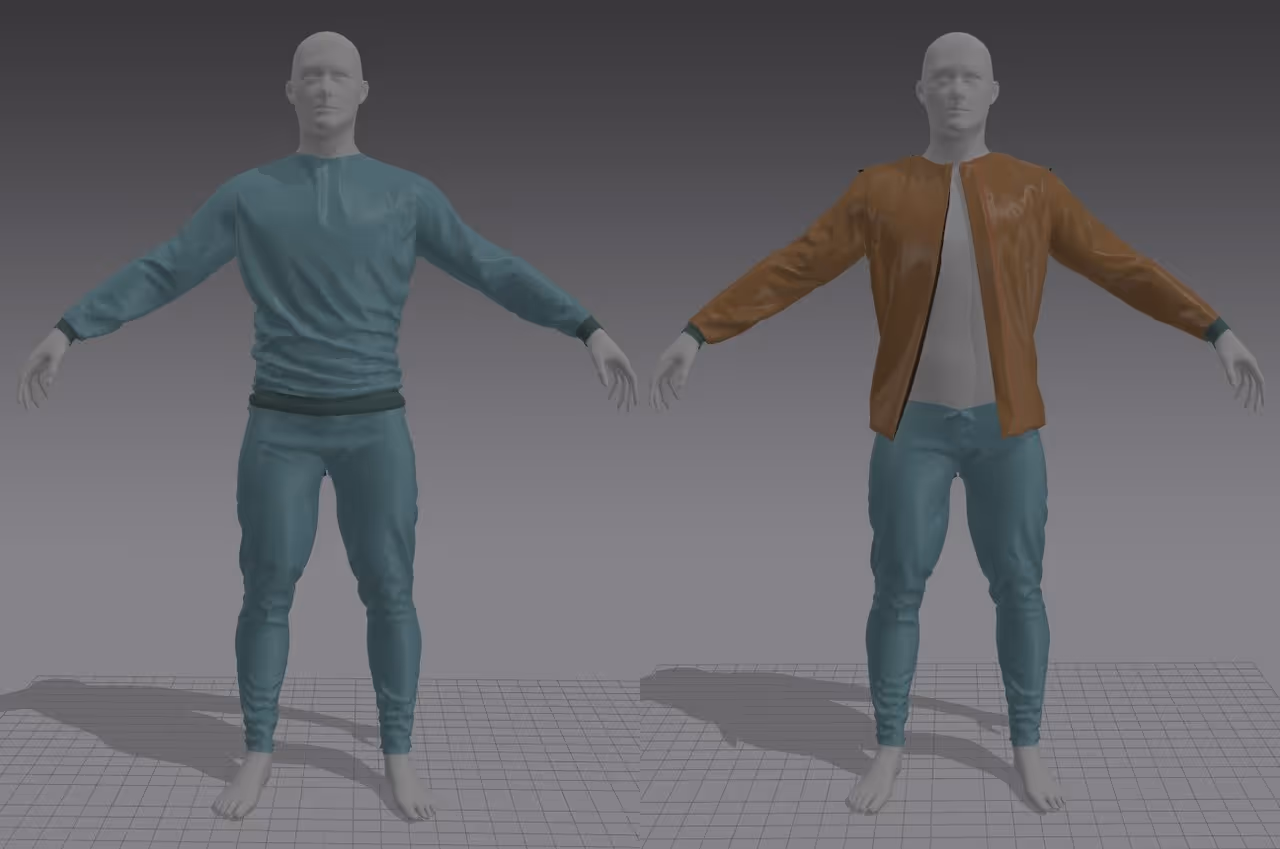
In MD you can add pieces to fine-tune the clothes or cut things up to change the idea completely before you export everything else back to ZBrush to start the refinement process:


.webp)

.webp)