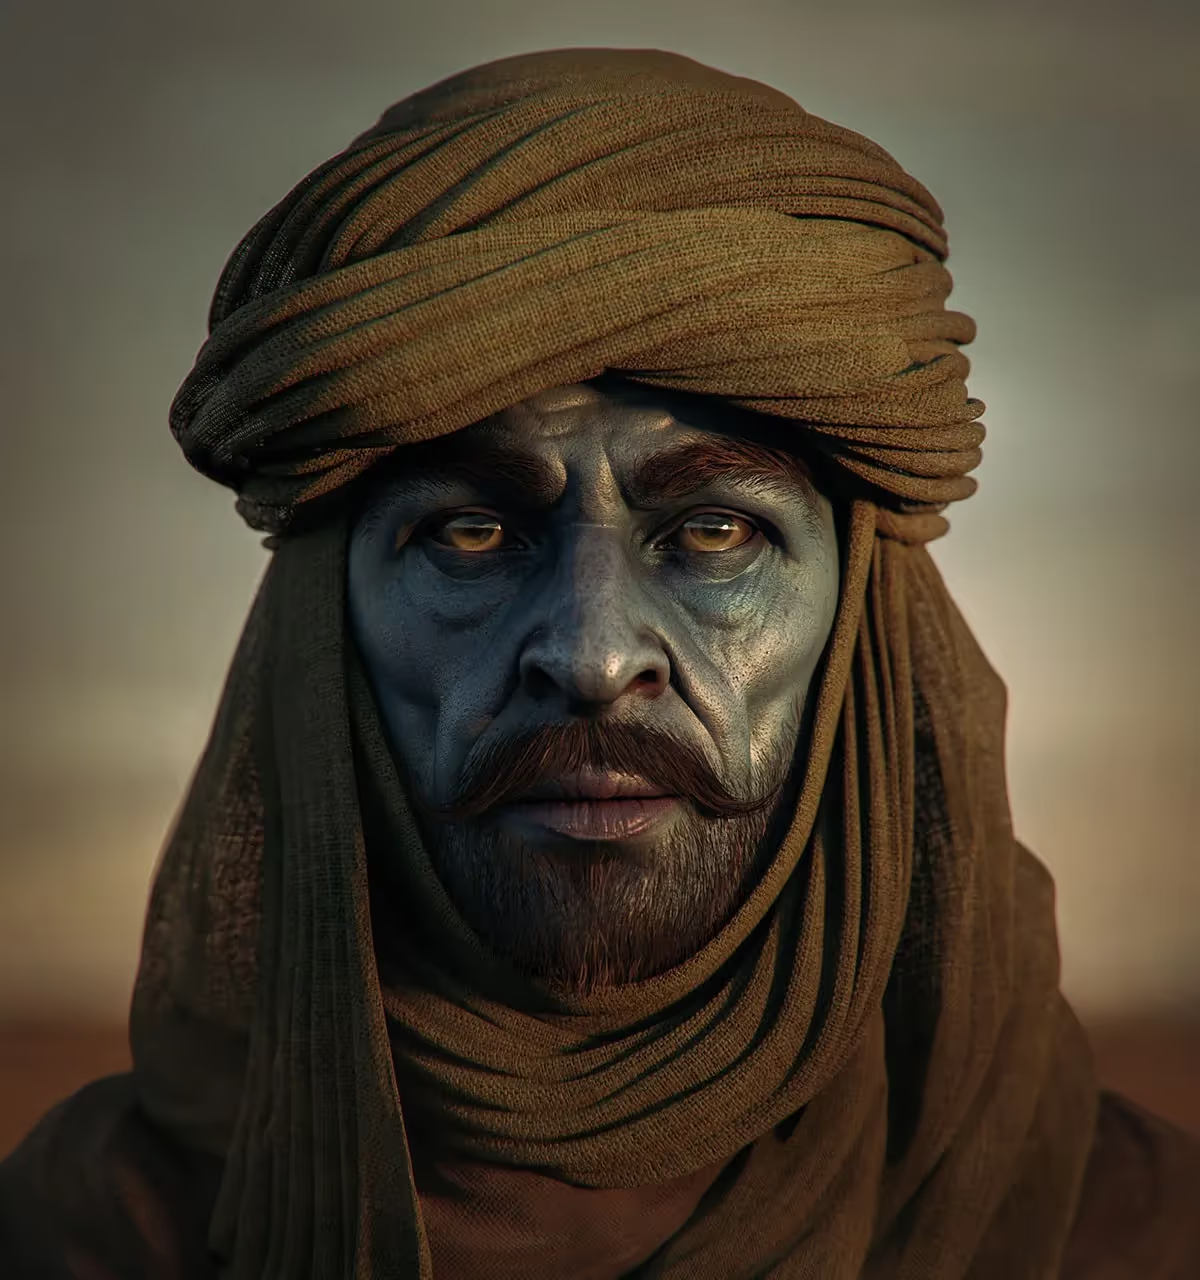
Ok so the first thing you’d want to do to create something realistic is use references and break it down into small digestable pieces. As an example if you were to take my concept and break it down, you’ll identify some sections quite easily.
![image.png [optipng output image]](https://cdn.prod.website-files.com/66724d67c7a3aed4762456d2/684b90e980831884fc76b4e7_ezgif-175bddd579d463.avif)
TIP: turn the image to black and white and highlight pieces with different colours… makes it really easy.
once you identify the smaller sections it gives you an easier way forward. Take a cylinder and stretch it out to make a long tube. Subdivide it a bit (or use dynamesh up to you) and use a brush like the standard brush to create some folds and make it look more organic.
Then add some sharper wrinkles along the tube. I used one of my custom brushes from the clothes and drapery pack but you can achieve this with something like the dam standard brush:
![image (1).png [optipng output image]](https://cdn.prod.website-files.com/66724d67c7a3aed4762456d2/684b95ccbce09d8981aa64fd_ezgif-8c4b2bd0bcfe9e.avif)
No here is the first trick… switch to the TransposeCloth gizmo to affect the mesh with Dynamics. Also change the focal shift to something like 80 and place the gizmo on one side of the tube…. Now rotate along the tube long axis (X axis in my case) and it should create a really nice compression and wrapping effect (the focal shift gives you the soft deformation):
![image (2).png [optipng output image]](https://cdn.prod.website-files.com/66724d67c7a3aed4762456d2/684b95ccbce09d8981aa650b_ezgif-8b47fe0e1bf47d.avif)
Here is the second trick… since we set up a cylinder, we can take the Bend Curve deformer an using the curve points to place the ‘wrap’ of the turban where you want it (keep checking your references).
![image (3).png [optipng output image]](https://cdn.prod.website-files.com/66724d67c7a3aed4762456d2/684b95ccbce09d8981aa6505_ezgif-827646cf7ba78b.avif)
Here is how I adjusted my first ‘tube wrap’ and placed it on the head sketch:
![image (4).png [optipng output image]](https://cdn.prod.website-files.com/66724d67c7a3aed4762456d2/684b95ccbce09d8981aa6502_ezgif-80a4c8ddcf8af6.avif)
That’s about it in terms of the ‘tricks’. The rest is rinse and repeat doing the same process for the various ‘wraps’ or sections you have identified from your reference. I repeated this process about 5 times for the main wraps and completed the effect with some other meshes:
![image (5).png [optipng output image]](https://cdn.prod.website-files.com/66724d67c7a3aed4762456d2/684b95ccbce09d8981aa6508_ezgif-84b71e9c85aeff.avif)
That’s it for now!


.webp)

.webp)