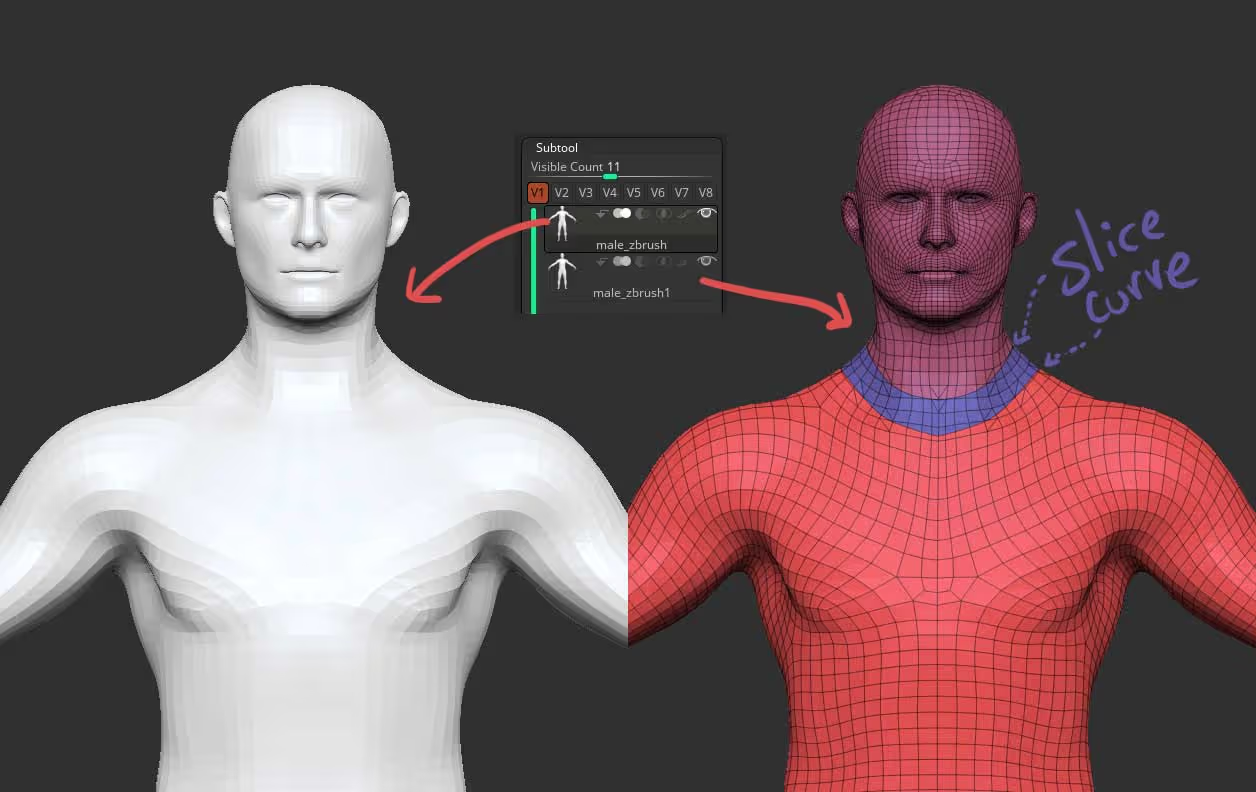
First, take your mesh (it doesn’t have to be human obviously) and duplicate it so you have the exact same volume... use something like the Slice curve to cut through the duplicated mesh and define an area for the necklace (purple polygroup below)
Once you have your necklace is defined, you can hold Ctrl+Shift to hide the other polygroups and then delete them (Geometry > Modify Topology > DelHidden). With the isolated piece for the necklace, run a quick ZRemesher process to simplify the geometry and get rid of weird triangles.
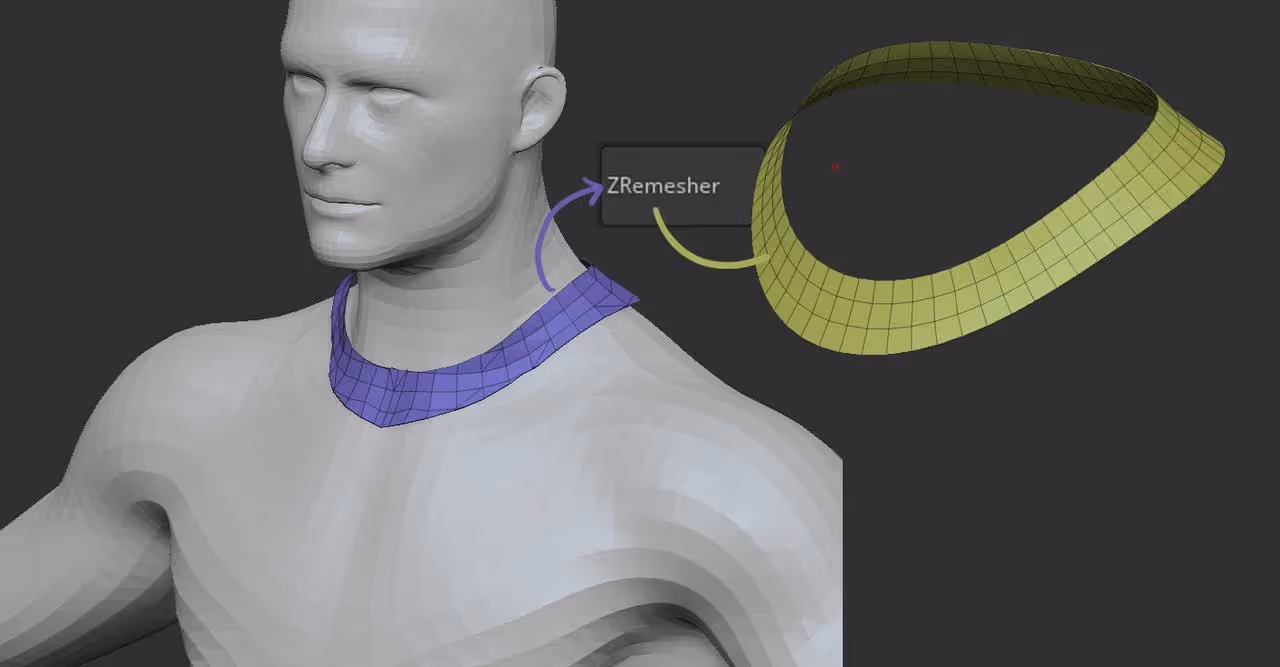
The idea is to keep only a few polygons, so try to optimise it as much as you can... I deleted the inner two edge loops (with the ZModeler) and a few of the other loops going across the necklace to end up with something like this:

This will be the piece we’ll simulate so it’ll be really quick and easy.
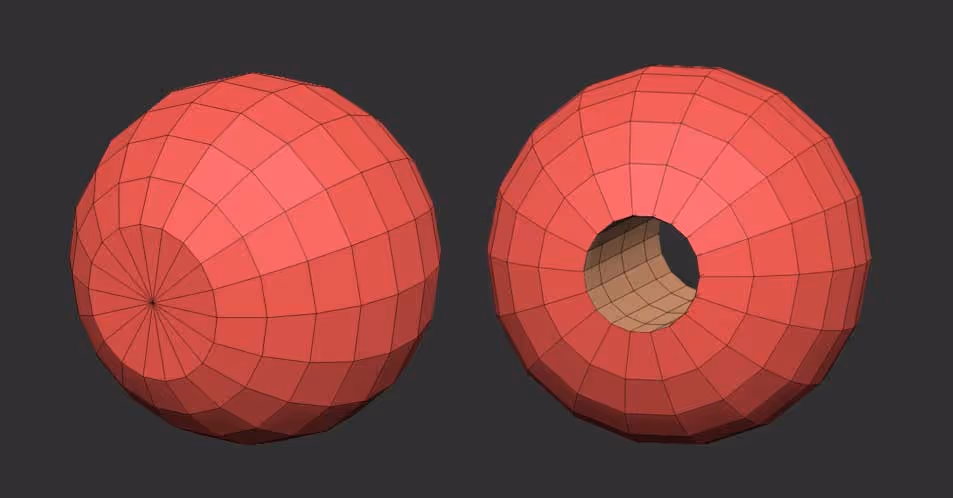
Now, for the beads or whatever ‘rigid body’ you want to simulate, go ahead and create an IMM brush from it and then a NanoMesh brush from the IMM. For the beads in my example, I took a 3D sphere and punched a hole through it using the ZModelere before turning it into my NanoMesh brush.
With the NanoMesh brush ready, go ahead and select the Polygroup All option from the NanoMesh menu (hover over any polygon and press the space bar or right-click). Click and drag on the necklace base to generate the NanoMesh with the beads:
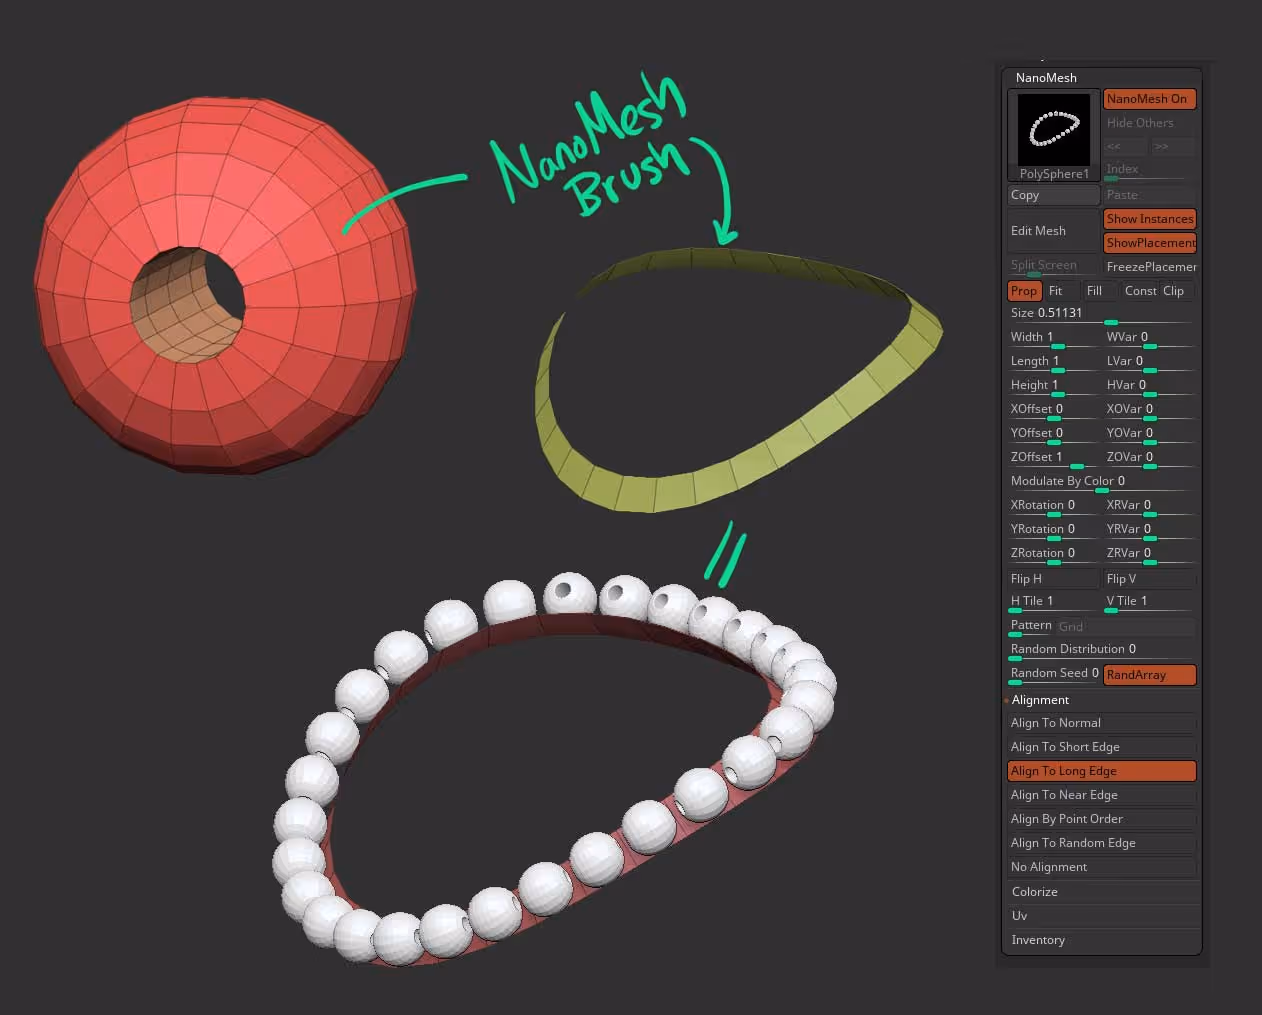
That is basically all there is to it... The NanoMesh is simply instanced across the polygons of the necklace so as long as you keep the ‘Prop’ switch on in the NanoMesh settings, it doesn't matter how much you deform the base of the necklace.... the shape of the spheres will remain constant.
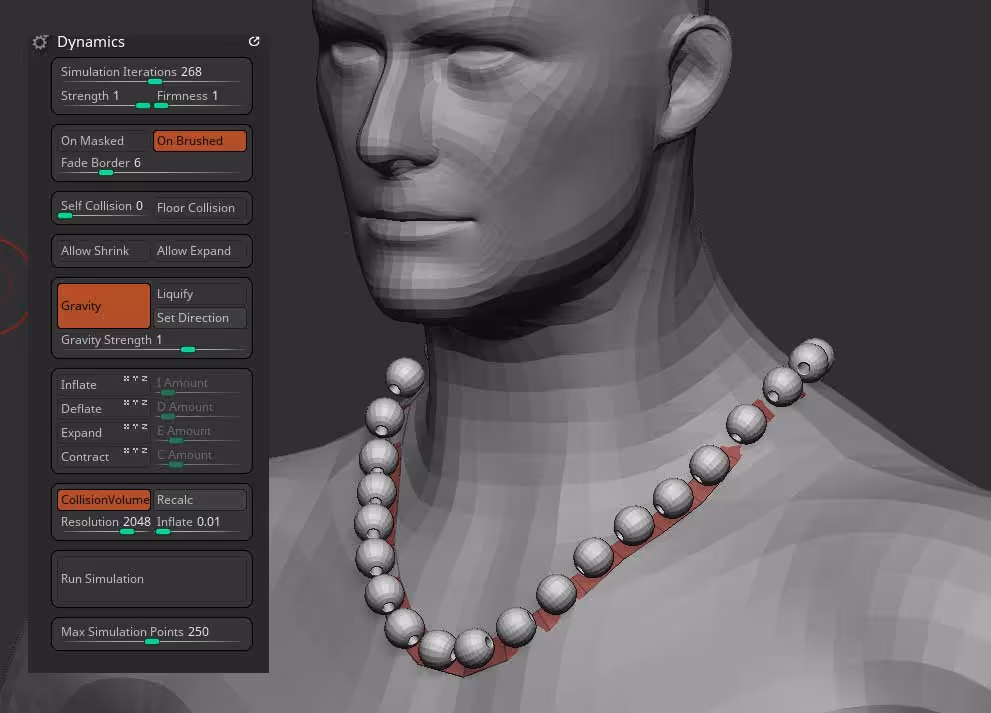
So with the base mesh of the necklace selected, you can go to the Dynamics palette and do the following:
- Set the simulation iterations to something over 250 for better results
- increase the Firmness to something other than 1 so the base doesn't deform as much
- Set the gravity strength to 1 or less
- Make sure the other meshes you want to use as ‘obstacles’ in the simulation are visible and click on the ‘CollisionVolume’ switch to calculate the volumes
- Hit simulate and stop it when you want to
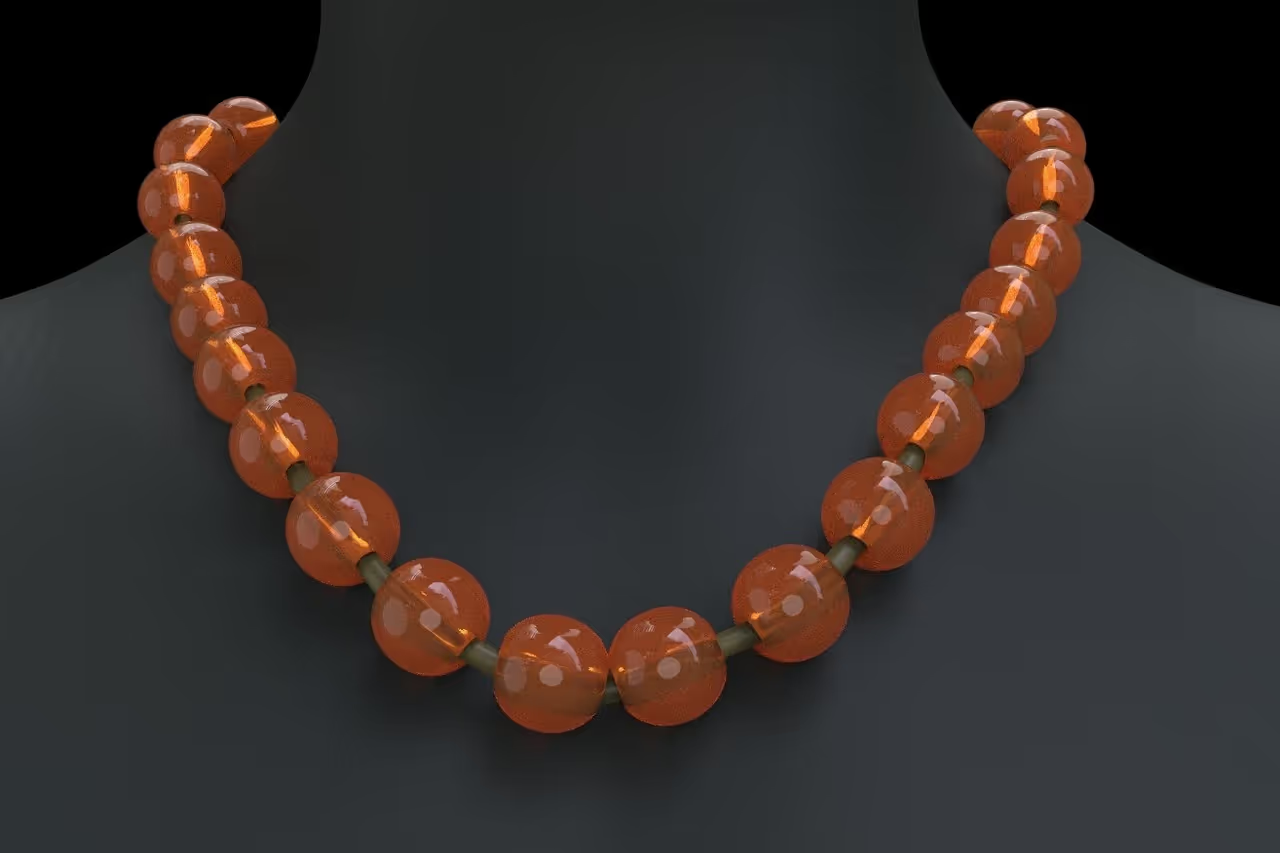
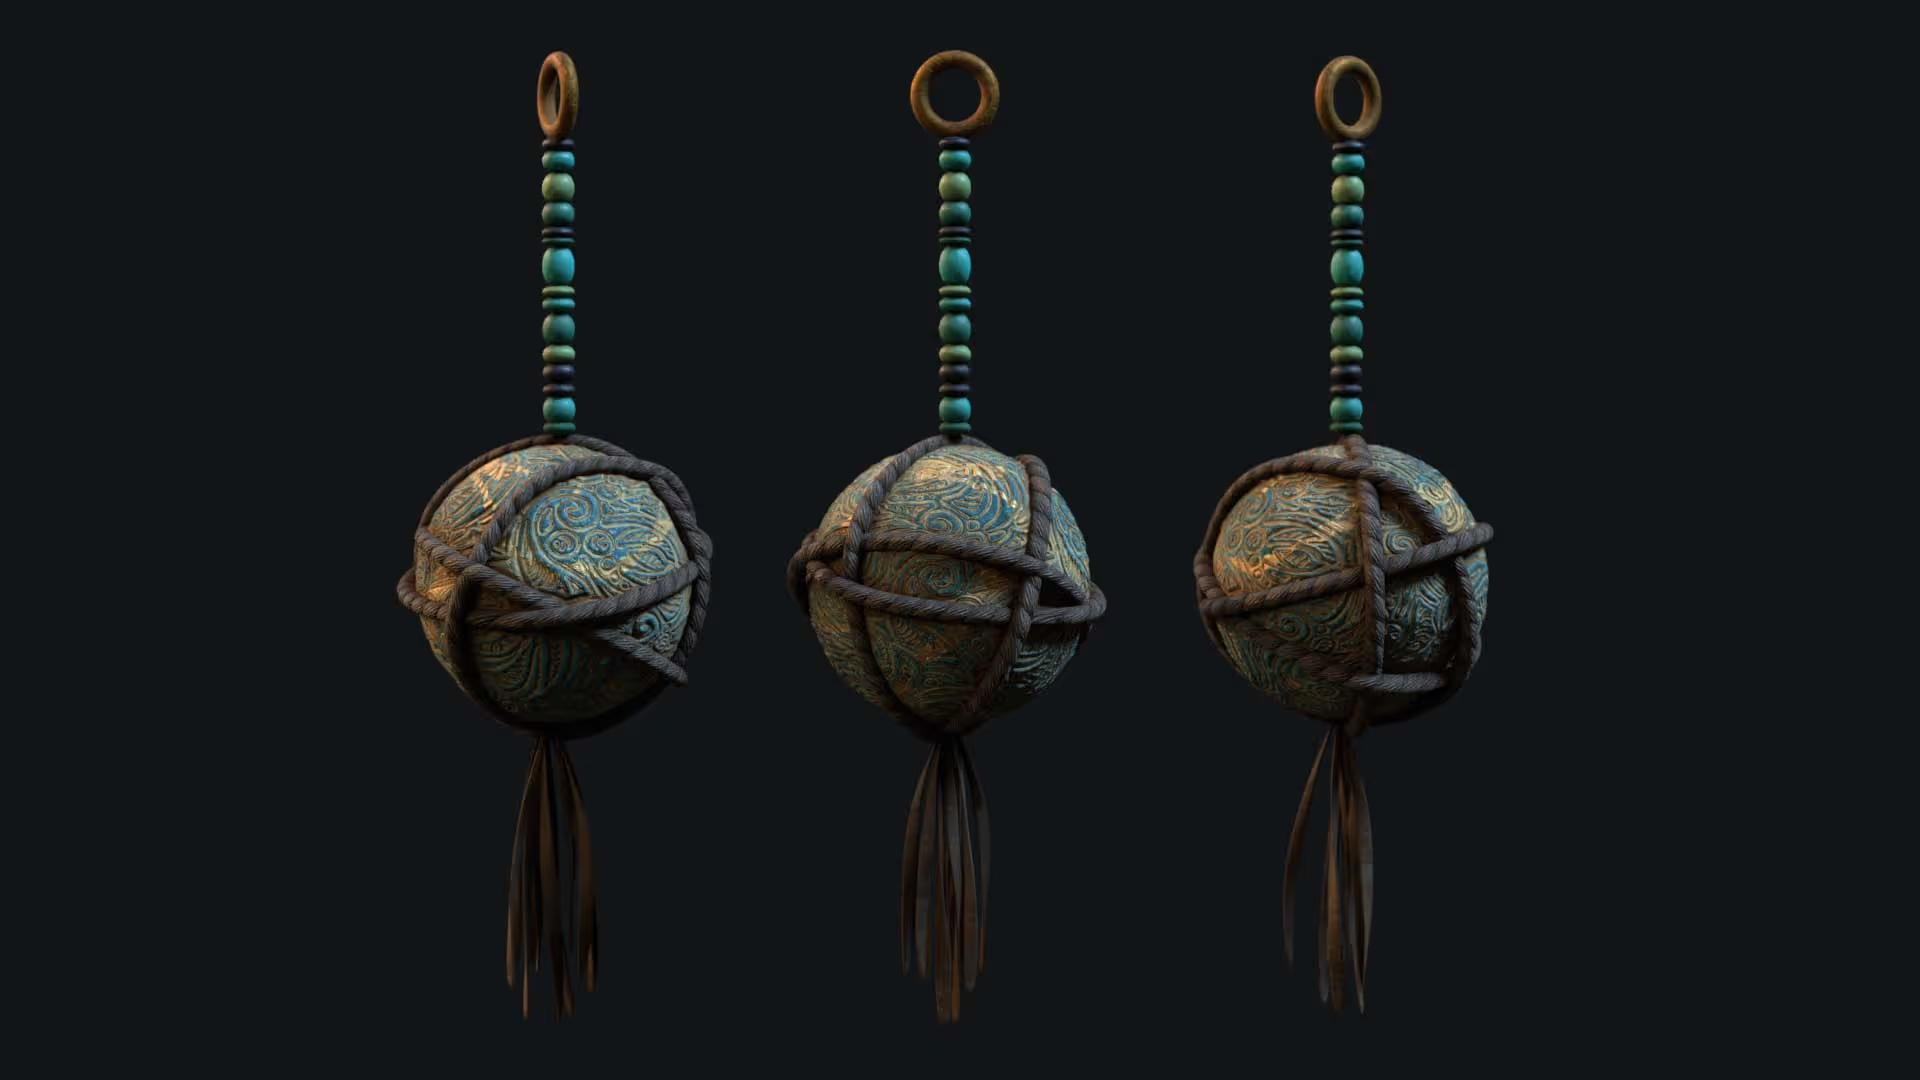
Here is the result:
Then you can just frame the mesh and use any curve brush to create the string going through the beads or use ZSpheres chains if it is something more complex.

One extra tip...
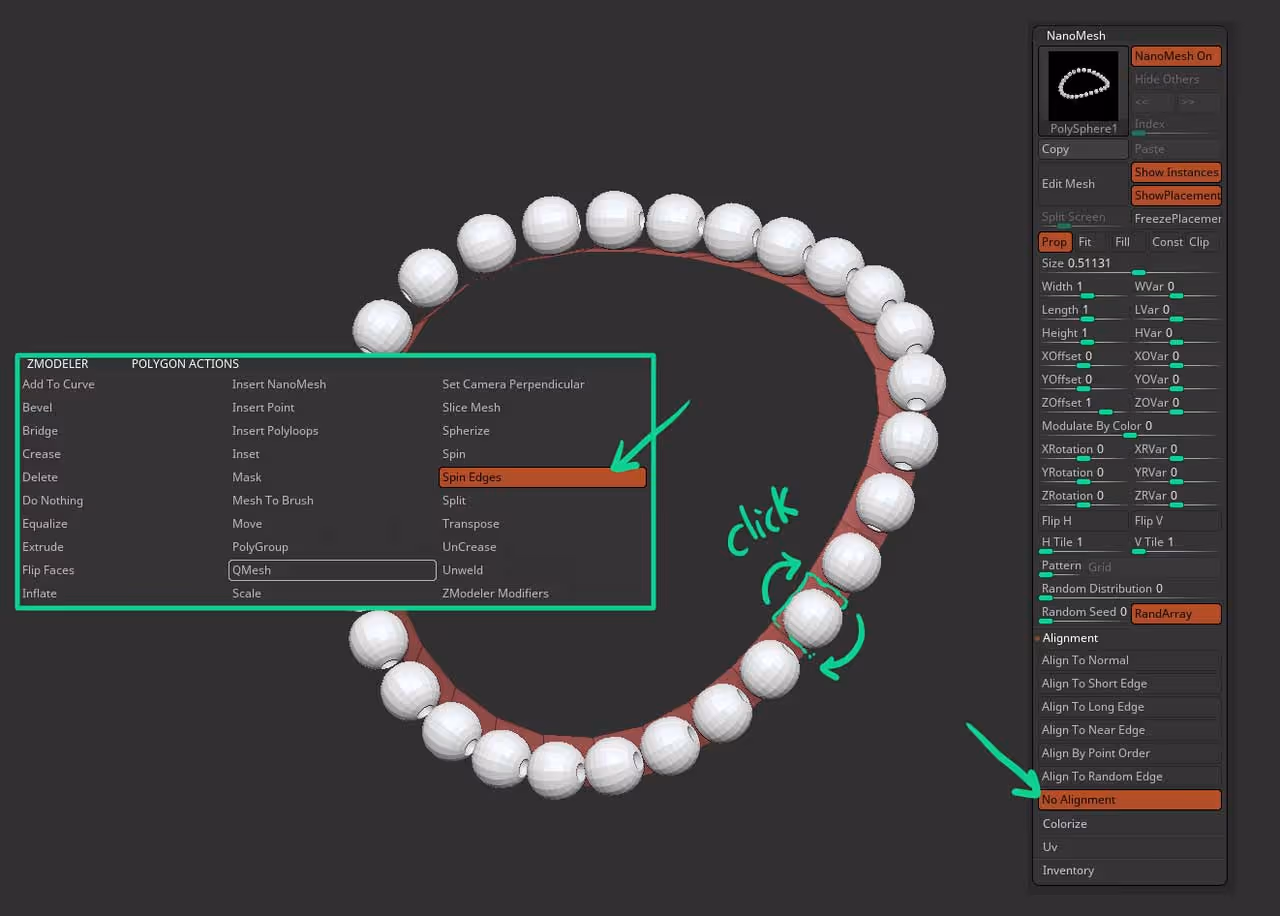
If your NanoMeshes are not all pointing in the right direction and you cannot get them to align properly, you can choose the ‘No alignment’ option and use the ZModelere brush to ‘spin the edges’ of the polygons:
That’s it!


.webp)

.webp)