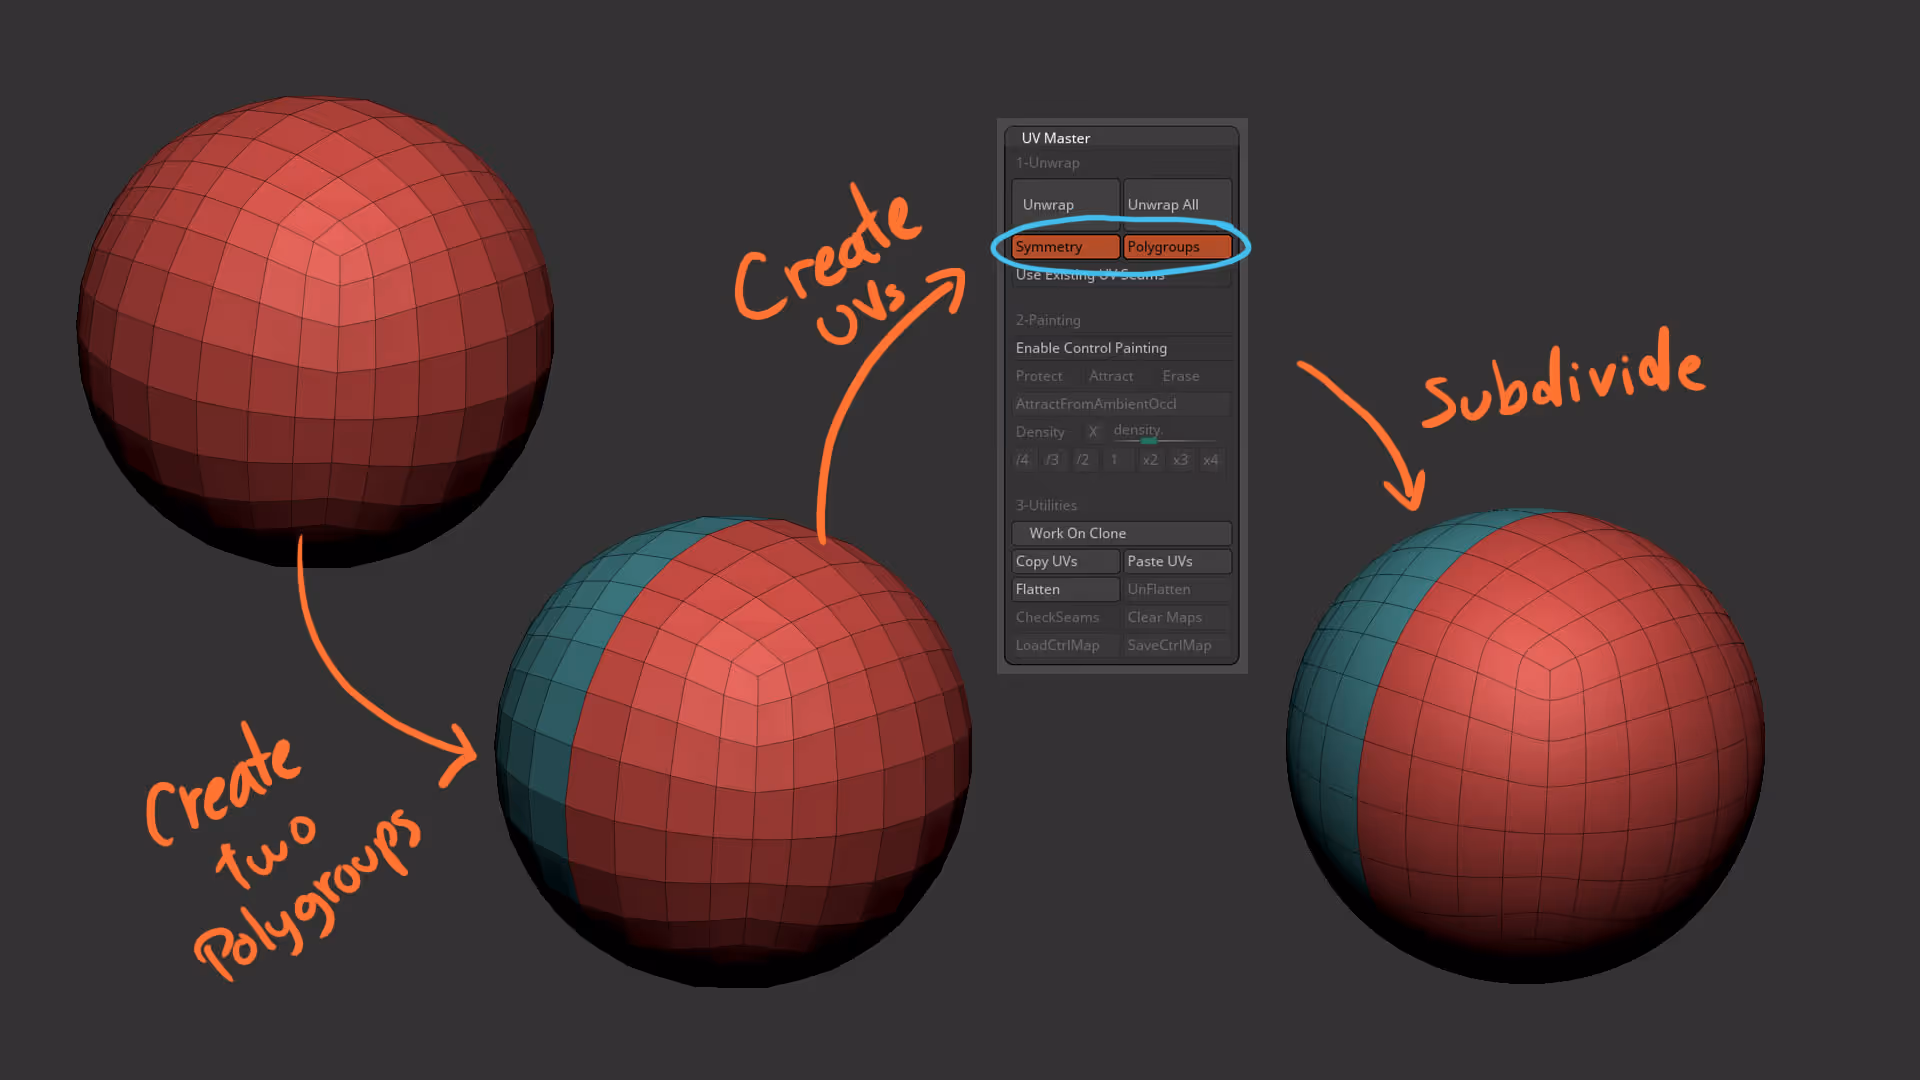
Go ahead and start with a polysphere, create two polygroups (for two halves) and use the UV master plugin to create UVs for the Sphere based on the two polygroups you created… you can also go ahead and subdivide it a few times:
The next part of this process is in Photoshop (or similar, it could even be Procreate). In Photoshop you need to create a tileable pattern, so create a 1024 x 1024 document with a black background, create a new layer and enable the Pattern Preview from the ‘view’ menu. Once it is active you can paint with white on the new layer to create something like this:
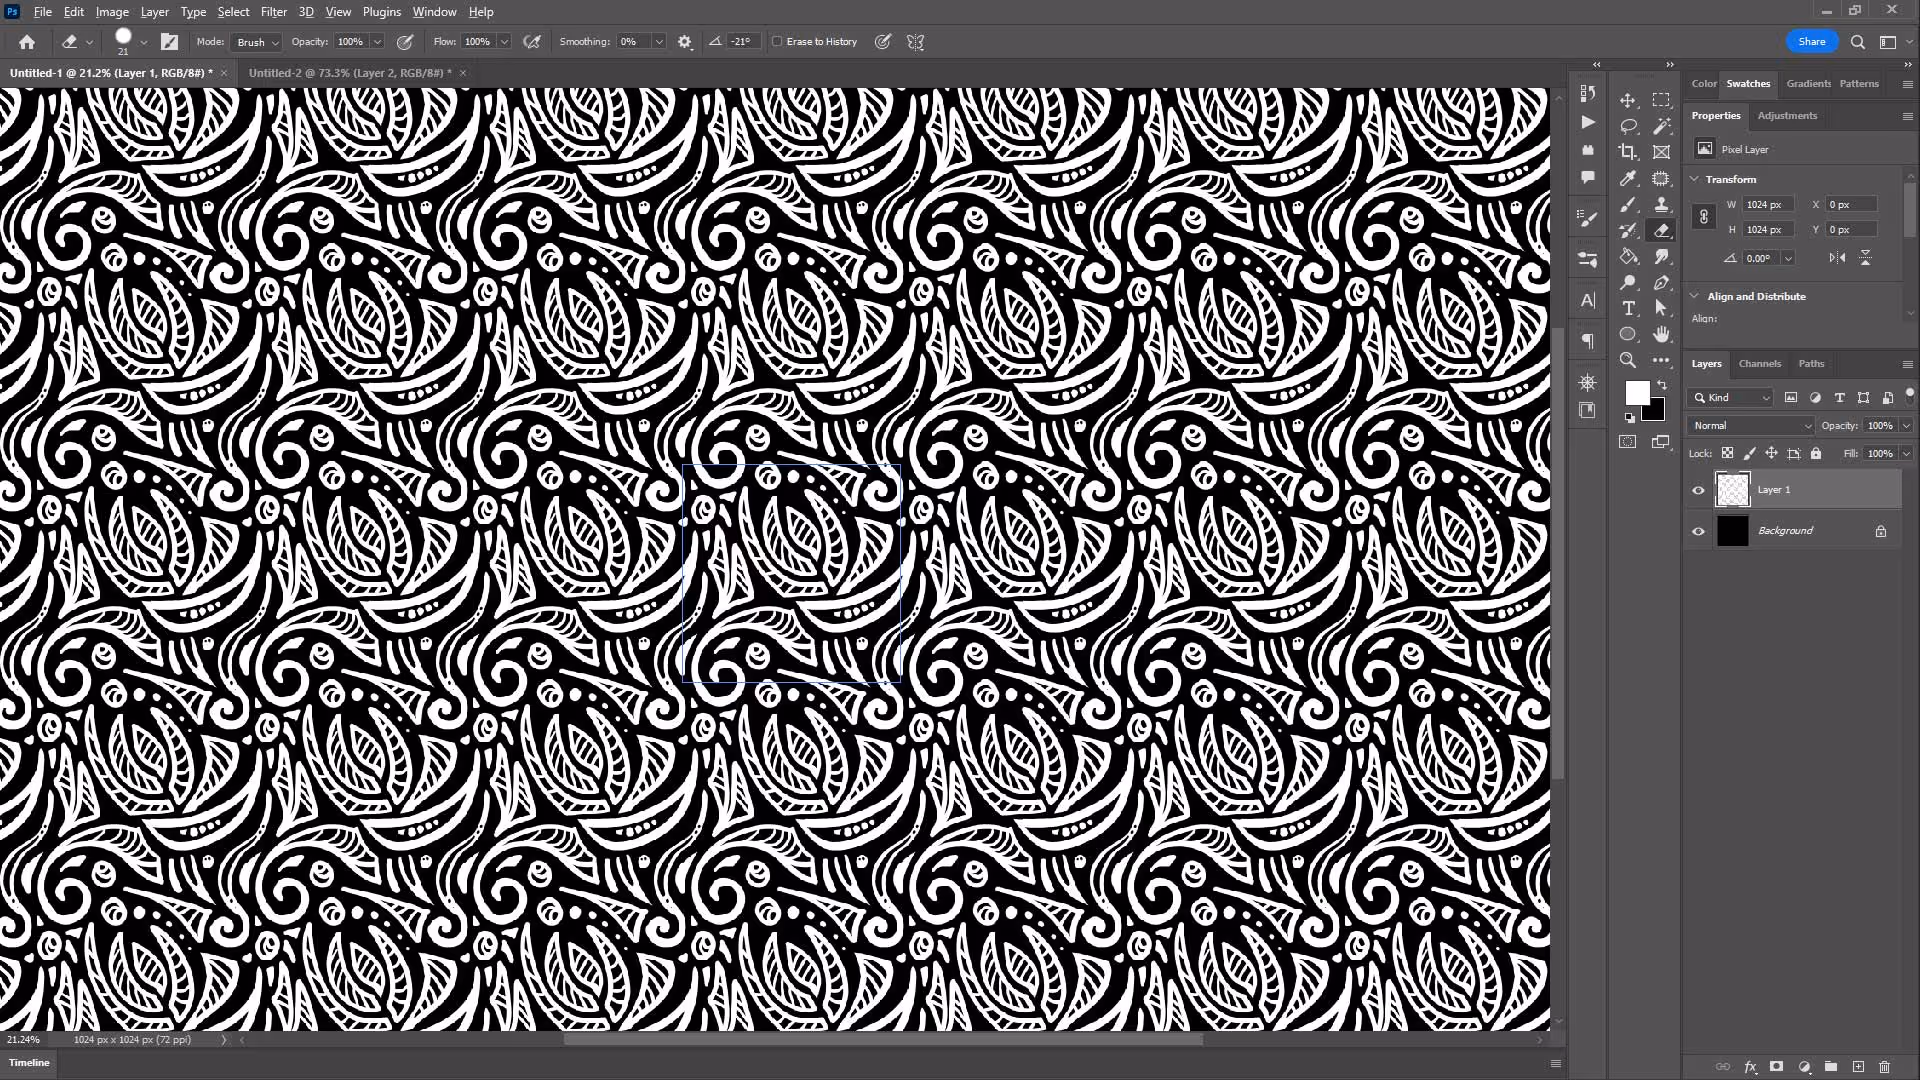
You can obviously spend a bit more time creating an interesting pattern but after you finish, go ahead and save the pattern as a JPEG image.
Back in ZBrush, with your Sphere selected in the highest subdivision level, click on the Morph UV from the UV Map subpalette to see a ‘flat view’ of the model based on the UVs we created earlier.
Then select the ‘Pattern01’ brush that comes wit ZBrush and open up the Brush palette. In the Brush palette, open the ‘surface’ subplatte and click on the ‘Edit’ button… this will bring the Noise plugin window where you can load your own pattern (clicking on the bottom left corner):
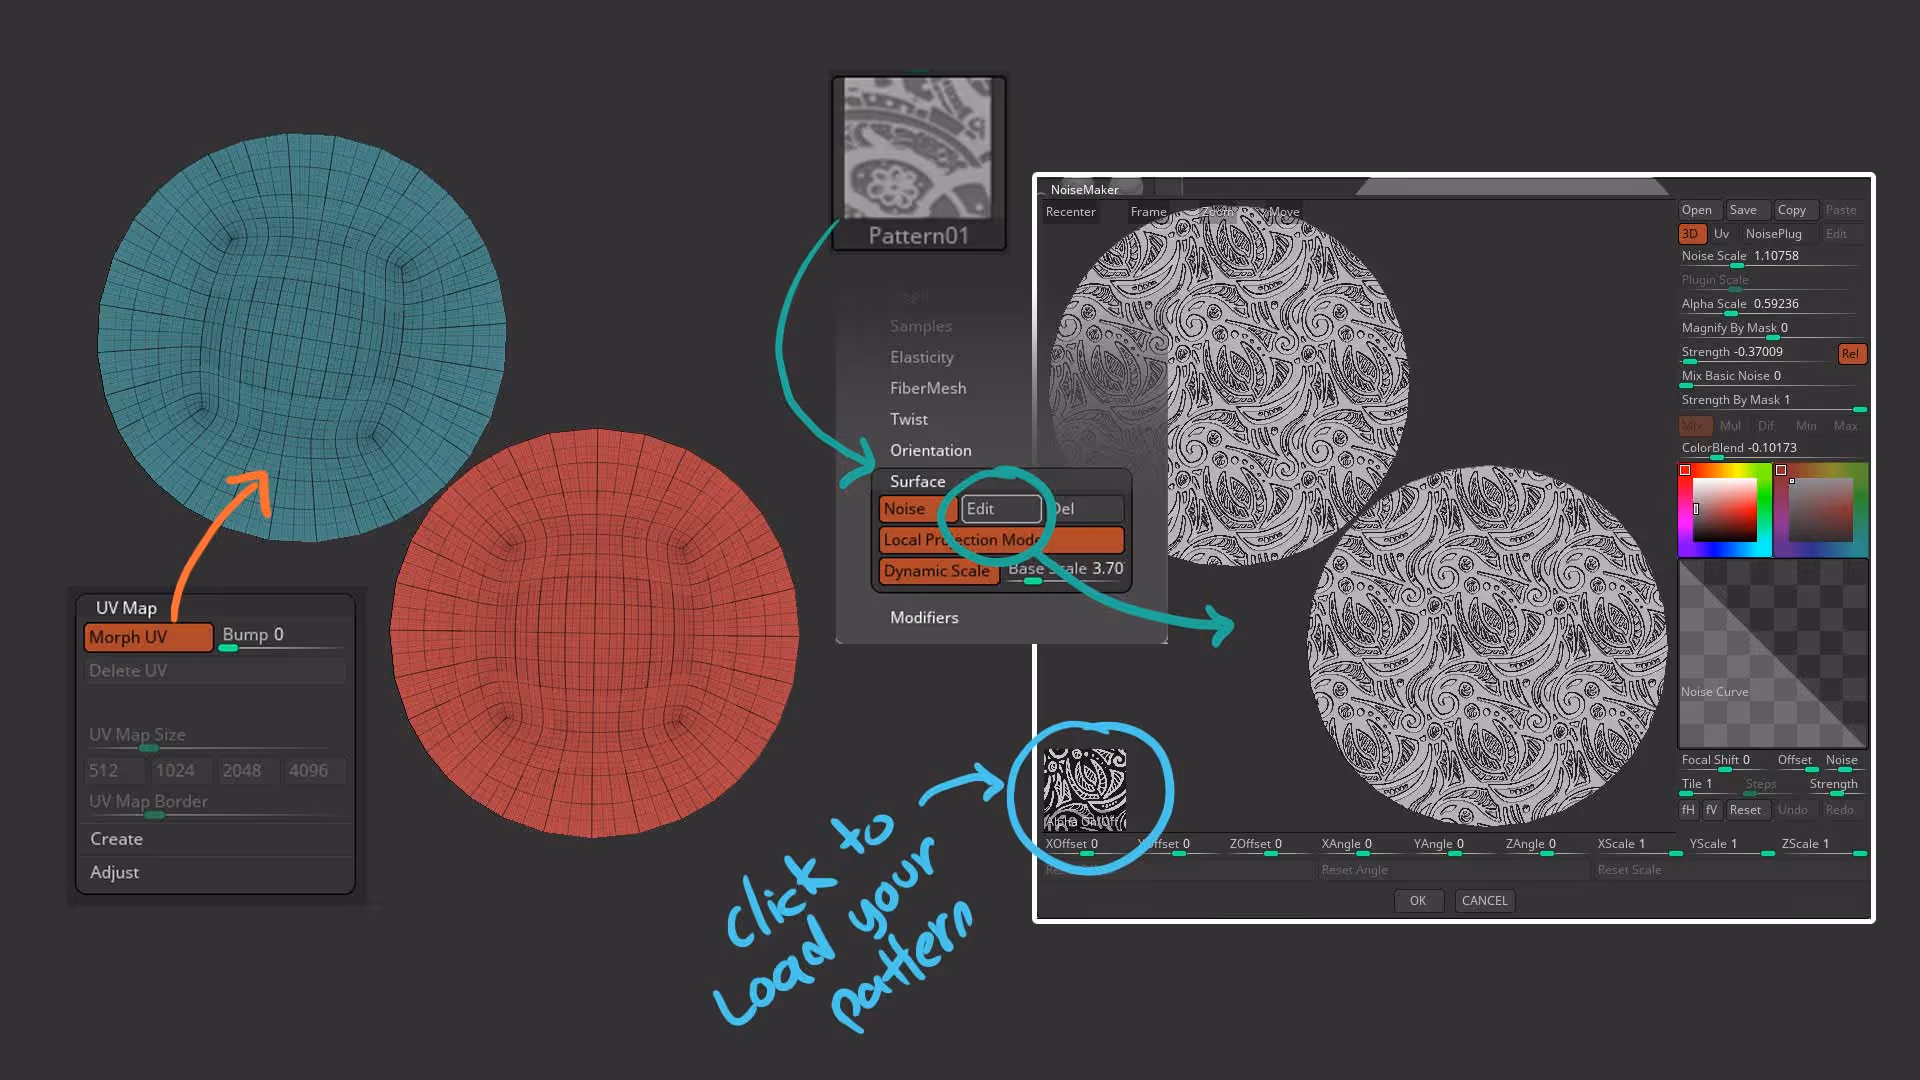
Once is loaded, you can basically ‘sculpt’ your pattern. You could achieve a similar result with just the usual Surface noise from the tool palette, but with the brush you have more control of where to place the details and also changing the size dynamically as you change the brush size itself:
after applying your pattern, you can simply click the Morph UV switch again to get back to the 3D Sphere but with a nice pattern applied to the surface.
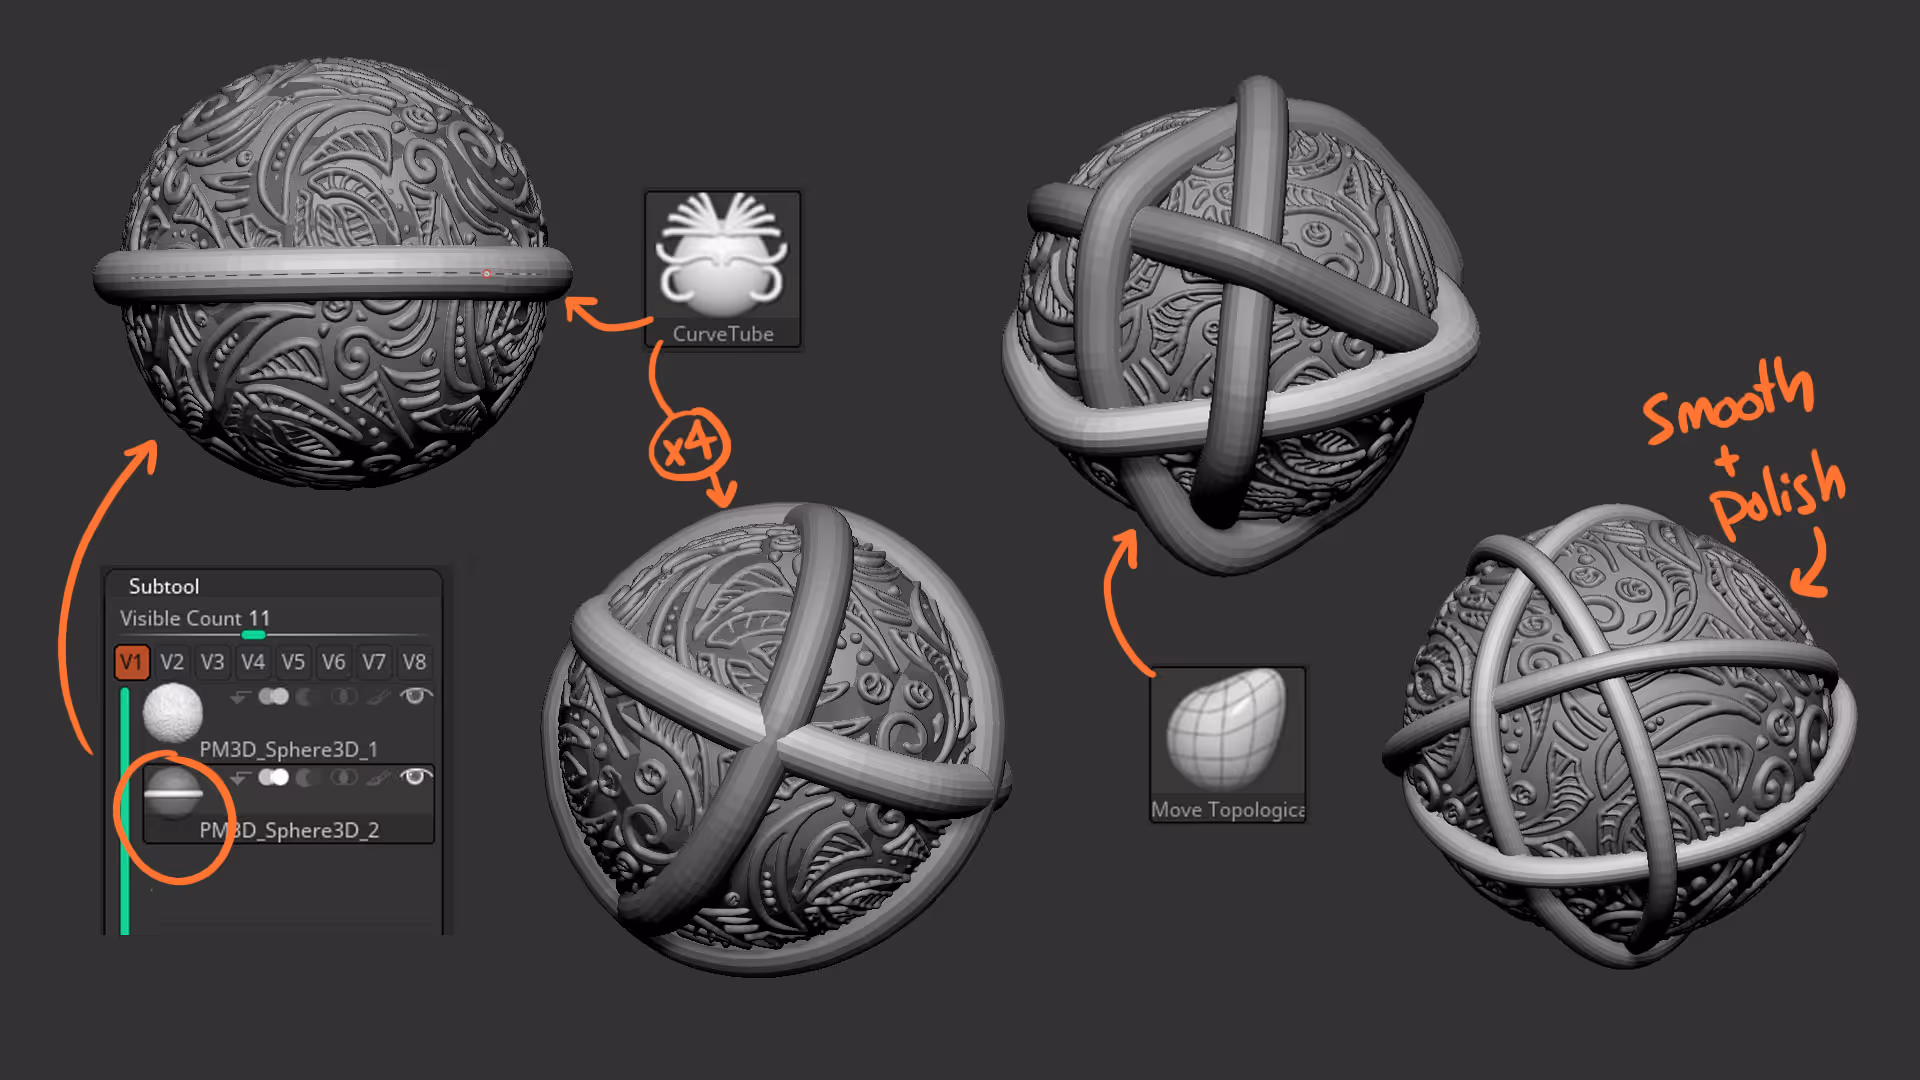
The next step is up to you, but I wanted to have some rough wraps or strings around the sphere:
First I duplicated the sphere, went to a lower subdivision level and get rid of the high and low subdivision levels, this is so that I can use insert or curve brushes. Then with the curve tubes brush I create 4 wraps around the sphere… if you want to ‘wrap’ a tube around the sphere you need to switch the ‘Cont Z’ from the ‘Picker’ palette and then click the sphere to start creating the tube and hold the shift key as you drag out of the sphere.
I also split all the ‘wraps’ and used the Move Topological brush to adjust the intersection.
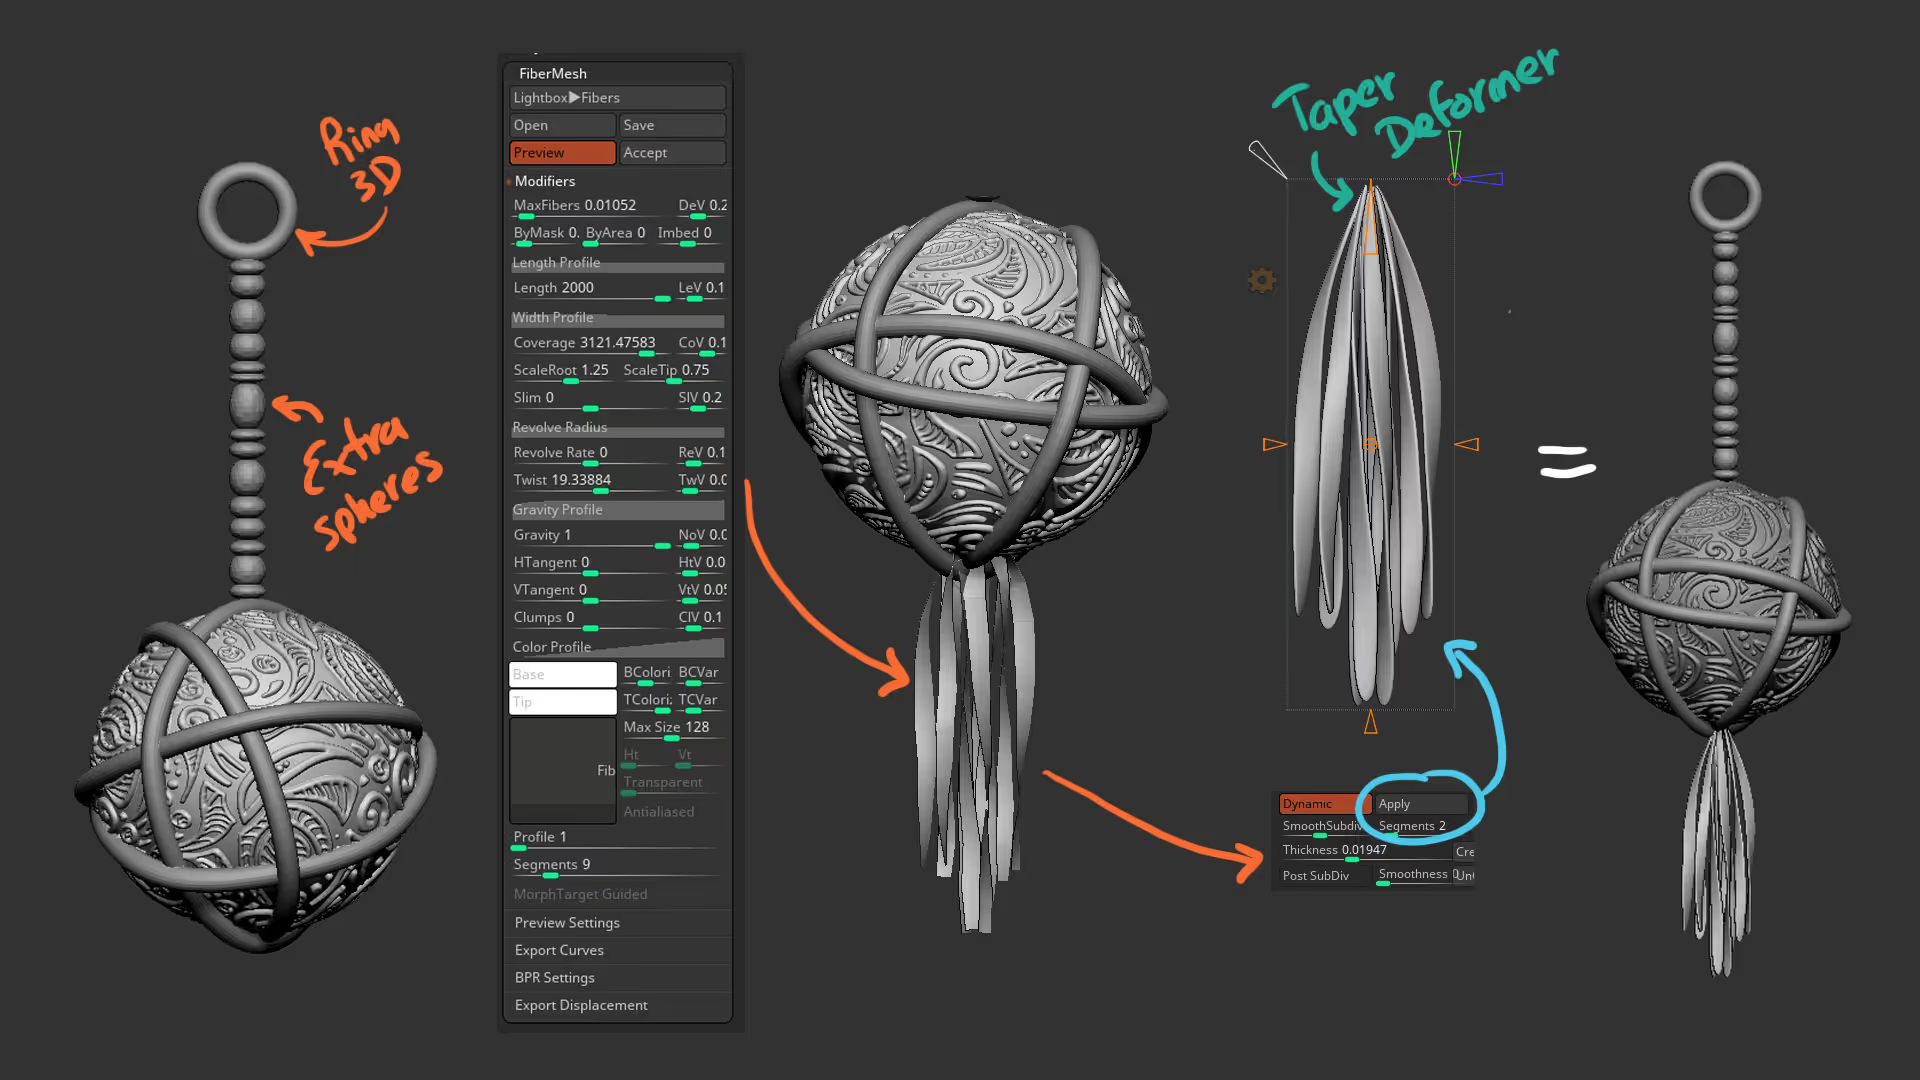
To wrap up this little asset in ZBrush, I inserted a bunch of tiny spheres and squash them vertically at different ratios to create the ‘beads’ and added a 3D ring for the top.
I also masked the bottom of the sphere and created some flat and wide FiberMesh objects to simulate some hanging threads or parts of the wraps. I then added a Dynamic subdivision to the FiberMesh object with thickness, apply the Dynamic subdivision and used the Taper deformed from the gizmo to bring the top section closer together:
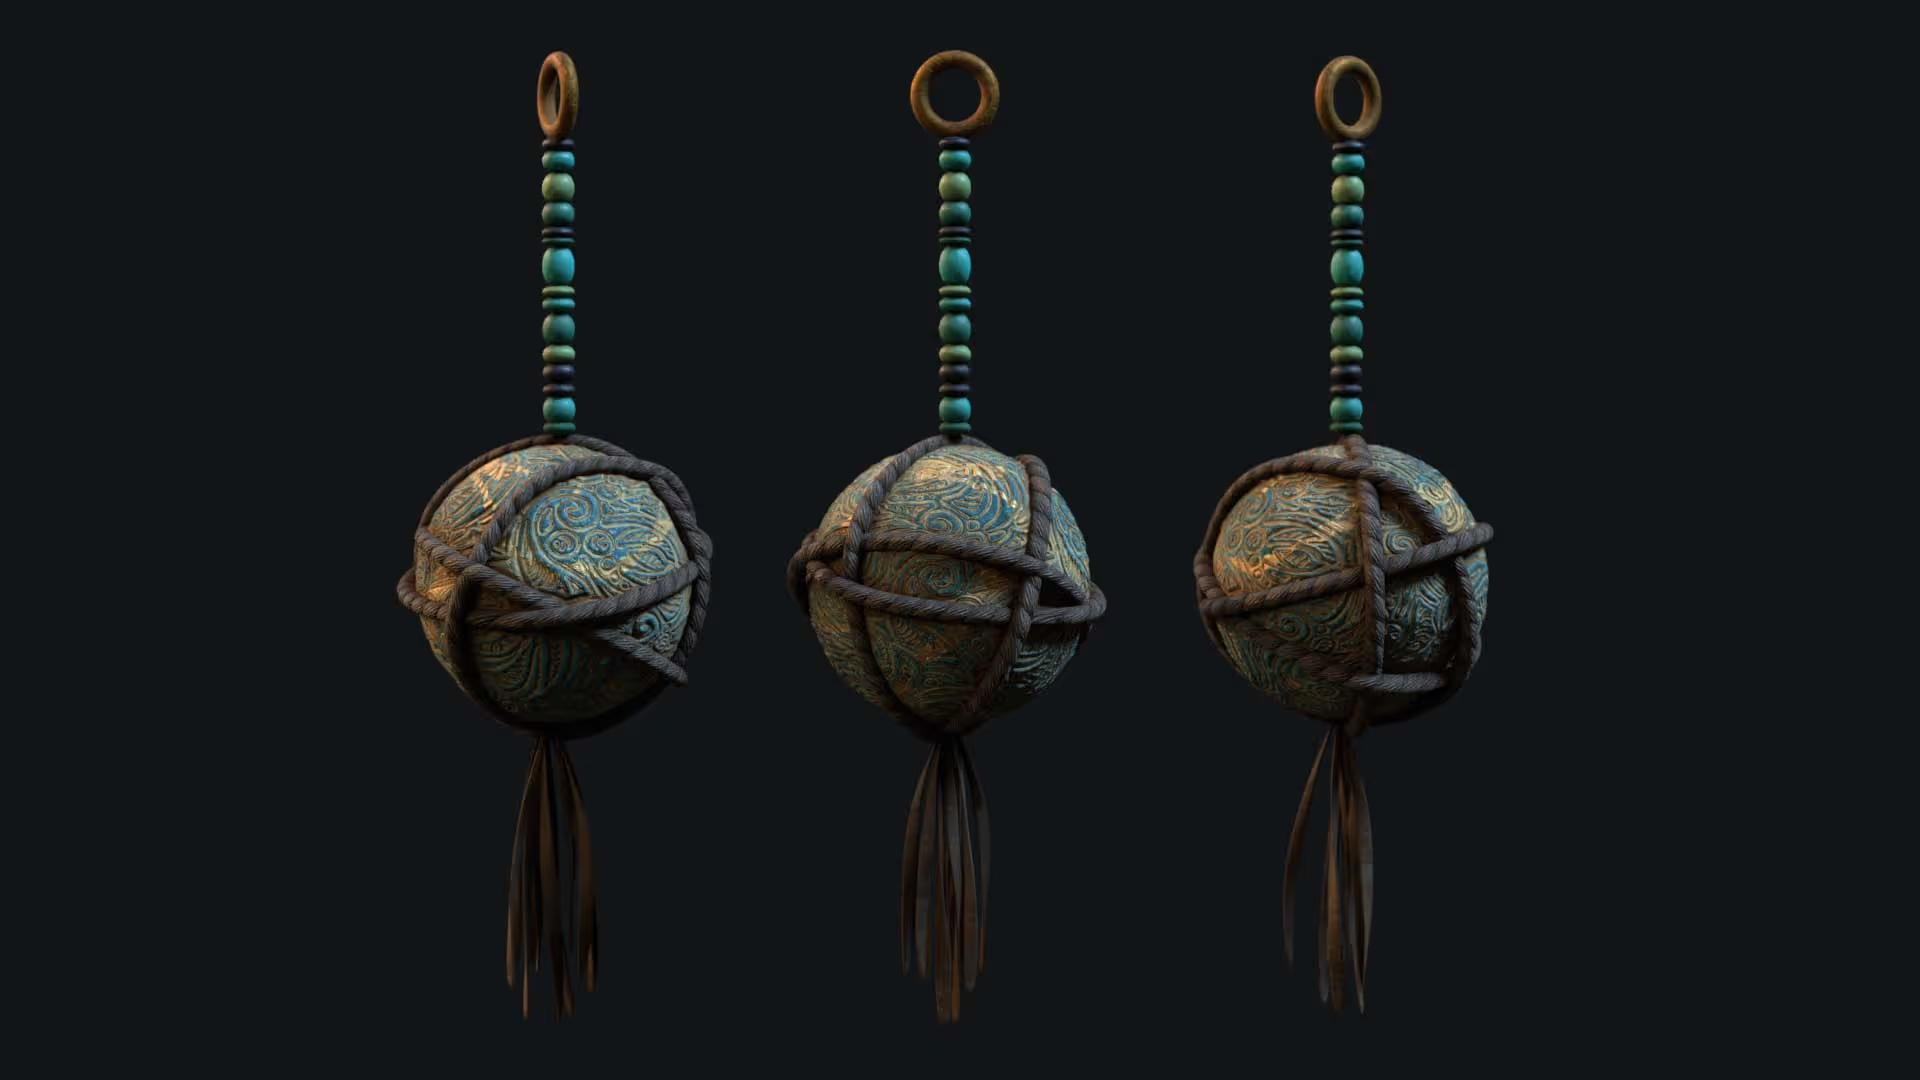
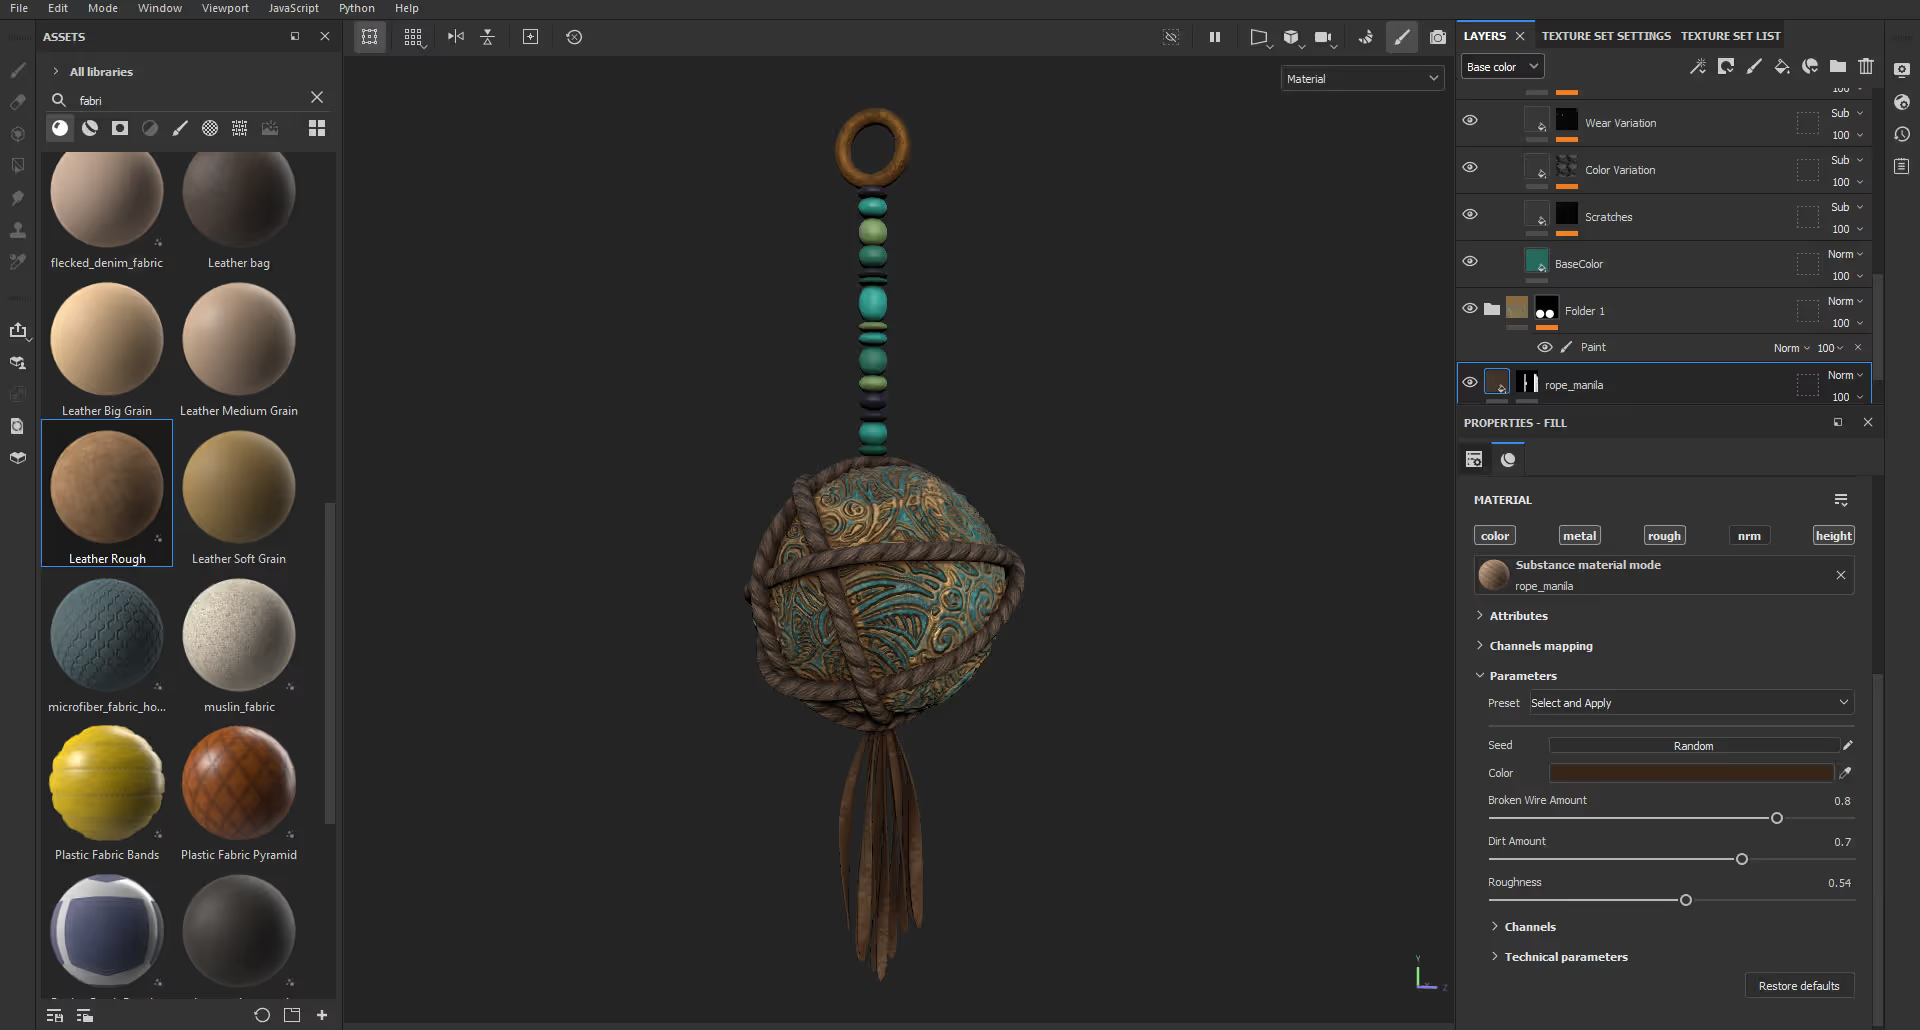
That’s about it and just for fun I exported this to 3D Painter and added a few textures to ‘make it look cool for the shot’:


.webp)

.webp)