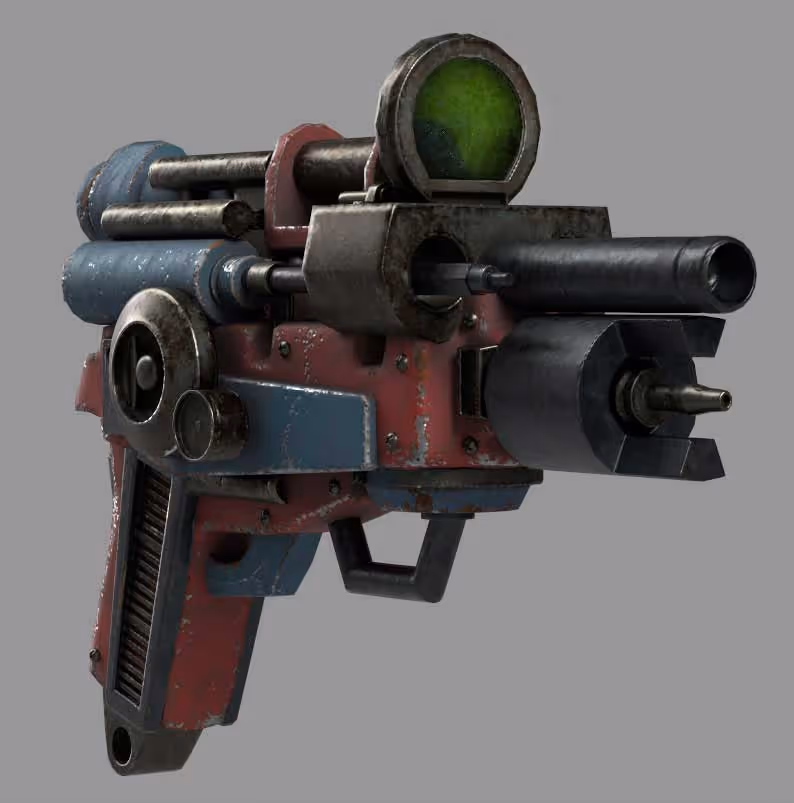
There isn’t really any complicated technique or even much ‘design’ to be honest… I just started with a very basic shape created with the ZModeler and then used various IMM brushes (mainly the ‘IMM ModelKit’ that comes with ZBrush) to kitbash some more objects around the base to create the gun:
So yeah… nothing too fancy. After moving and scaling pieces around this is what I ended up with:
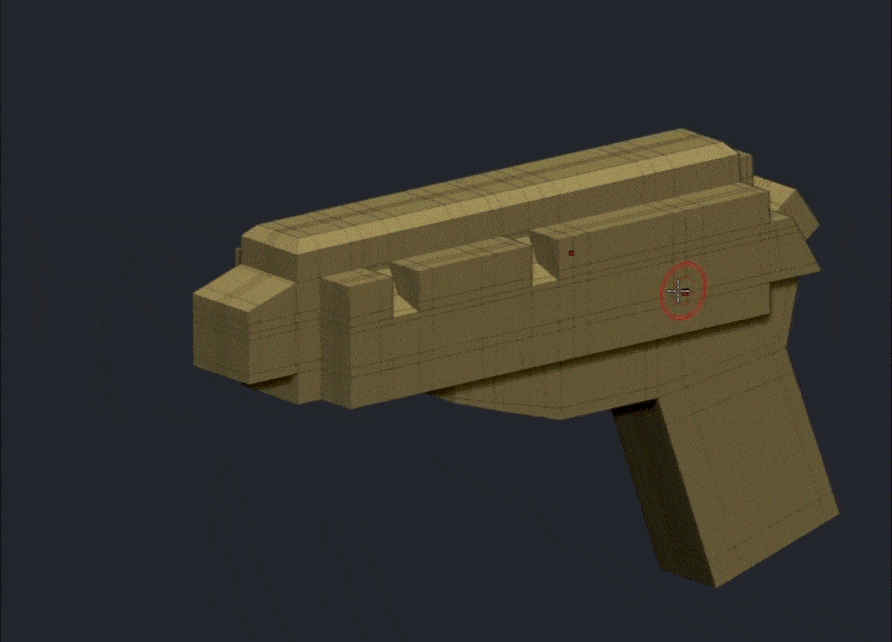
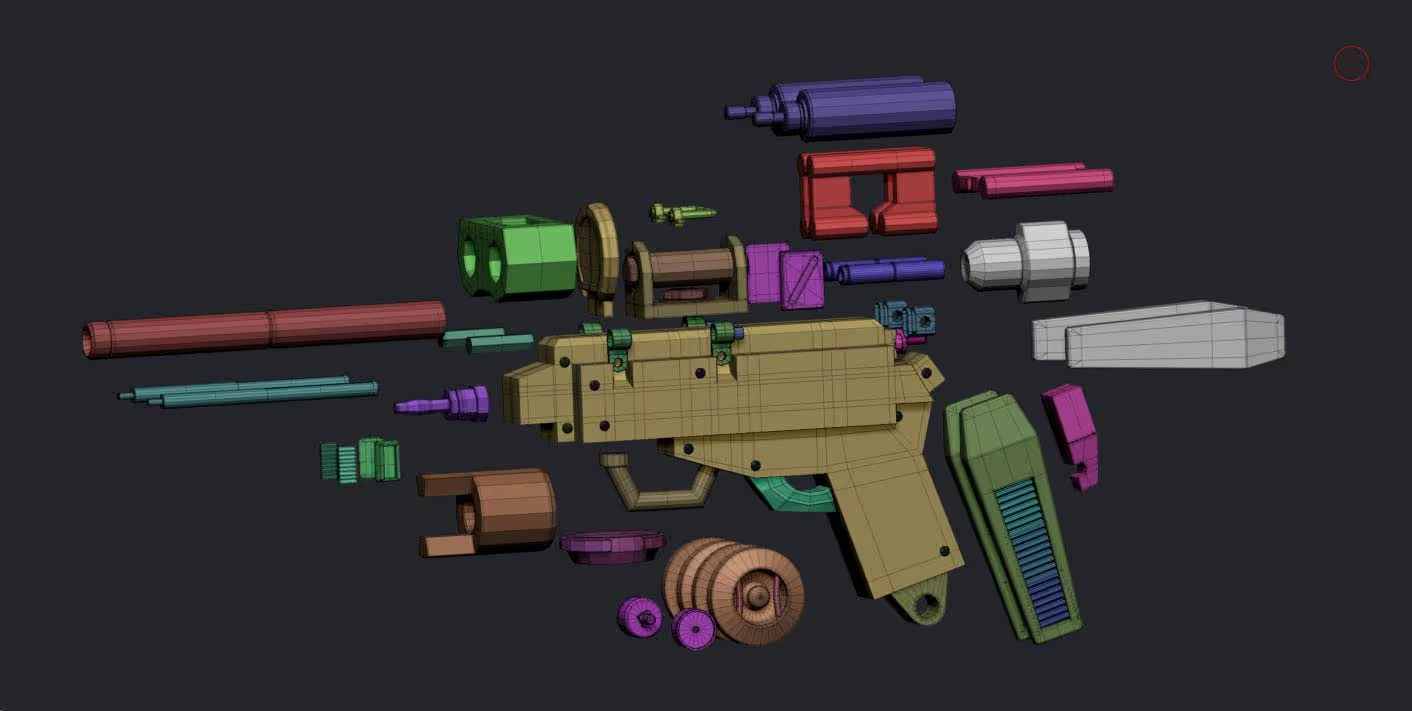
And I didn’t use that many pieces either:
I opted for a simple model with lots of small pieces to test out a free tool called UV-Packer. It’s a straightforward app that helps you to improve the arrangement or ‘packing’ of UV islands, but keep in mind, it only works with existing UVs… it doesn’t handle unwrapping meshes.
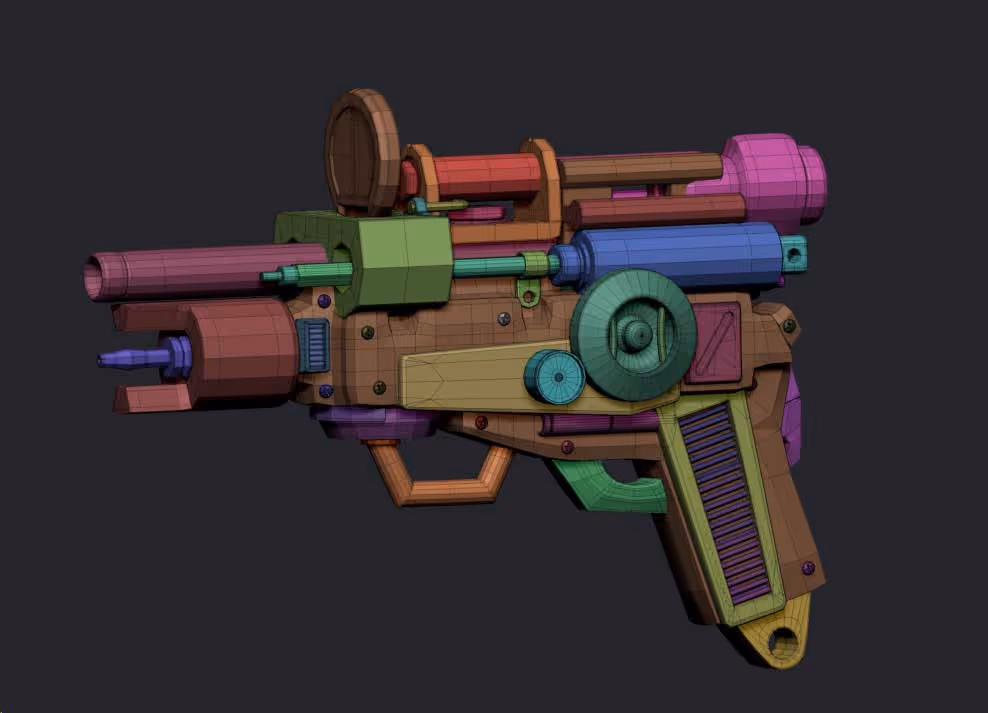
In ZBrush, I used the various polygroups created with the insert mesh process to create UVs with the UV Master plugin (found in the ZPlugin palette). By clicking the Unwrap button:
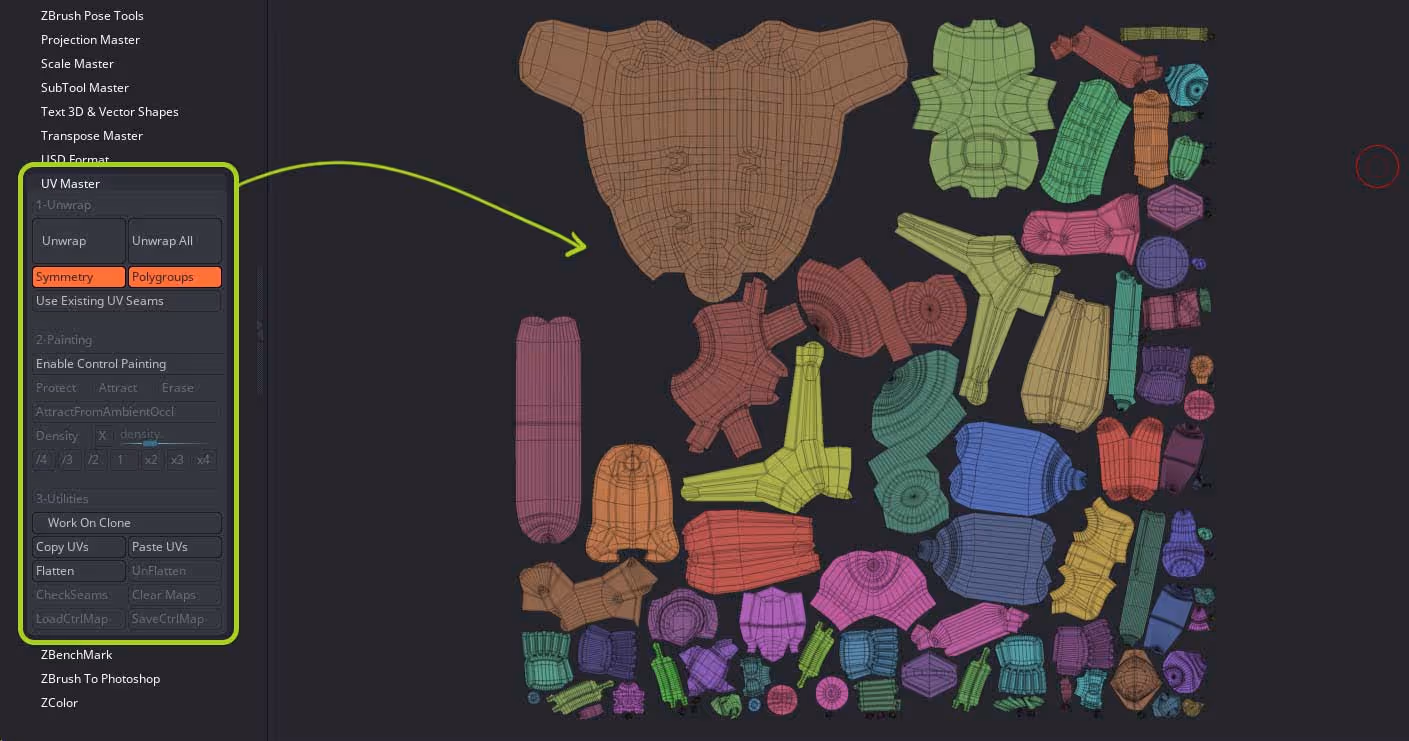
To be fair, the UV Master from ZBrush does a pretty good job optimizing the space and arranging the UV islands but the layout could be improved… this is where UV-Packer comes into play.
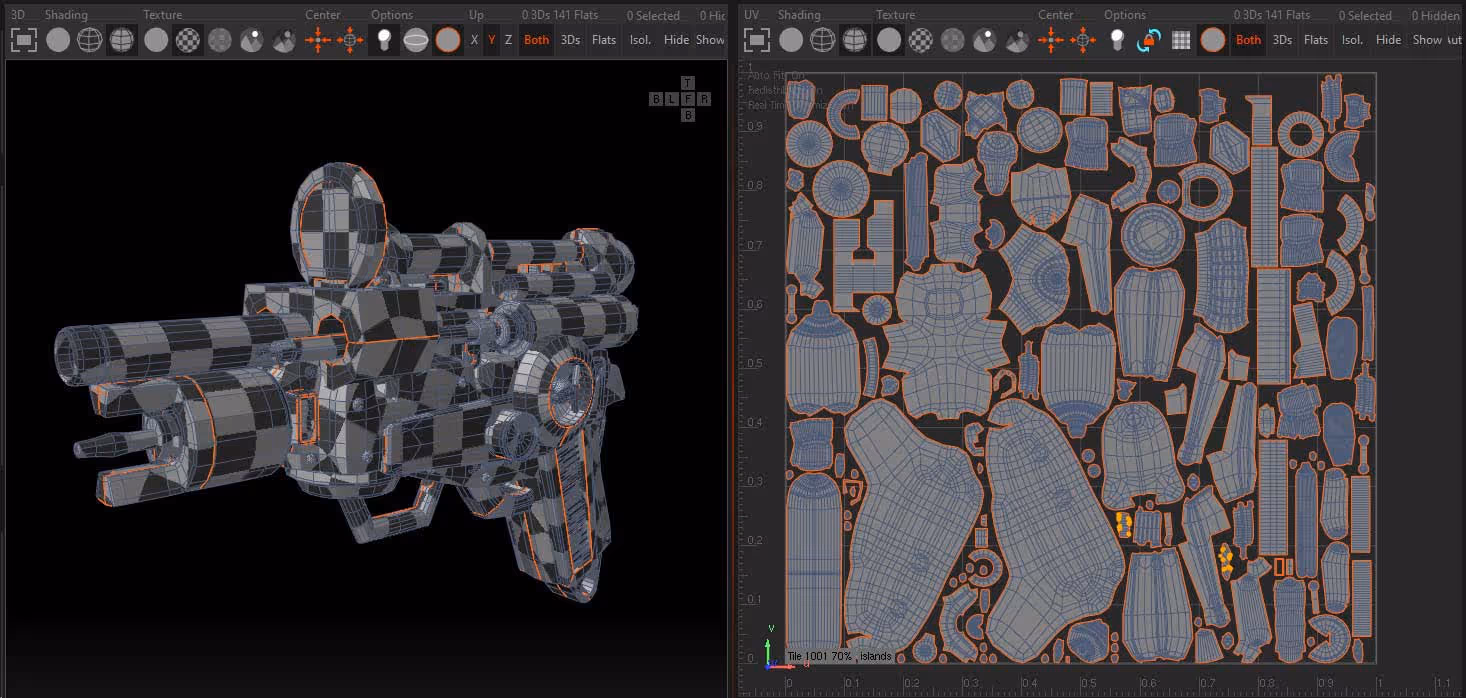
I exported the asset as an FBX file with the UVs generated from the UV Master and drag and dropped it into the UV-Packer app:
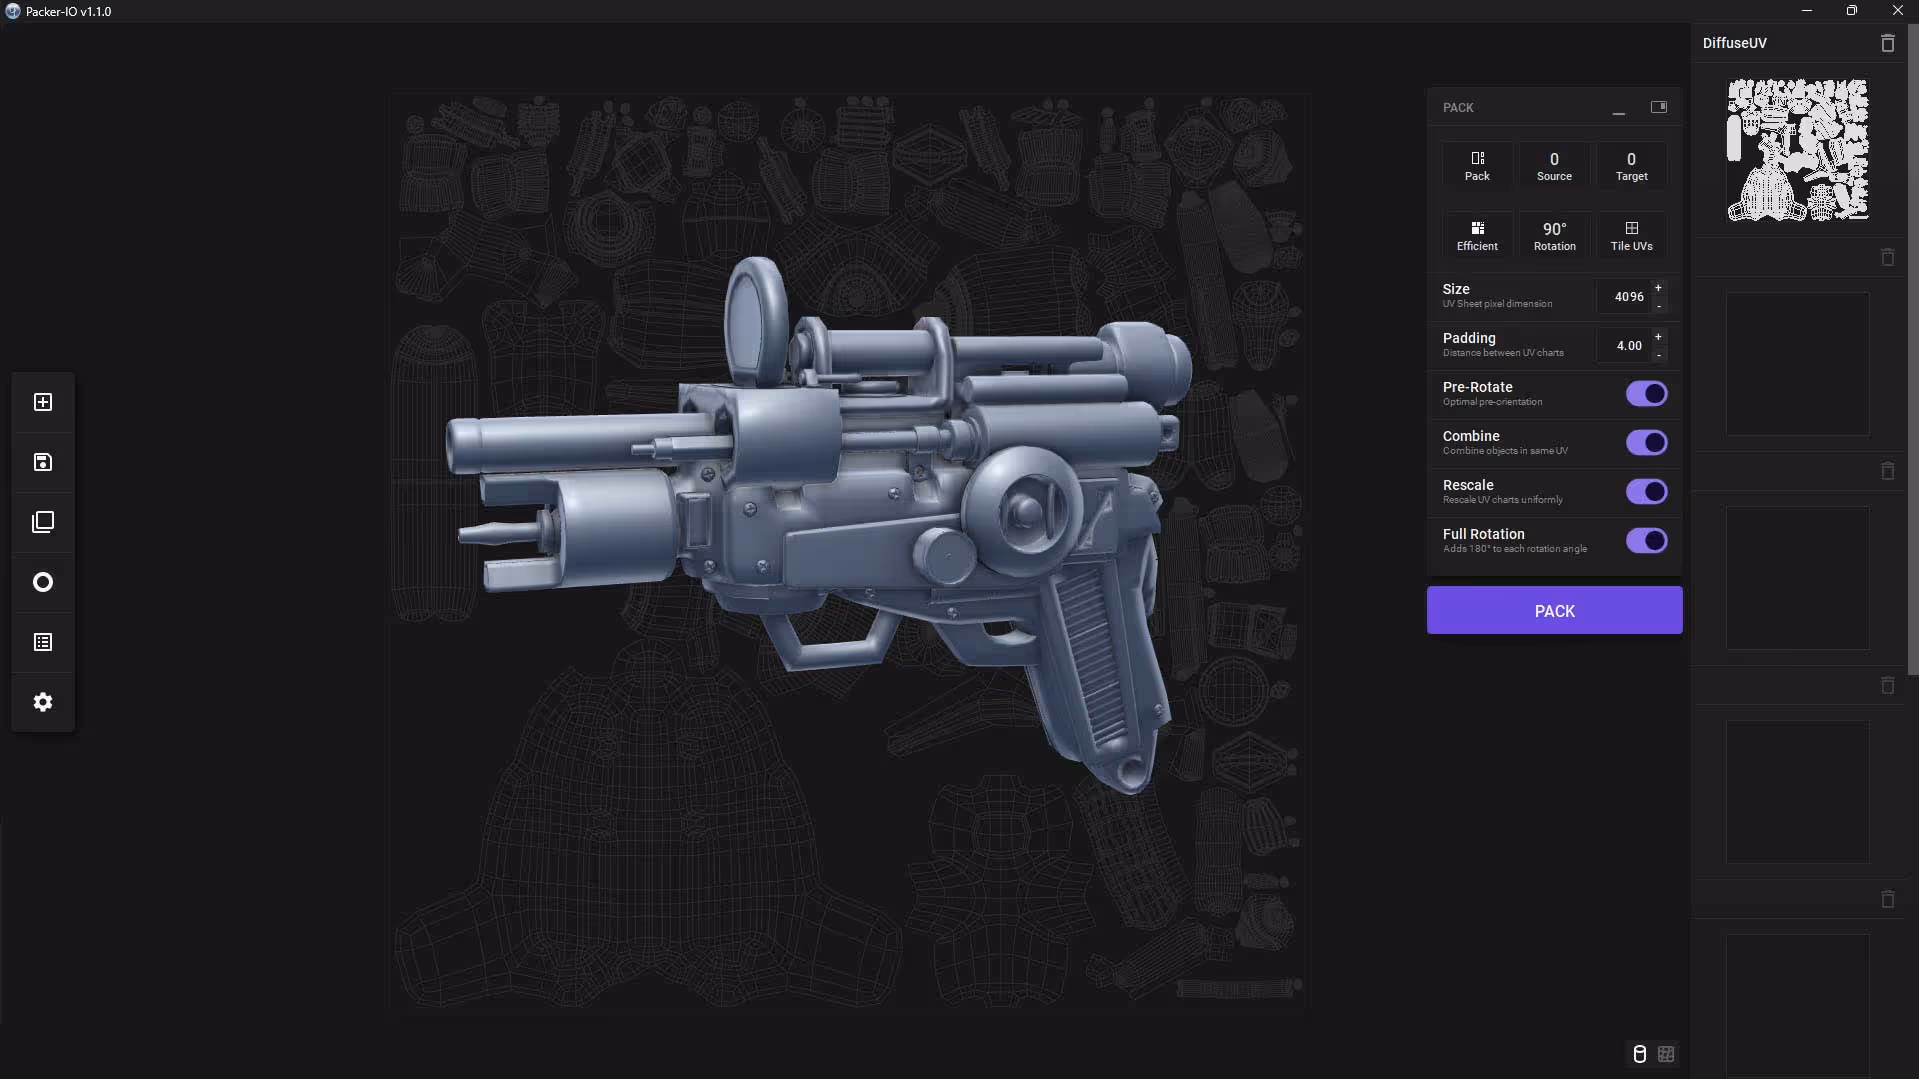
There is really not much to explain about the UI or the app itself… it is very simple and intuitive and all you want to do is click on the ‘pack’ button. You can change things like the rotation and a few other things to see what other results you can get.
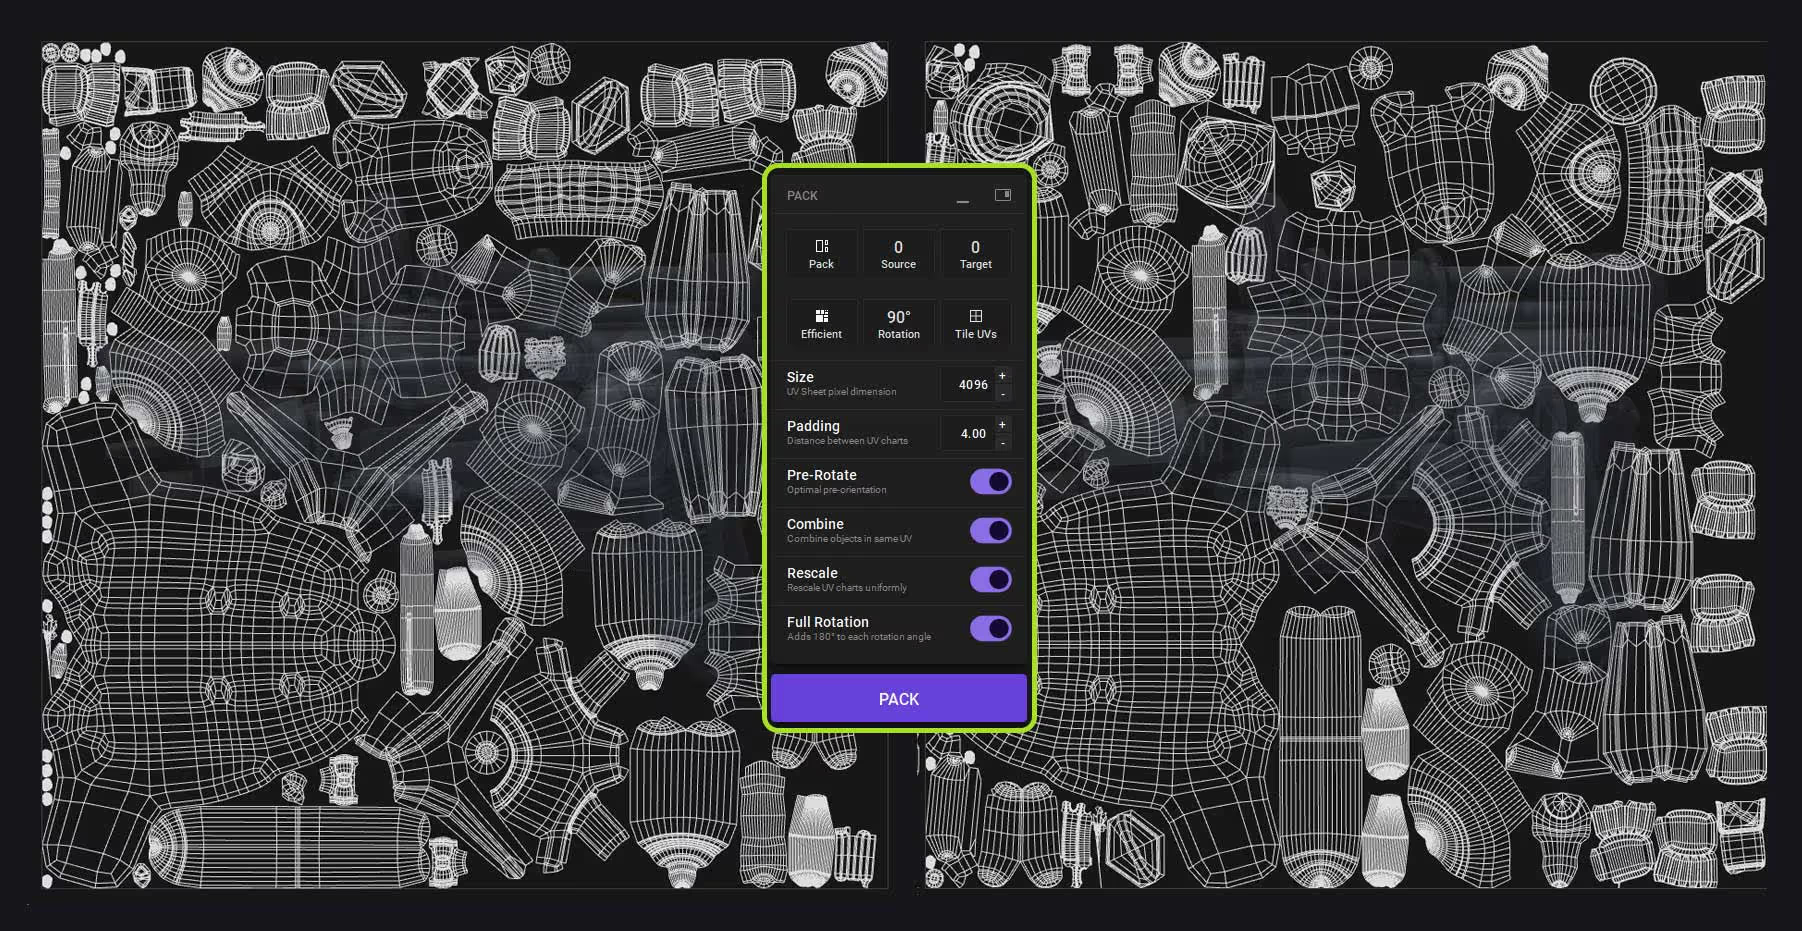
Every time you click on ‘pack’ you can generate a different layout that has a much more optimised used of the space. Here are a couple of examples after clicking the ‘pack’ button a few times:
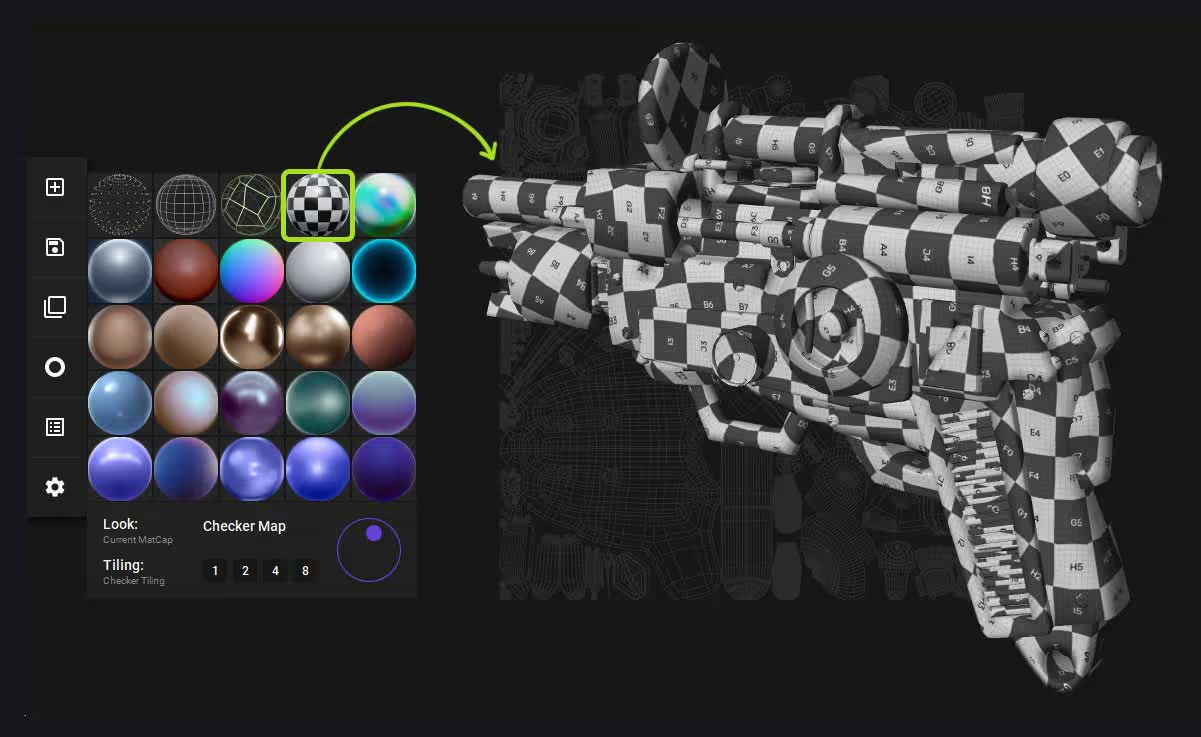
The app itself has other cool little features to check UVs that you might be interested in… so for instance clicking on the ‘circle icon’ on the left you can select a different material to apply on the model and even combine it with other stuff like the wireframe or the ‘cuts’ or ‘seams’ view:
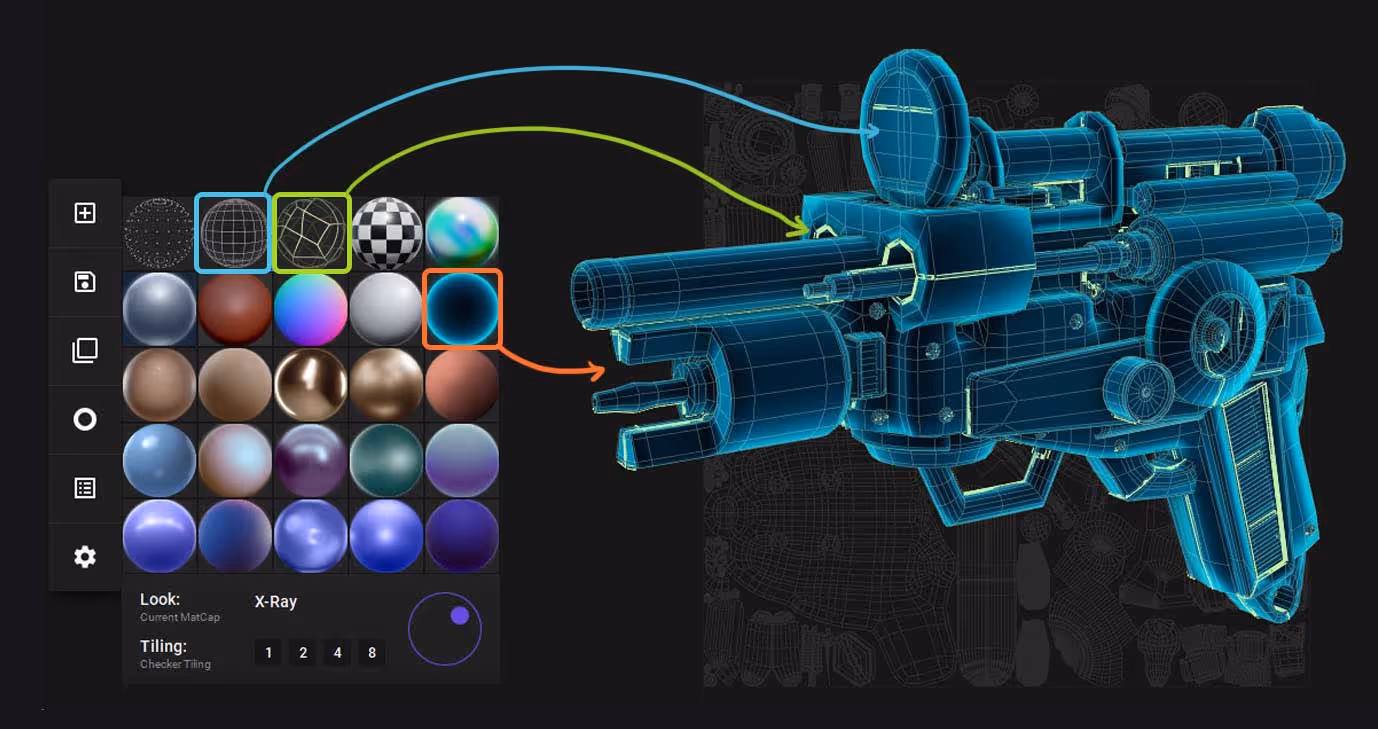
I also find the fourth material in the list quite handy to check the UVs for stretching:
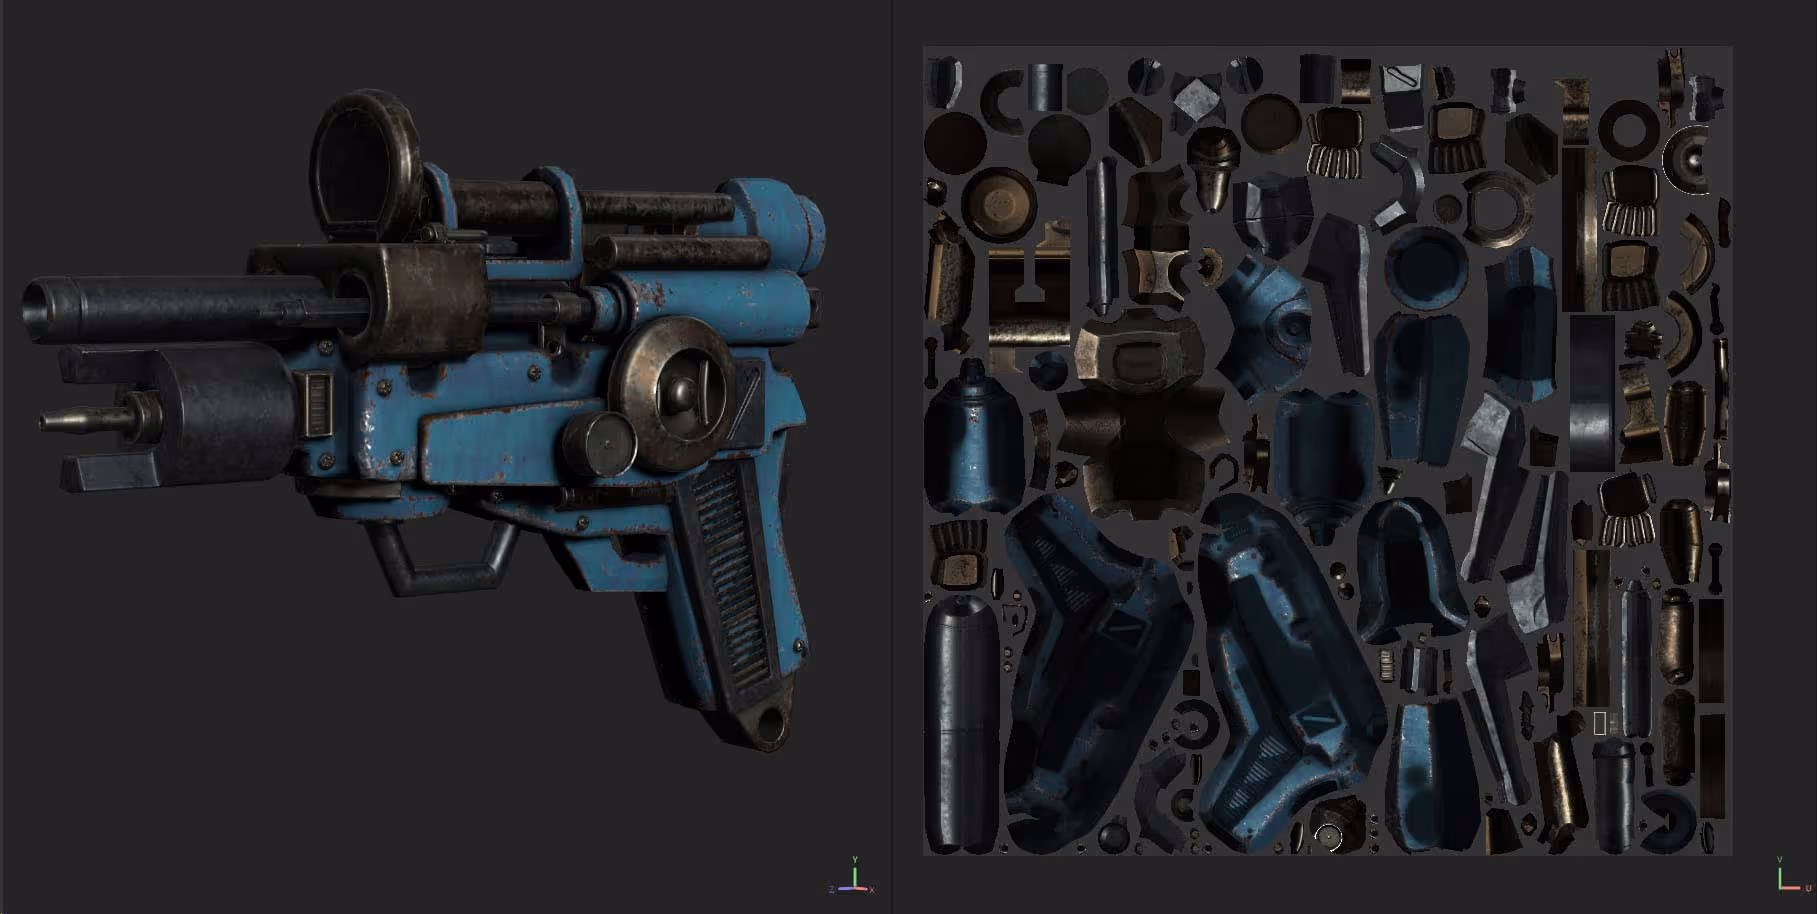
That is about it really… you can then export the file with the newly packed UVs and continue from there. In fact there is a Blender plugin for UV-Packer that allows you to do the unwrapping in Blender and take advantage of the algorithm for UV-Packer to pack your UV islands. Here is a link to the plugin for Blender.
Also, because I know this is a subtle thing to notice, here is a side-by-side comparison between the result of the UV Master and what UV-Packer did to optimise the space with the same UV islands:
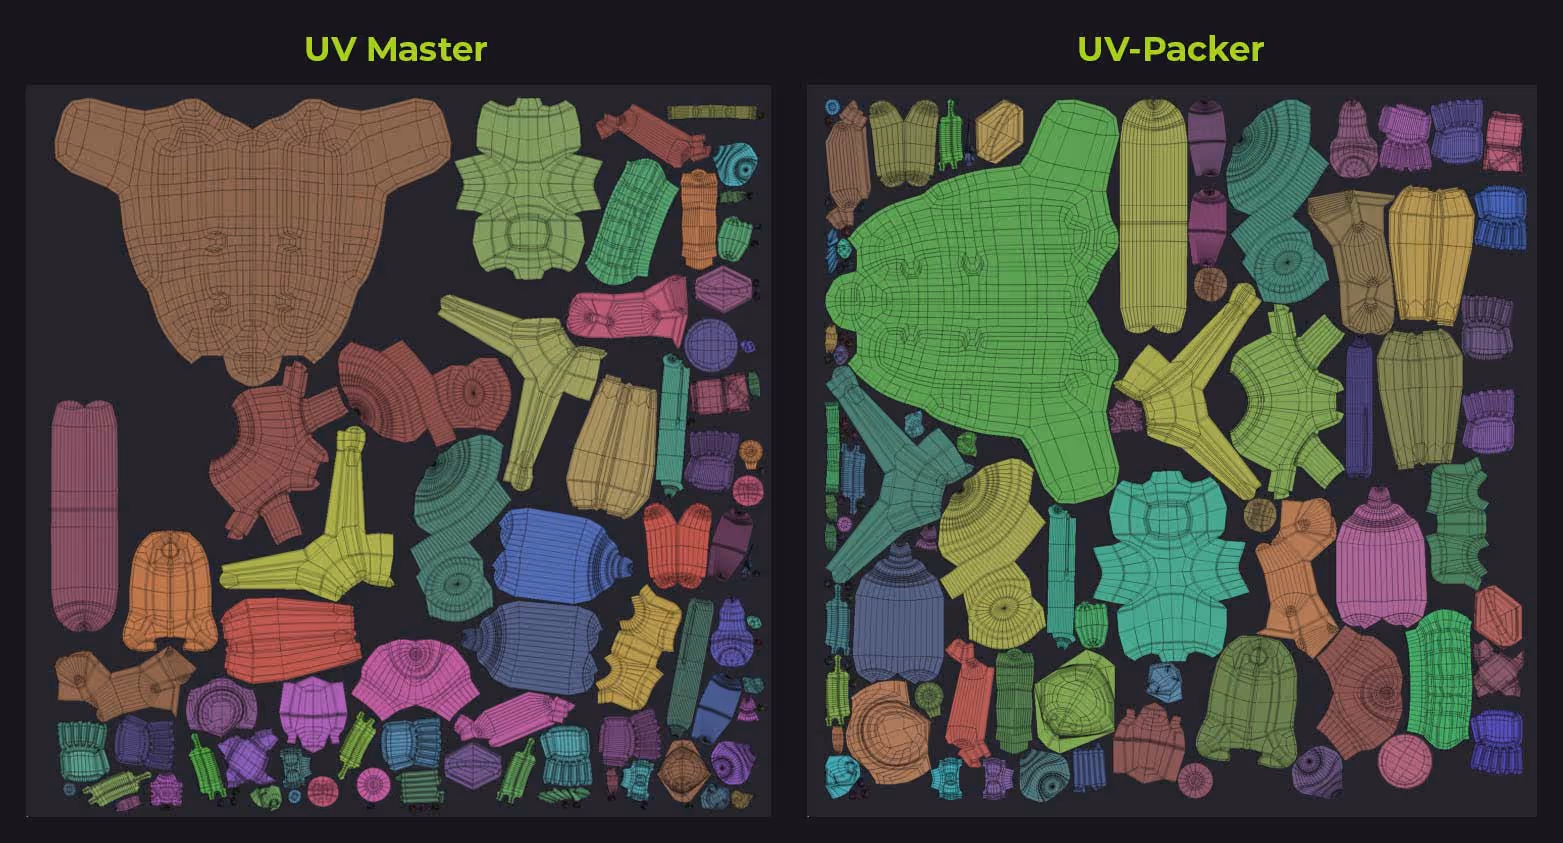
I think it is really good… almost as efficient and optimised as what you could get from Rizom UV (a dedicated tool for UV unwrapping and packing that I use):
And finally… the purpose or the reason you might want to have more optimised UVs is so that the Texturing process is easier and you can ‘pack’ more pixels and more texture information in your asset with.
In most cases the difference will be hard to spot but if you are trying to create something for games and you have a limited budget of the size and resolution of maps you can use, every single area in the UV space matter!
Hope you find this tip useful and do check out the Blender Addon, it definitely can improve your UV unwrapping and packing processes ;)


.webp)

.webp)