
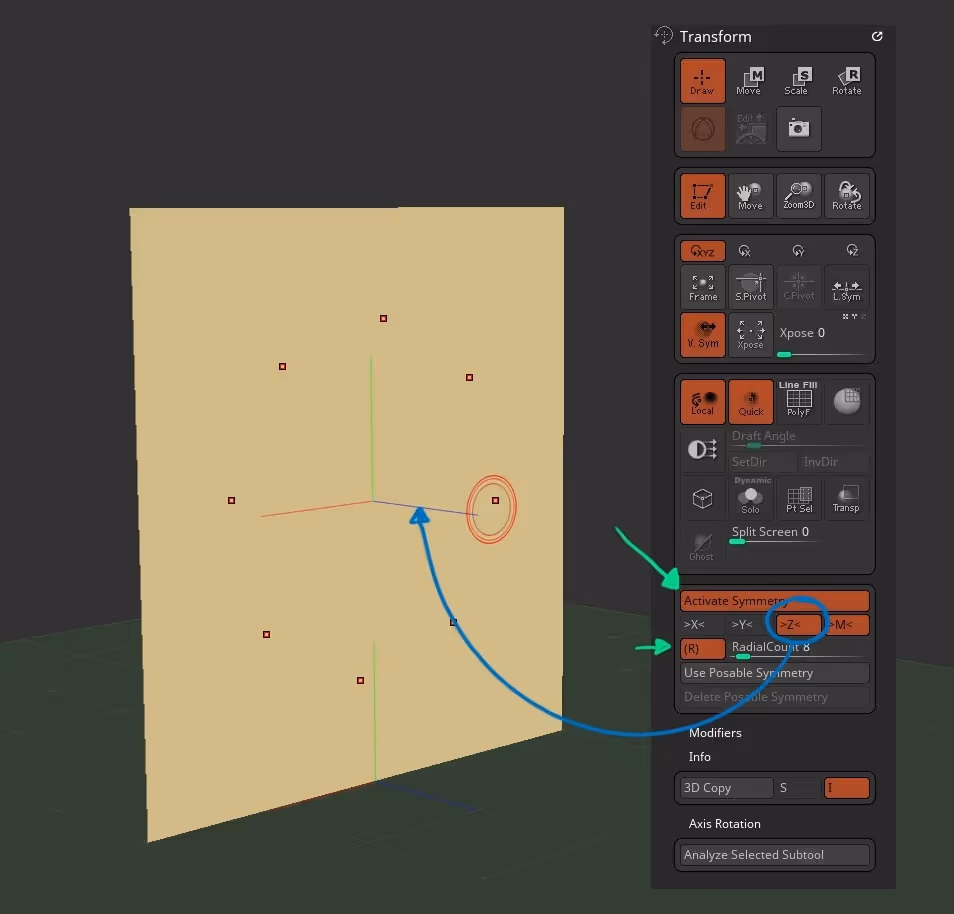
To turn the radial symmetry on, go to: Transform Palette > enable the 'Activate Symmetry' switch, > enable the '[R]' Switch (radial) > Switch on the axis that you want to use with the radial symmetry ('Z' in most cases):
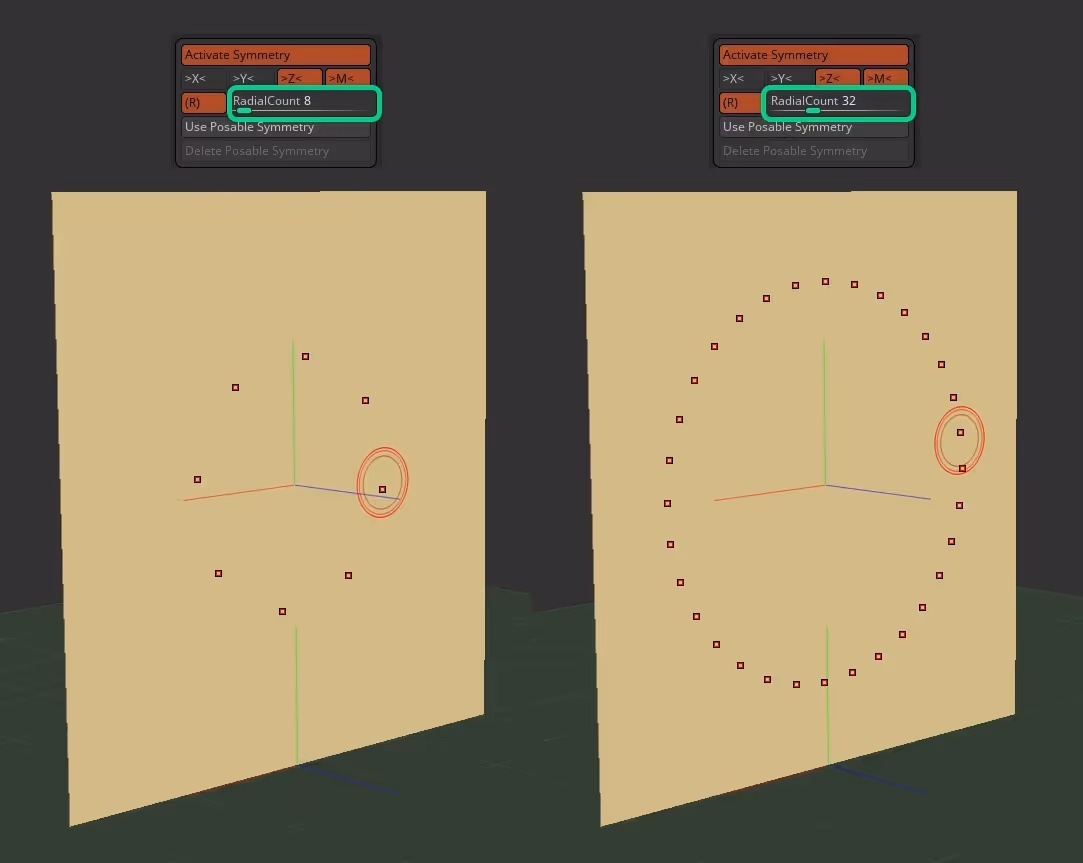
The 'RadialCount' slider determines the number of 'brush points' or instances of the brush that will be used with the radial symmetry... you can have any number you want but to keep it simple, I'll use 8 which is the default
The next step is to choose a surface... could be any 3D mesh so I'll just use a simple plane. Then click on the Brush thumbnail or press 'B' on your keyboard to bring the quick pick palette for the brushes and choose the 'Mesh Extrude brush' which will become your new Masking brush (mapped to your Ctrl Key)... and remember this works with any masking brush ;)
Now all you have to do is hold the Ctrl Key to access the Mesh Extrude brush and draw a shape:
This is really cool and you can change the RadialCount slider with every stroke if you want to make something more intricate! Keep in mind that I'm using a simple plane as an example, but you could do it on a sphere or a cylinde.
Another cool trick from this brushes, is the Add of Subtract function. After you draw a shape, you can do another one holding Ctrl but before you release the Ctrl key, you can hold Shift to add the mask to the current shape, or holding Alt to remove the area covered by the mask:

The only thing to keep in mind with this workflow, is that you are ultimately creating 'duplicates' of the shape you draw, so if you turn on the polyframe (shift + F) you'll see the meshes intersecting. This is just something that is important to know but a very easy fix... you can just Dynamesh it later and run a ZRmesher for example.

as I mentioned before, this is no exclusive to the Mesh Extrude brush, you can use any of the new masking brushes! Here is a quick idea using the MeshExtrudePro brush with the Shift and Alt modifiers to add and subtract areas:

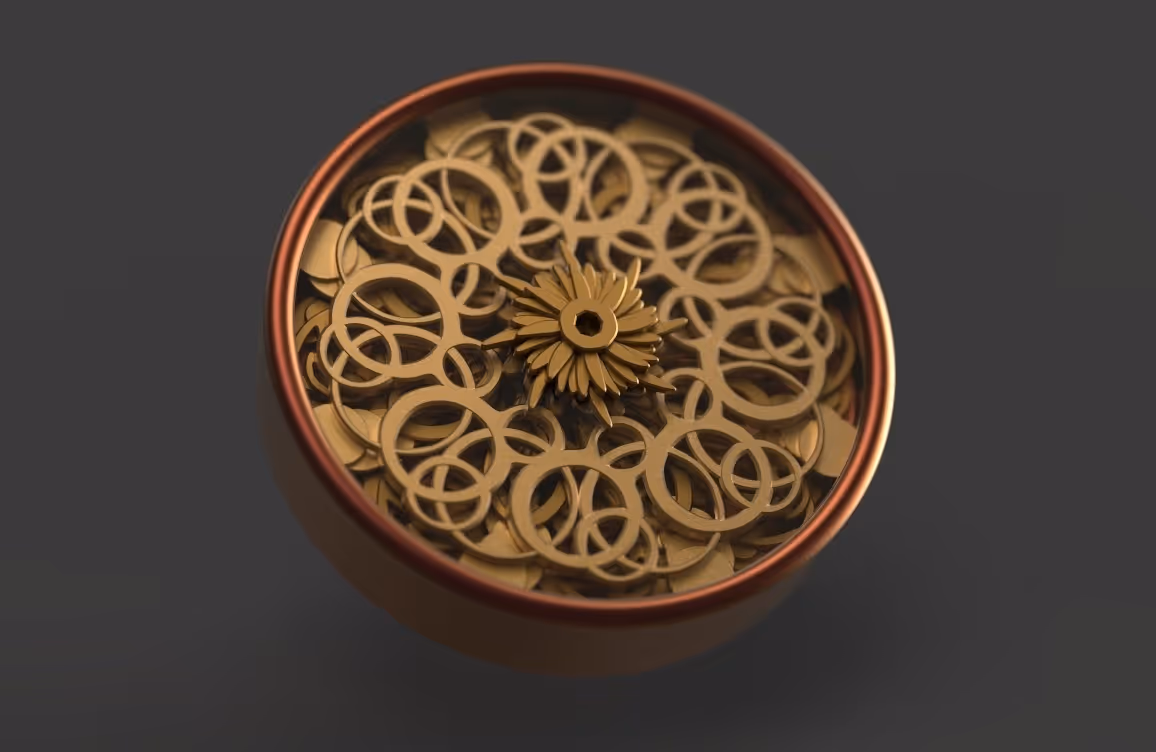
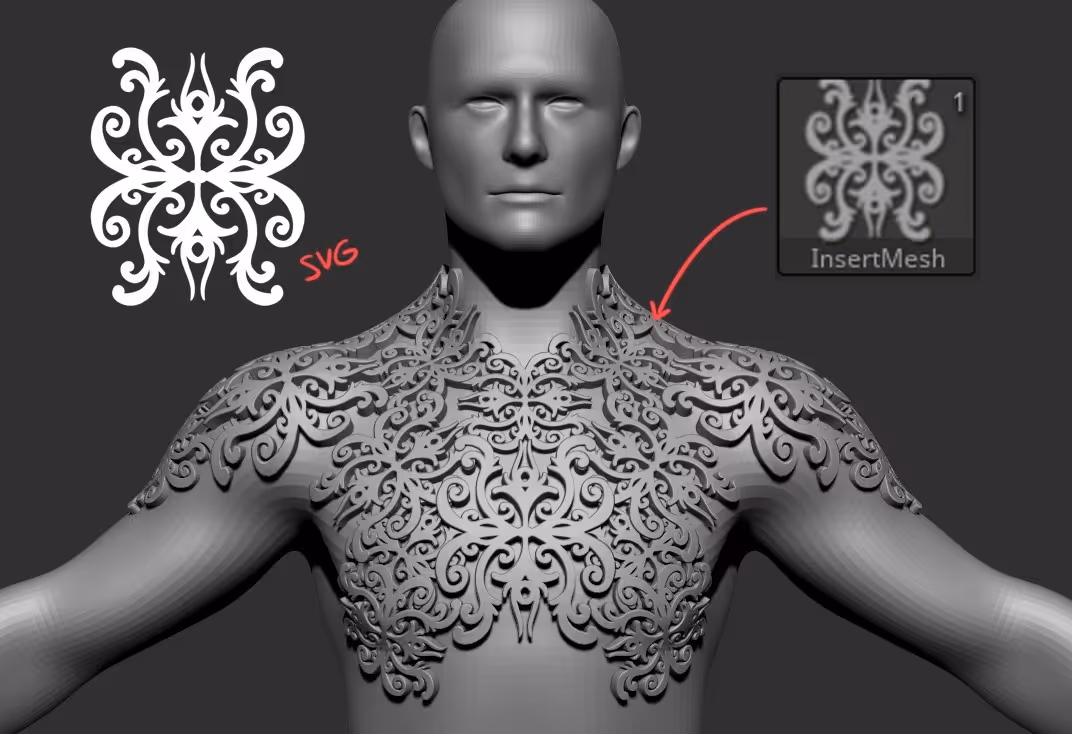
That's pretty much it. I think is a very useful technique to create ornaments and stuff like that but you can create all sorts of interesting designs with this workflow. Here is a quick example of the sue of this technique to crease some interesting shapes and patterns and rendered with Keyshot:
Hope you found these tips useful. until next week!


.webp)

.webp)