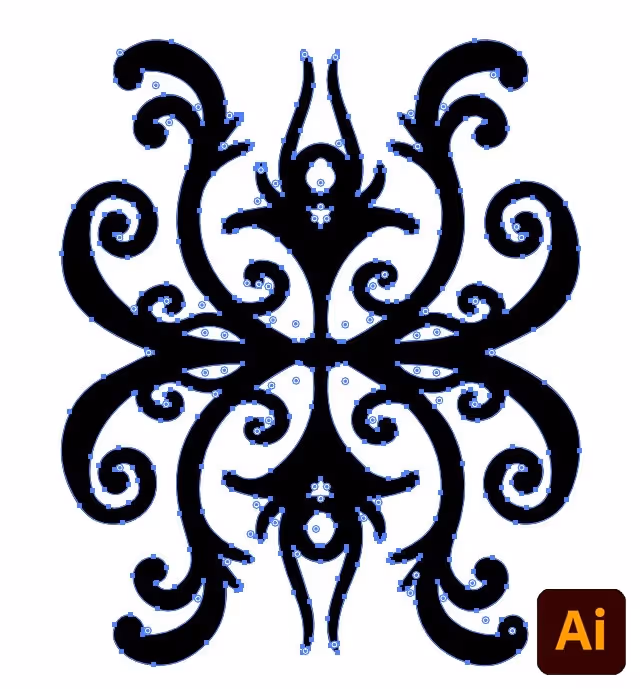
Obviously, the first step is you create a SVG file. You can do that in any software that allows you to work with vectors (a cool free option is Inkscape). For this example, I used Adobe illustrator to produce a simple ornament design in black and white and then exported it as SVG.
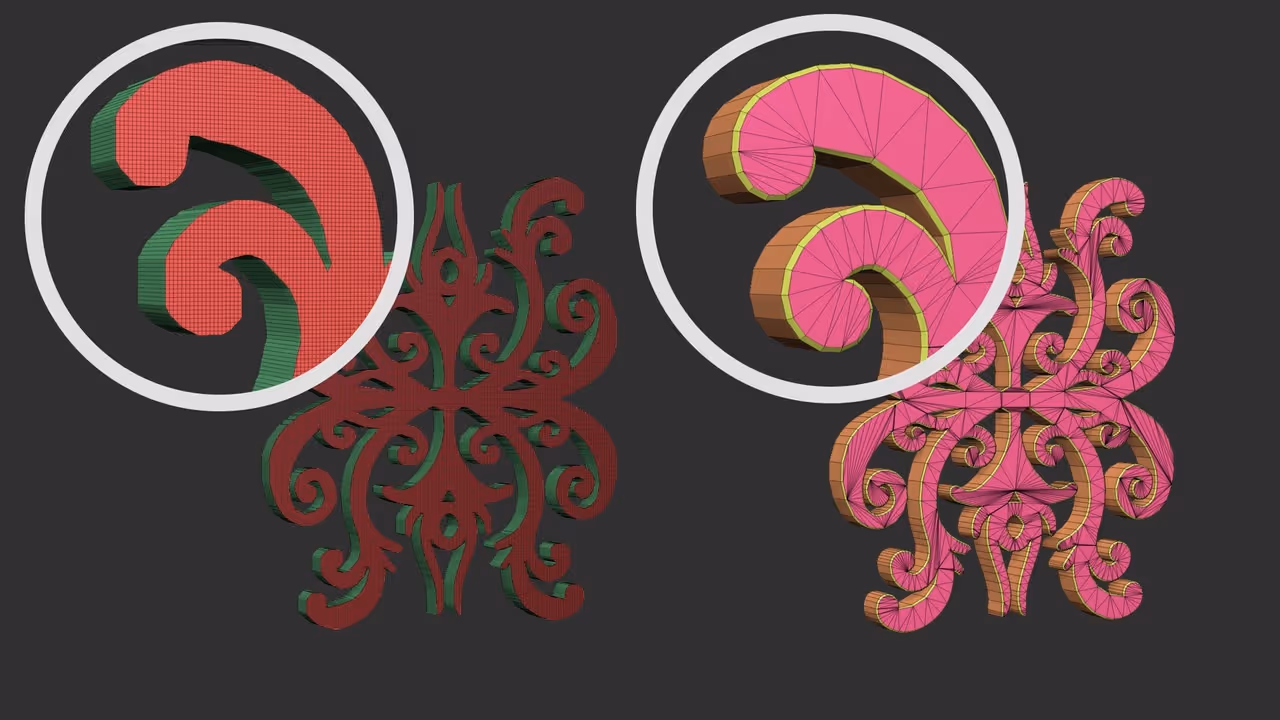
Having the nice vector shape is already half the job done. ZBrush actually introduced an official plugin a while back where you can easily create text in 3D. This plugin also allows you to create a 3D mesh from a vector! so cool... This is similar to create a flat mesh from an alpha, BUT... with the plugin and vector shape you'll get a much more controlled and nicer mesh:
(mesh from alpha on the left, mesh from SVG on the right)
So let's make the mesh...
The first step is to open up the plugin palette and expand the 'Text 3D & Vector Shape' plugin. The next thing is to bring the SVG file into Zbrush by simply clicking on the 'New SVG' button and select the file you created...
That's pretty much it... ZBrush will look at the vectors and figure out the rest. I f you look at the wireframe, the mesh is pretty decent and you'll also get polygroups!
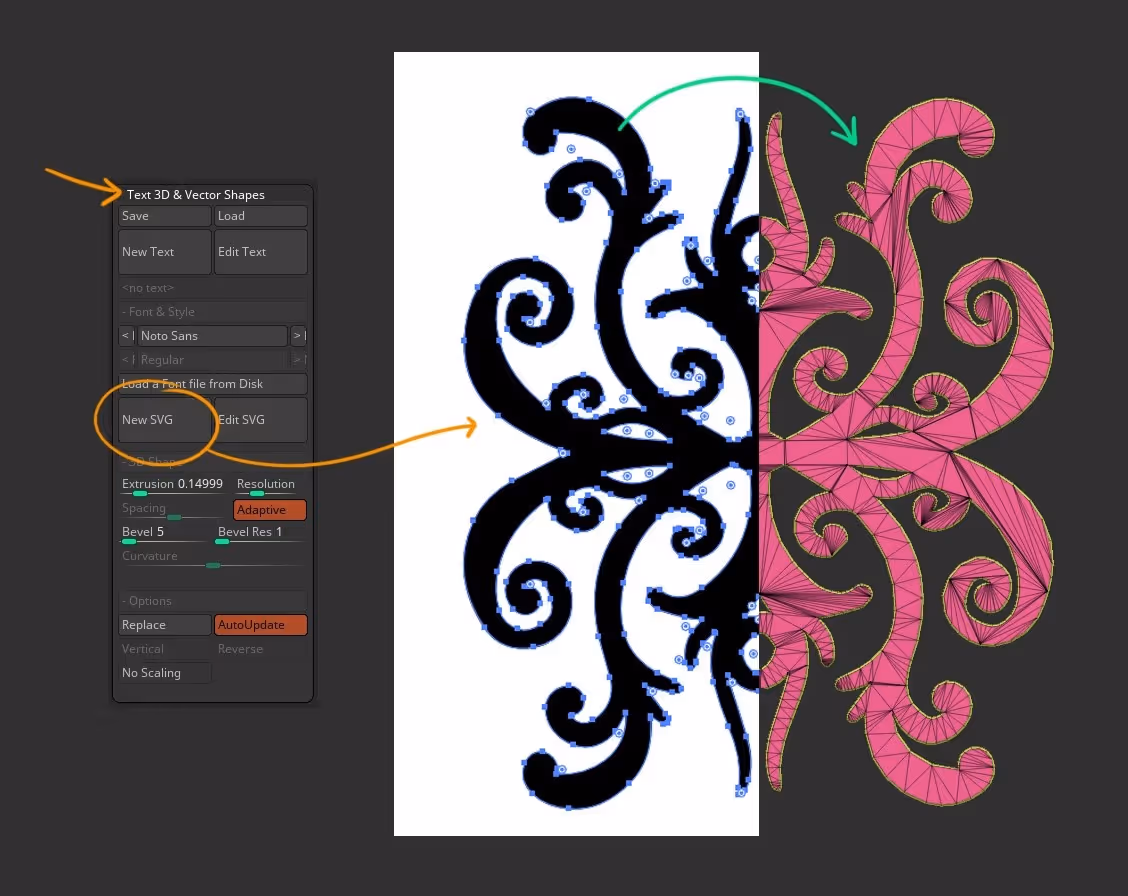
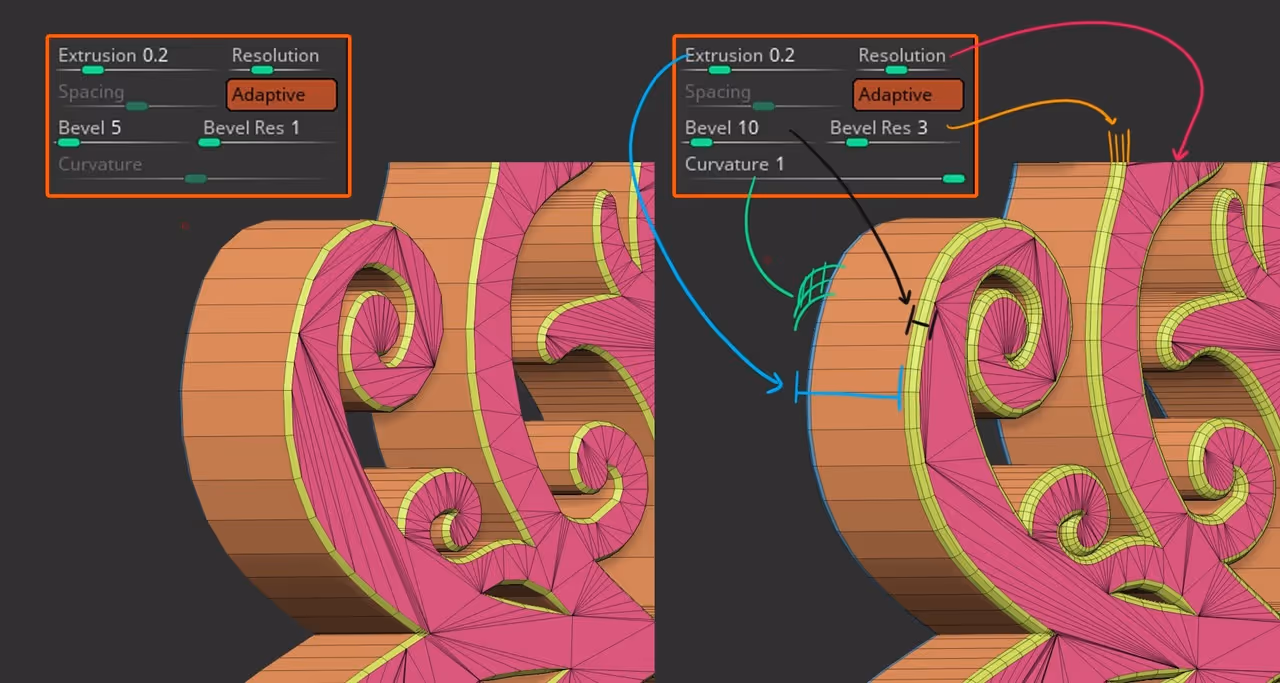
The cool thing is, that you have a few sliders to control and customise the creation of the SVG-based mesh... and they are pretty self-explanatory, the extrusion slider... well, extrudes the mesh (or make it thick). You also have a bevel and resolution, so play around with those settings so fine-tune your mesh.
Cool... now you have a nice mesh WITH POLYGROUPS and you can run a ZRemesher with 'groups on' if you want, but I'll focus on the next step which is to make this ornament a brush asset.
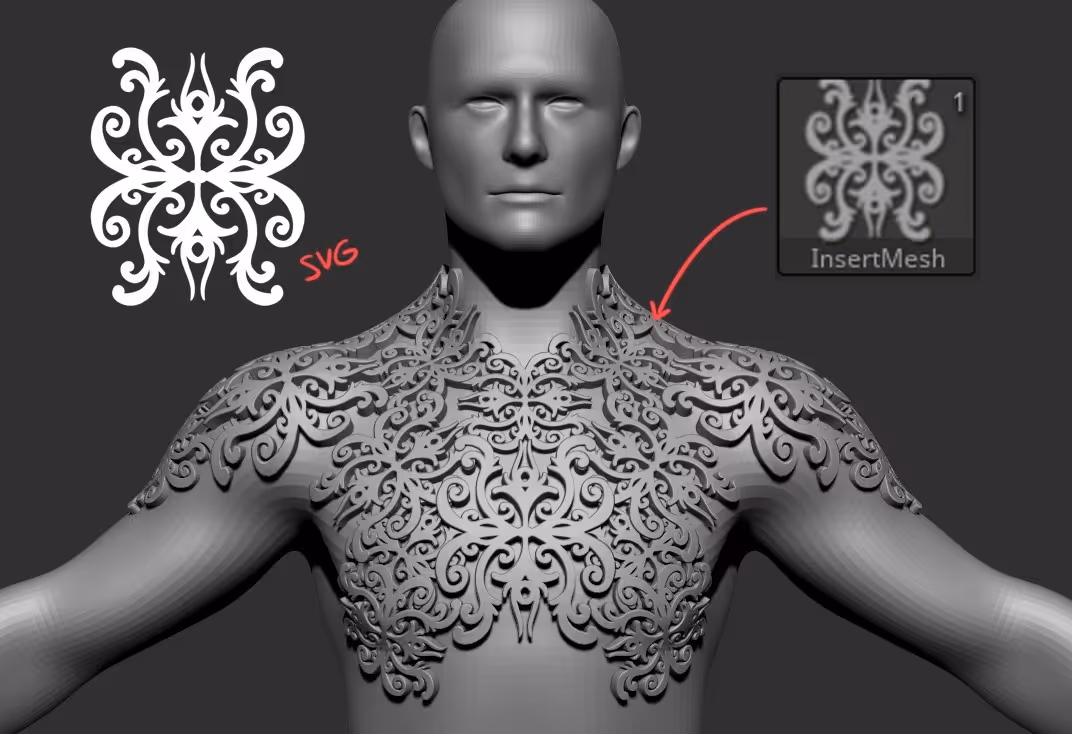
Go ahead and set your camera perpendicular to how you want to insert your mesh... basically rotate the camera to fit the front view of your object
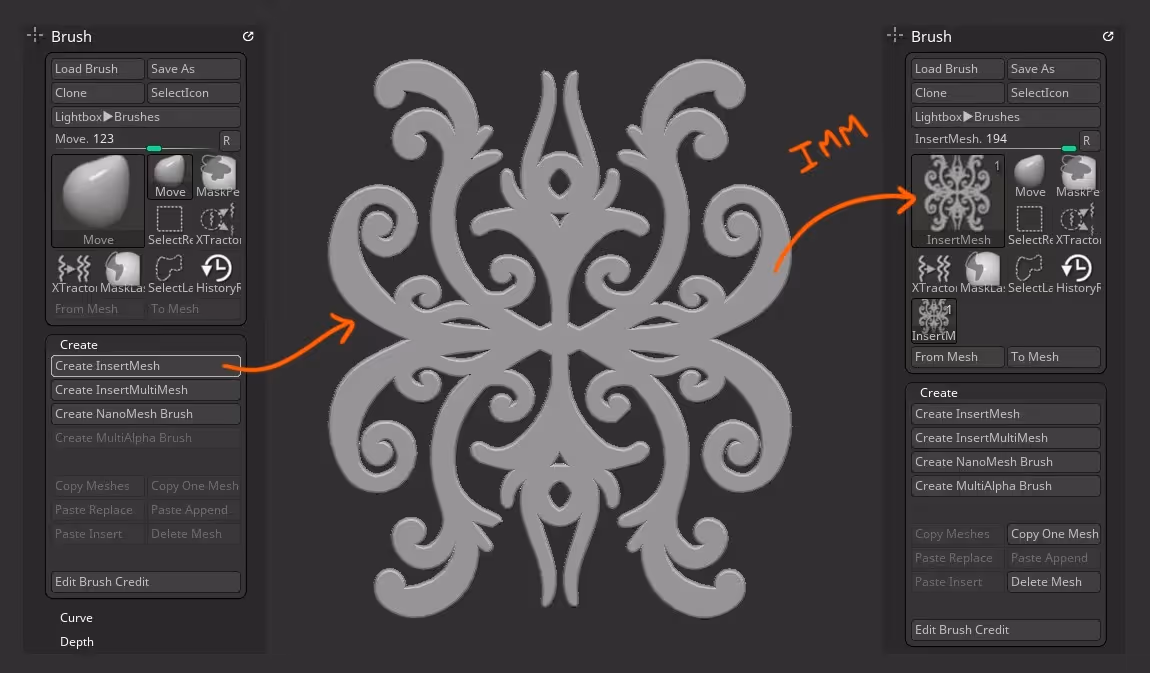
The next step is to go to the brush palette, open up the 'create' subpalette and click on the 'Create InsertMesh'... select 'New' from the pop-up and you now have a Custom IMM.
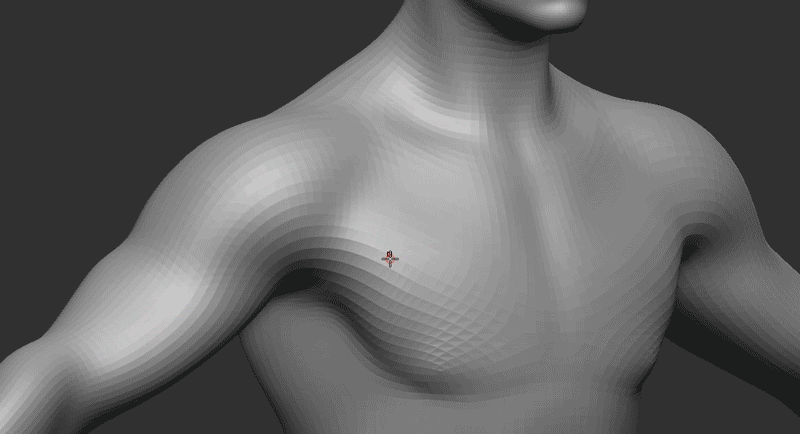
now, here is the super cool thing you can do... from the brush palette, under the 'Modifiers' section go ahead and set the 'Projection strength' slider to 100 (it should be at 0 by default).
So now, when you add your mesh from the IMM brush, ZBrush will take a look at the surface and project your ornament mesh to fit the volume! so cool!


.webp)

.webp)