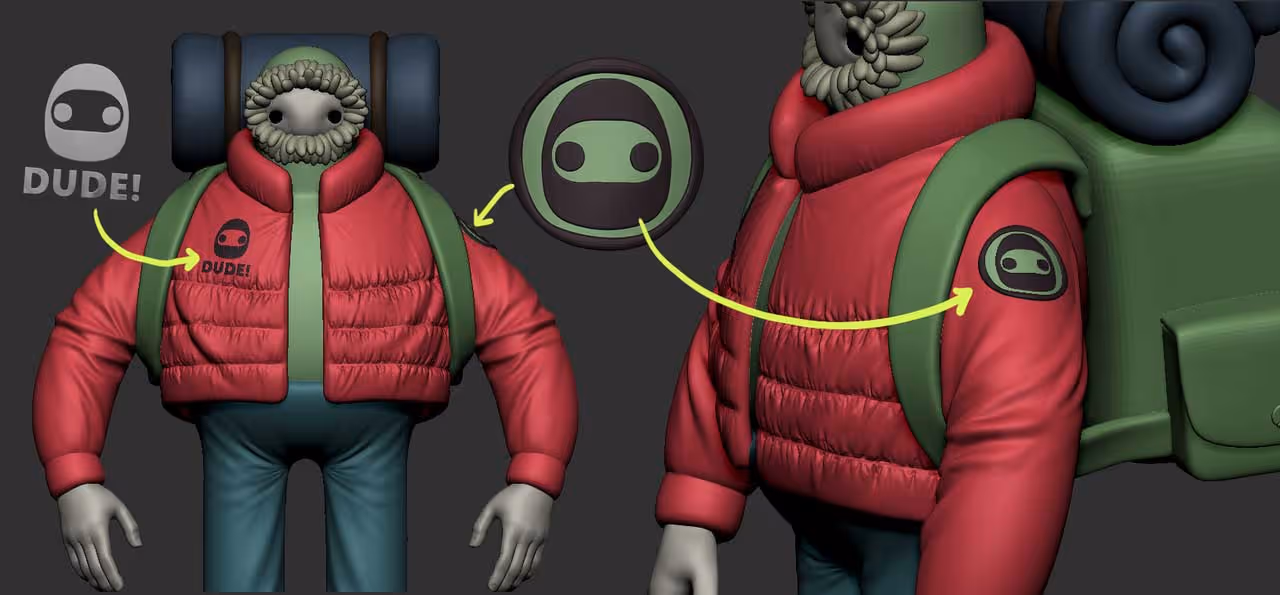
So the tip is simply a follow up on what we did and to give you an alternative for more complicated surfaces where you need to match the deformation area with a cleaner topology.
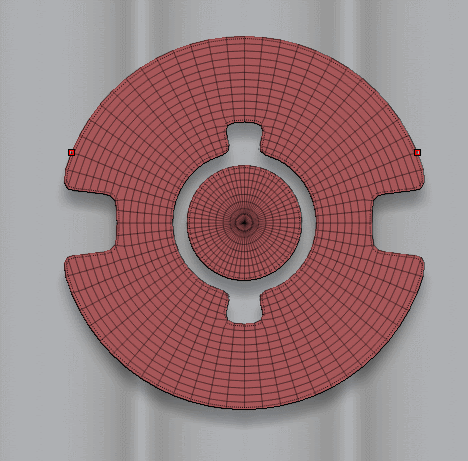
In this example, I just created a random shape with a single-sided mesh:
- Created a cylinder and deleted everything but one of the flat sides
- created polygroups
- select a polygroup, hide it and ‘delete hidden’

Place the object you want to match, closer to the surface you want it to follow. I also subdivided the object a bit and polished the edges to get something softer:

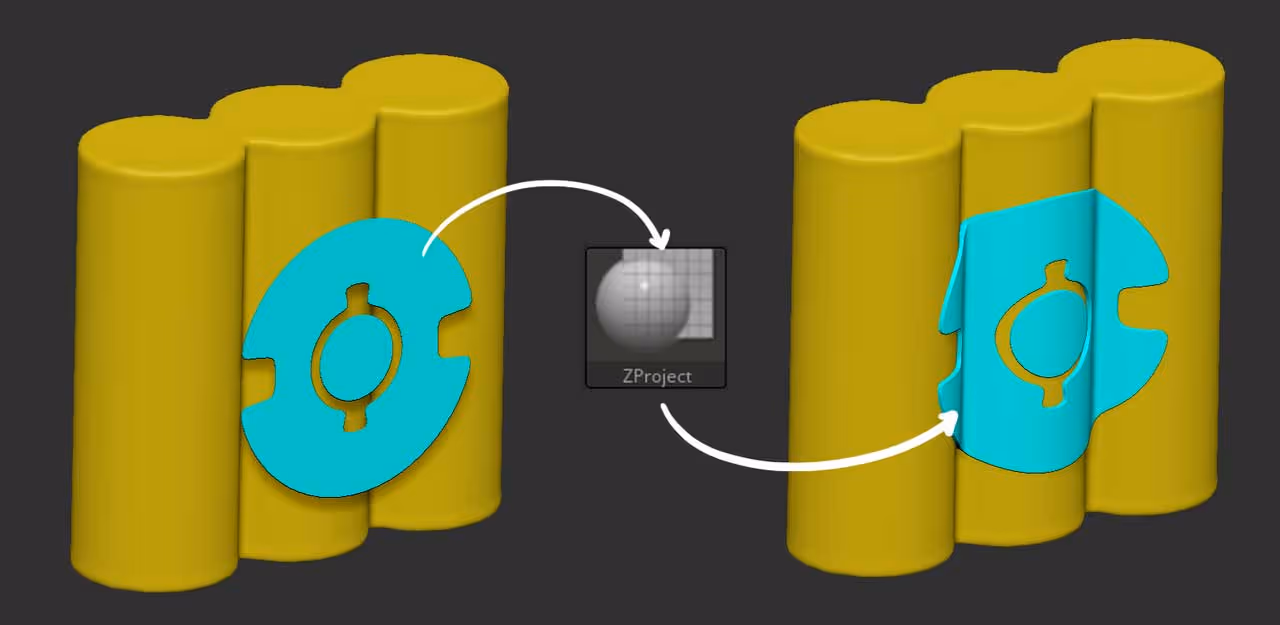
Now with the ZProject brush selected, position the camera in front of the object and start pushing the geometry towards the surface of the object you have behind
That’s it. You can enable the Dynamic subdivision switch to smooth out the surface and give it some thickness.
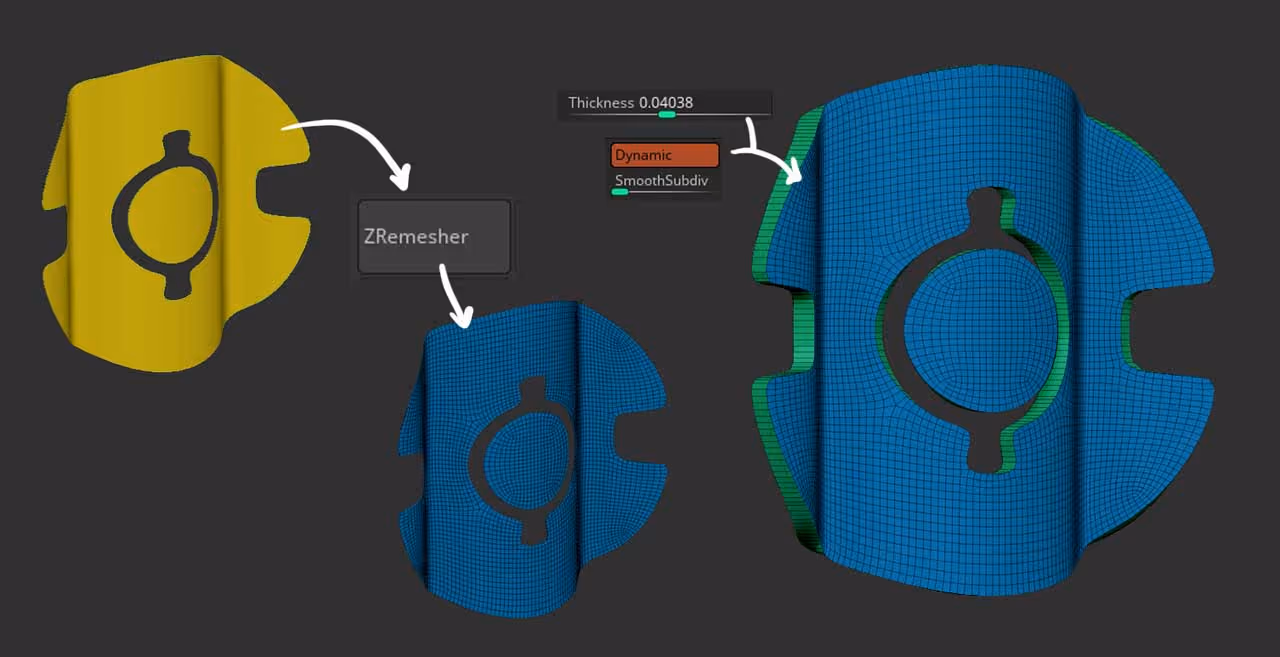
Alternatively, you can use a boolean method to achieve the same result but with a different way of re-creating the topology. First, use whatever ‘flat’ object design you have and extrude it using ZModeler > QMesh.
With a solid mesh, place it below the object you want to match and make sure it is intersecting it. Select the ‘intersect’ icon in the subtool palette and produce a boolean object:\
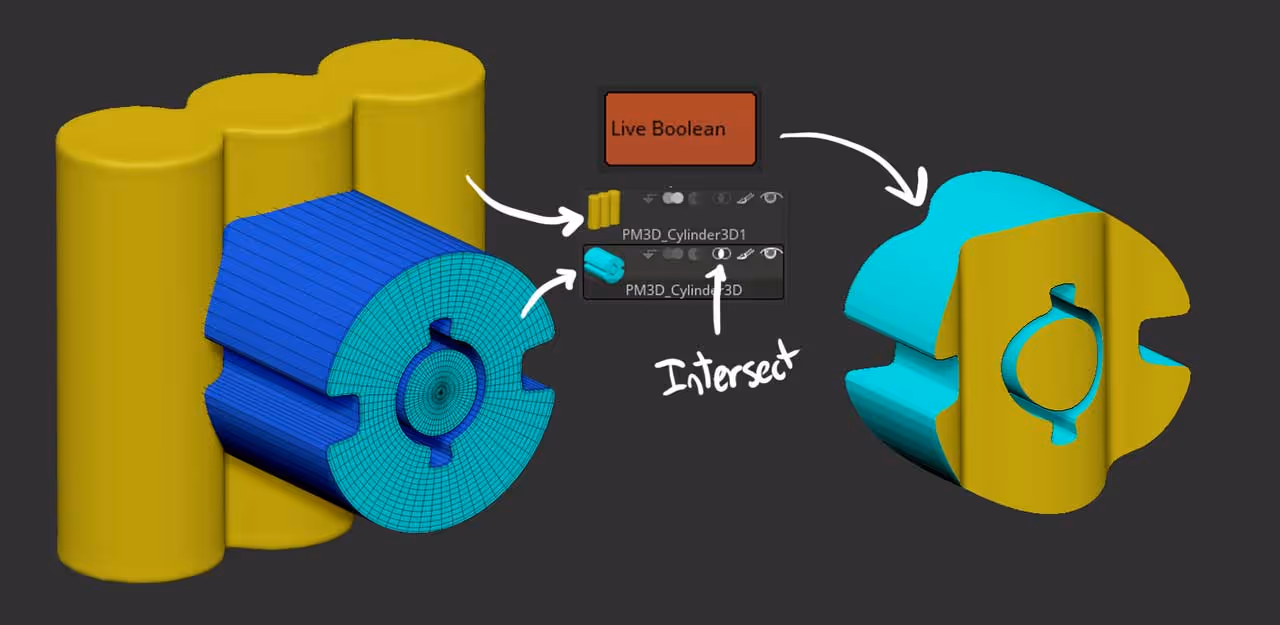
The boolean object should also come with polygroups so you can easily isolate the face that matched the surface of the original object you wanted to match, delete the rest and run a ZRemesher to get a better topology.
Once you have the new topology, you can play with thickness and smoothness again using Dynamic subdivision:


.webp)

.webp)