I know is very specific but it is really cool and definitely something I’d be using more. I might even turn this into a short video tutorial… but here is the gist of it:
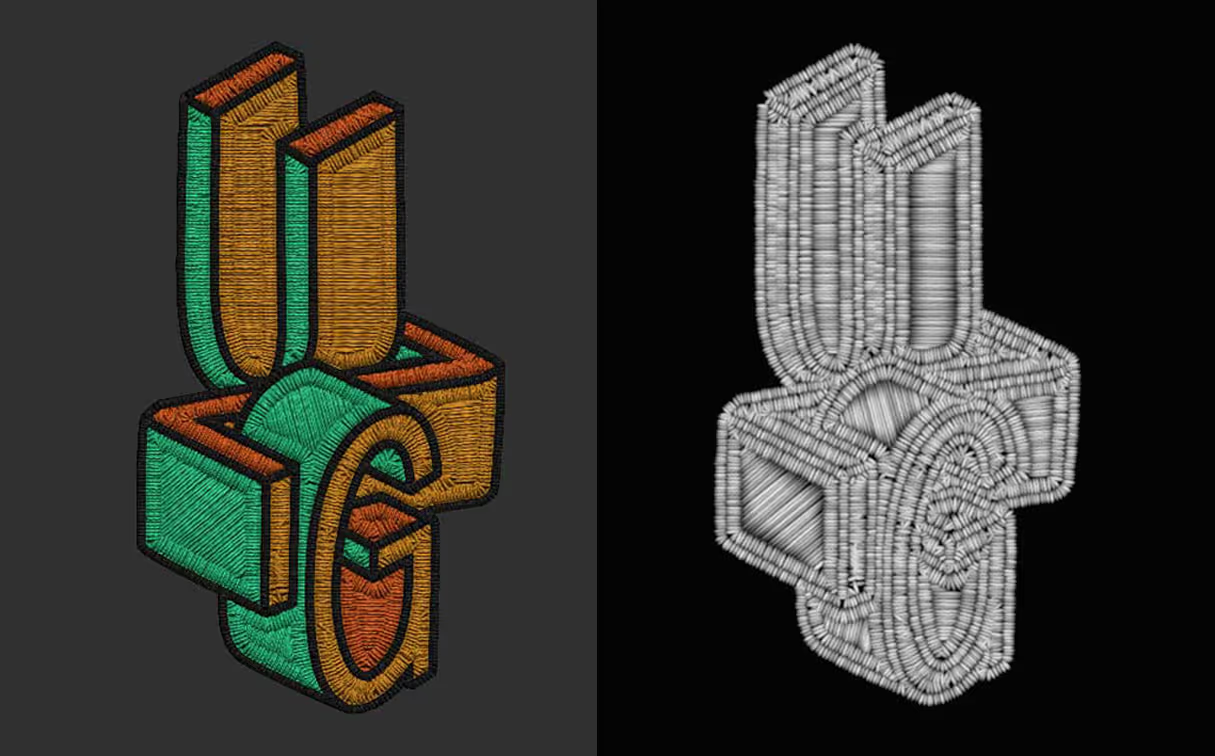
Take any image you want, ideally with transparency to have a cool and clear outline and vectors work great. I’ll use this logo of the UZG course as an example:

Open up 3D Sampler, create a new project and from the effects button search for the Embroidery effect to added it.
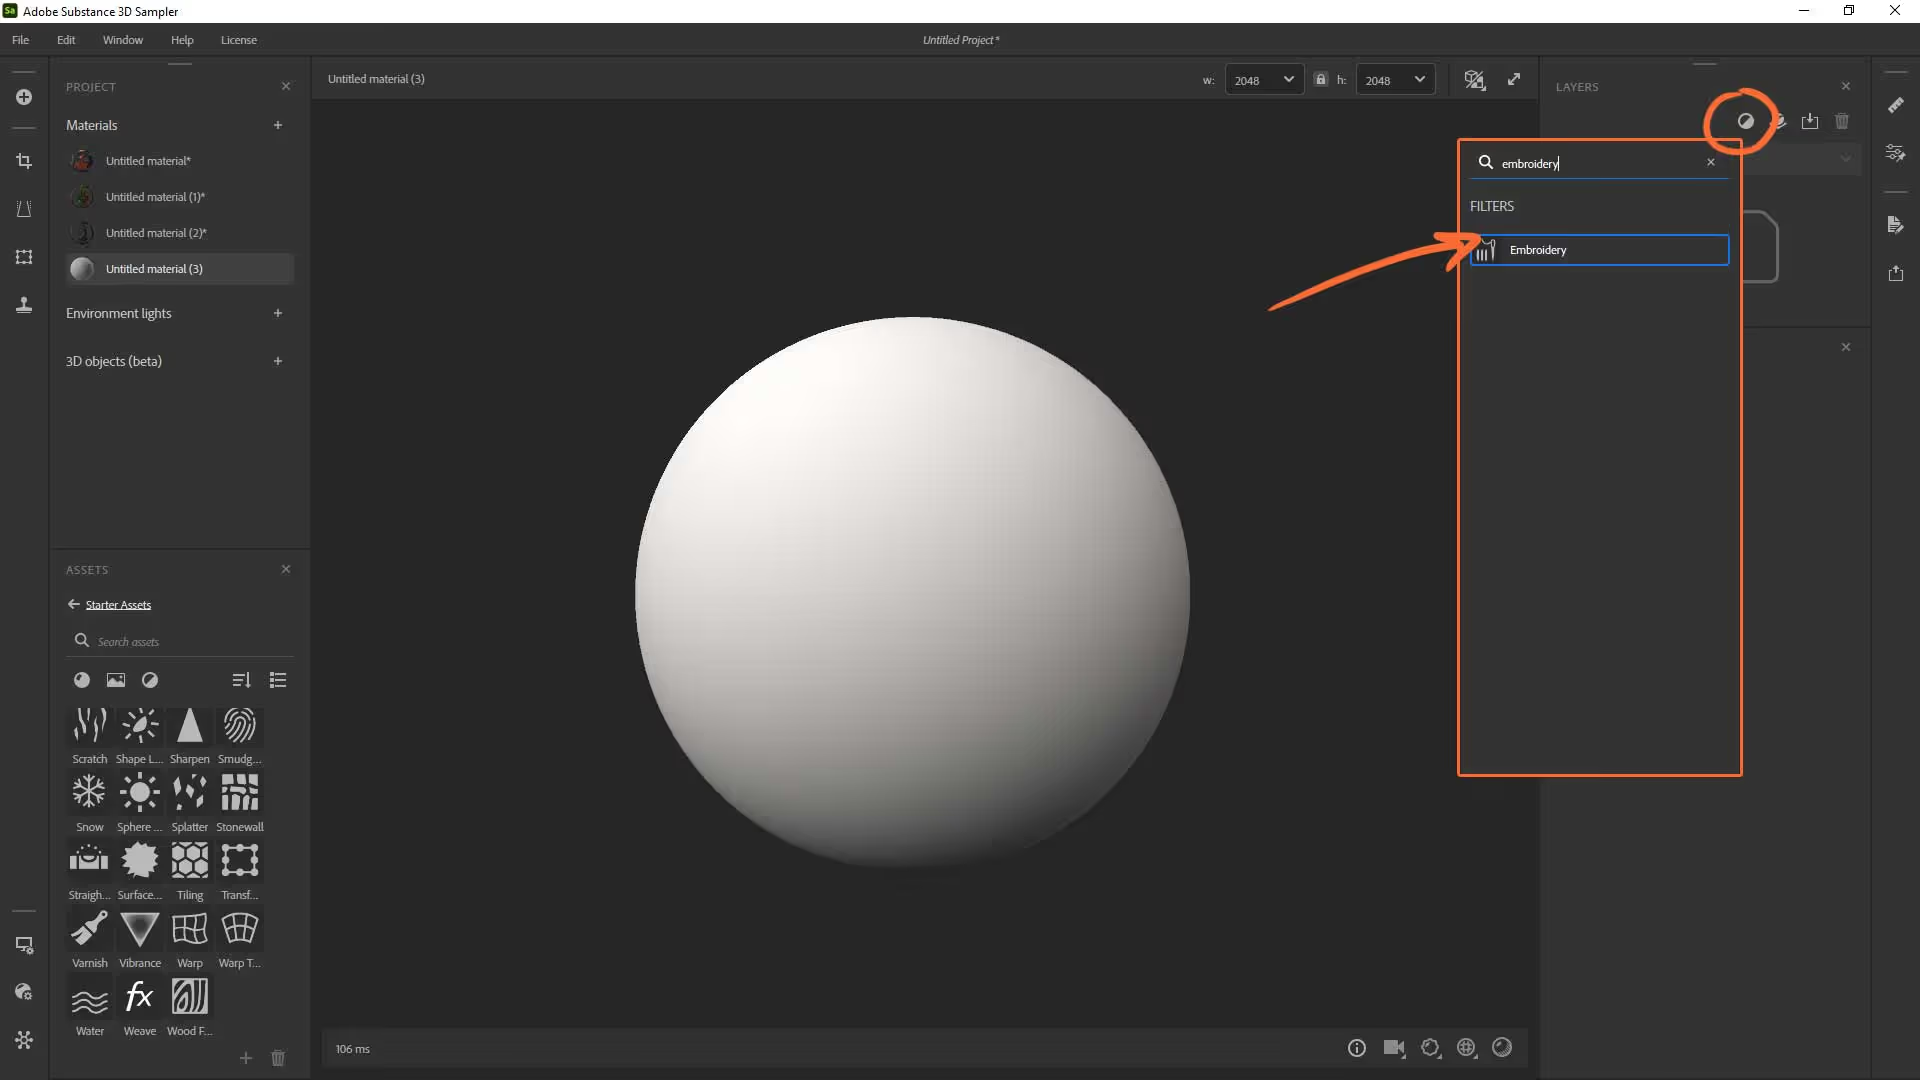
Then drag and drop your image into the input slot. it can have various colours or just a black and white image, up to you.

That’s pretty amazing already… I mean you can just leave it at that and export maps you need. However I’d like to tweak it a bit so to see things better you can change the Mesh to a flat plane, reduce the displacement value and remove the tiling (set it to 1).
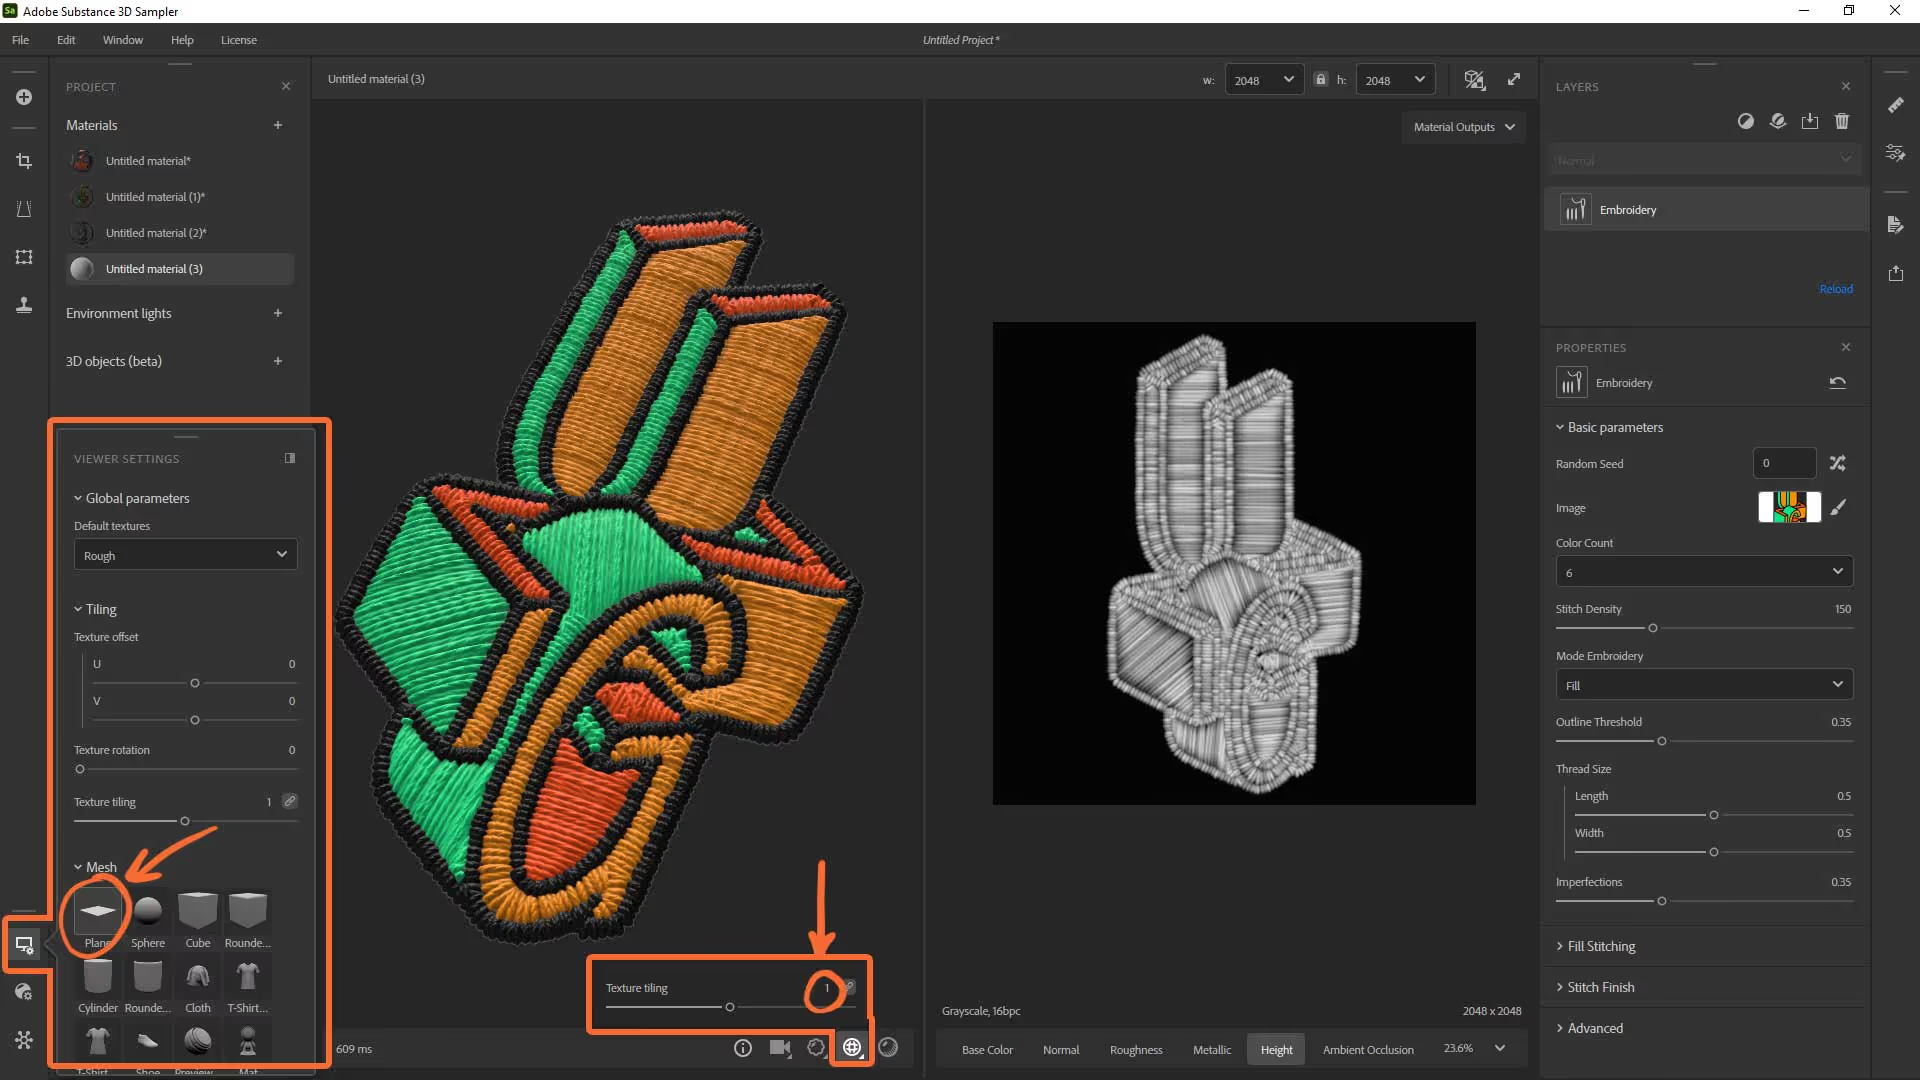
You can play around with the settings within the Embroidery effect and they are all very self-explanatory. I set the ‘colour count’ to 4 since the logo has 4 colours including the black outline, the ‘Stitch density’ to 210, and the ‘Mode Embroidery’ set to Fill + Outline, that way you get that nice inner pattern within the coloured areas. Also I reduce the imperfections to 0.29 to make it more regular so it feels ‘new’.

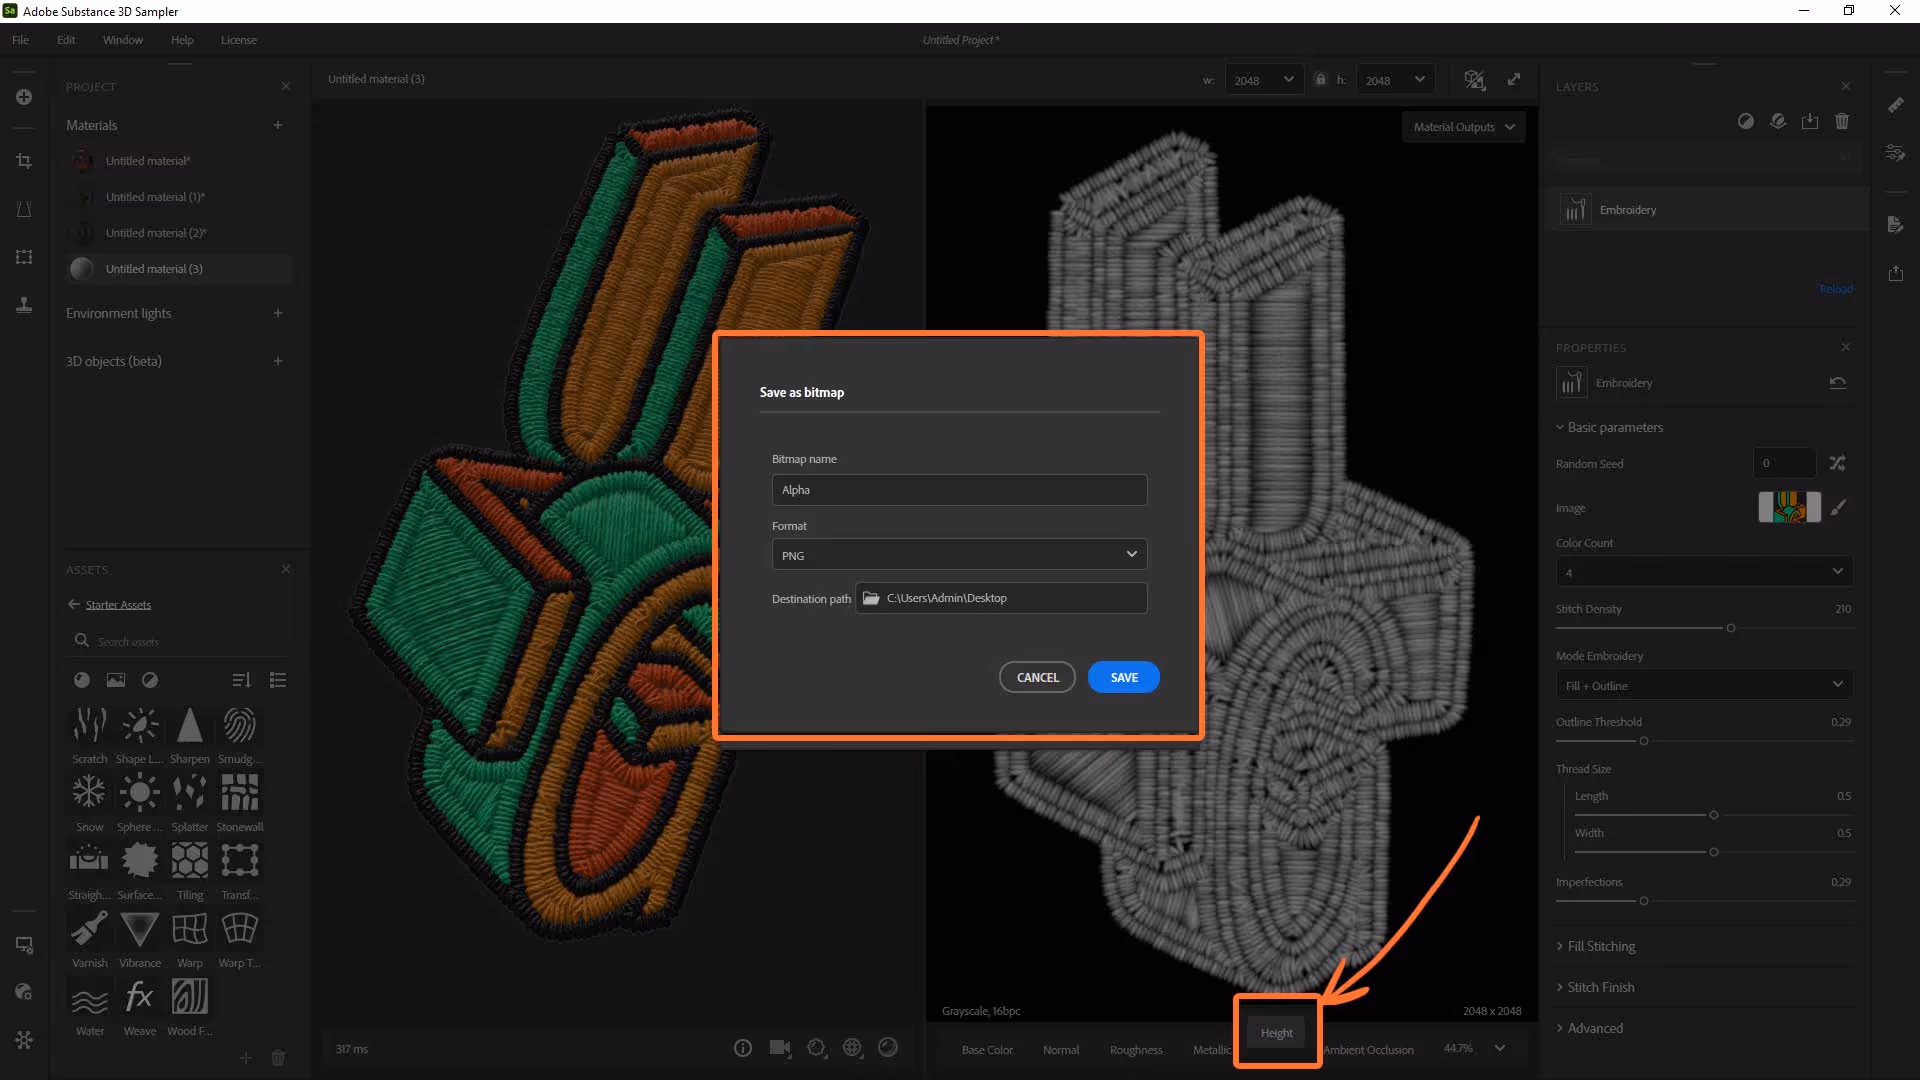
That’s it, you can export the texture set or simply right click on the image maps (from the 2D viewport) and save as bitmap. The only one you really need for this to work in ZBrush, is the Height which you can export with the name ‘Alpha’:
Once exported, go ahead and create a 3D plane in ZBrush. Import the coloured image as a texture and select it from the texture palette for the plane. You can also enable the Transapency slider and if your image has a black background, ZBrush will read it as a transparency:

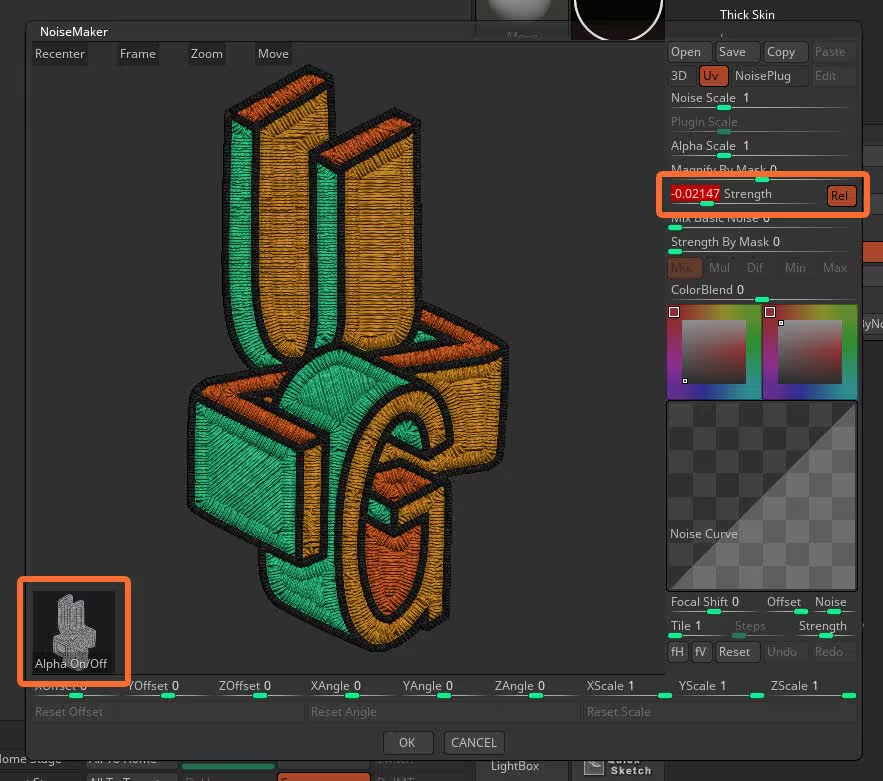
now you can open up the surface palette and activate the noise. From the noise palette, select the UV switch and from the bottom left corner load the Height map you exported from 3D Sampler. Then set the ColourBlend to 0, the Strength By Mask to 0, the Mix Basic Noise to 0, and just play with the strength slider to get the detail information from the embroidery!
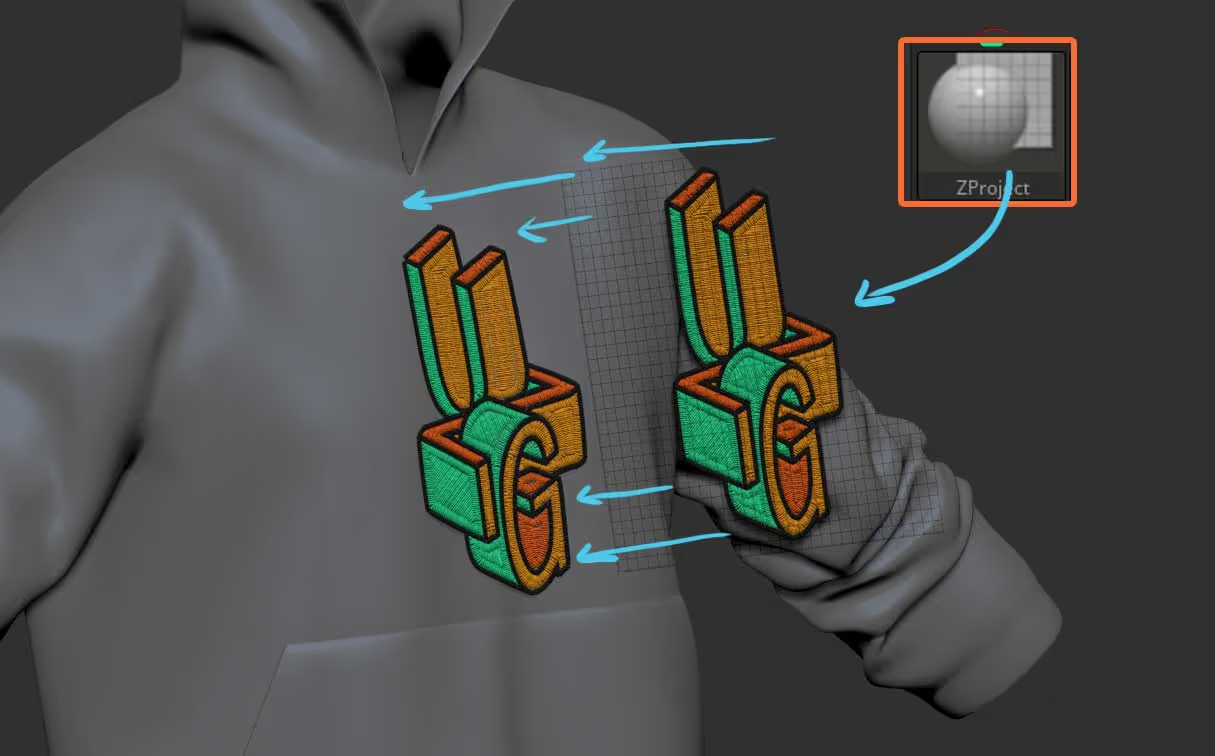
Once you have your simple plane with the ‘noise’ enabled (your custom height map), you can apply it to any subtool. Here is how… place the plane closer to the surface you want to ‘attached’ it to, in my case a quick blockout of a hoodie.
Then you can use the ZProject Brush to project it into the surface to it matches the contours of the surface underneath.


.webp)

.webp)