
So let's get to it, and go through the process of how I created this image...
- Take a sphere in ZBrush, flatten it a bit and use the Move brush to give it some basic shape. I used the Move brush with AccuCurve enabled (Brush > Curve > AccuCurve) to get that 'pointy' effect... The rest is just Dynameshing, carving some veins with Dam Standard brush and smoothing the transitions:
Quick tip: Enabled BackFaceMask (Brush > Auto Masking > BackFaceMask) to sculpt details in the thin areas of the mesh.
- With your mesh ready, crop the canvas to a square size, open up the ZBrush Compositor and hit the Create Substance Composite button. Once you are in Substance Painter, refresh the resources (from the ZBrush icon on the left)
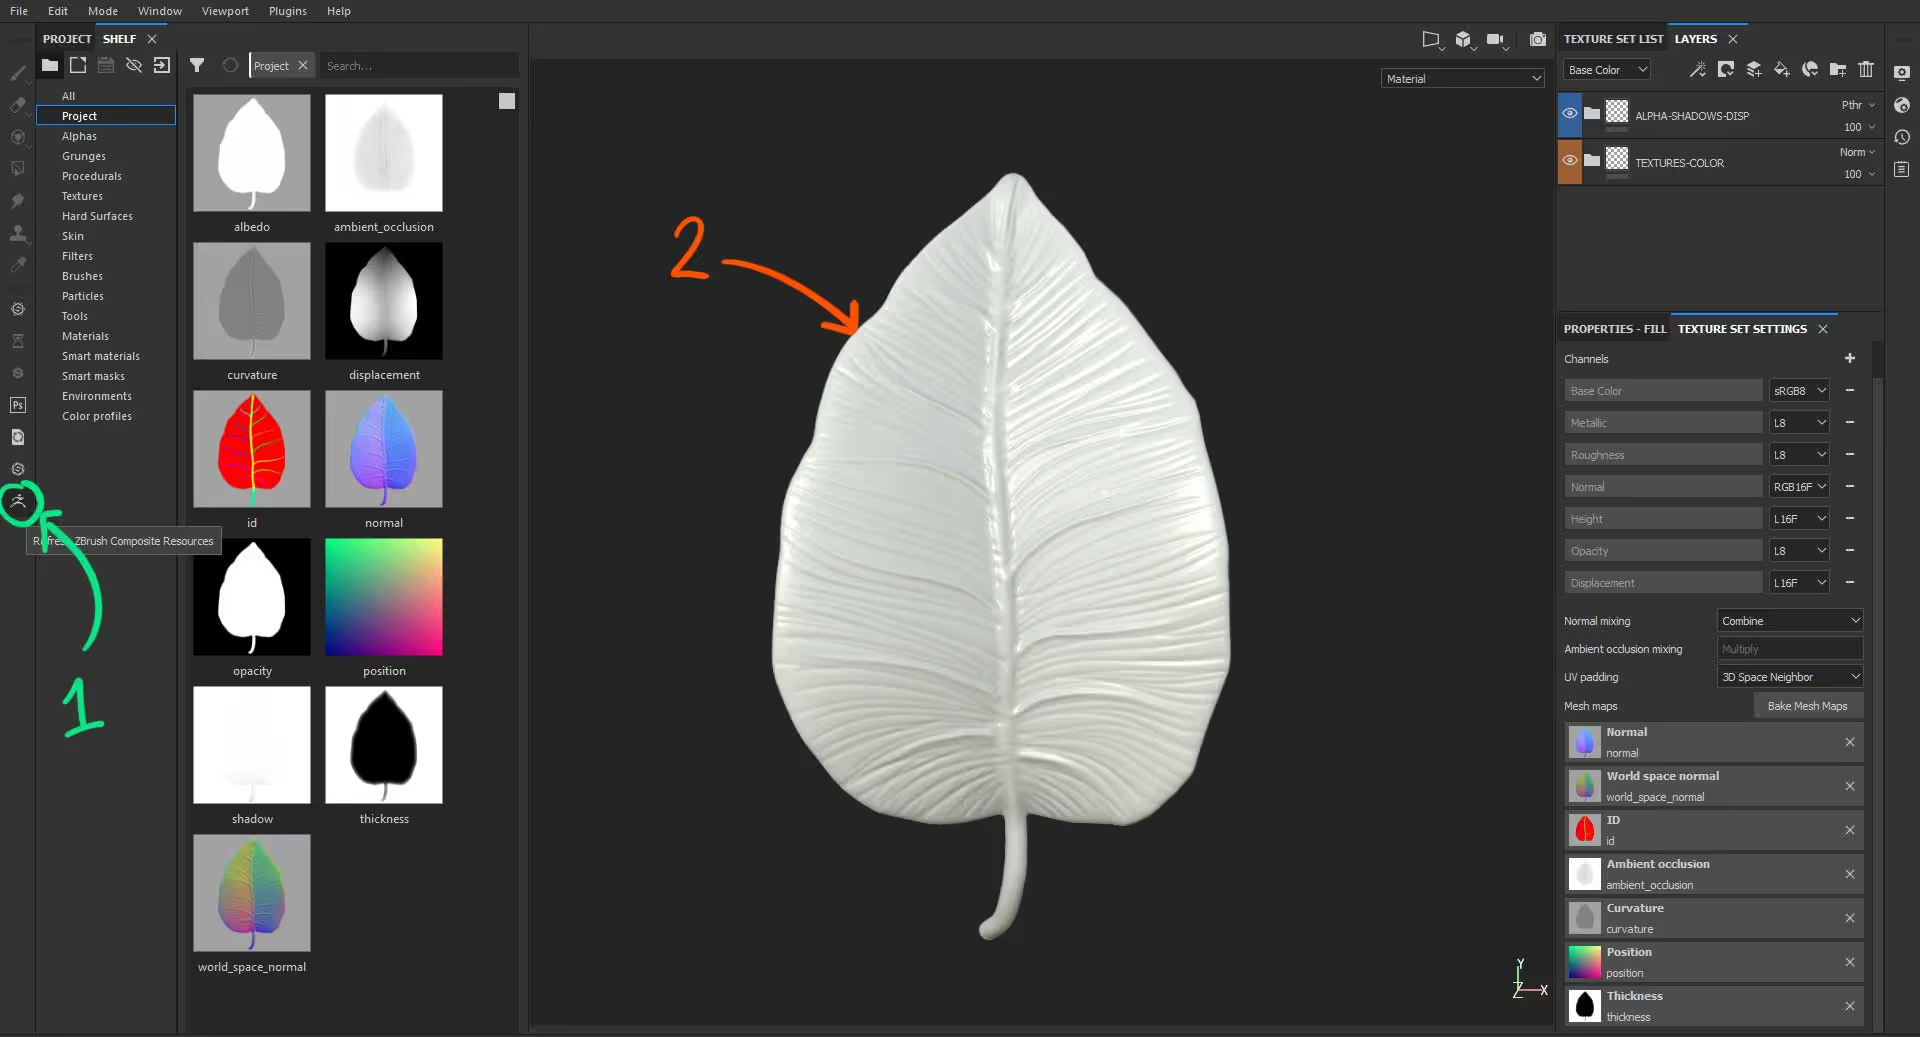
- Use anything you want in a substance painter to create the texture of your leave (or anything else you want to create with this approach). I like to use various fill layers with different masking options to generate colour variations:
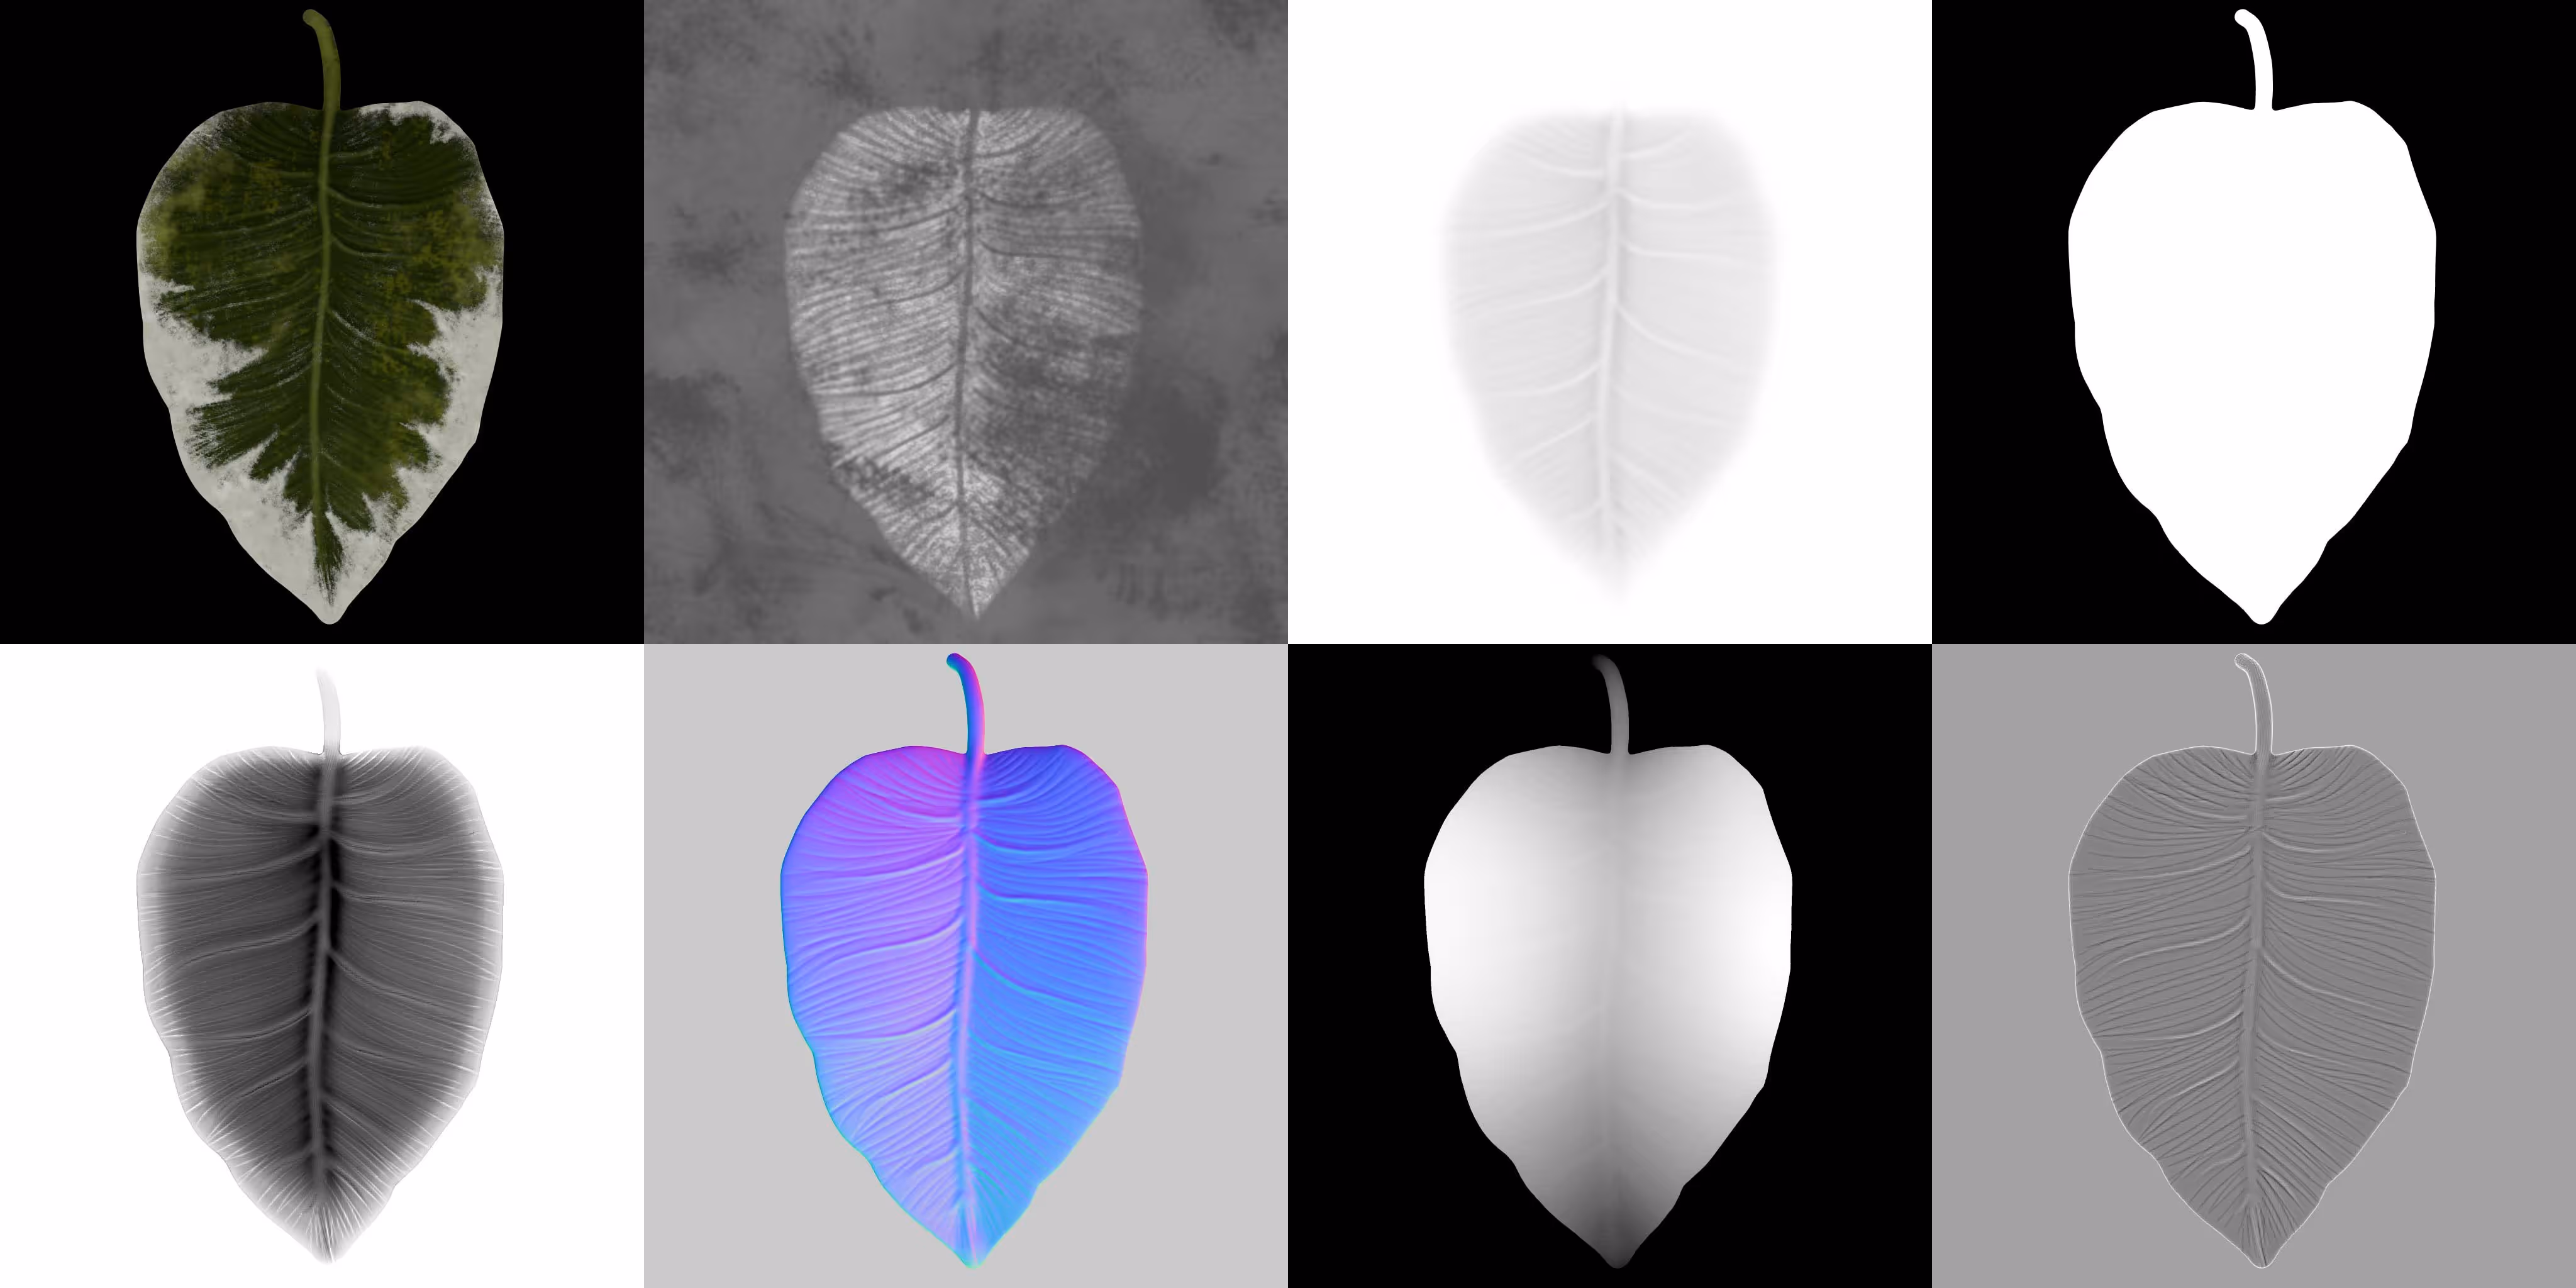
- Once you're happy with the textures, go ahead and export them for the render engine of your choosing (Ctrl+Shift+E). You can also choose the PBR MetalRough from the 'Config' dropdown if you want to play it safe and use the textures in different renders that support PBR.
- Finally, you can take this a bit further and give these leaves some context. For the pot, I created a very simple cylindrical shape in ZBrush using the ZModeler. For the vines and the ropes holding the pot, I used the CurveTubes brush, and to add the leaves, I use a custom insert mesh with UVs (a simple plane with UVs).
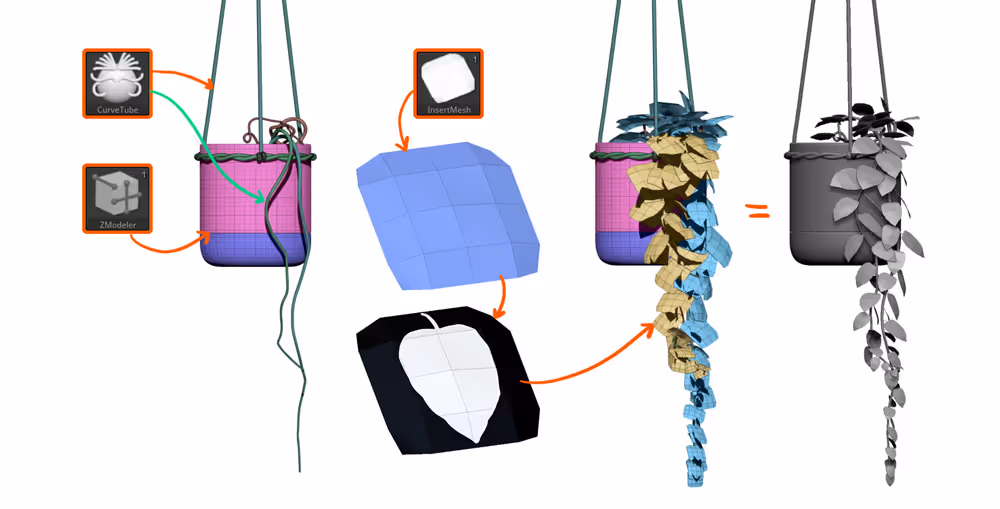
Quick tip: you can import the Alpha (or any other map with black background) back into ZBrush, assign it to the plane with UVs as a texture and enable Transparency from the Texture palette. This will allow you to see the outline of the leaves to check orientation and the way they are placed.
- For the render, I used a simple HDRI in Maverick's render (A very cool renderer that I'm learning at the moment) and assign a couple of materials to the pieces exported (as FBX) from ZBrush.
That's it for now!


.webp)

.webp)