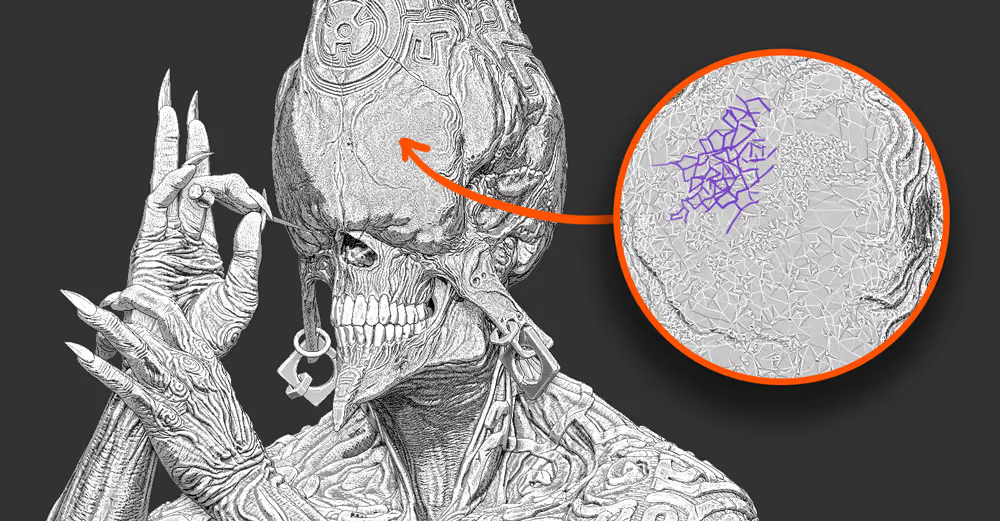
This might be a conscious choice and the style you are going for, but if you want to avoid this, the expected action would be to subdivide the mesh to smooth it right? - Well, you can definitely do that but if the framing of the render changes and you get closer to the camera you might run into the same issue. Fortunately, ZBrush has an awesome little switch called Draw Polydensity that allows you to preview the ‘density’ of polygons based on the document size or pixels that are going to be rendered (Transform palette > Draw Polydensity):
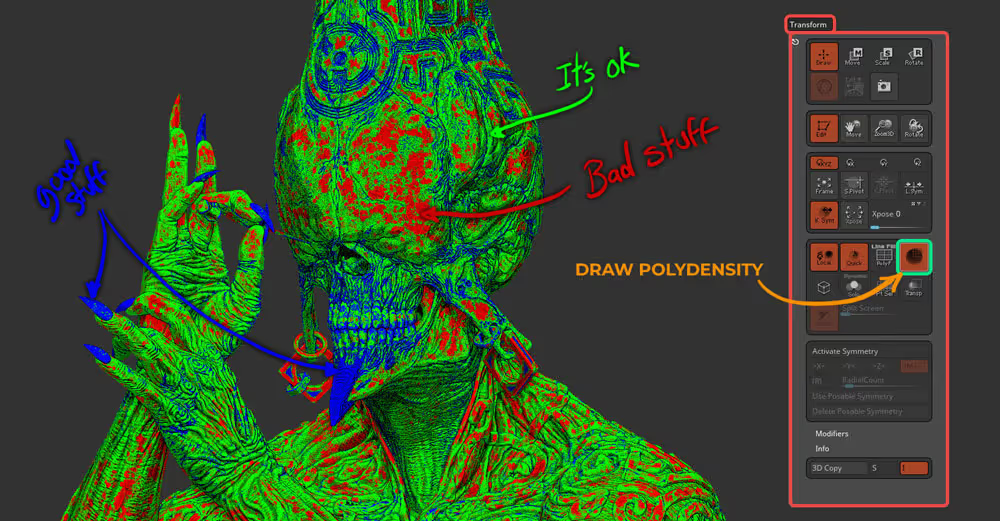
This is very useful because it gives you visual feedback of the areas that the polygons will be clearly visible and the areas that will look smooth. So anything tagged with BLUE is GREAT, the GREEN is ‘okeish’ (hard to see the edges but still there) and RED is ‘BAD’ where you can clearly see the faceted polygons.
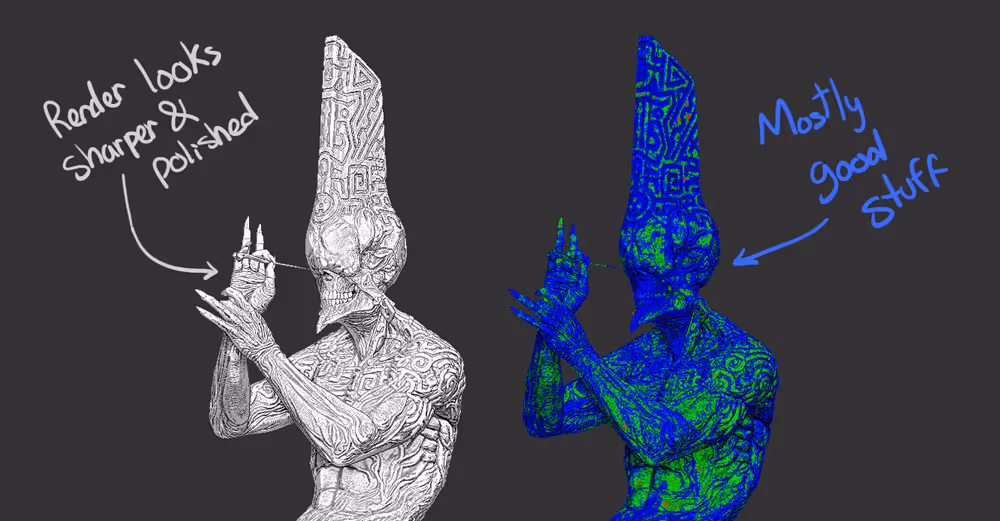
So with this Polydensity switch enabled, you can reposition the camera to a distance where most parts of the mesh are ideally blue to get a very sharp and smooth render.
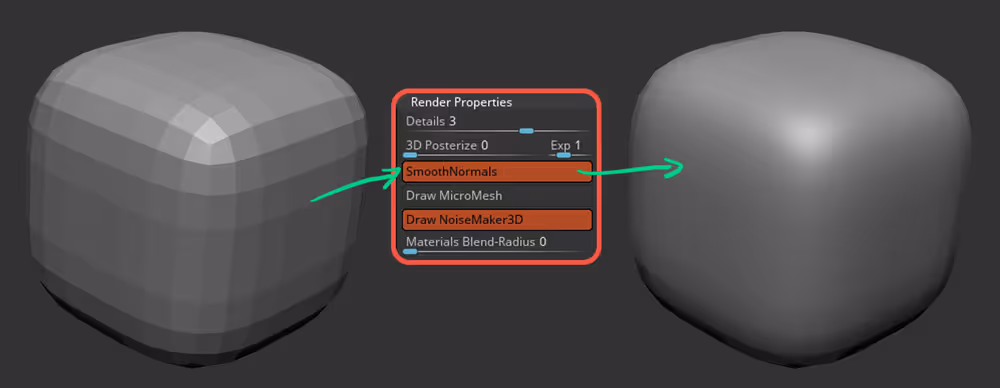
BONUS TIP: if you have a clean topology with quads, you can also enable the ‘Smooth normals’ switch from the Render palette > Render Properties tab:
Hope you find this useful.


.webp)

.webp)