The whole workflow is made out of only 3 steps:
1. Prepare the ZBrush model:
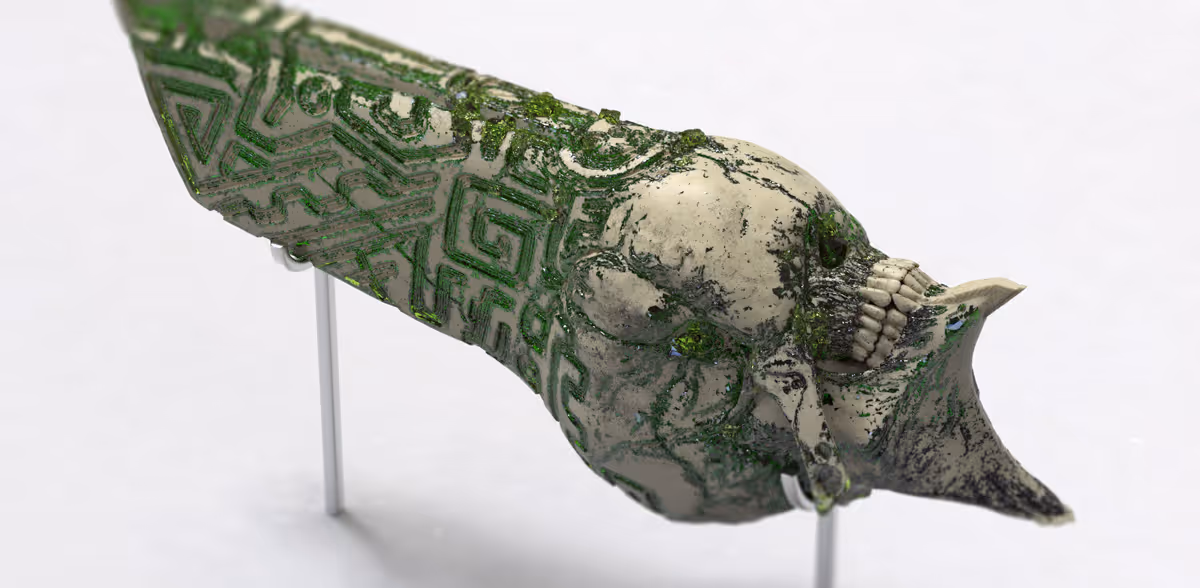
Assign a material to your entire model (any materials is ok). Then use the Masking tools to generate a mask for the areas you'd like to have a different material. In my case, I use this creature head and masked by smoothness, Peaks and Valleys and cavity to generate an interesting mask:
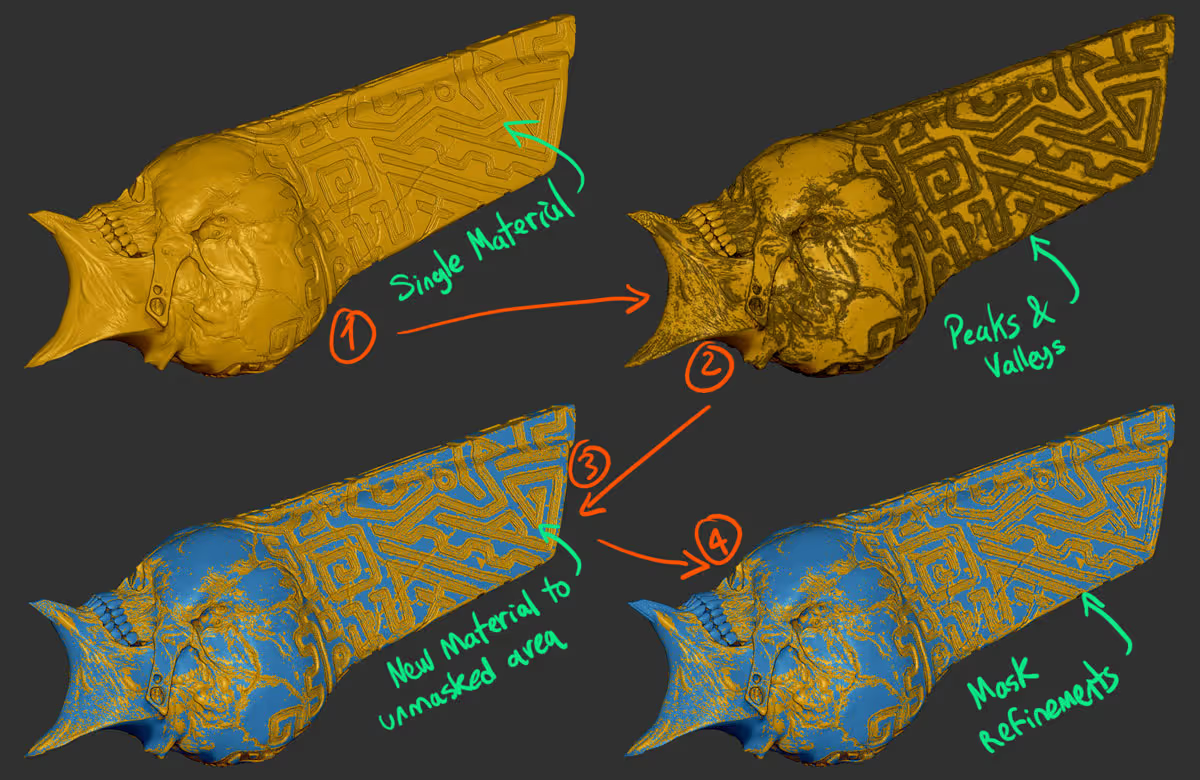
Once you have the mask (which you can also paint manually) select a different material and fill the object with it... you should have a single mesh with two materials now.
2. Send model to keyshot
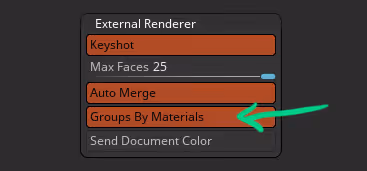
From the Render palette, expand External renderer, enable Keyshot and switch on 'Group by Materials'... that's it, click render to send it to Keyshot.
If you don't have Keyshot, you can use the mask from step one to split the model (1. Polygroup masked area, 2. split by groups) and send it to another renderer ;)
3. render in keyshot
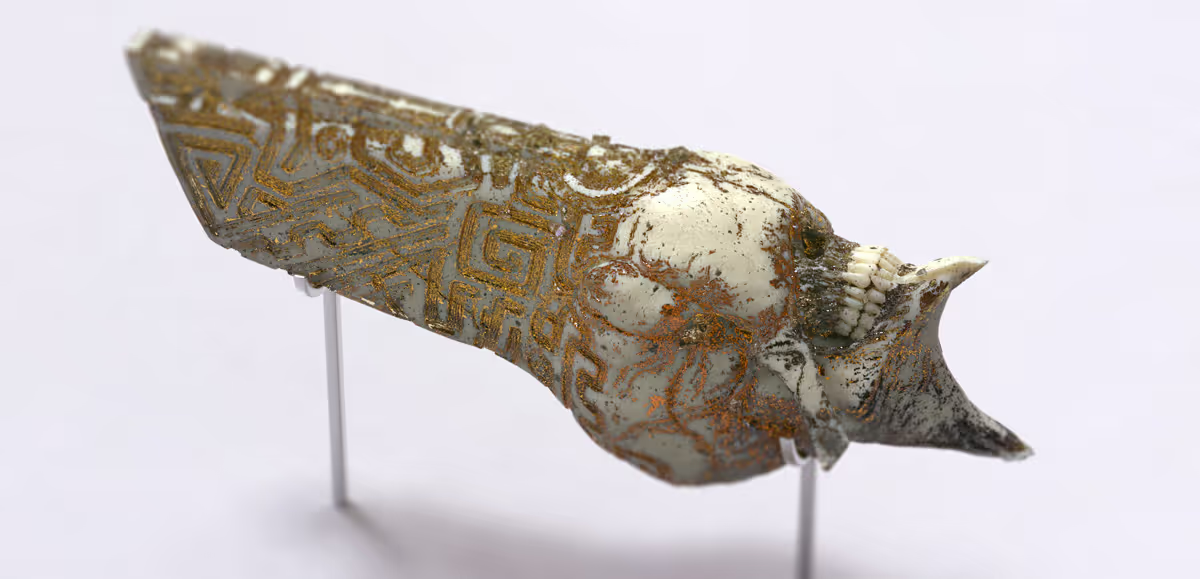
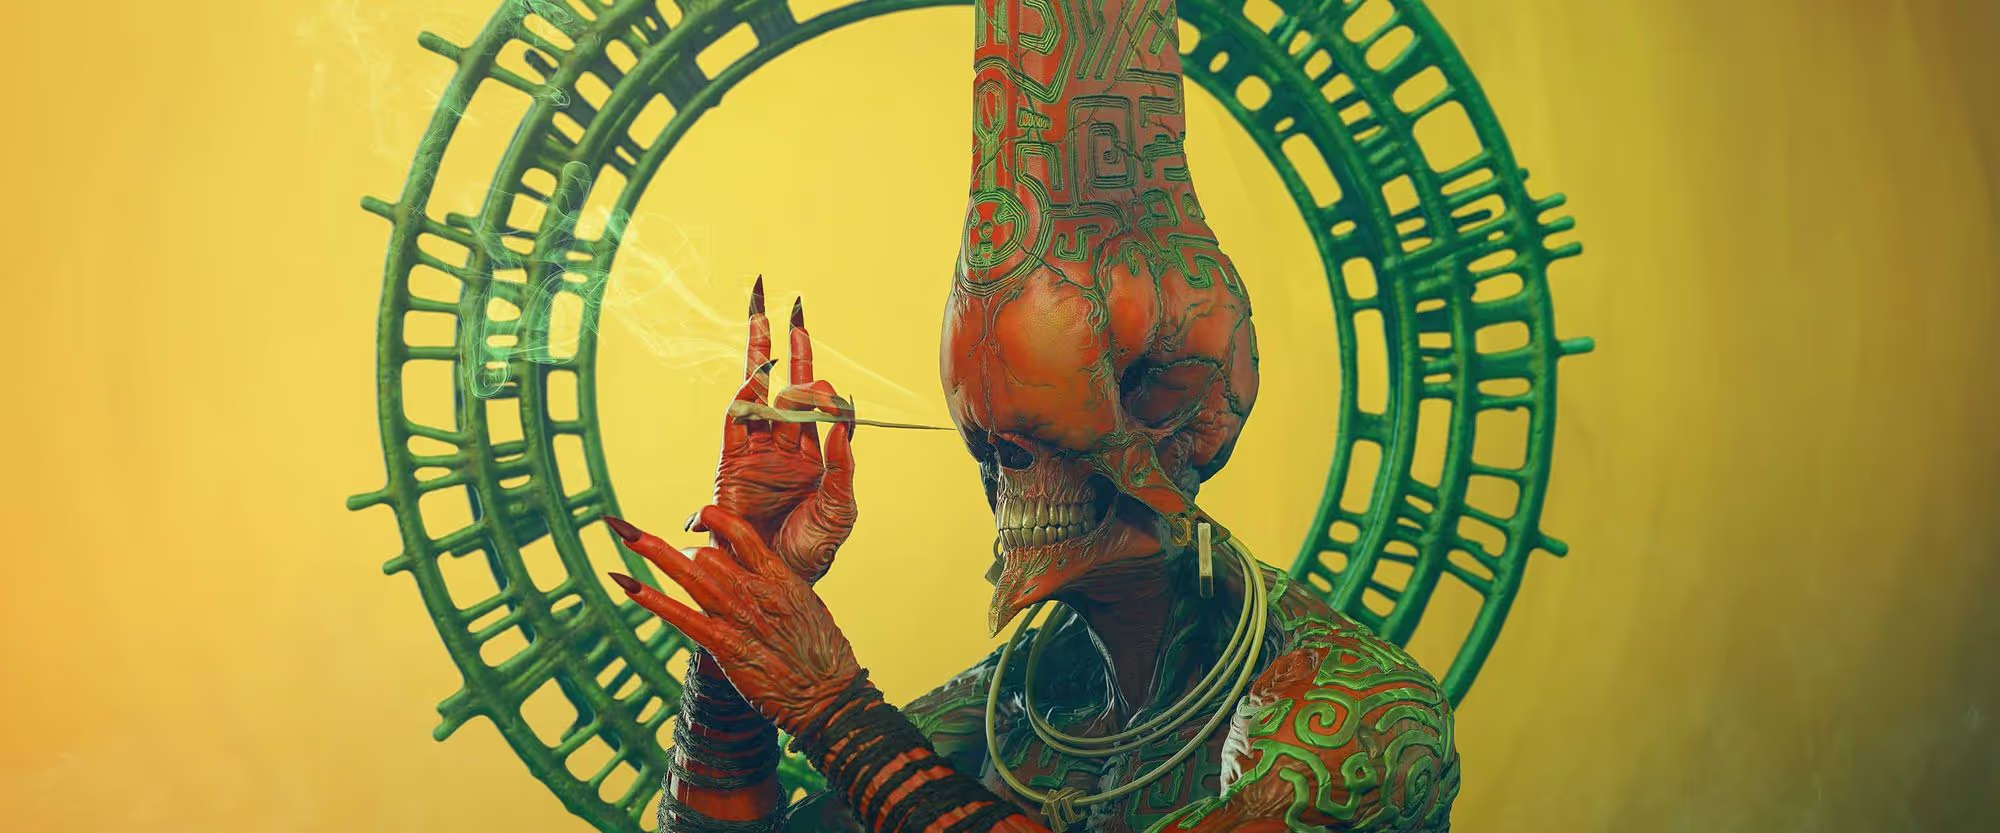
In keyshot, you should have two different meshes, one for each material you assigned in ZBrush. Now it's just a matter or clicks a new material in Keyshot and drag it to the mesh you want... I used a 'Bone' material and an 'amber Gemstone' for this image (I also inserted a couple of extra stones from my advanced rock pack).
That's it! I hope you find this useful. You can also use this method to get something like a metal scratch on paint for example.


.webp)

.webp)