
Once you have your polygroups in the mesh, you can use something like the 'Polish by groups' slider from the Deformation subpalette or the 'Smooth groups' brush to create a nice and clean division between the different colours.
The next step is to run a 'PanelLoops' process in ZBrush to create individual pieces with thickness based on the polygroups you had. You can play around with the PanelLoop settings and change things like the thickness or the bevel profile between the polygrouped pieces. I like to keep it simple at this stage:

Now we have a bunch of individual objects with a very nice set of polygroups that we can split and refine individually and have more control over the polishing process.
The idea for the next step is to split the model into all the separate objects but also keeping the polygroups generated from the PanelLoops process. The simplest method is to click on 'Split to Parts' from the 'Split' section under the Subtool list.
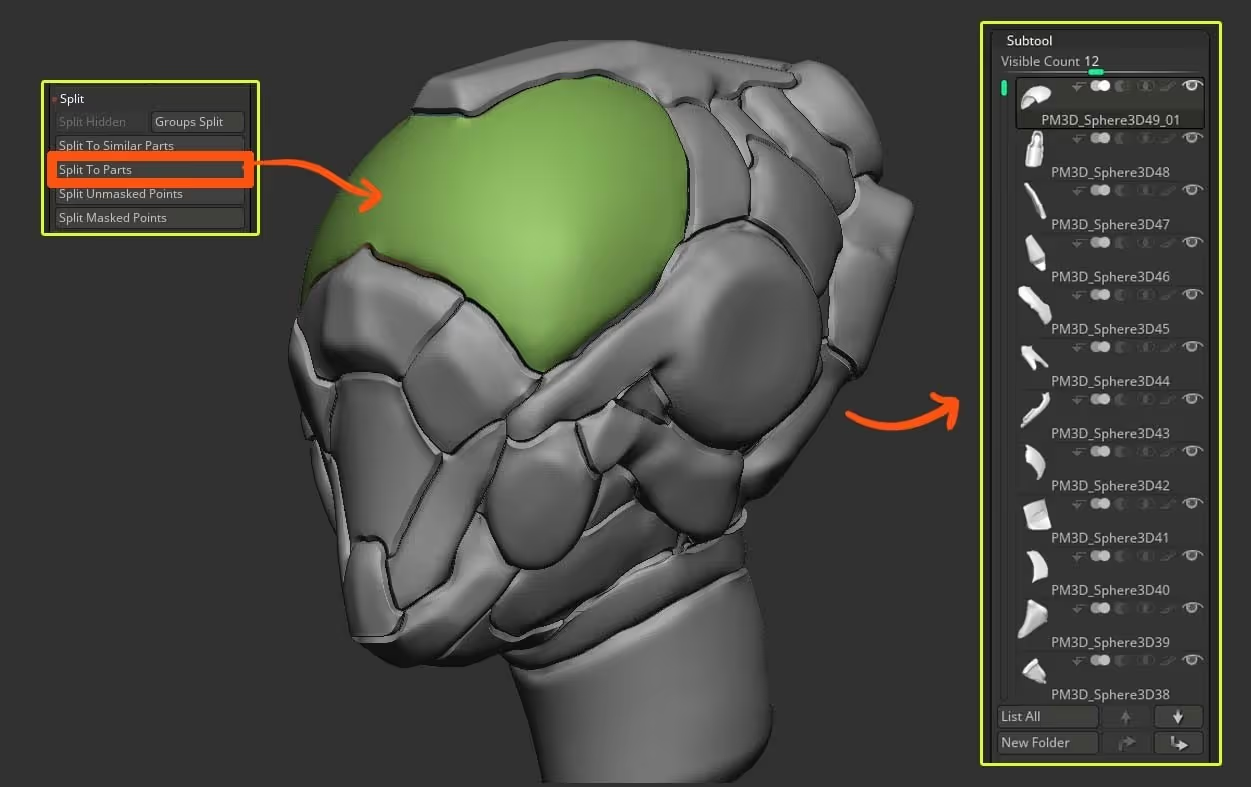
Now you have each piece on its own subtool and you also have a nice set of polygroups including one for the border/thickness of the mesh.
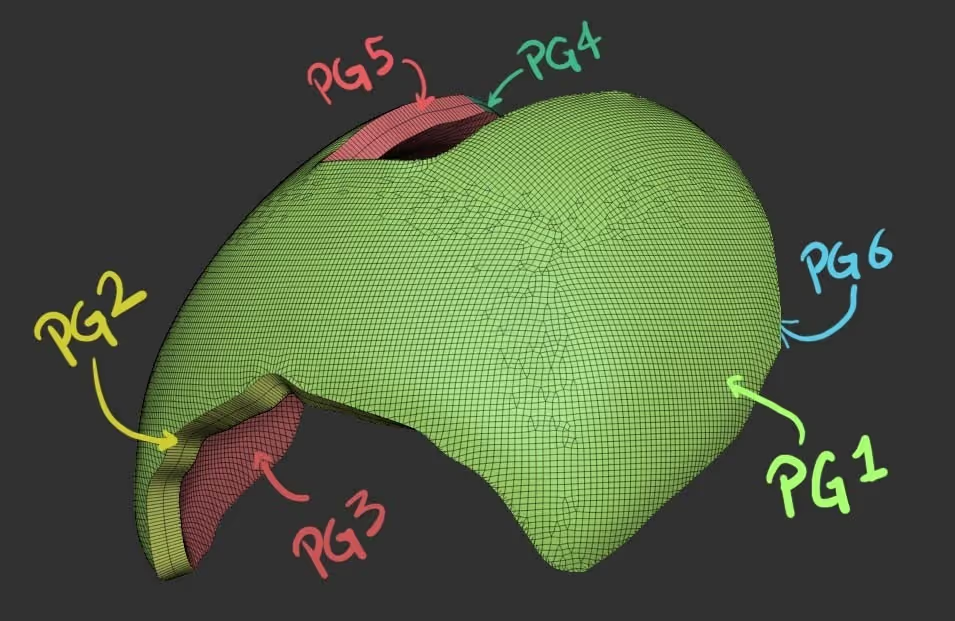
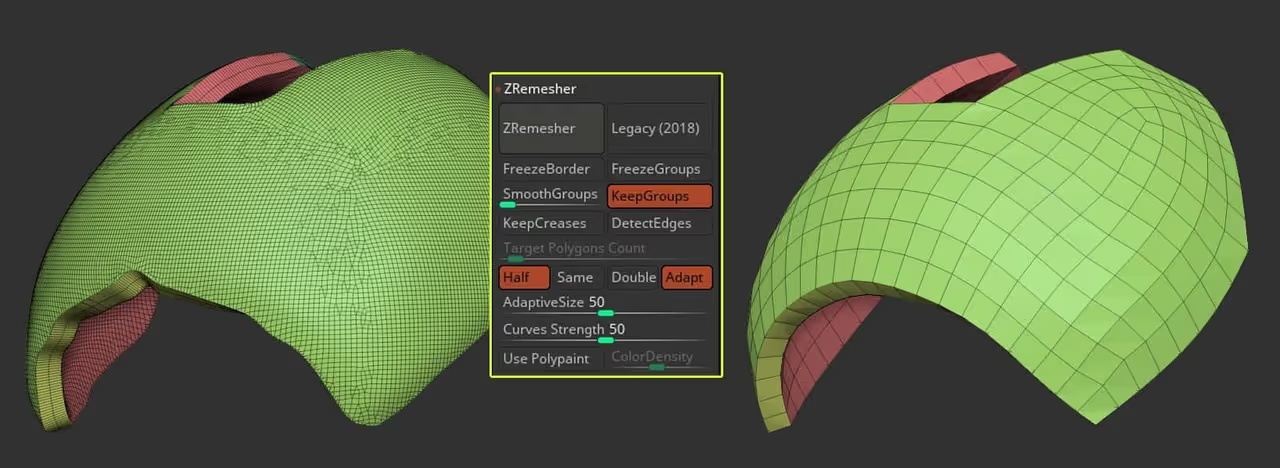
That's it. at this point, you can focus on one subtool to polish and refine it using any other process you want in ZBrush. For instance, if you want to simplify the mesh and go for a low-res base, you can add more polygroups to the border and run ZRmesher keeping groups:
This is basically the process I used to refine the meshes in one of my project:


.webp)

.webp)