So the first step is optional and is about planning, but if you haven’t done anything like this before, I think is a great way to ensure you have an aim.
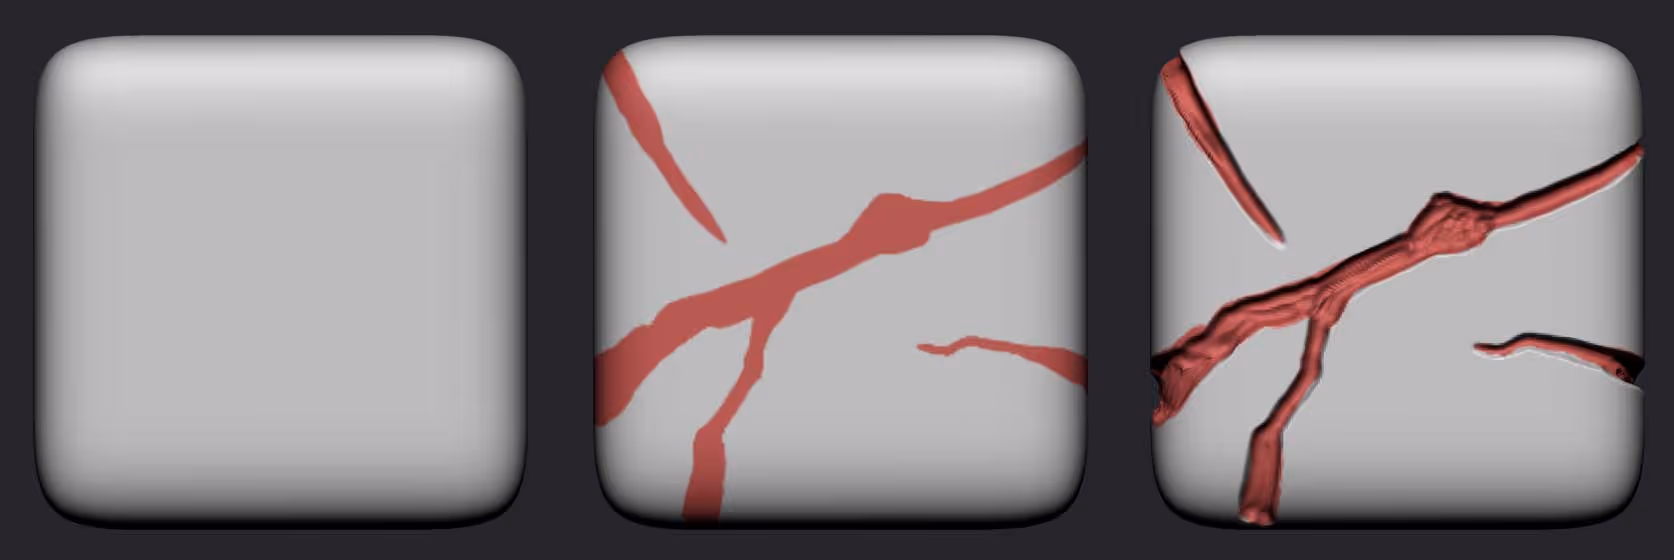
The idea is simply to to use polypaint on your mesh to draw the ‘cracks’ over the mesh. This step allows you to find a good balance between the large cracks and small crevices without committing to any sculpted details…
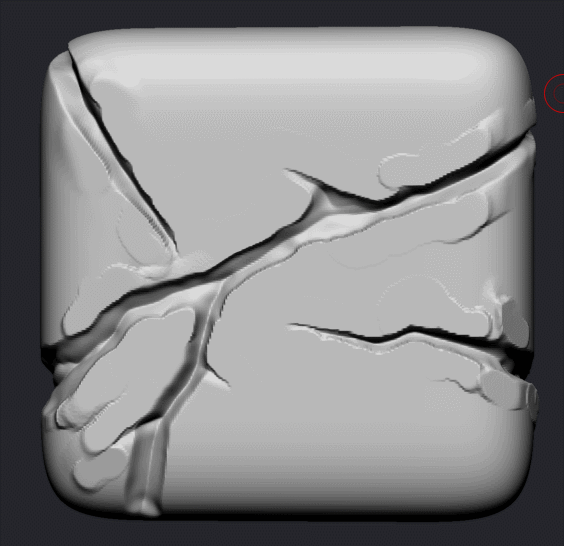
Once you are happy with the layout of what you are going to sculpt, the second step is to store a morph target. Then you can go over the painted colour and start pushing it in with any sculpting brush. I prefer to do it with a stronger Standard brush holding ‘Alt’ so that it creates some bumpiness and irregularities:
Then for the third step you can use smoothing brushes to soften the inside of the crevices and sharpen some of them using the Dam_Standard brush. The idea with this step is to add some additional depth values around the crevice.
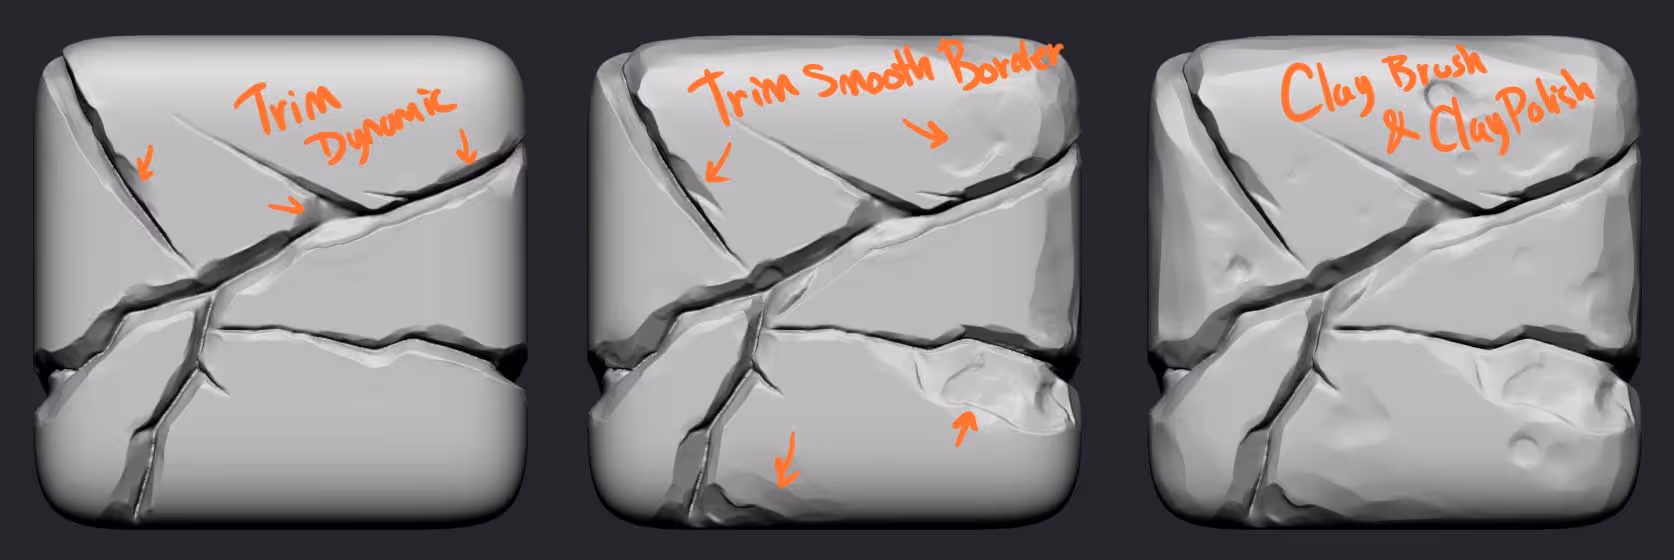
Step four all about bringing the sharpness of the edges back so I like using the TrimSmoothBorder which is not loaded by default but it does come with ZBrush so you can load it from the Trim brushes folder. With this brush selected you can hold the ‘Alt’ click (to pull instead of push geometry) and click on a flat area near the crevice.
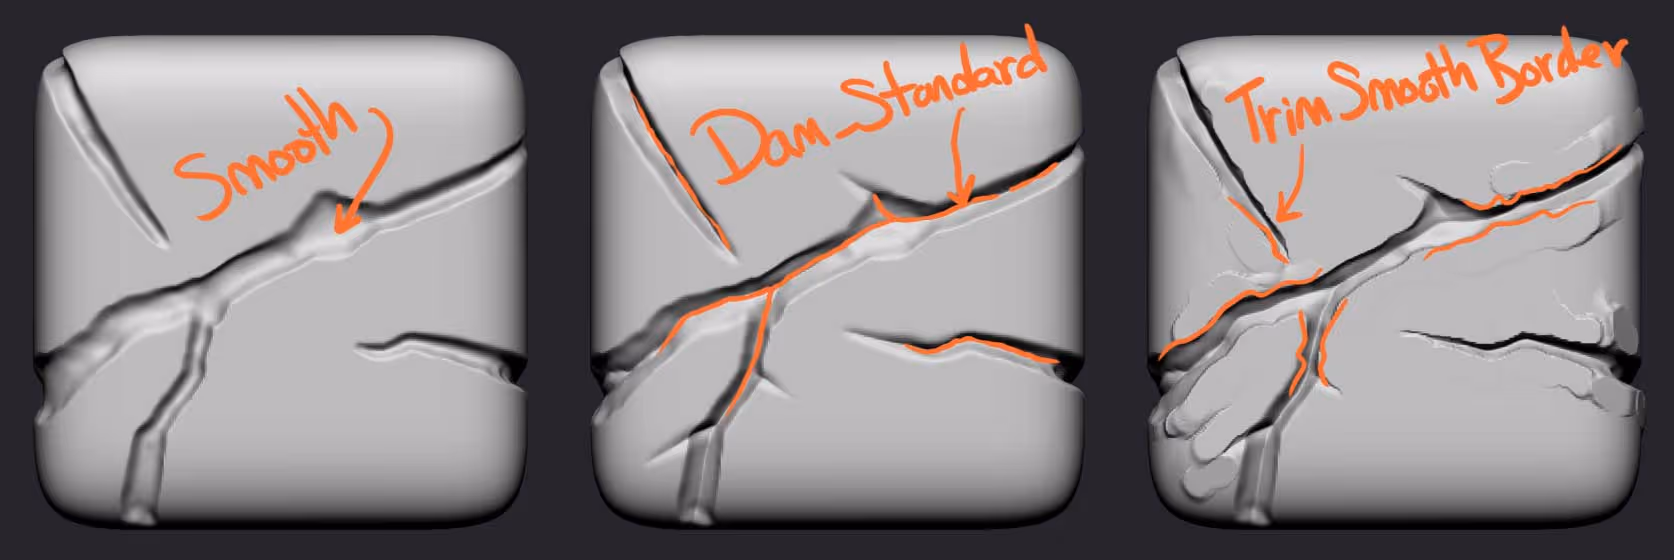
Here is an example of the TrimSmoothBorder in action. You’ll end up with some extra bumps and planes but the this tehcnique will give you seme really nice cuts and sharp edges around the crevice outline.
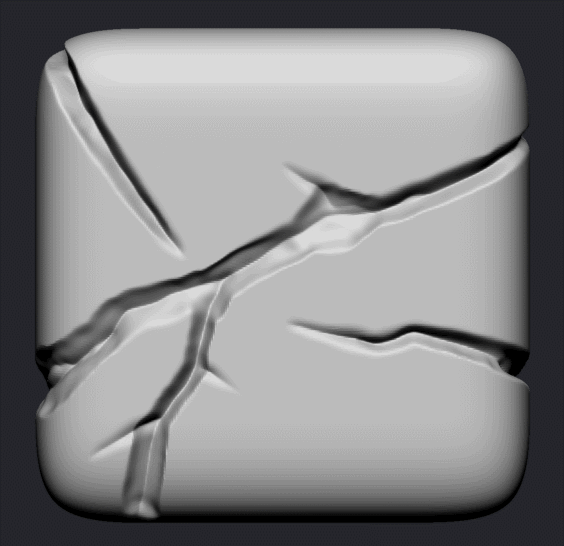
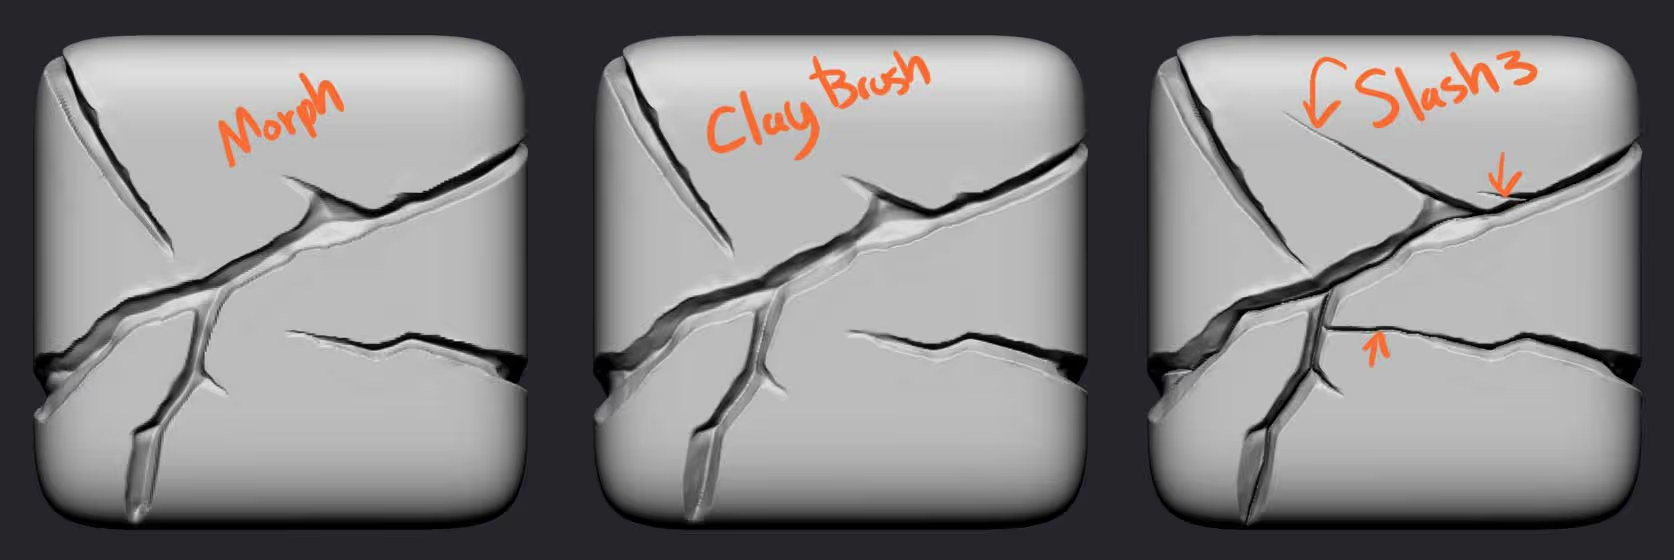
Focus on the edges for the cracks and ignore the extra planes and bumps that this process generate, you can easily be remove them using the Morph brush and taking advantage of the MorphTarget we saved before like this:
So the next step after you have cleaned the mesh and around the cracks using the Morph brush, you can use the Clay brushes to refine a bit of the volumes inside the crevices and maybe add a bit of volume around the walls of the crack.
You can also use something like the Slash 3 brush that gives you a very sharp effect, to cut additional lines or simply extend the cracks a bit more so the can have a more organic tapering:
The final steps to polish the sculp is to trip some edges. Using the Trim Dynamic brush, you can go through all the edges of the cracks and flatten certain areas to enhance the stylization of the piece:

You can also use the TrimSmoothBorder brush again to add additional planes and variation. If you want to make things a bit more interesting, you can use the Clay Brush to carve out some pieces and indentations before running a ClayPolish process to unify the look/ style of the entire mesh.
That’s what the technique is all about.
The other think you can so is create multiple cracks on objects or a plane and then convert those into alphas to detail meshes…. here is a quick alpha I made from the example cube from this email:
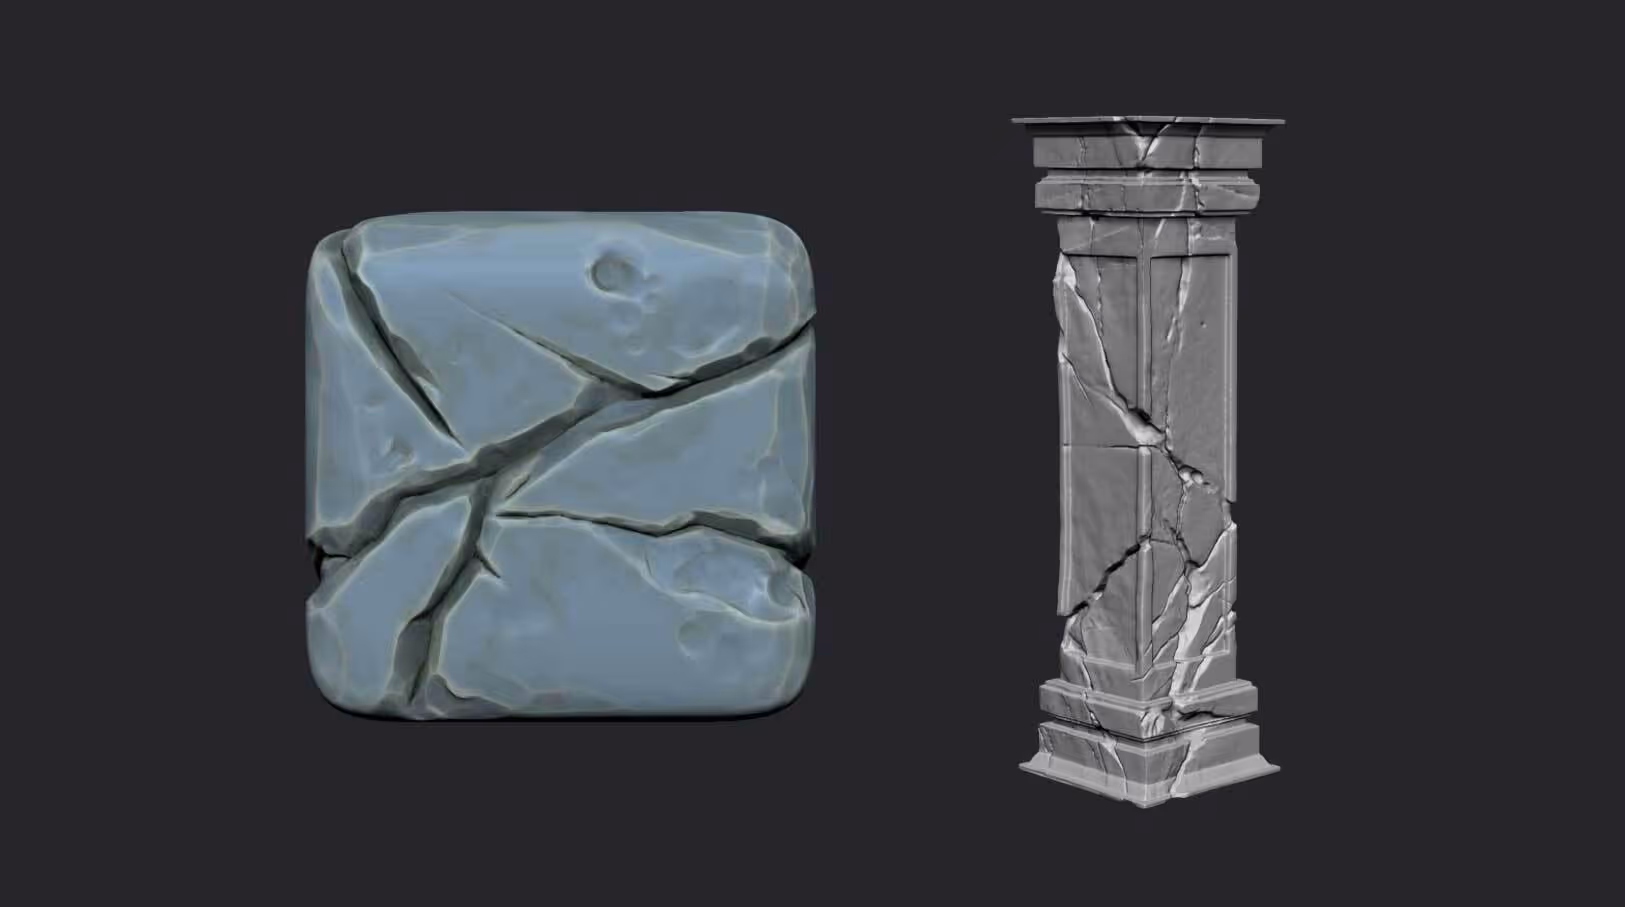
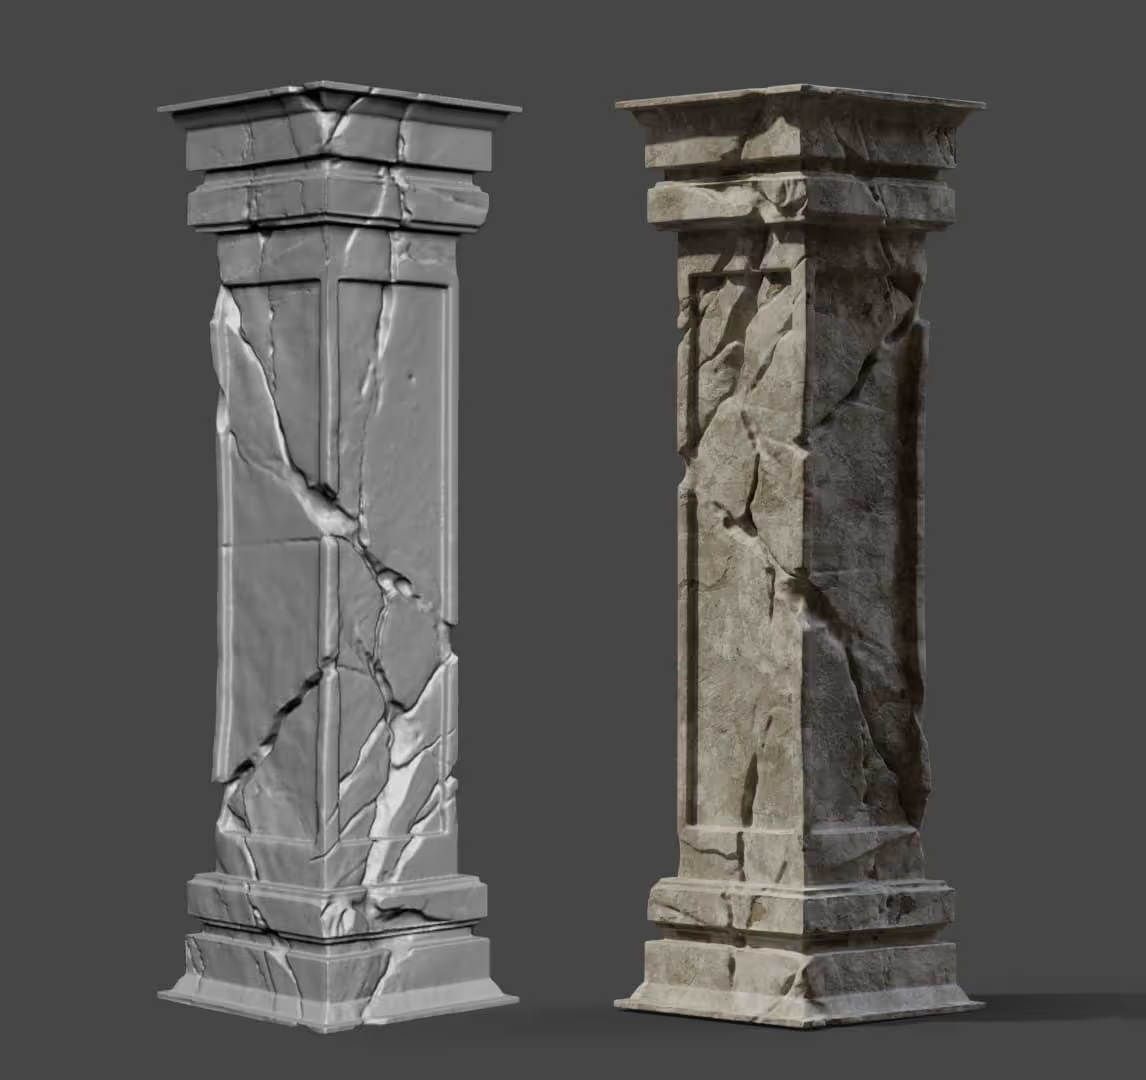
And here is an example of the exact same workflow I just shared with you but in a slightly more interesting asset:


.webp)

.webp)