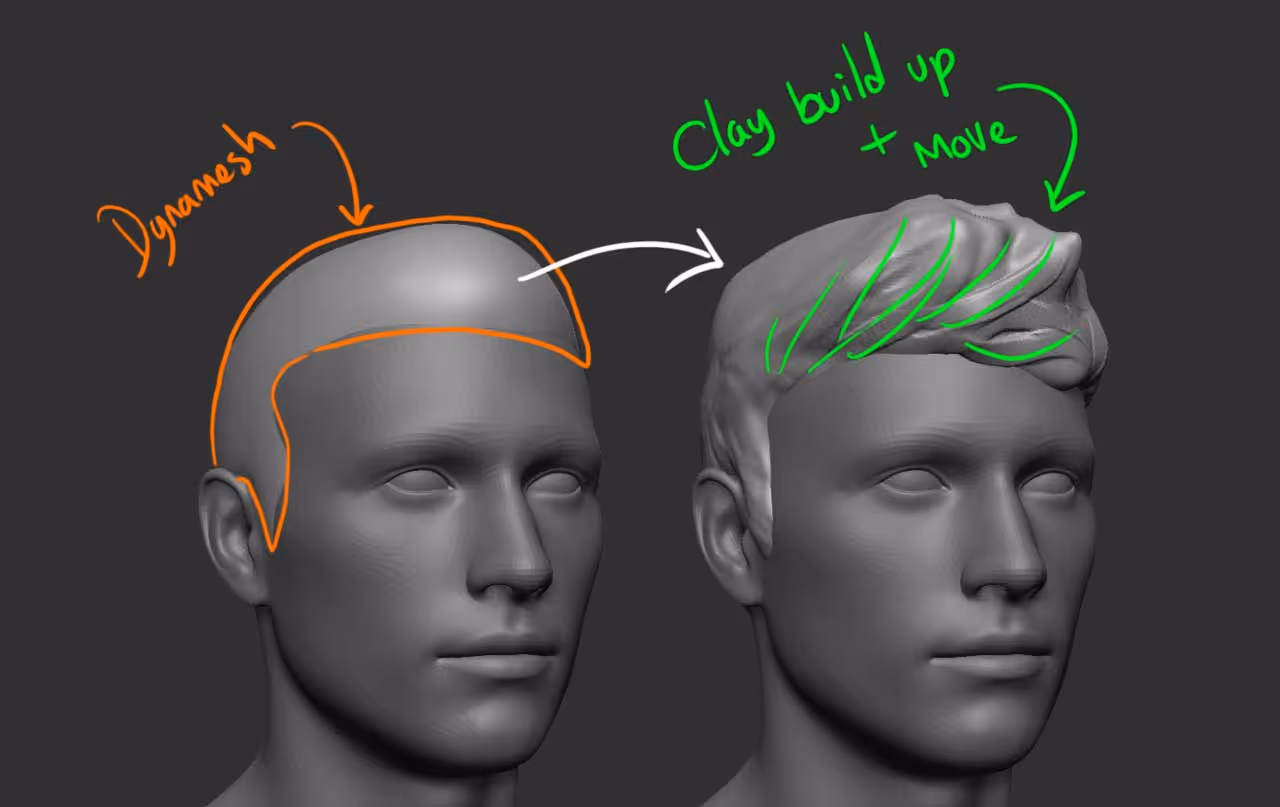
In the example below, I started by appending a sphere to my demo head and converting it to a Dynamesh object. Then you can use something like the move brush and the Clay build Up brush to give it some shape! (keep it simple and focus on the volumes).
Clumps and custom mask
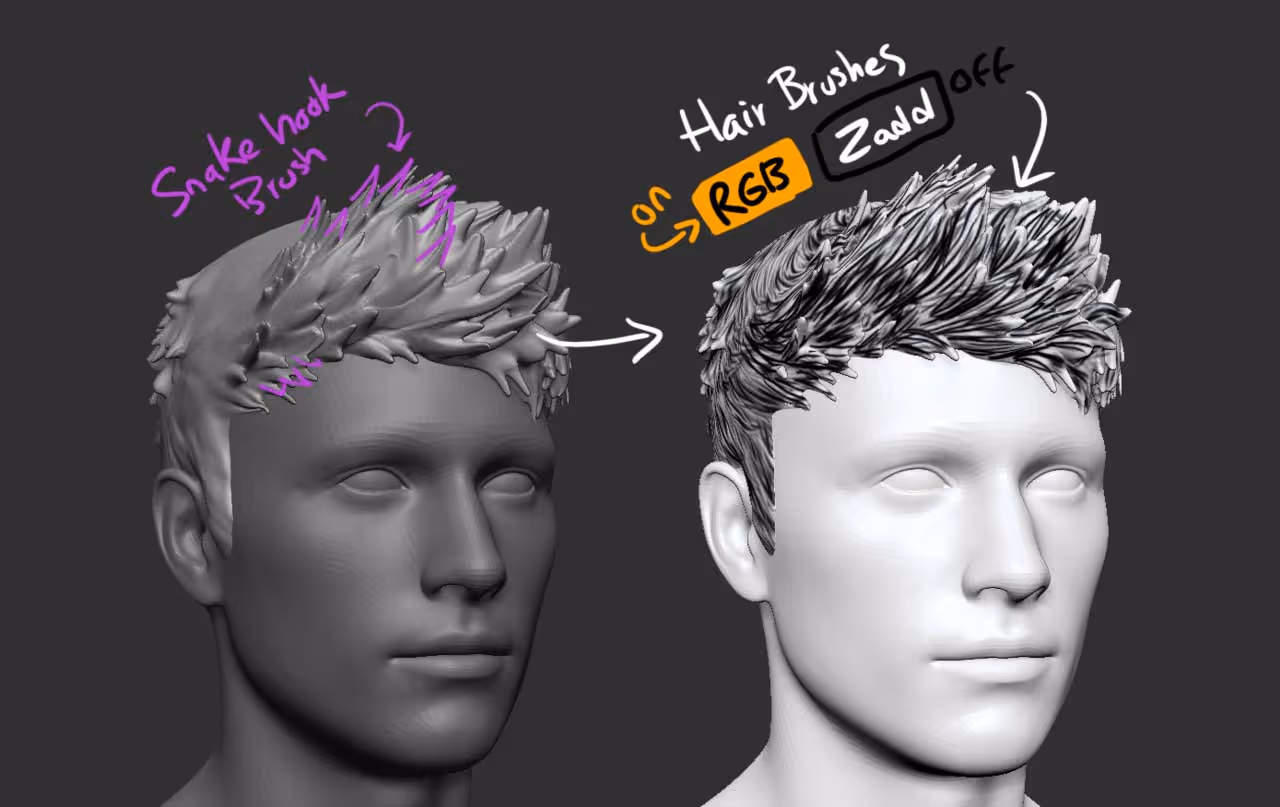
For the next step, the idea is to use the Snake Hook brush to push little pieces of hair up to create this guy's hairstyle. Try not to overdo this and make sure that the 'flicks' or 'clumps' of hair have direction.
Then the trick comes from the brushes I shared in the pack last week, but with a little tweak: Go ahead and load one of the long hair brushes, turn off the ZAdd (so no sculpting info) and turn ON the RGB so you can paint.
- Choose a different material so it is easier to see (like SkinShade 4) and fill the hair with a white colour.
- Choose a black colour and use the brush to paint the hair following the flow you established in the sculpting stage.
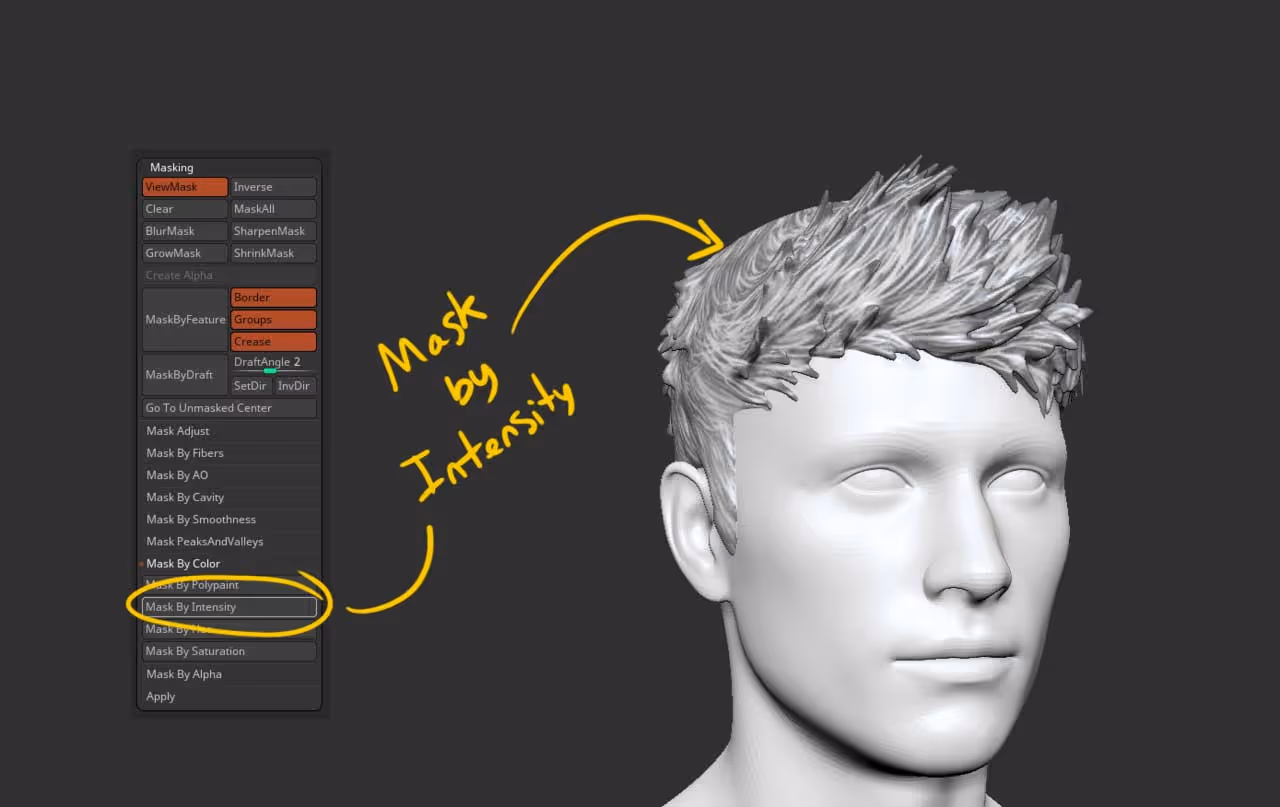
That's it, once you have the black and white polypaint on your model, you can essentially generate a quick mask using the Masking options in ZBrush.
With the hair sub-tool selected, expand the 'Mask by colour' section under the Masking sub-palette, and click on 'Mask by intensity'
You can also turn of the polypaint and hide the mask to see better.
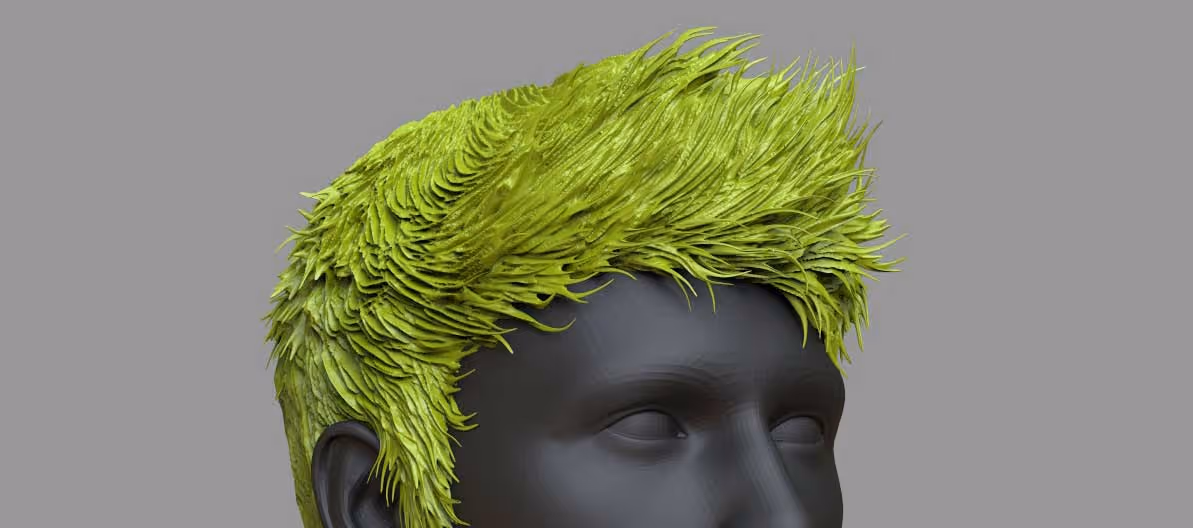
Now here comes the magic... with the move brush selected, gently push the geometry outwards and since we have a mask based on the strokes from the hair brush, you can produce a very complex hairstyle very quickly
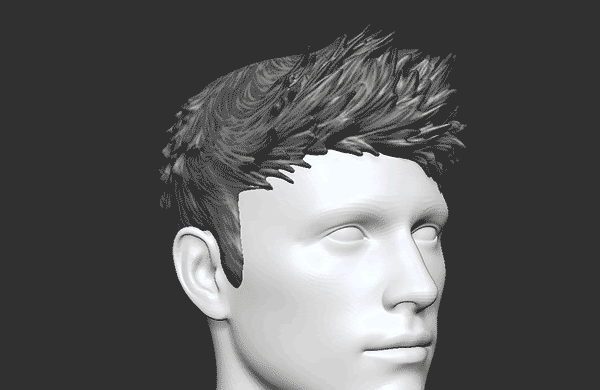
At the end, you can simply take the snake hook brush again, enable Sculptris Pro and with a small brush push little 'flyaways' to add complexity to the hair.


.webp)

.webp)