
ZBrush is quite flexible in terms of customisation but you can only arrange the UI elements that are available. In this simple tip, I’m going to show you can work around this restriction and create your own buttons to save space in your UI.
The tip is this: Create a new ‘Macro’ for each button or switch you want to ‘shorten’. The Macro would be as simple as Macro can be as it will simply play the action/state of the button or switch.
STEP 1:
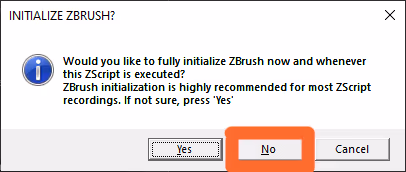
Go to the Macro Palette and click on ‘New Macro’ and then click ‘NO’ when the pop up window warning appears:
STEP 2:
Click whatever button or switch you want to shorten and without performing any other action, click on the ‘End Macro’ from the Macro palette to stop ‘recording’. Now you can name your macro with whatever word or letters you want, the name of the macro will determine the length of the button.
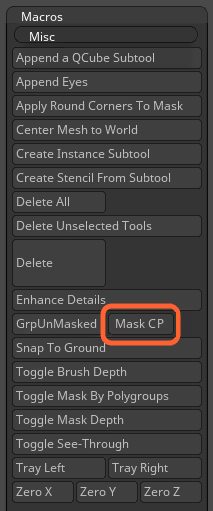
I’d suggest you keep it relevant to the actual action so in my case, the ‘CP’ of my button ‘Mask CP’ stands for ‘Changed Points’.
NOTE: Make sure you save the Macro in the ZBrush Macros folder so it is available to you every time you start the application.
STEP 3:
Enable the UI customisation in ZBrush from the preference palette, and you can now move the Macro button (from the Macros’ Palette) to a convenient spot in your custom UI
That’s it really, this is how simple this workaround is. Obviously, there are some limitations but for the most part, long buttons can be simplified to fit a more compact UI if you need to.
A final tip is to create multiple smaller buttons if a default button has more than one alternative. For instance, the Mirror button can be used to mirror on the X, Y or Z axis, so you can create there separate buttons for each action:


.webp)

.webp)