
First things first, Spotlight in ZBrush is an awesome tool to work with images and textures overlayed over the canvas (Texture palette > import textures or load spotlight). And the ZBrush Compositor plugin is a free plugin that I collaborated with Joseph Drust to develop (Jospeh coded it based on a workflow I designed).
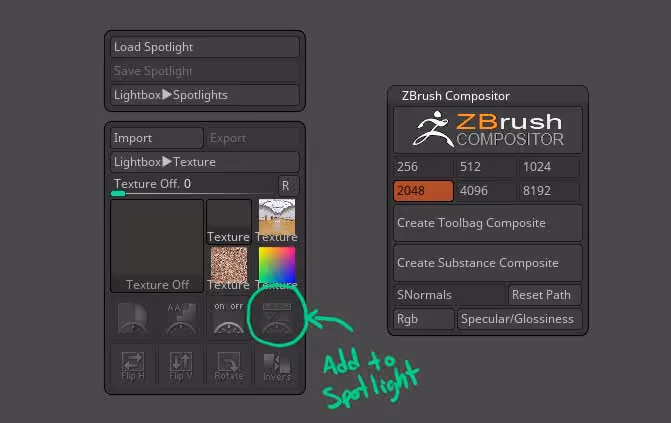
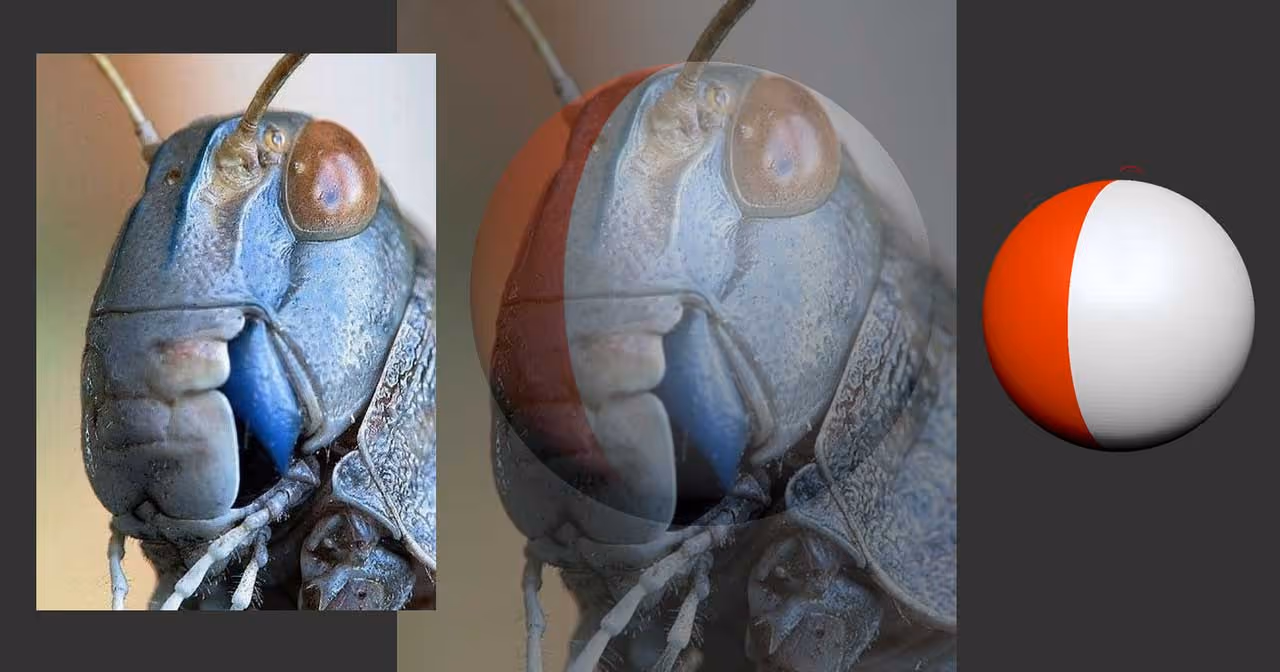
The first step is to load an image in the spotlight that you want to use as a reference (click import from the texture palette, then selected and press the 'add to Spotlight' switch). I chose a cool insect closeup as a reference.
The next step (2) is to add a sphere as our starting point and use polypaint to paint half of it... this would be a great reference to set the middle line of the sphere and try to match the perspective of the image you chose. Below is my image from spotlight overlay over the sphere and rotated to match (roughly) the angle of the insect's head:
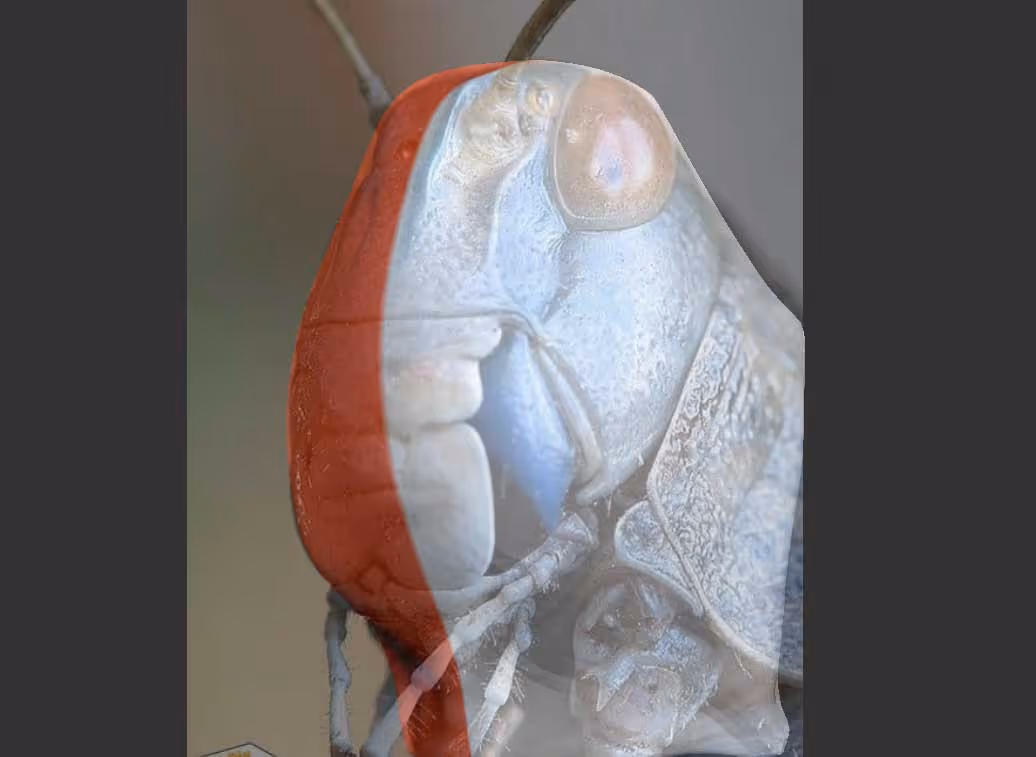
Step 3 is to lock the camera (once you find the perspective 'match) and then start using the move brush with symmetry to deform the sphere and adjust the silhouette to match the reference. You can also save the camera in case you want to rotate around and come back to the view that matches the image.... this step won't look amazing but you just need something to get started with:
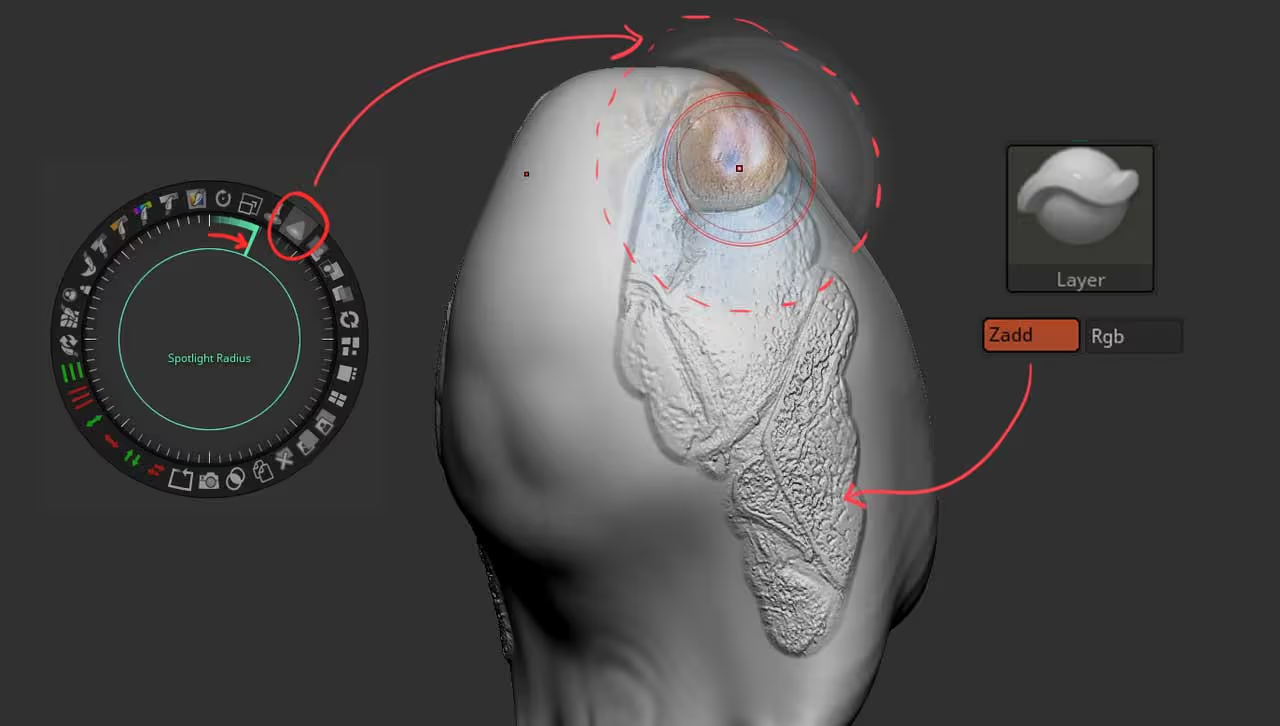
The fourth step is the cool one! now that you have a base that sort of matches the reference, you can actually use the spotlight to project both colour AND DETAILS! Basically, ZBrush will interpret the image as black and white and create details based on the lighter and darker values of the photo.
To do this, you need to bring the spotlight editor (pressing the 'Z' key), click on the Spotlight radius and increase it a bit. Get out of the Spotlight editor ('Z' again) and choose something like the layer brush with the RGB disable (unless you also want to have polypaint colour from the image).
That's it, go over the 'blob' mesh and as you draw strokes with the layer brush, you'll see details being projected into the model based on the texture values! (you might want to Dynamesh the mesh or increase resolution to see more details).
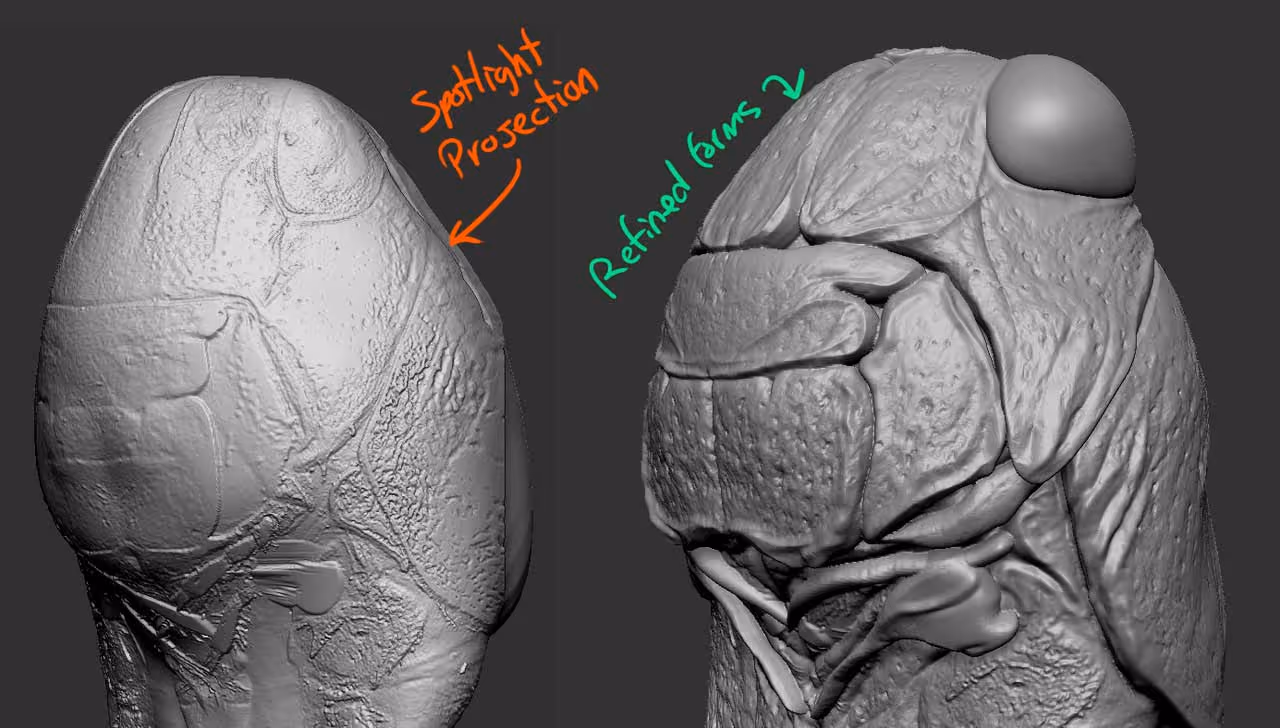
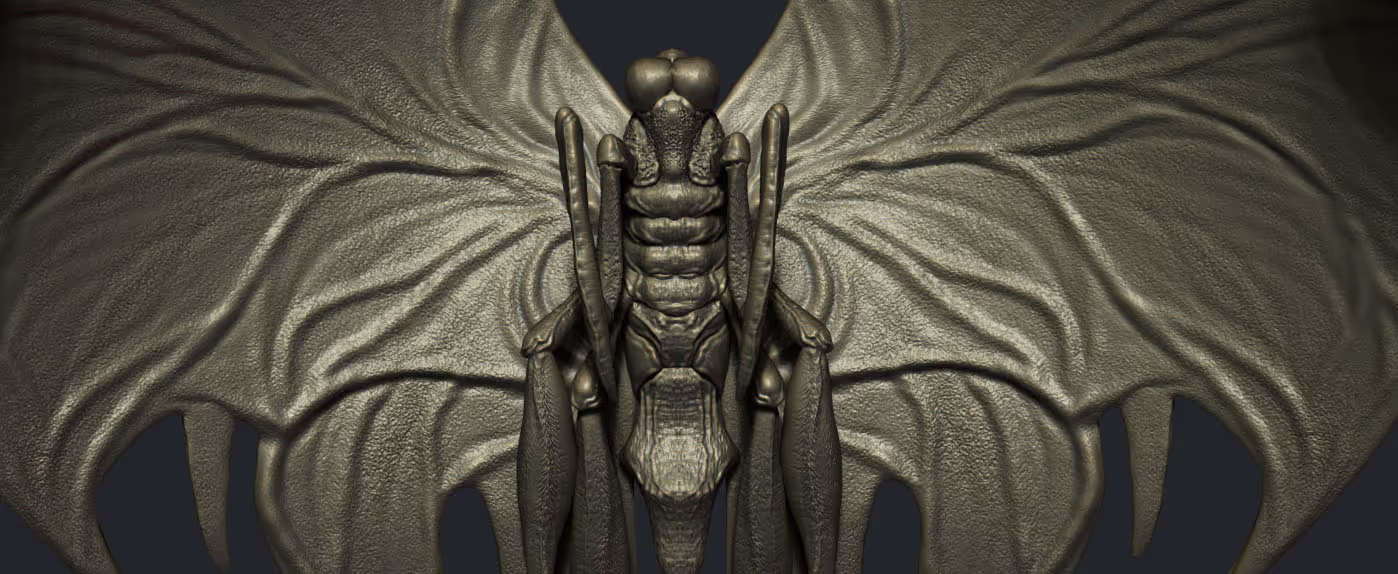
This should give you a nice projection of details as A REFERENCE. obviously there is more work to be done but it is a super handy workflow to get you started with proportions and a rough idea of what you want to make... Here is the final 'projection' and then a bit of refinement of the forms. The masking brushes are a great help to accentuate the 'panels' of this creature.
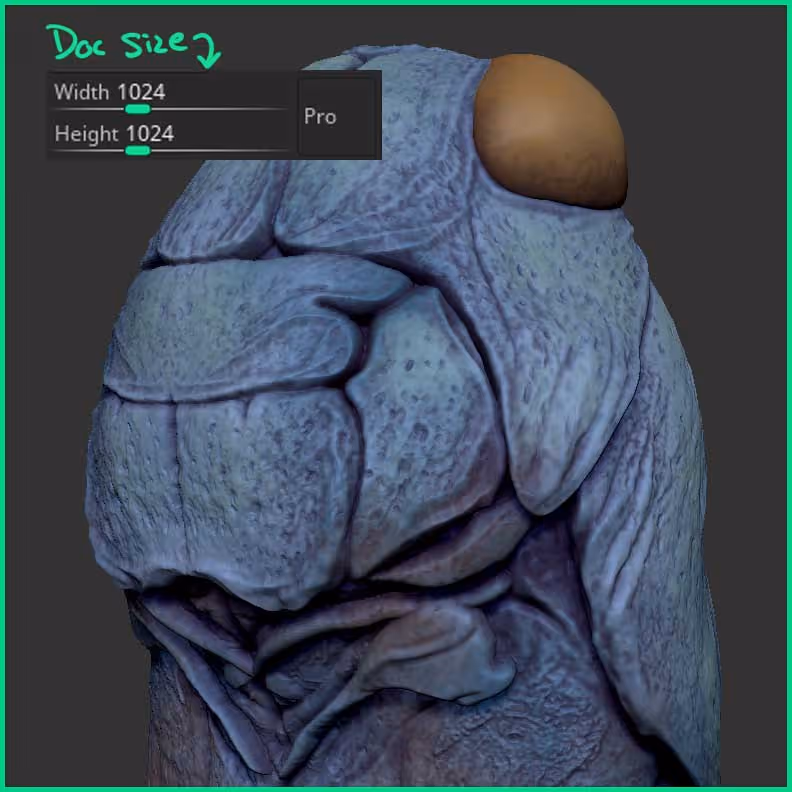
Now, we'll move into the ZBrush compositor to finalise this quick sketch... so let's start by changing the canvas to a square document (any size) This is important so you can frame the the model the way you want it to go into the ZBrush compositor. I also added some quick polypaint pass based on the colours of the reference image:
Now, go ahead and open up the ZPluing palette and expand the ZBrush Compositor (the ZBrush compositor doesn't come with ZBrush but it is free and you can download it from the download centre on Pixologic's website).
For the next step, you need Marmoset Toolbag (3 or 4) or Substance Painter. Find an angle that you like and click on the 'Create Toolbag Composite' (or the Substance Painter one), this button will launch a process that will create a few passes and a simple square plane where the maps will be projected... All of this is magically automated (thanks to Joseph Drust) and you'll have a 3D projection of your render in Marmoset or Substance Painter:
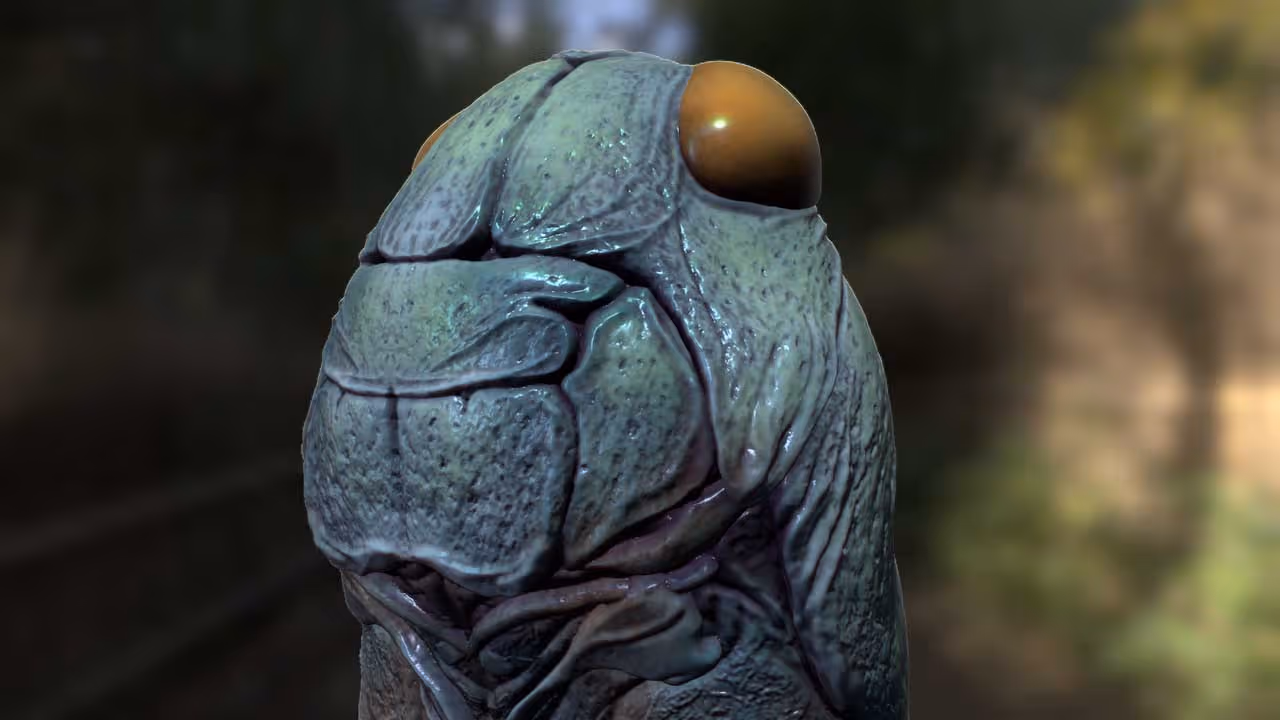
That's it... now you can play with roughness and other properties of the material to make a nicer render from a simple sketch in ZBrush ;)


.webp)

.webp)