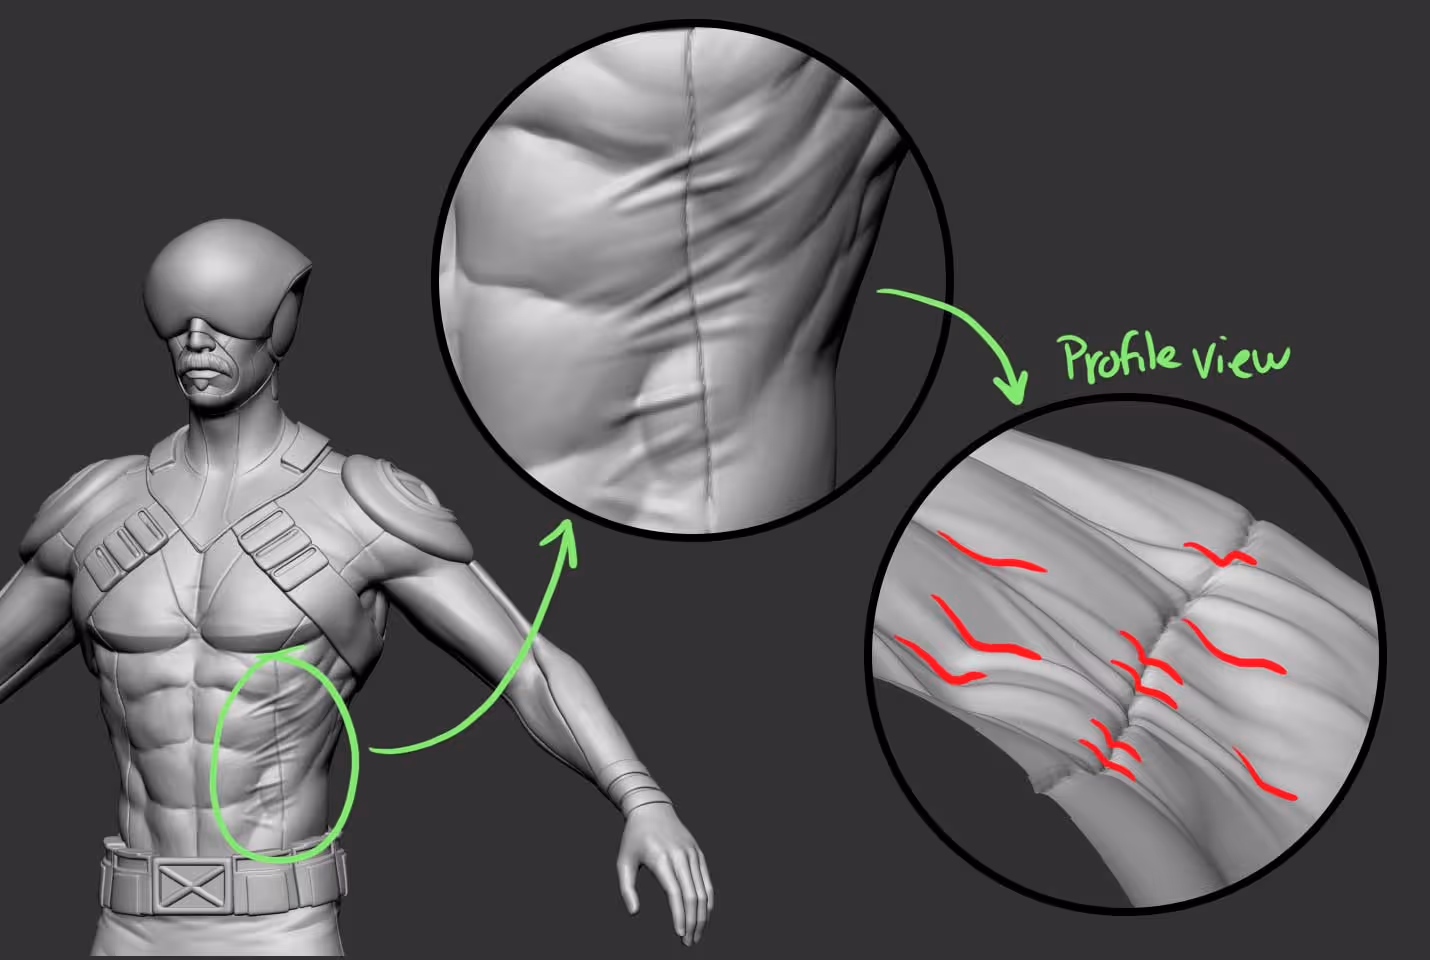
You might think that this would be an obvious simple process… it should be an easy thing to achieve with the standard brush. BUT, the problem is that adding these type of details on a base mesh with just the standard brush, you might get away with compression folds but when it comes to ‘tension’ folds, you need to make sure the fold is straight to simulate the tension in the fabric… otherwise you end up with this issue (folds that follow the base mesh but have not tension):
There are a lot of options to workaround this issue but here is a rather different technique (one of my favourites) that will give you pretty convicting results.
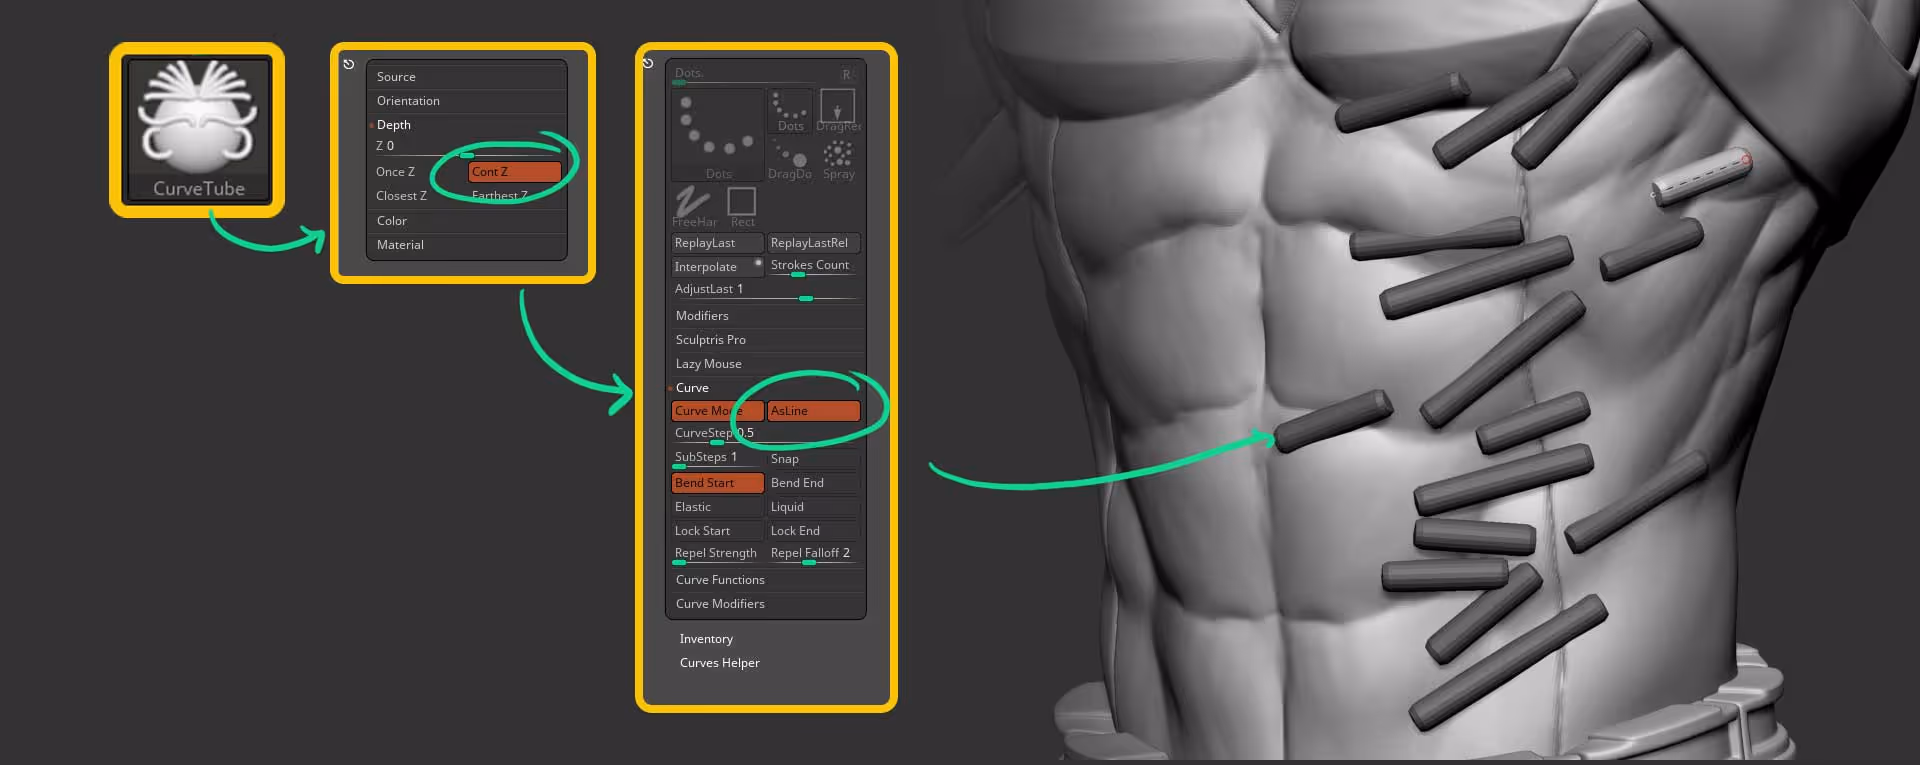
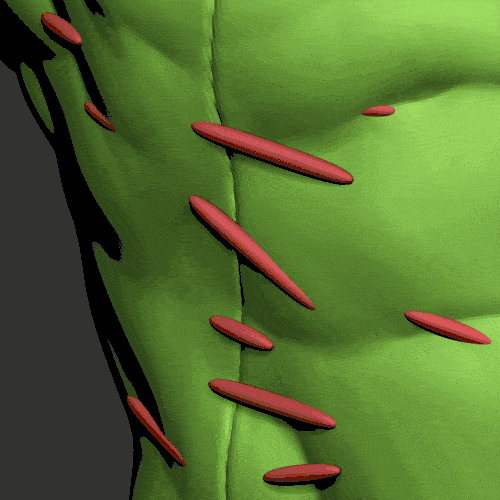
- Select the CurveTube brush an form the Picker Palette switch to the ‘Cont Z’
- From the Stroke palette enable the ‘As Line’ switch from the ‘curve subpalette’
- on a separate subtool (could be a simple cube hidden inside the main mesh) draw a few straight tubes in the areas you want to create the tension folds:
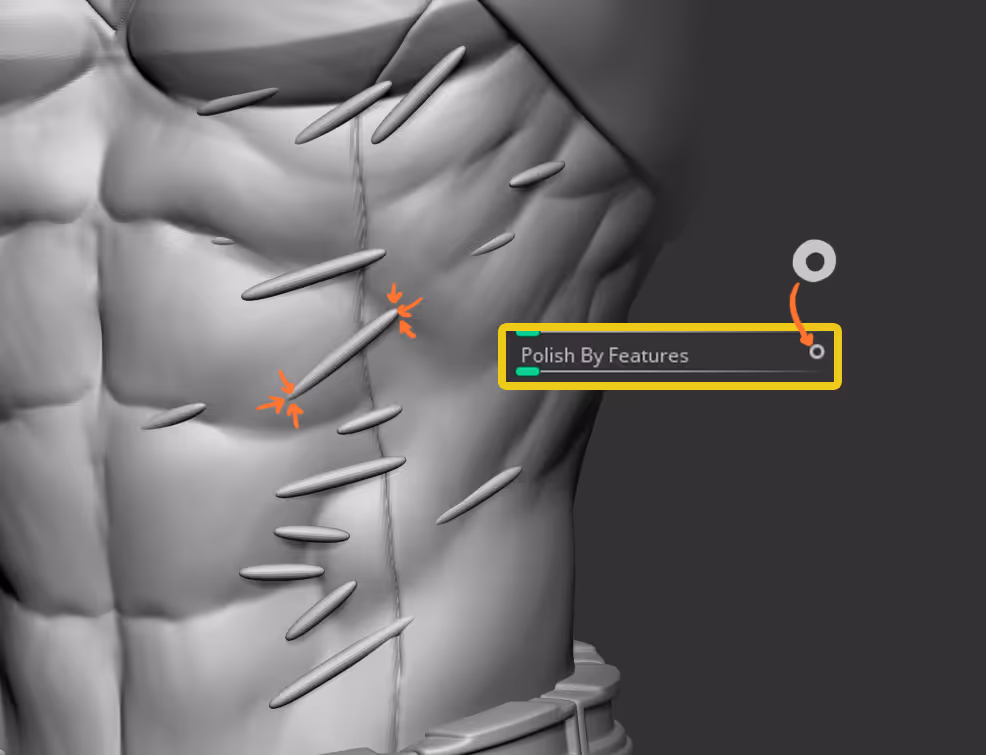
Obviously you can adjust the size of the tubes with the brush size but once you finish placing a few tubes you can use the ‘Polish By Features’ Slider from the Deformation palette to smooth the tubes and create a bit of a tapering effect.
clicking on the little dot at the top right of the slider will give you a stronger effect:
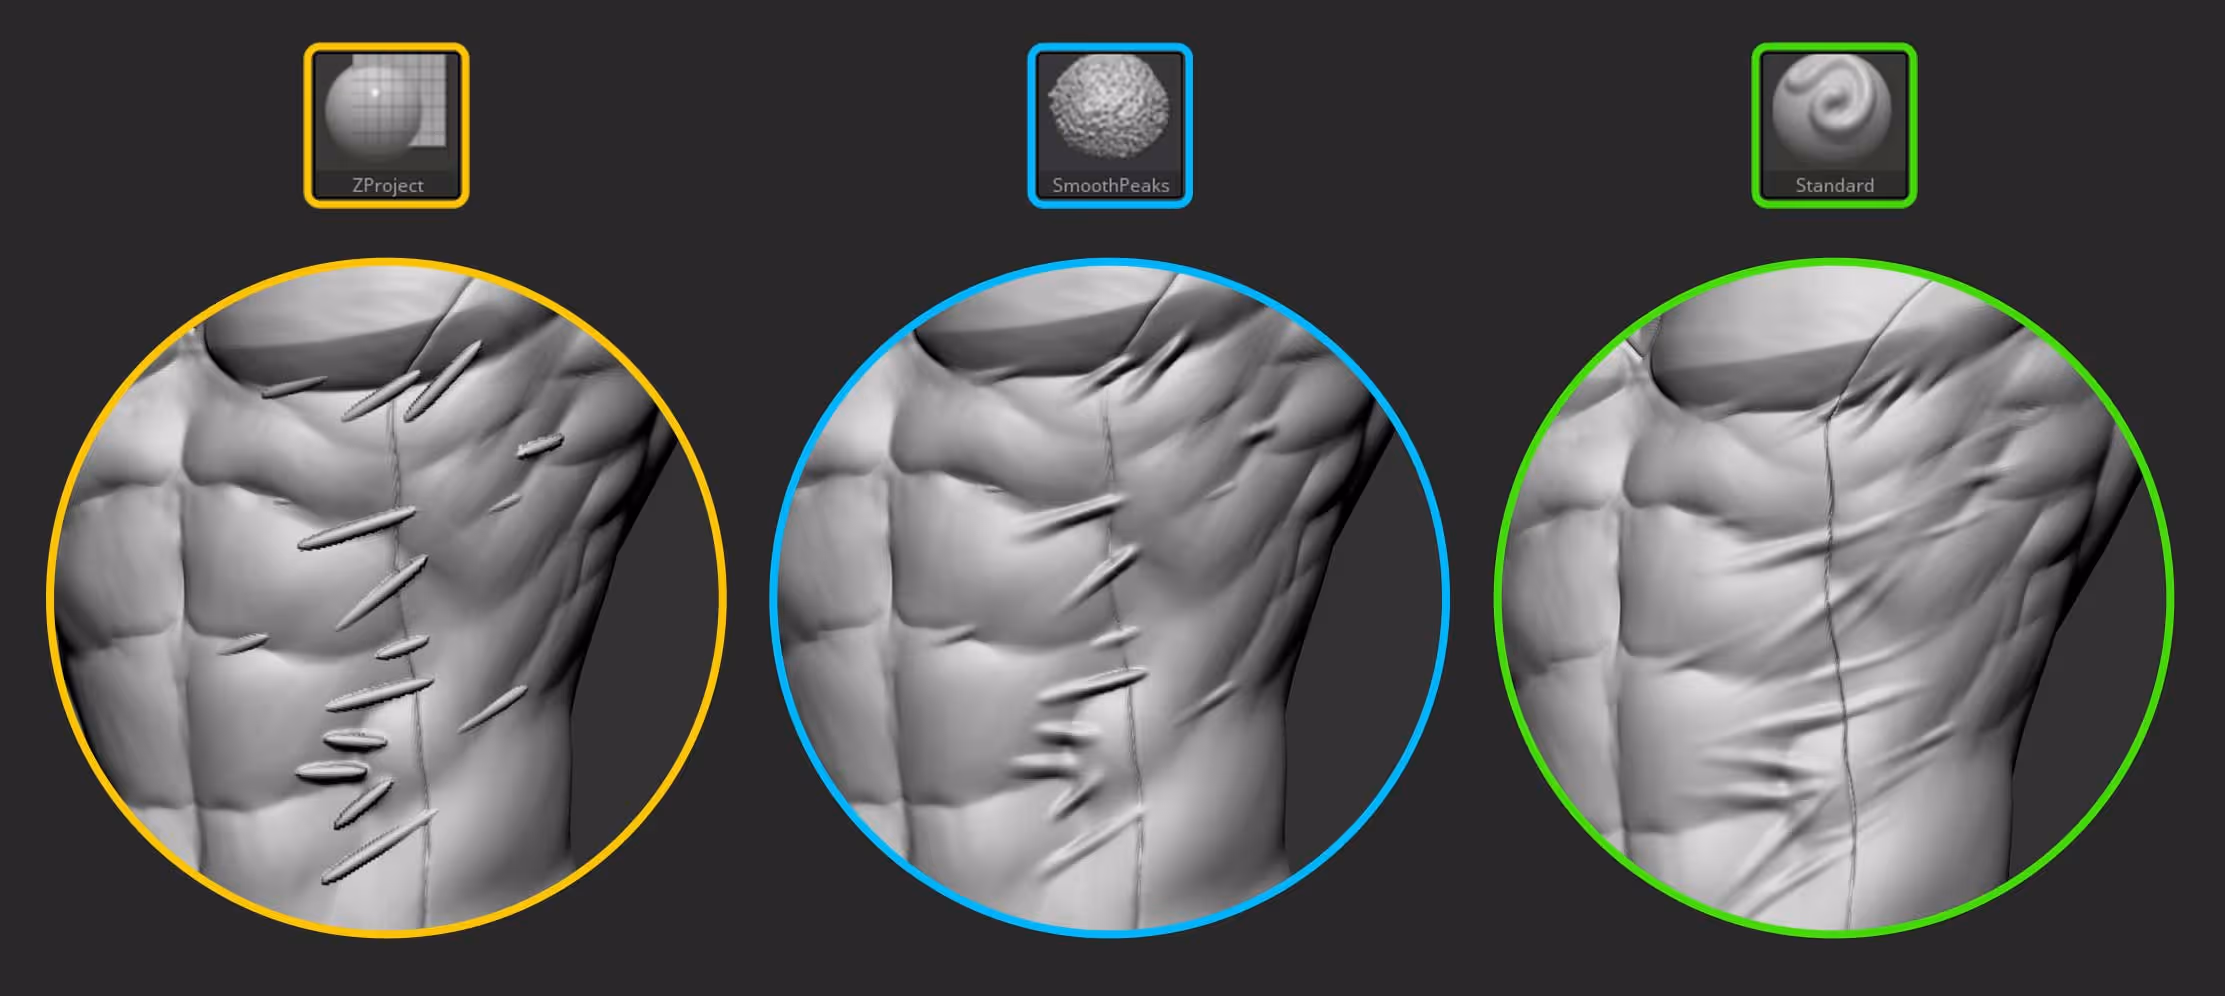
Now, here is the trick… you can select your base mesh again (in my case the mesh with the torso), select the ZProject brush and project the geometry of the base mesh to the volumes of the tubes (make sure you press the ‘Alt’ key modifier or switch to ZSub to project outwards:
Then you can use the Smooth Peaks to soften the transition to the rest of the mesh and/or extend the tension folds using the Standard Brush!
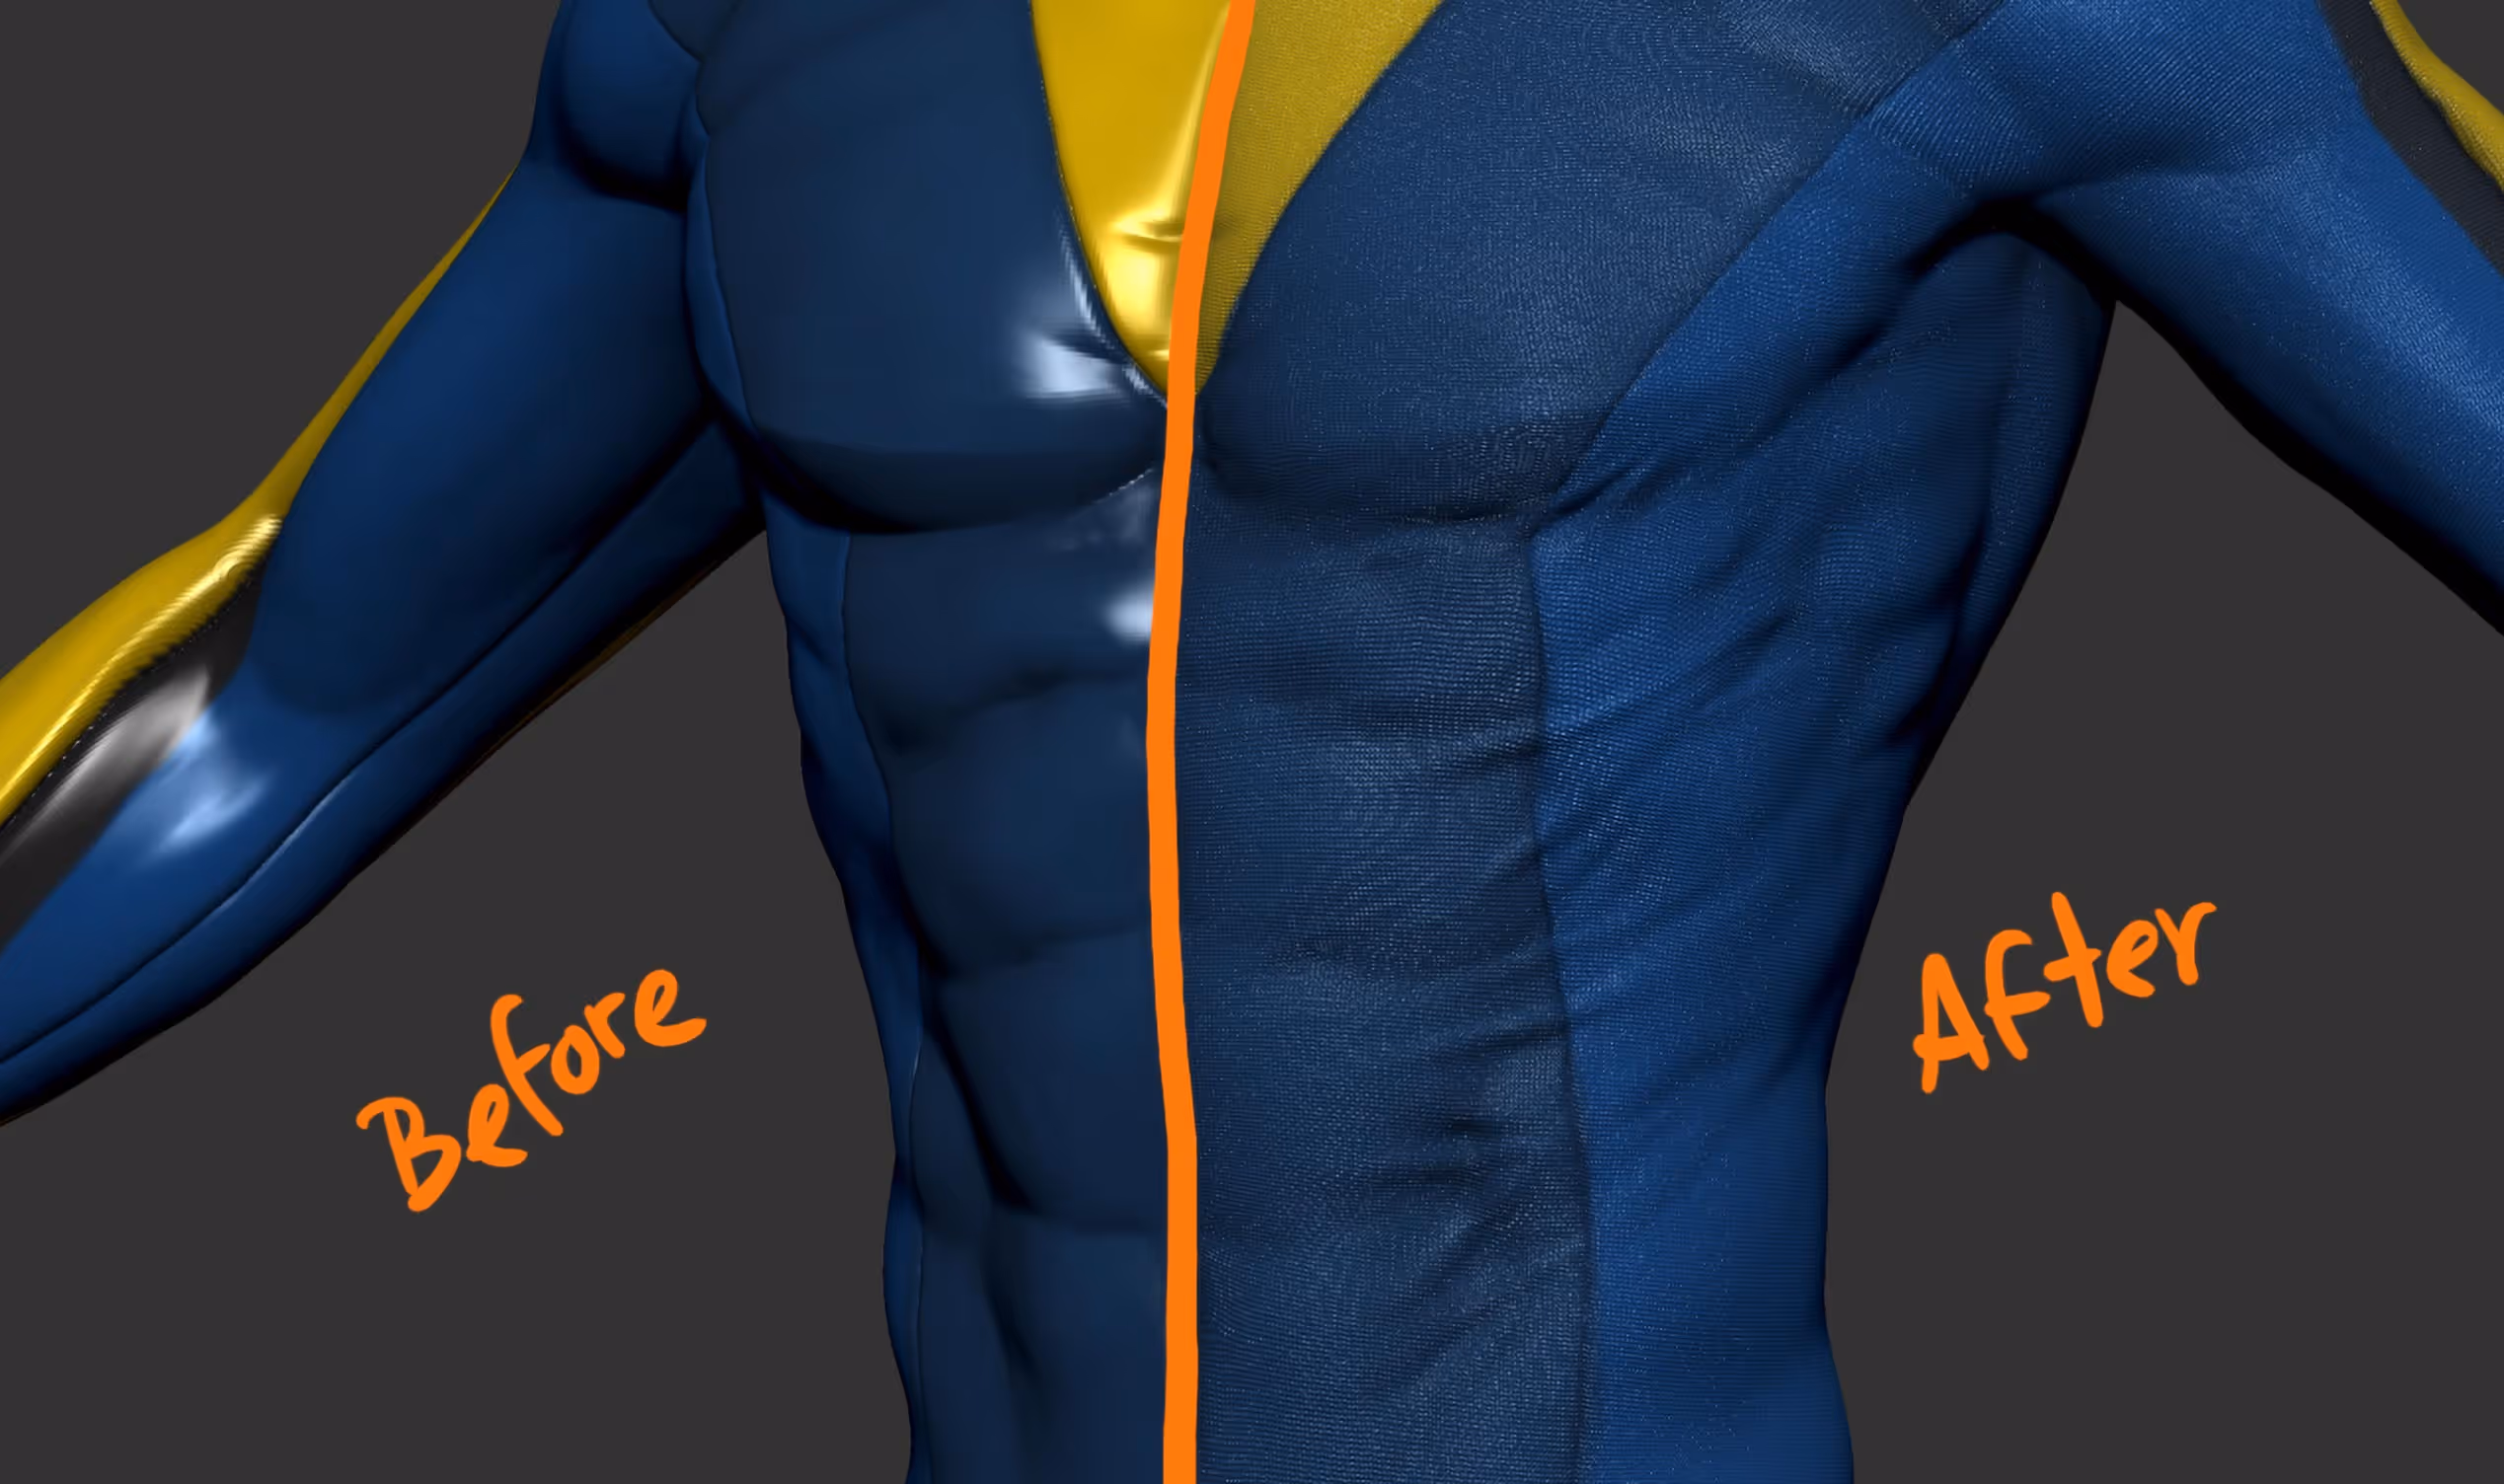
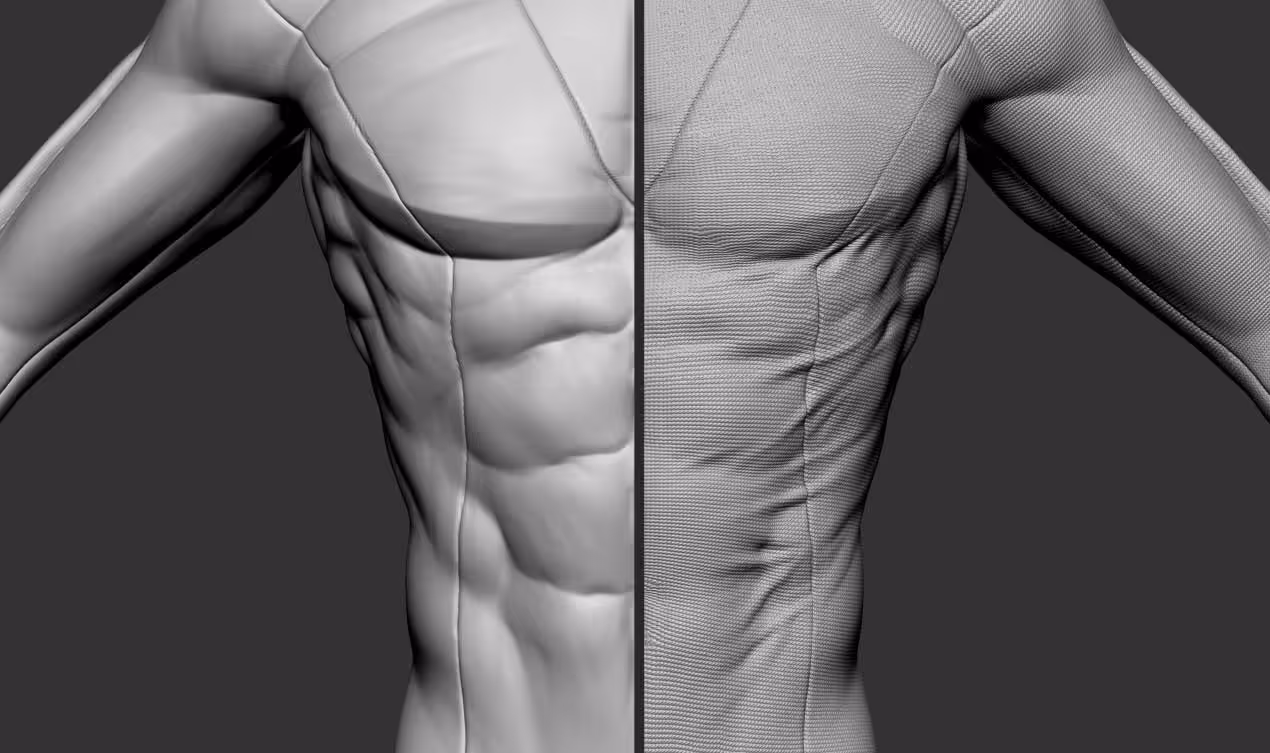
Final tip… it’s not JUST about adding tension folds, Depending on the stylisation of your design you might also want to soften the definition of the anatomy to create the effect that is ‘underneath’ the fabric. Here is a subtle comparison of the before and after side by side:


.webp)

.webp)